How can I add fallback to attributes in Template messages?
Check out how you can use Fallback while sending WhatsApp Templates in AiSensy

How can I add fallback to attributes in Template messages?
Check out how you can use Fallback while sending WhatsApp Templates in AiSensy
We've made it simpler for you to add attributes while sending WhatsApp Template messages.
Earlier, if you wanted to send a WhatsApp Broadcast with dynamic attributes, like a person's first name, you had to manually enter the attribute $FirstName.
Also, if the attribute didn't match the pre-defined value, e.g. let's say you added an attribute $Email but the contact did not contain the email of the person, there was no fallback.
The message failed to send.
We've solved this by adding a fallback option to the parameters.
How can I add fallback to attributes in Template messages?
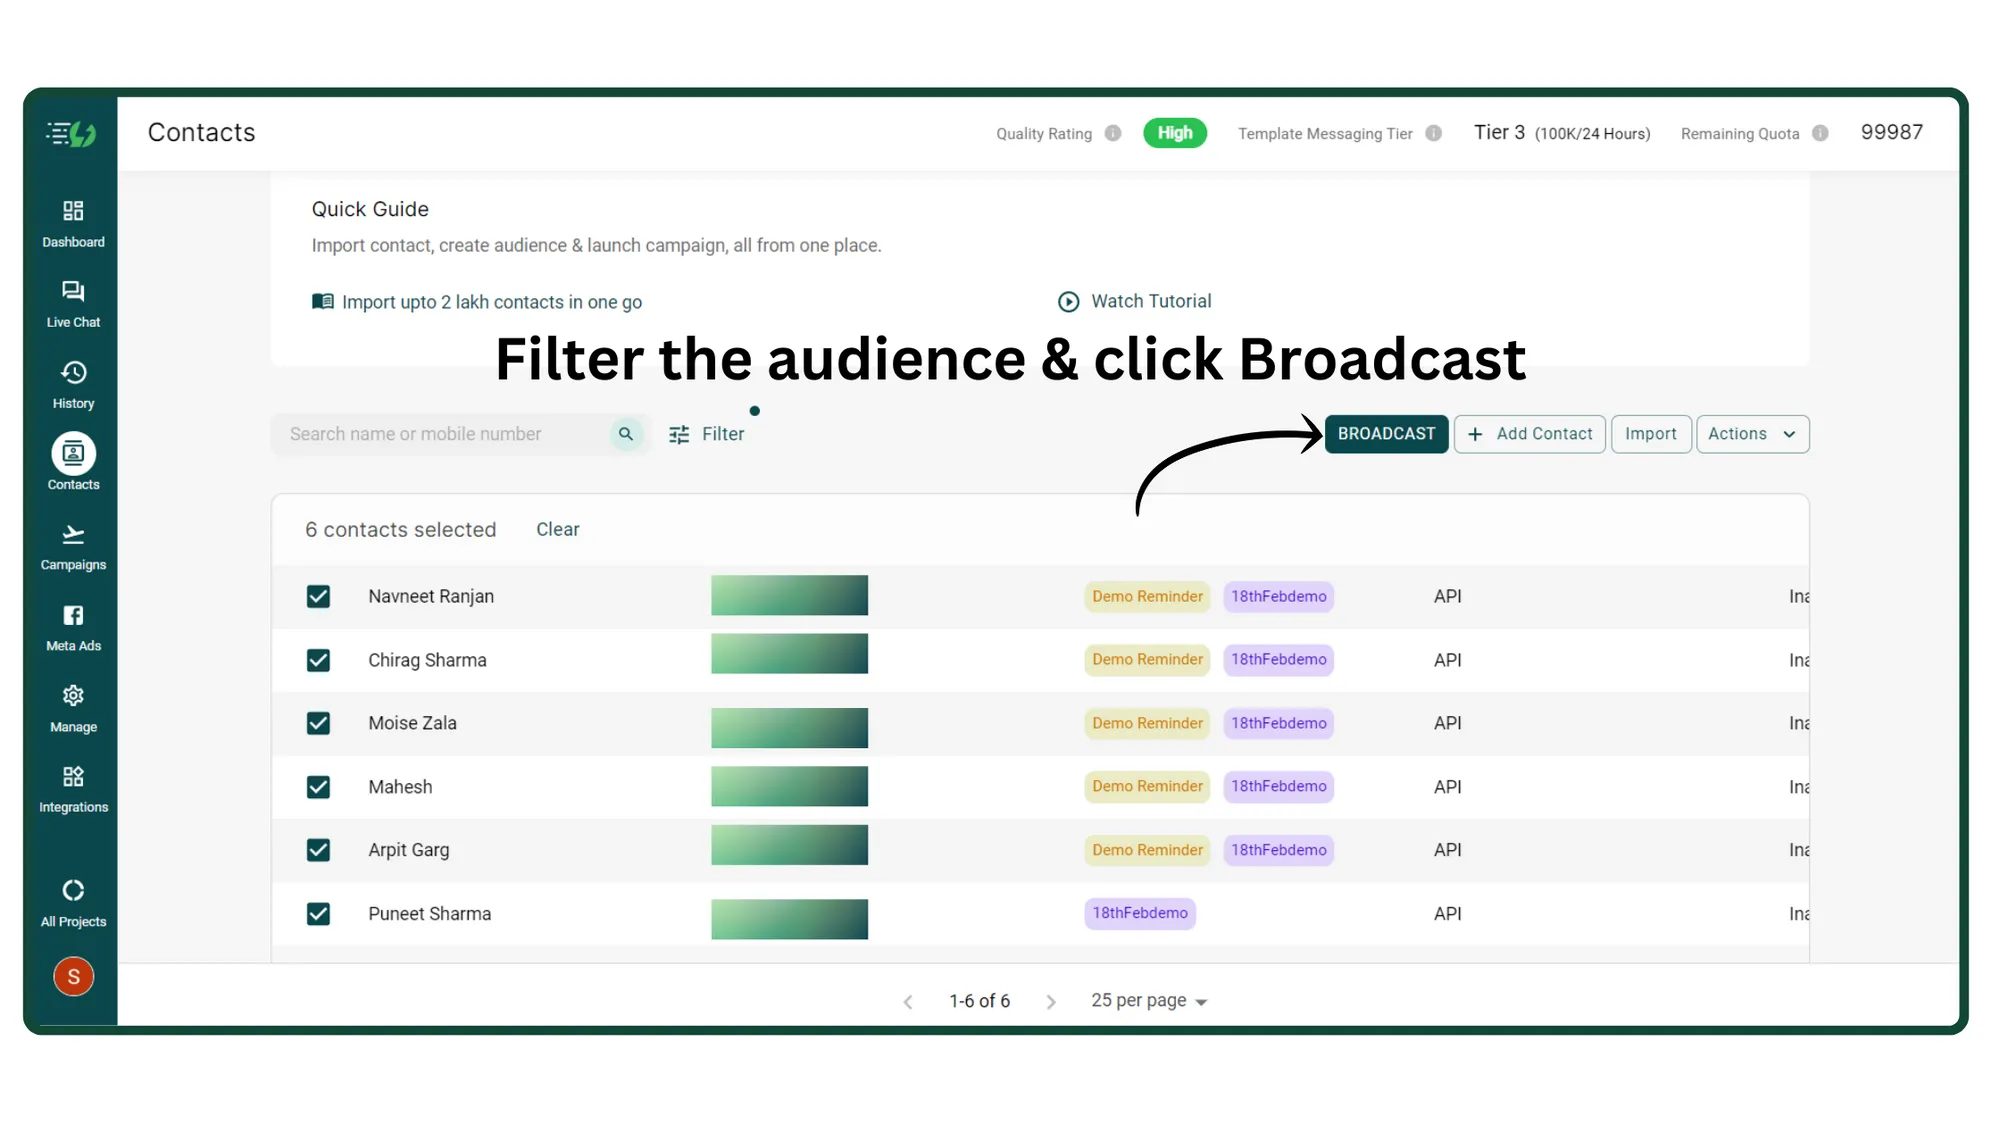
1. Filter your audience
First, filter the audience to whom you wish to send a WhatsApp Broadcast. Click the Broadcast button to proceed to the next step.
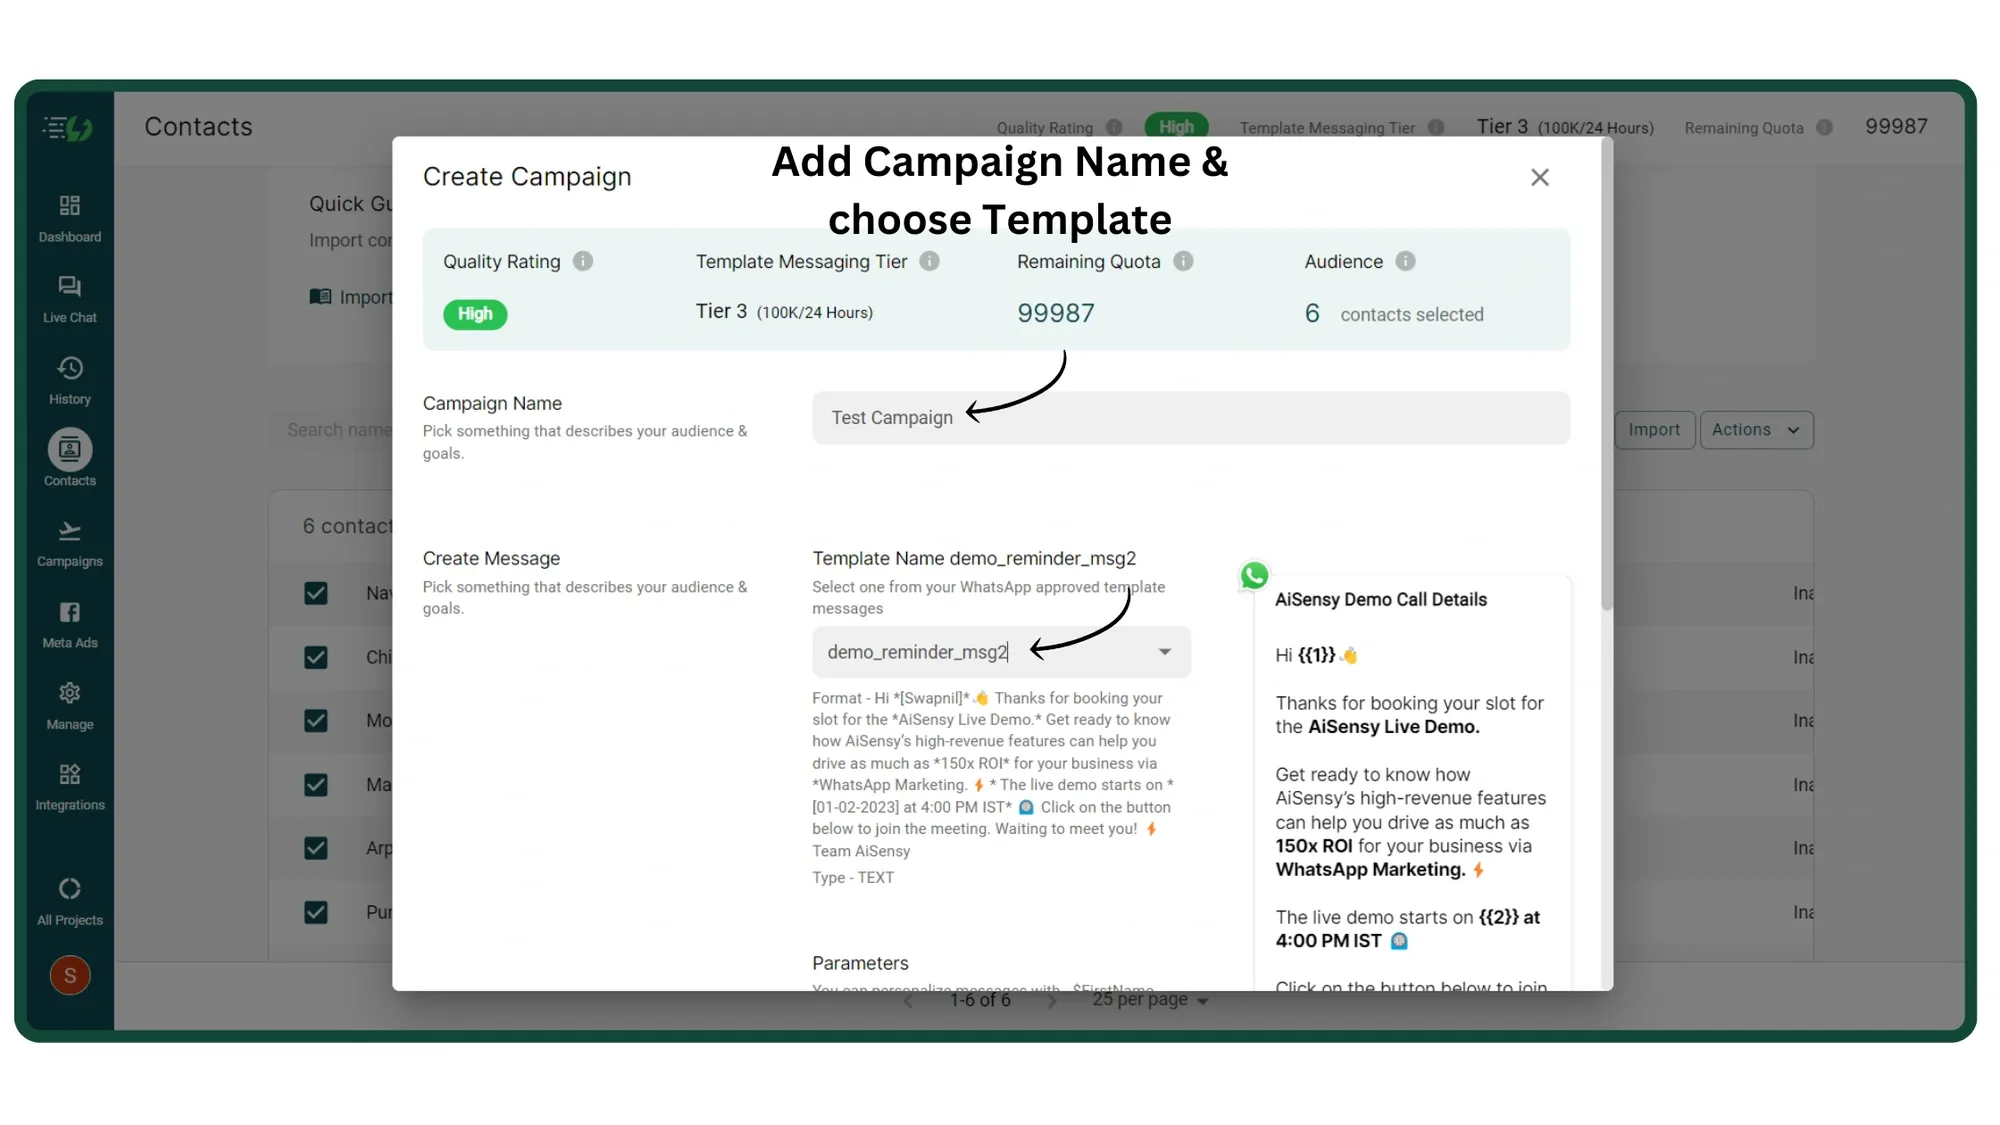
2. Name your Campaign & select a Template
Name your campaign & select a pre-approved template message to Broadcast to your users.
3. Scroll down & click on the Attribute button
Scroll down. You'll see a change in the UI as we've added an attribute button. Clicking this button will enable you to view all your added attributes in AiSensy app

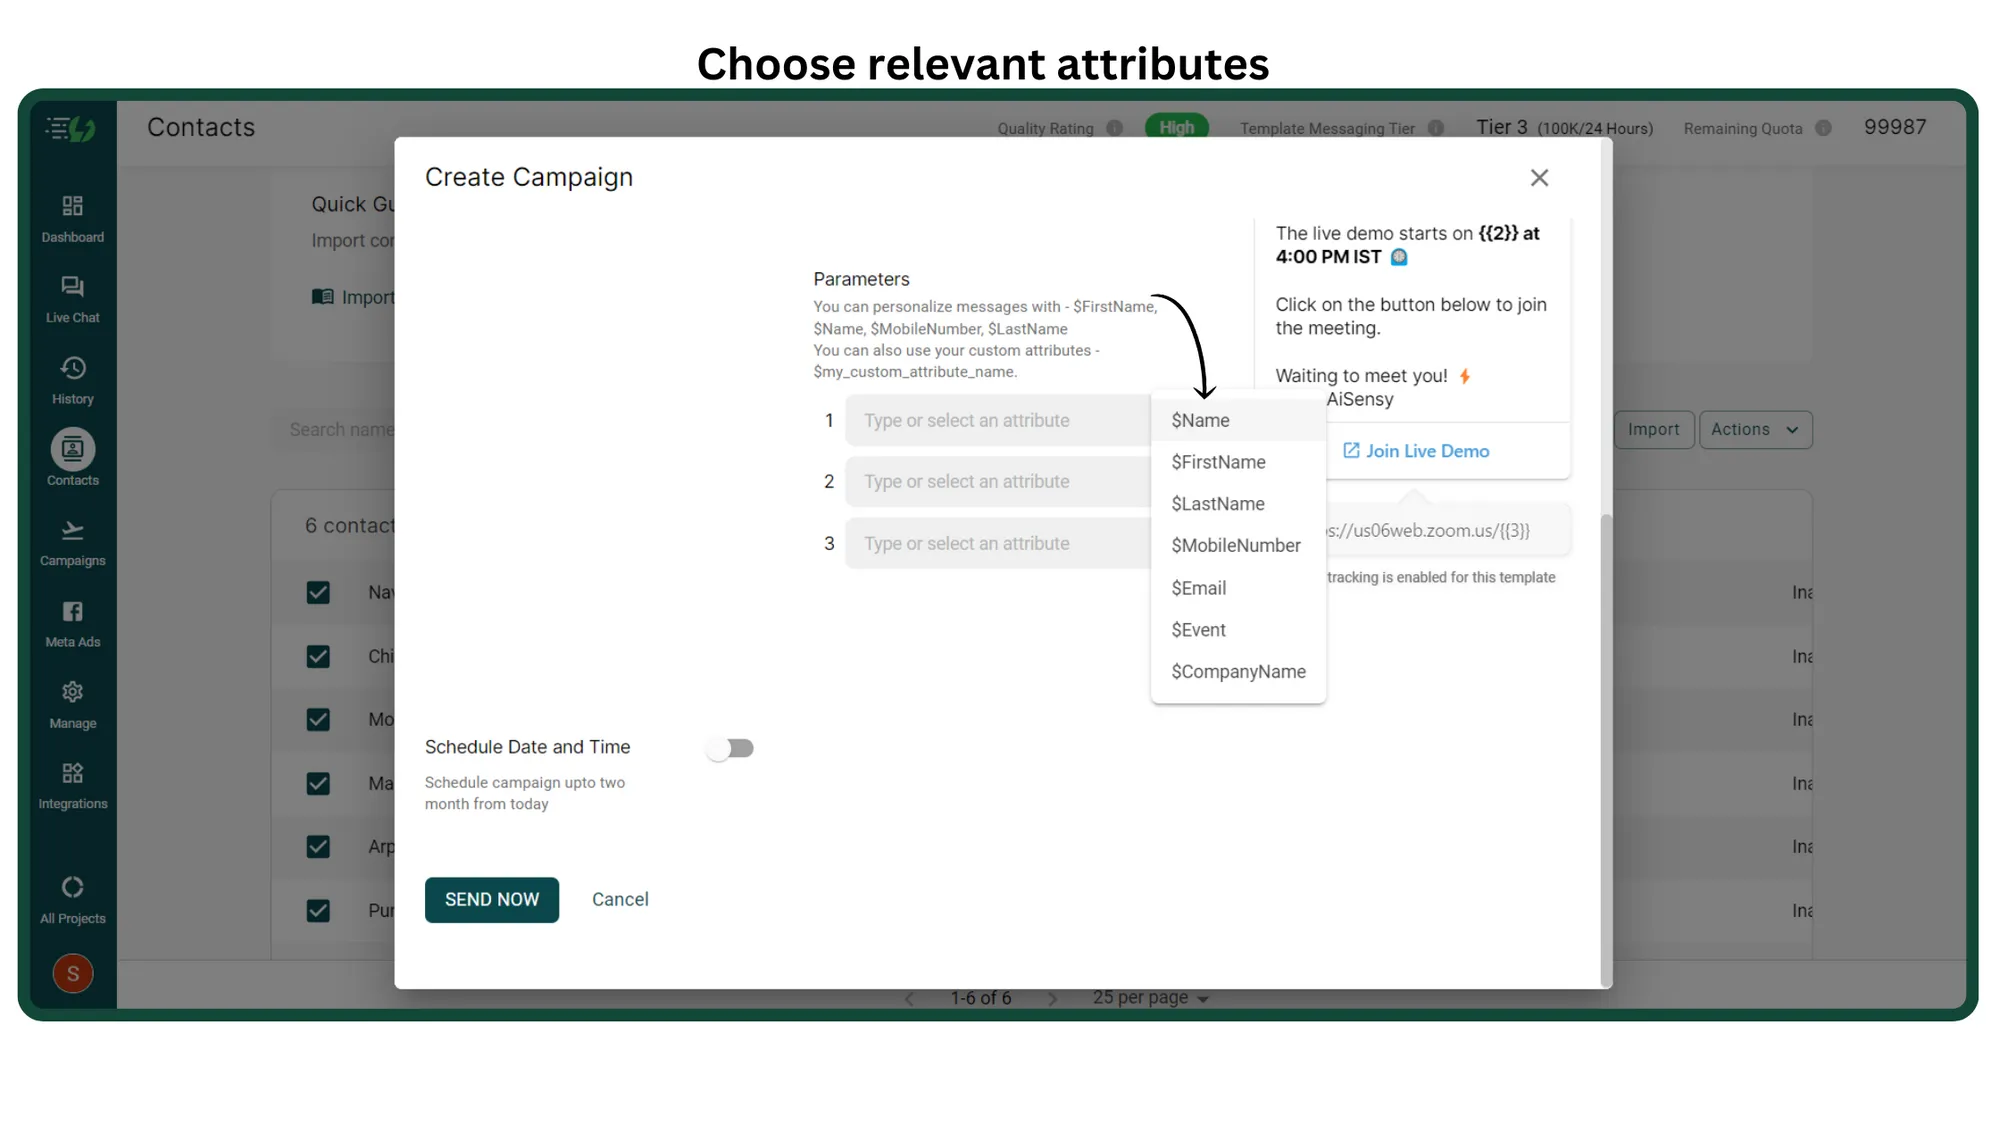
4. Select relevant Attributes
Now, choose relevant attributes that fit your template message. E.g. If you wish to fetch the first name of all users via the attribute, use the attribute $FirstName.
Note: It's not necessary to choose an attribute from the button. You can also type in the attributes manually as per your requirement.
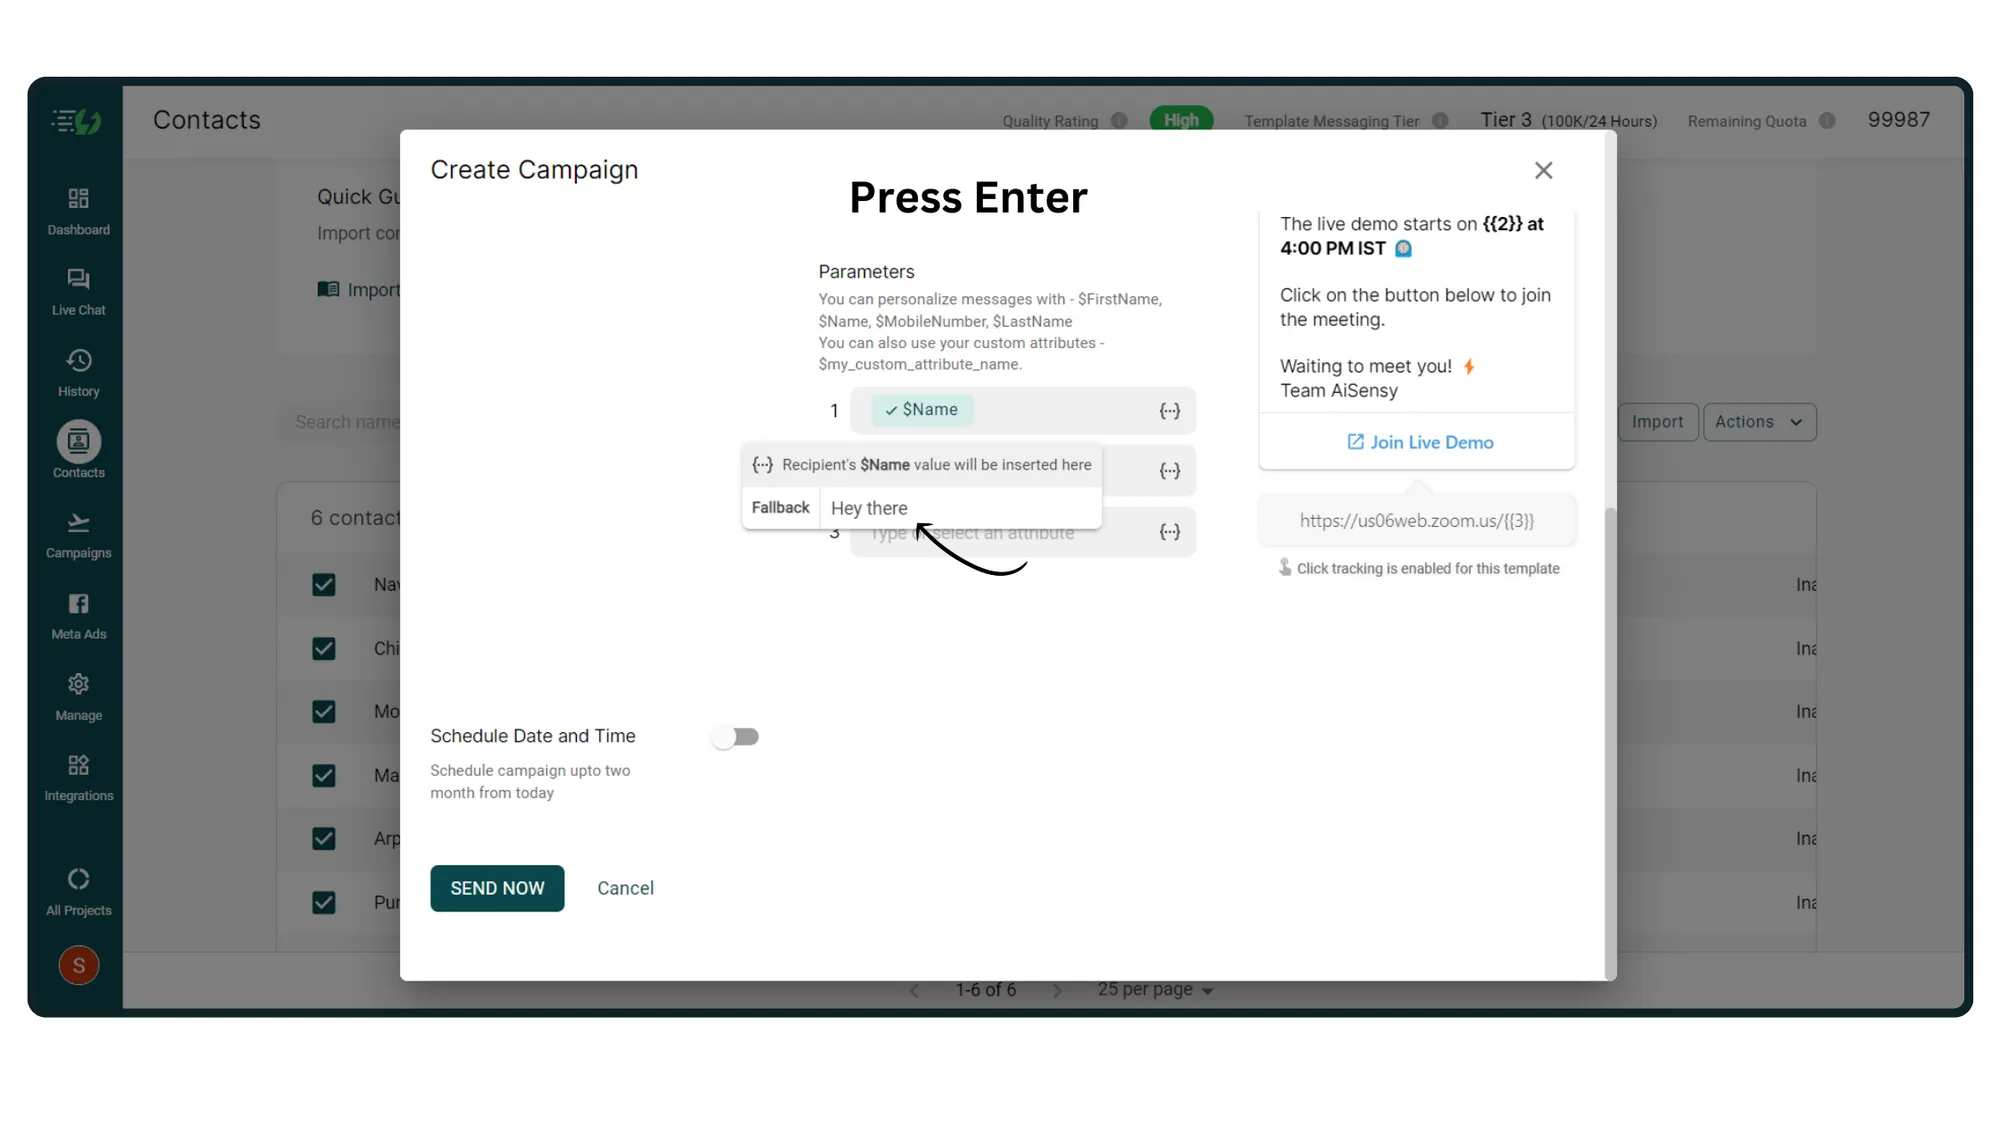
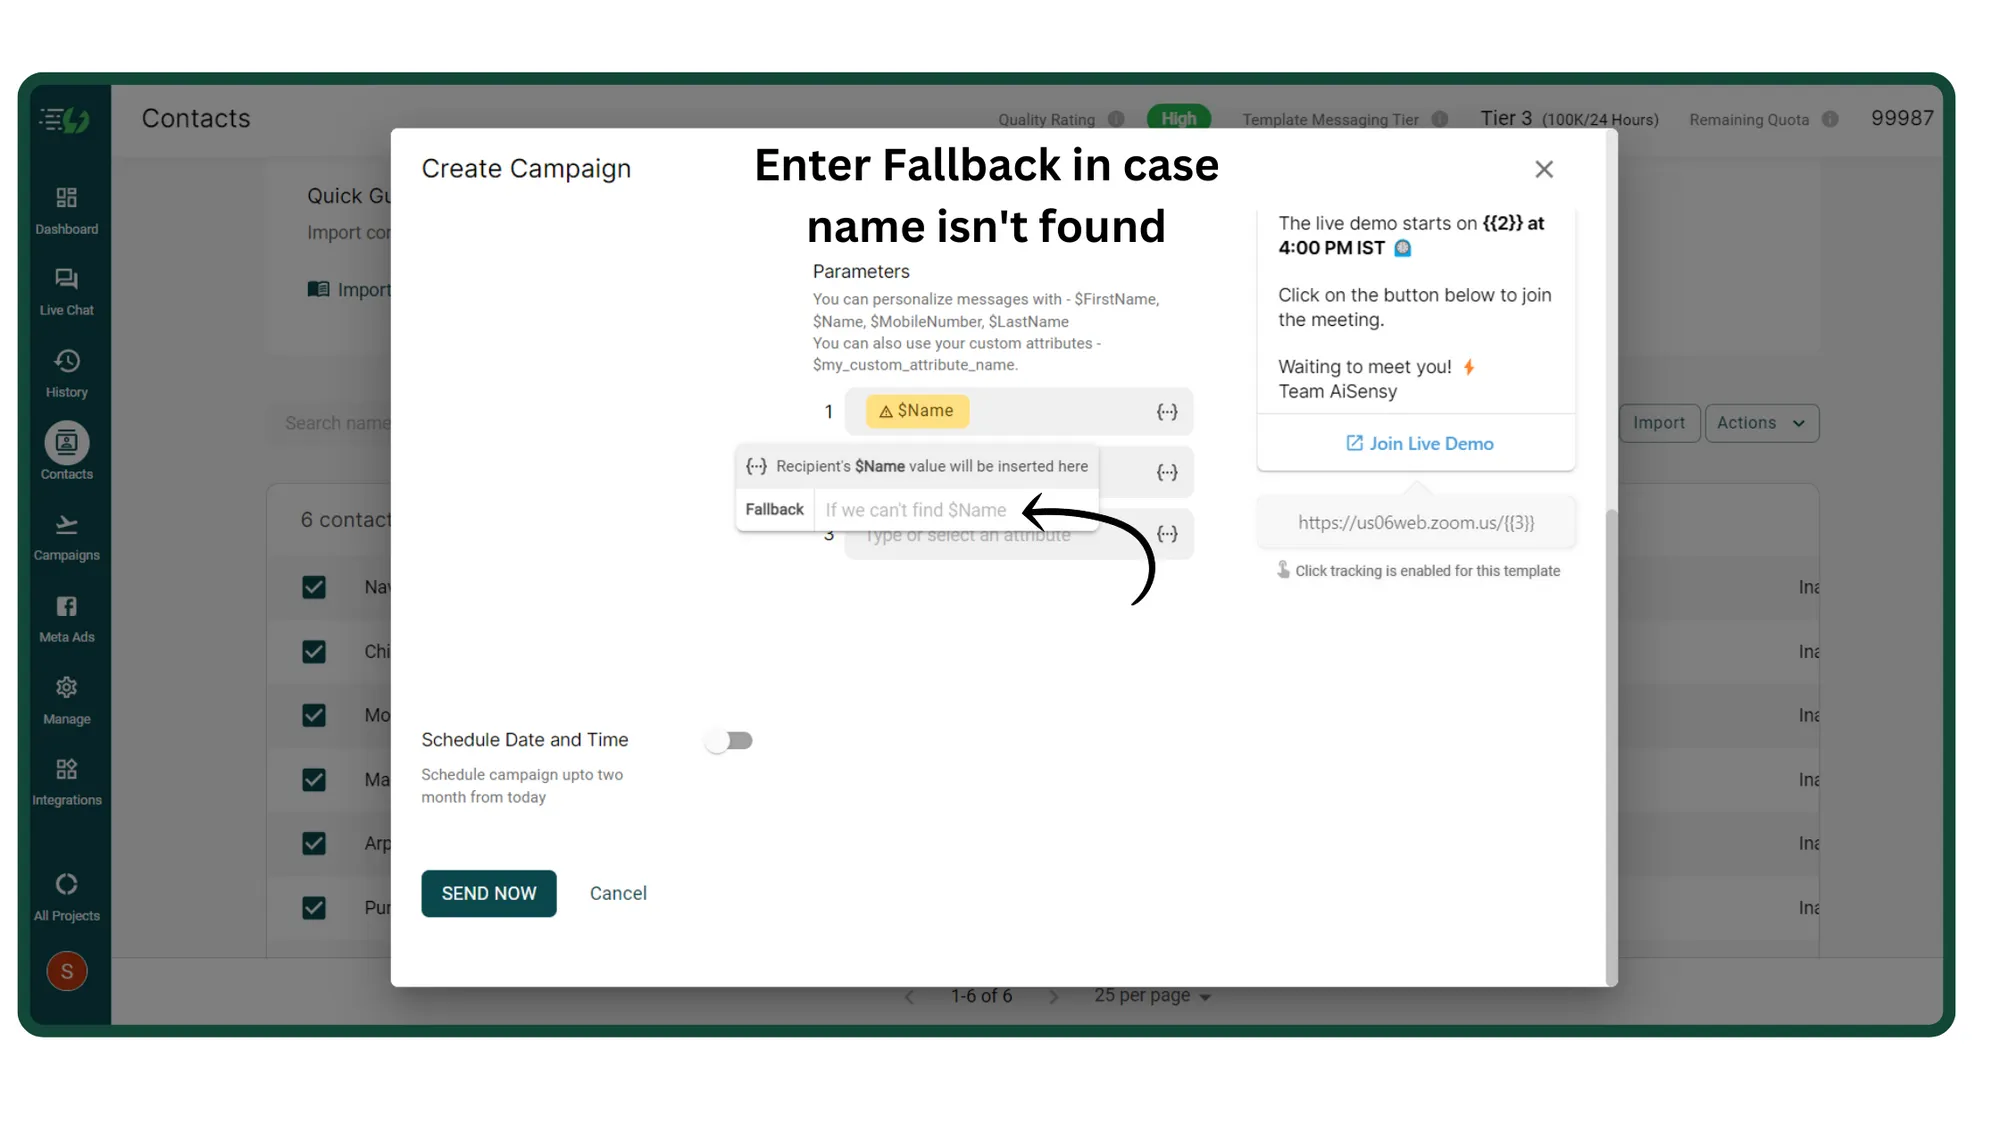
5. Add a Fallback in case the attribute isn't found in a contact
Now, enter a Fallback value which is the value that will be sent to the user in case the attribute isn't found in a contact.
E.g. if a user hasn't given you their email & you've added the attribute $Email, then enter a fallback that will be sent to the user.
Previously, if an attribute didn't match, the message would fail to send to those users. With the fallback feature, the message will send to all users, given that you've added a fallback to the attribute.
6. Press enter. Your attribute is selected