How to Create Website Ads in AiSensy (Traffic Campaigns)
Step-by-step process to create and run Meta ads that land on your website.

How to Create Website Ads in AiSensy (Traffic Campaigns)
Step-by-step process to create and run Meta ads that land on your website.
Before You Begin: Connect Your Facebook ads manager account to AiSensy.
Follow the below steps to connect your ads account with AiSensy easily:
1. Go to Meta Ads
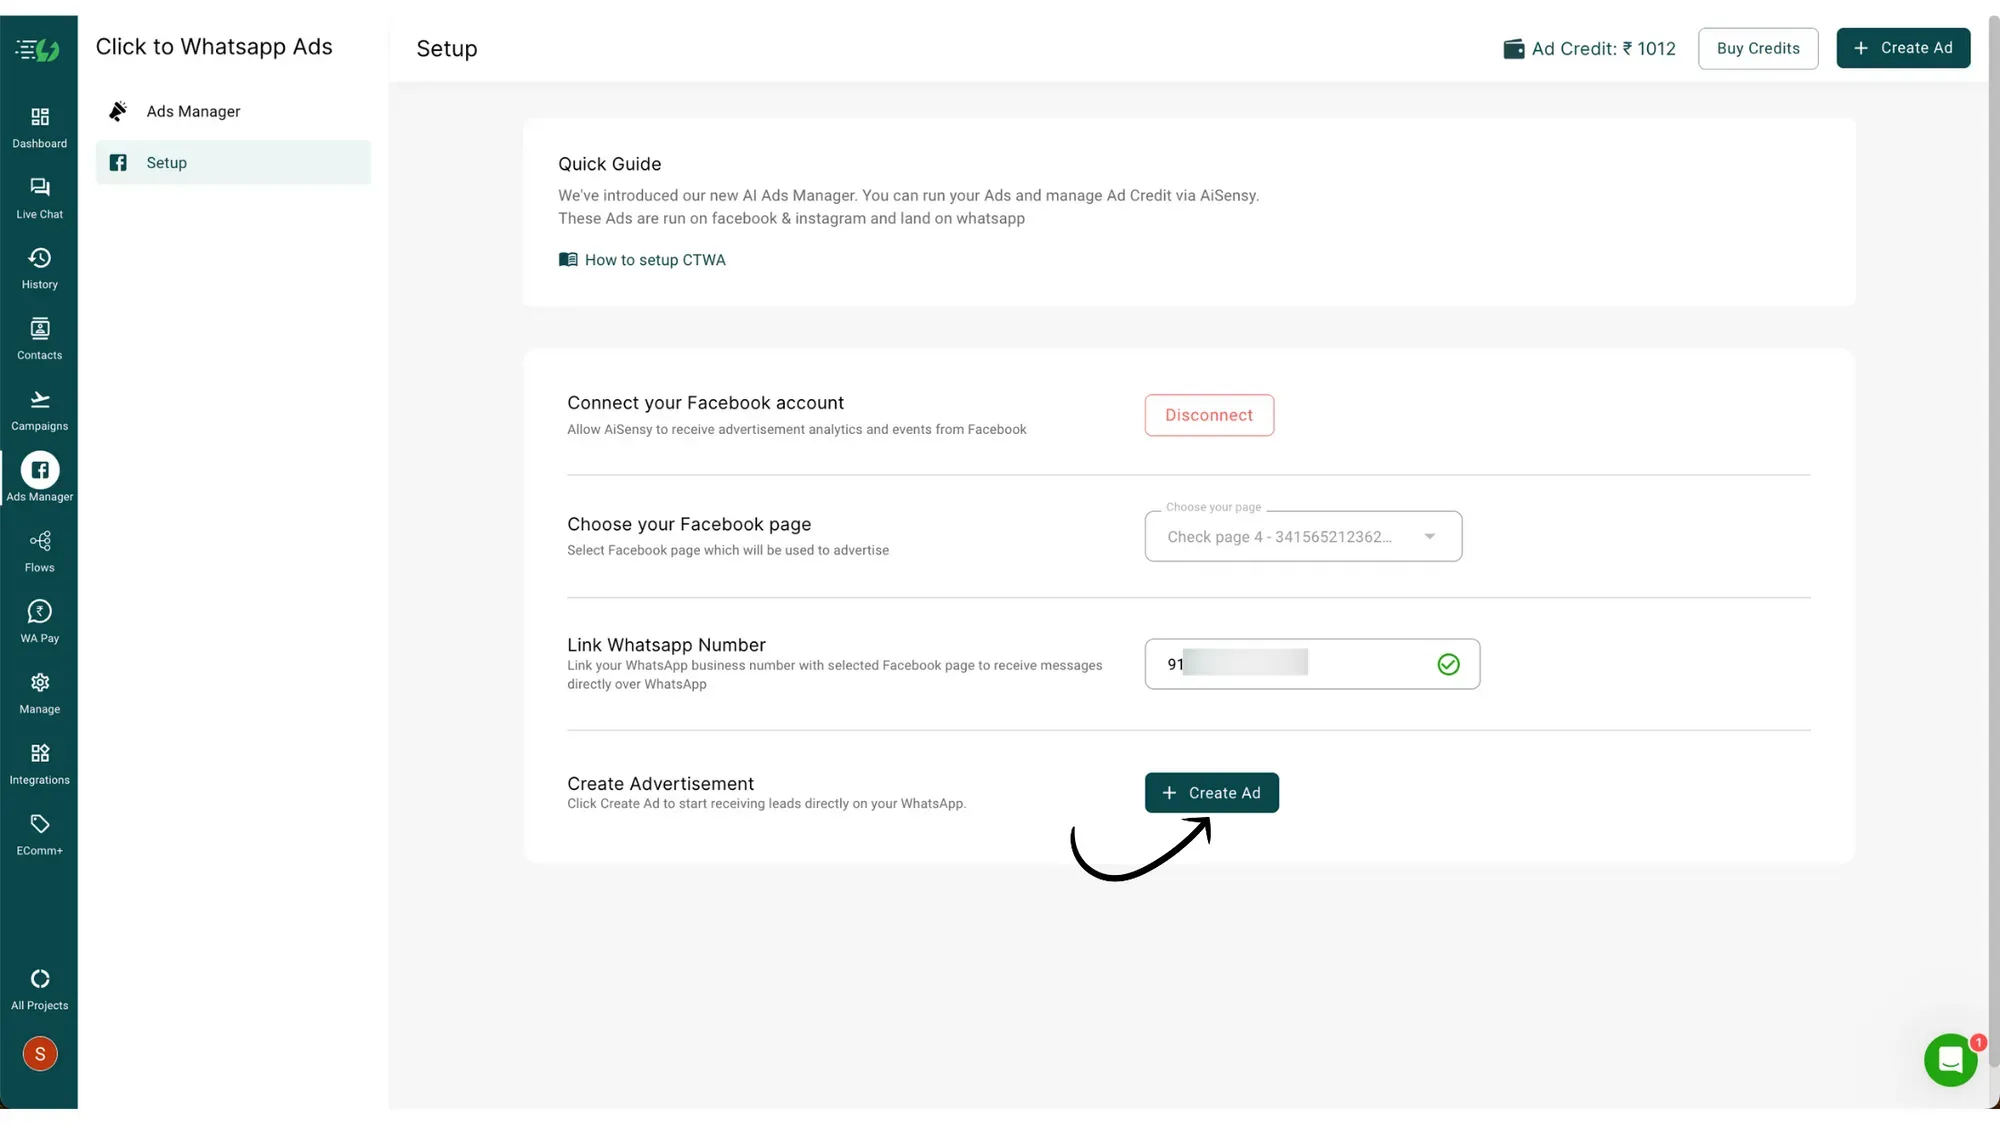
To create Click to WhatsApp ads, open the AiSensy app and navigate to Ads Manager.
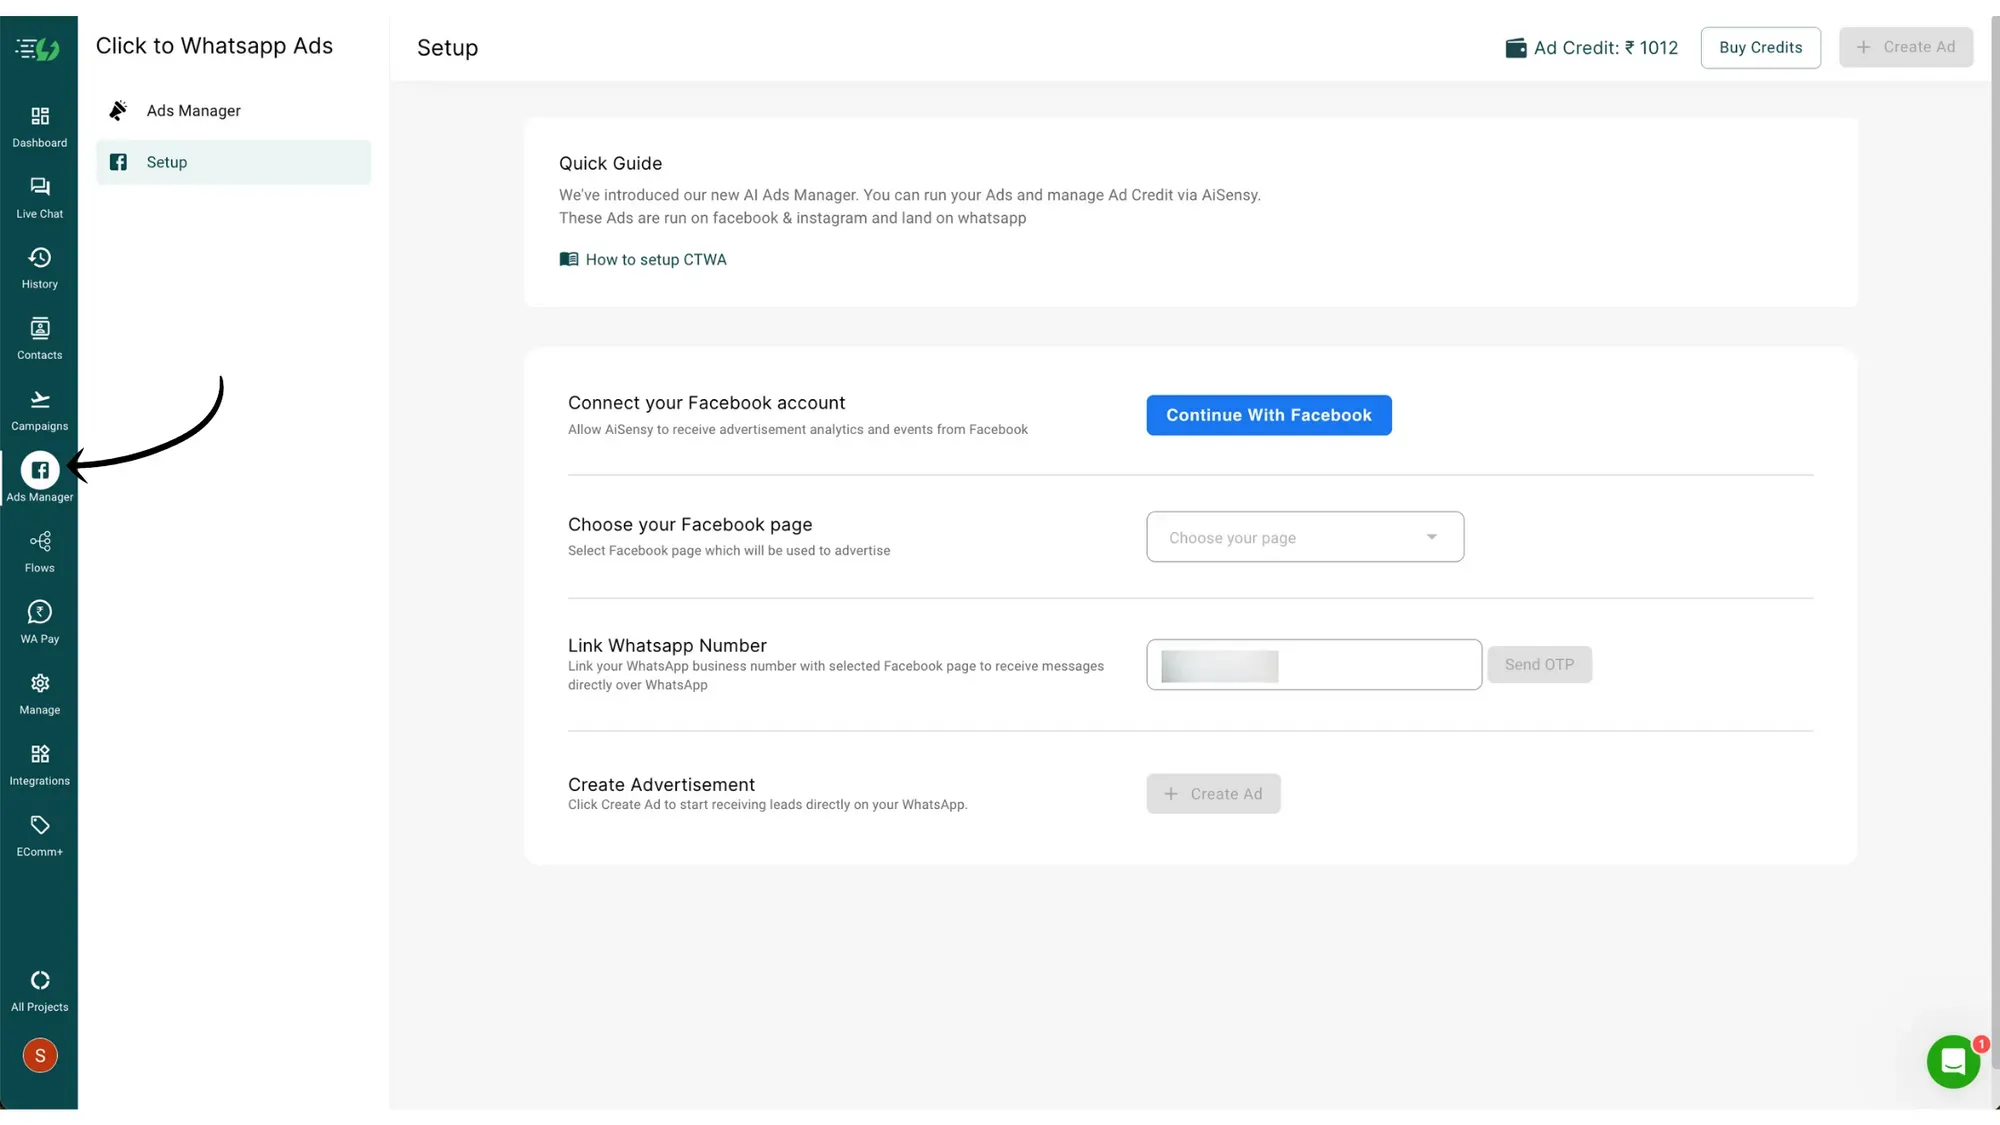
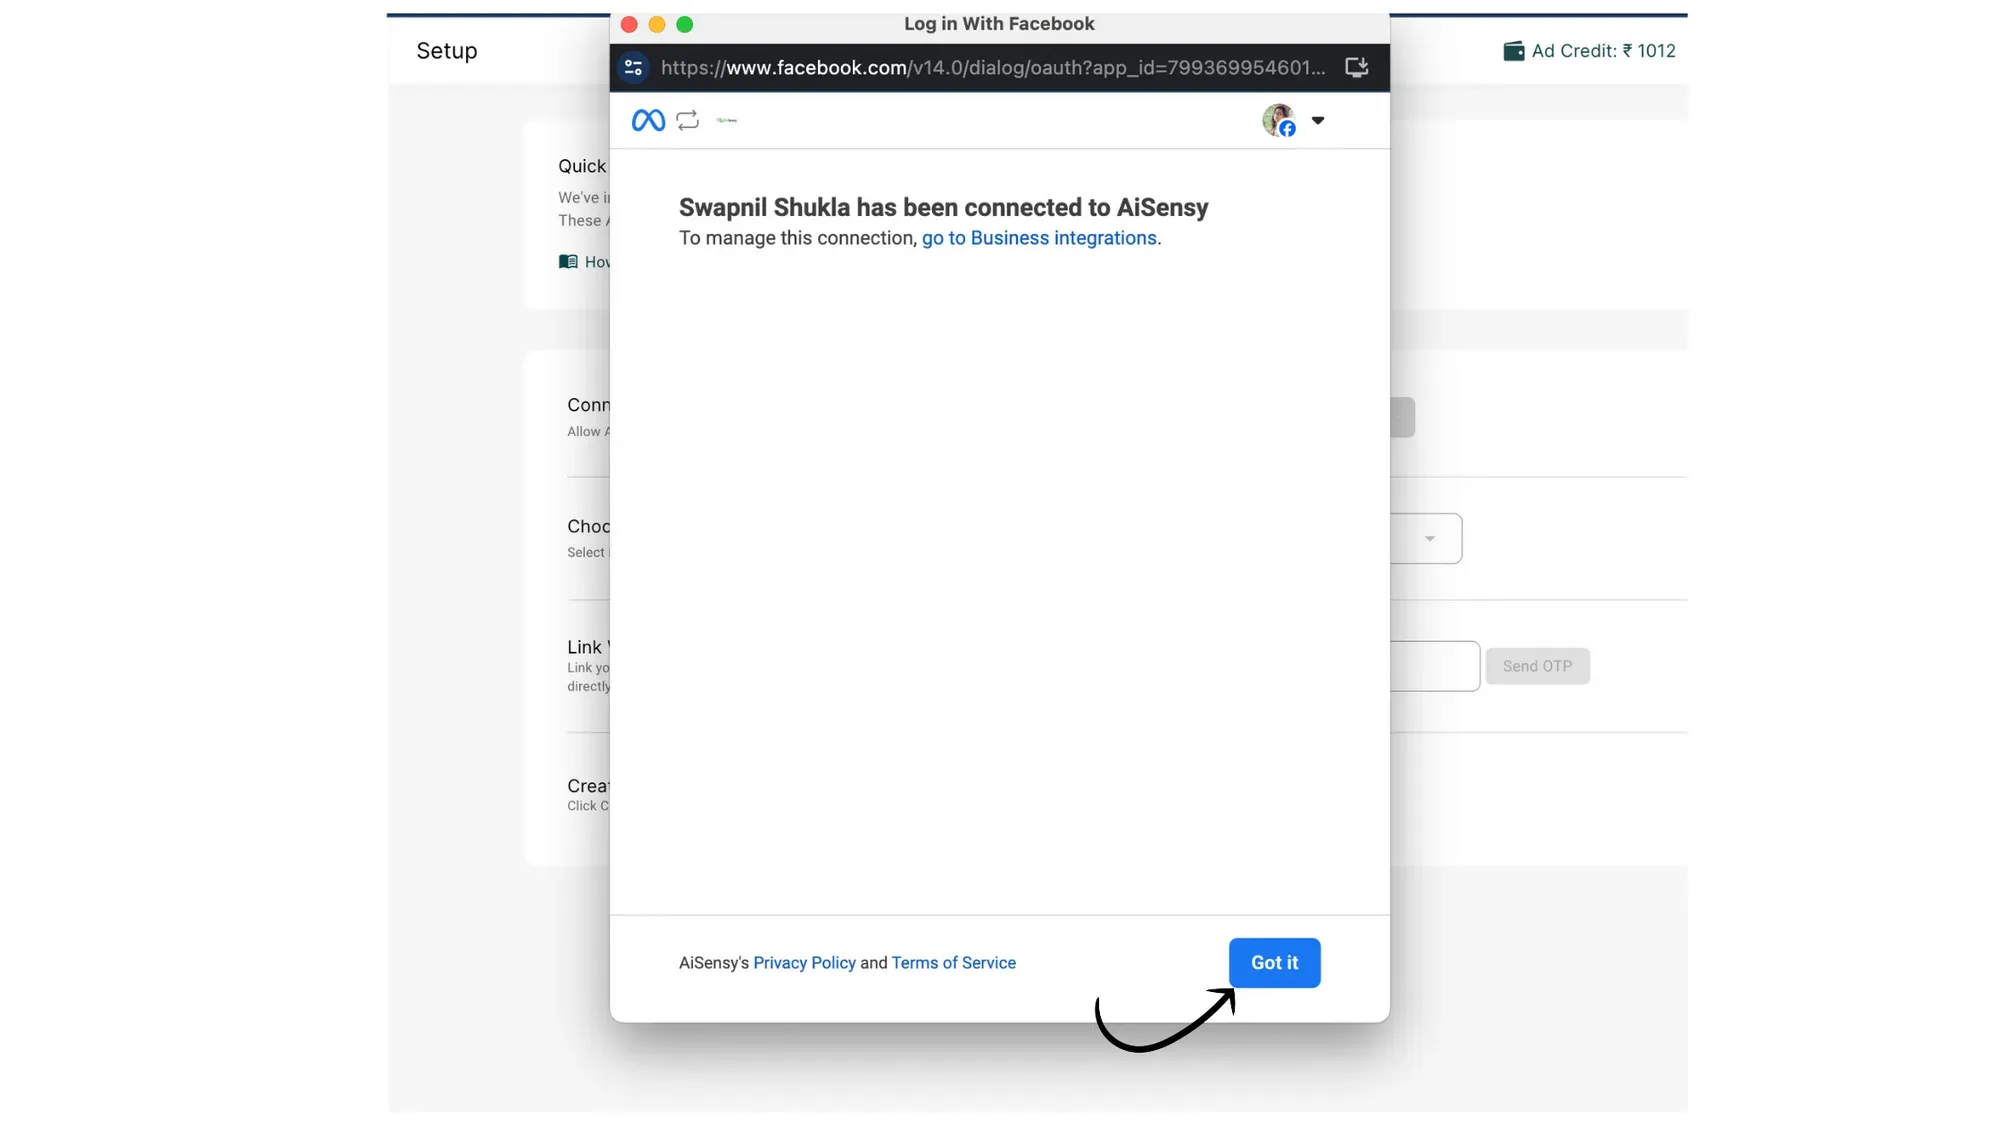
2. Continue with Facebook
Under Setup, click on "Continue with Facebook.". Next, select the business manager you wish to connect and click "Continue."
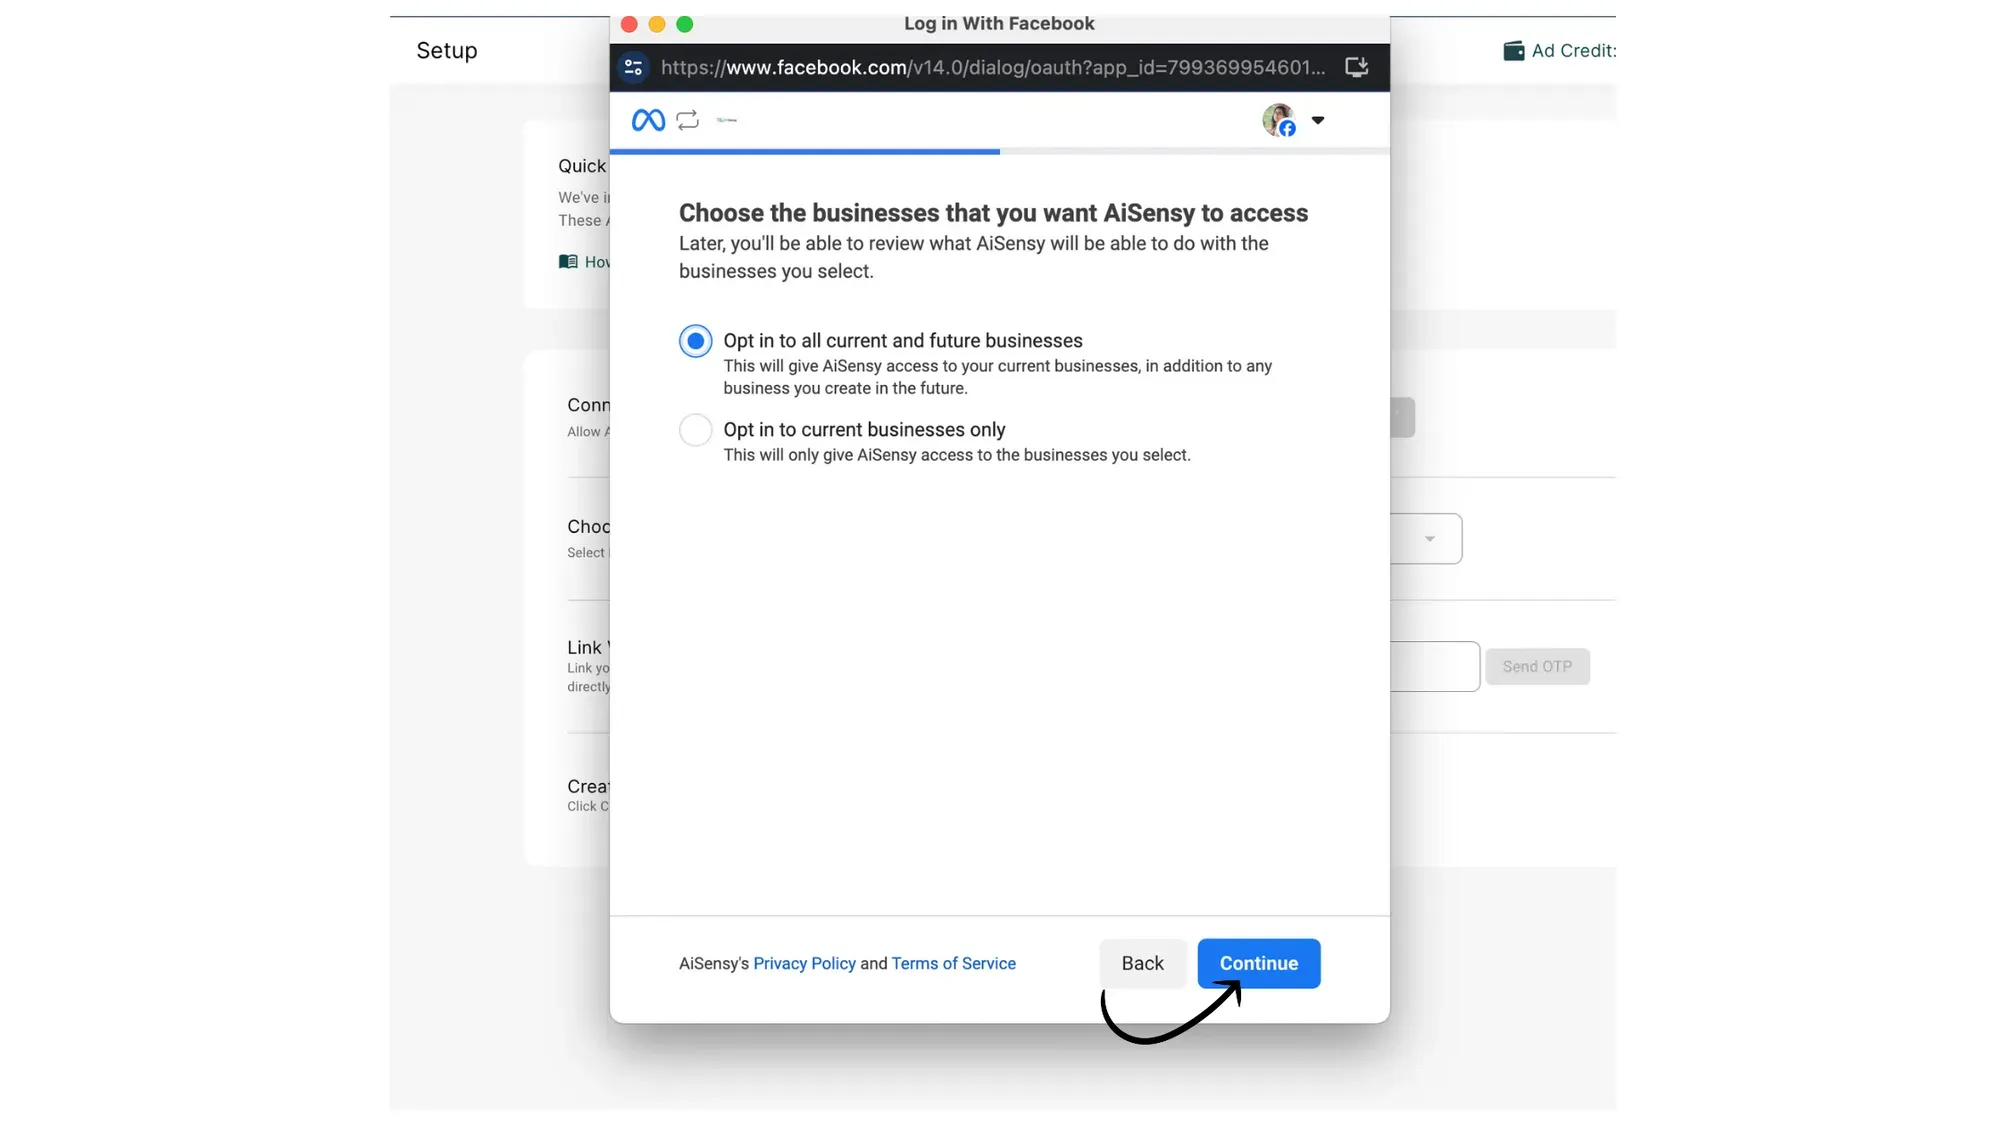
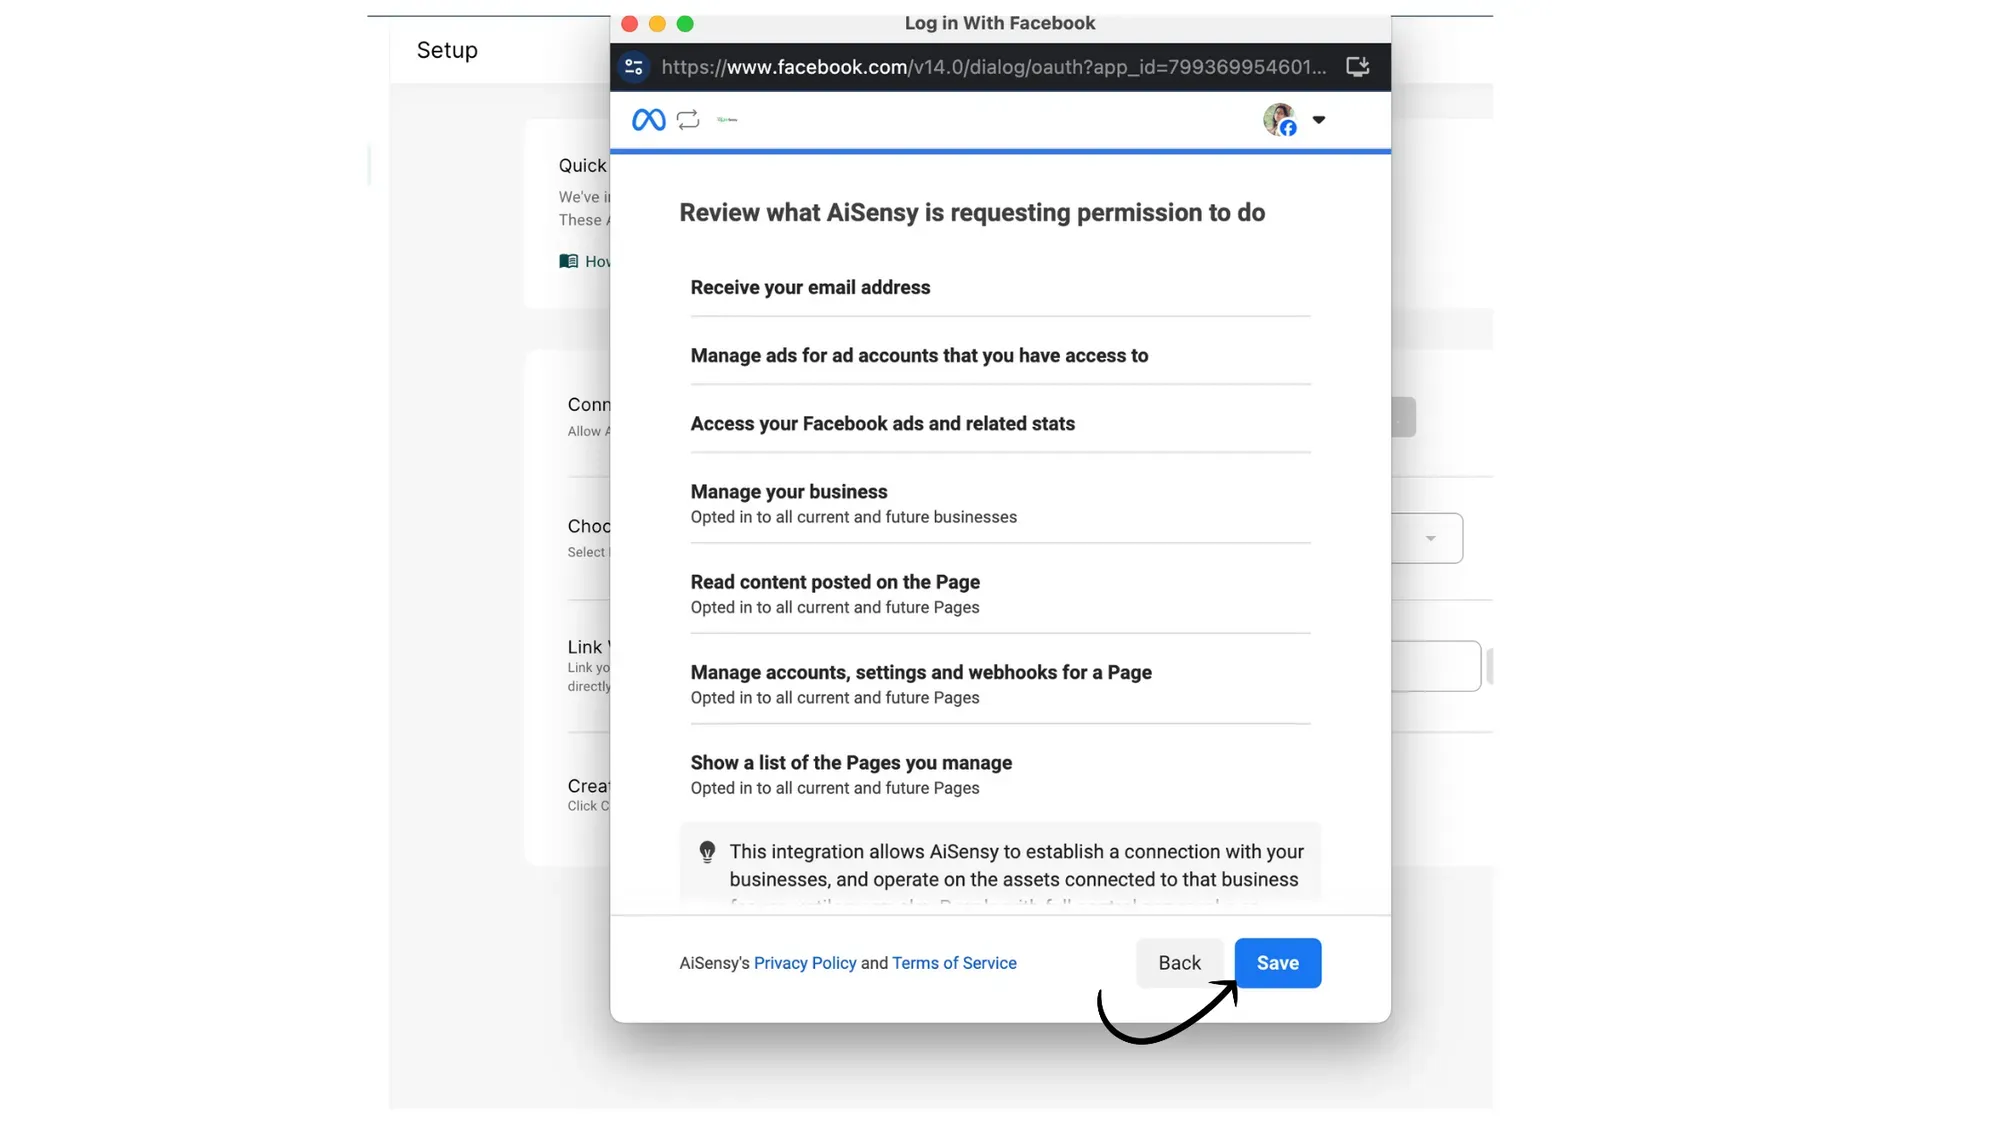
On the next screen, grant AiSensy the necessary permissions to set up the ad account for the page and business you want to run ads for.
Click "Save" and then tap "Got it."
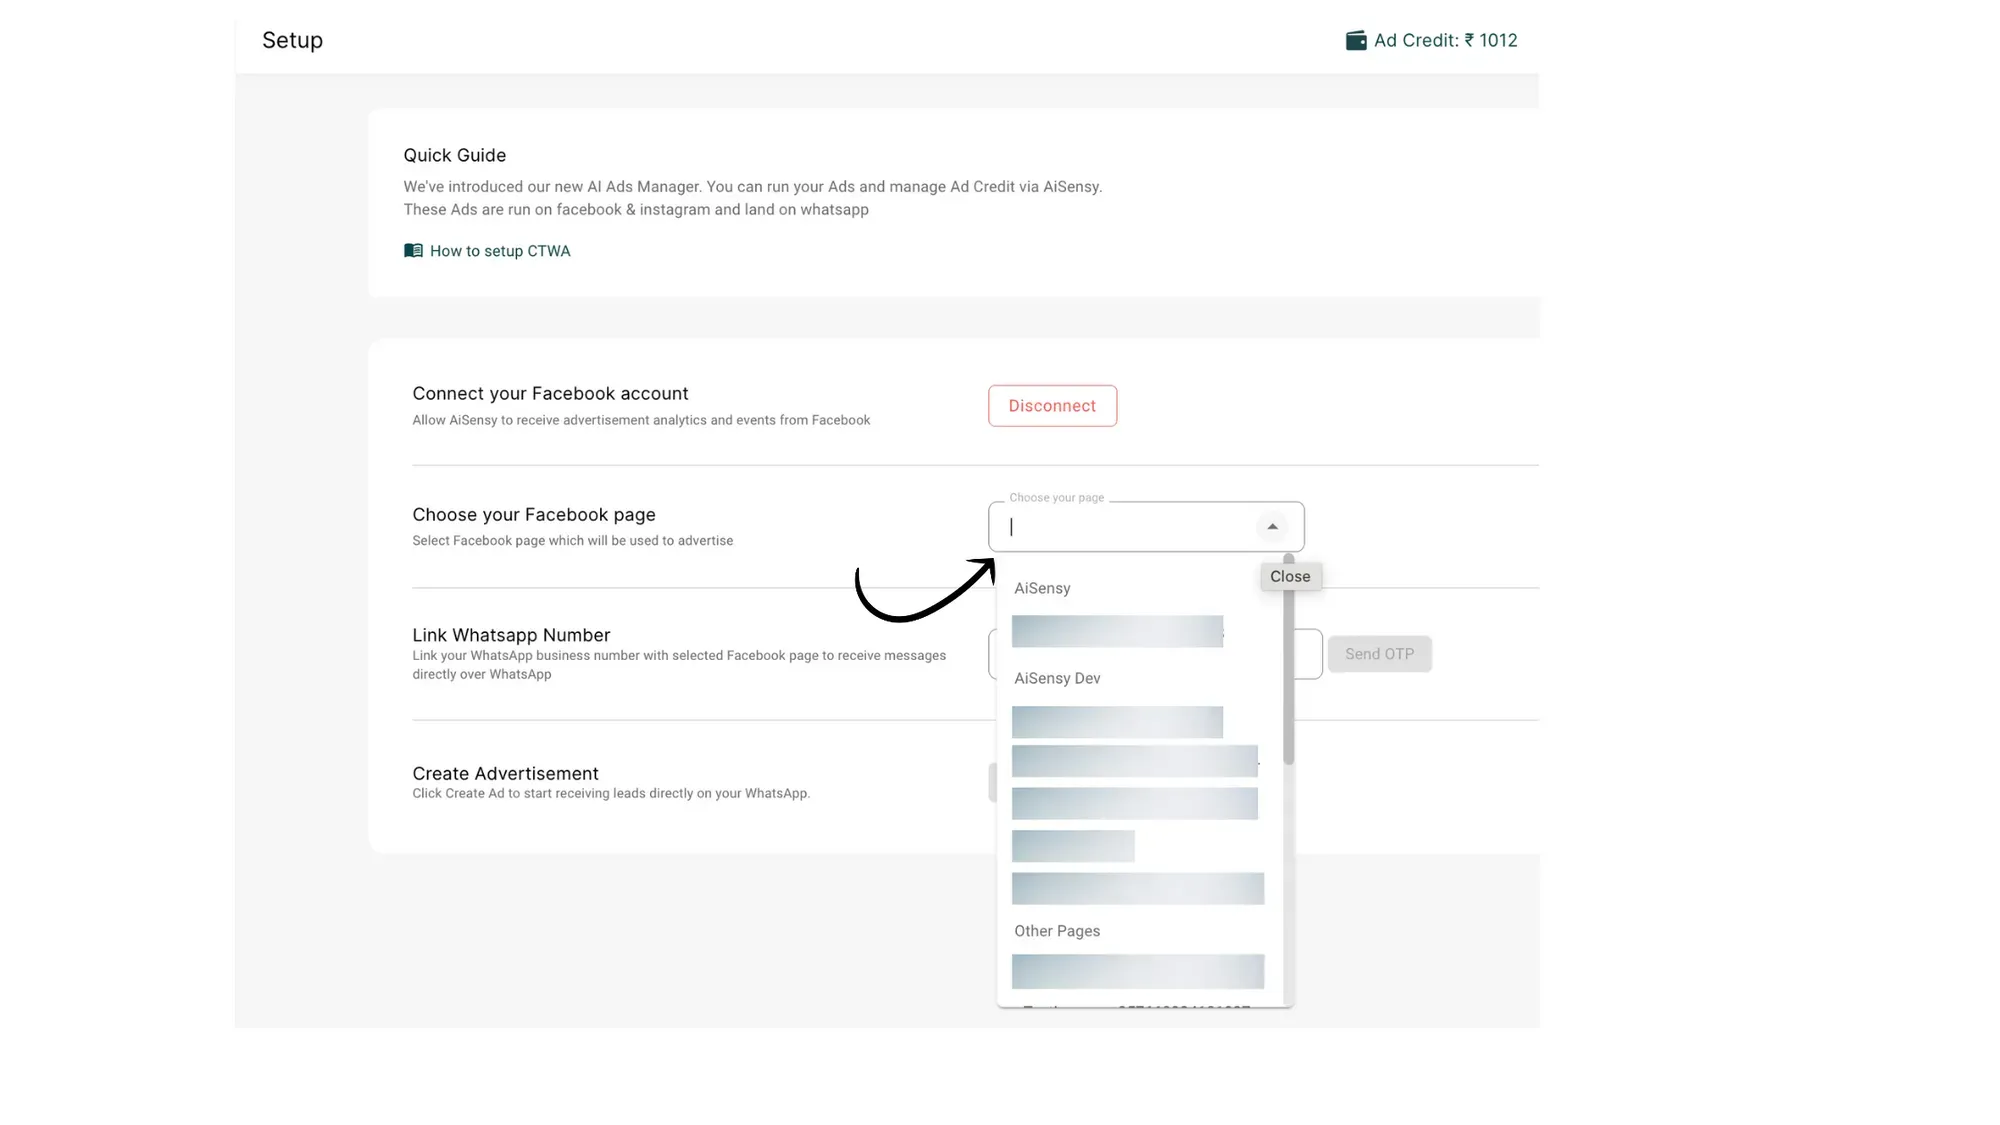
3. Select Facebook Ad Account
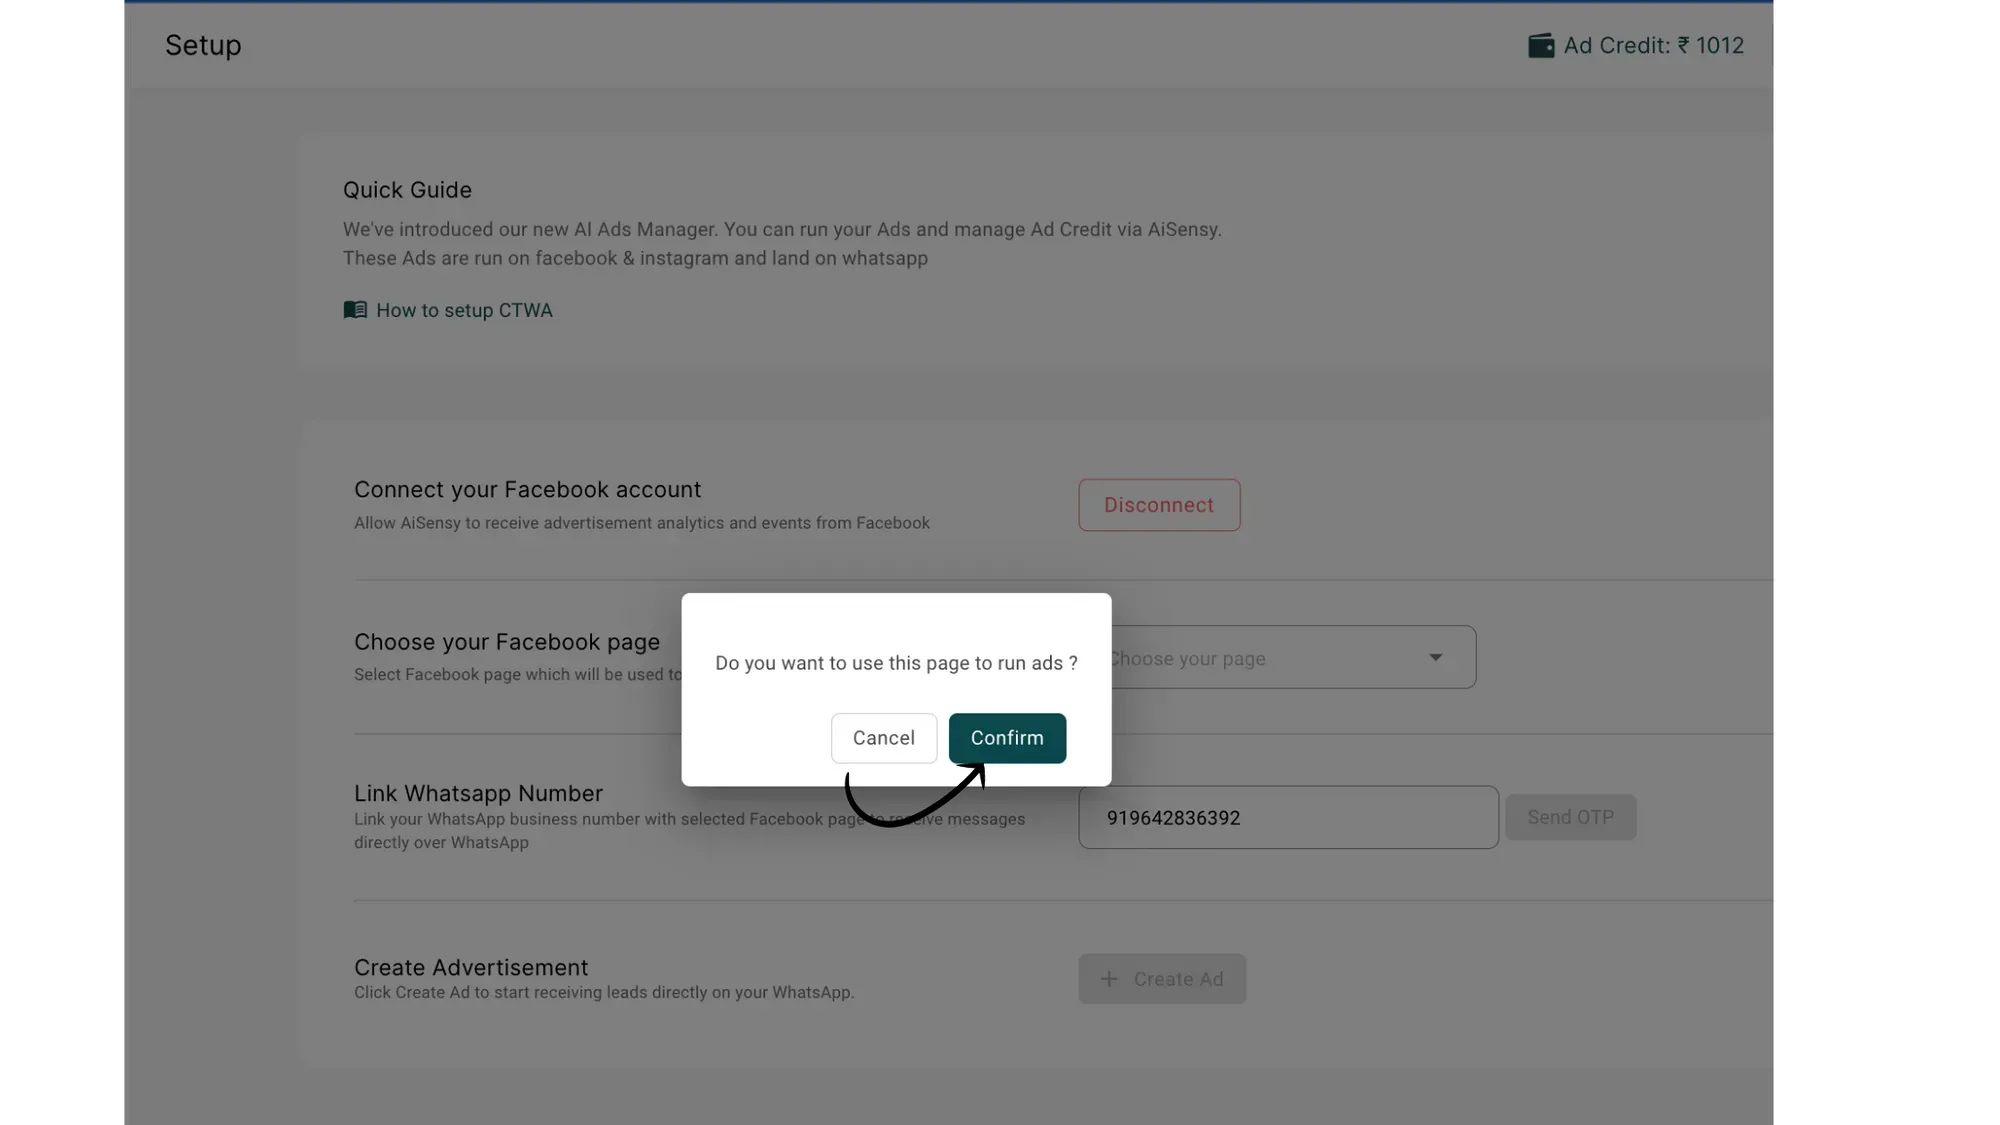
Choose your Facebook Ad account and the Page you wish to use for running ads on Facebook/Instagram.
Confirm the page you selected by clicking "Confirm."
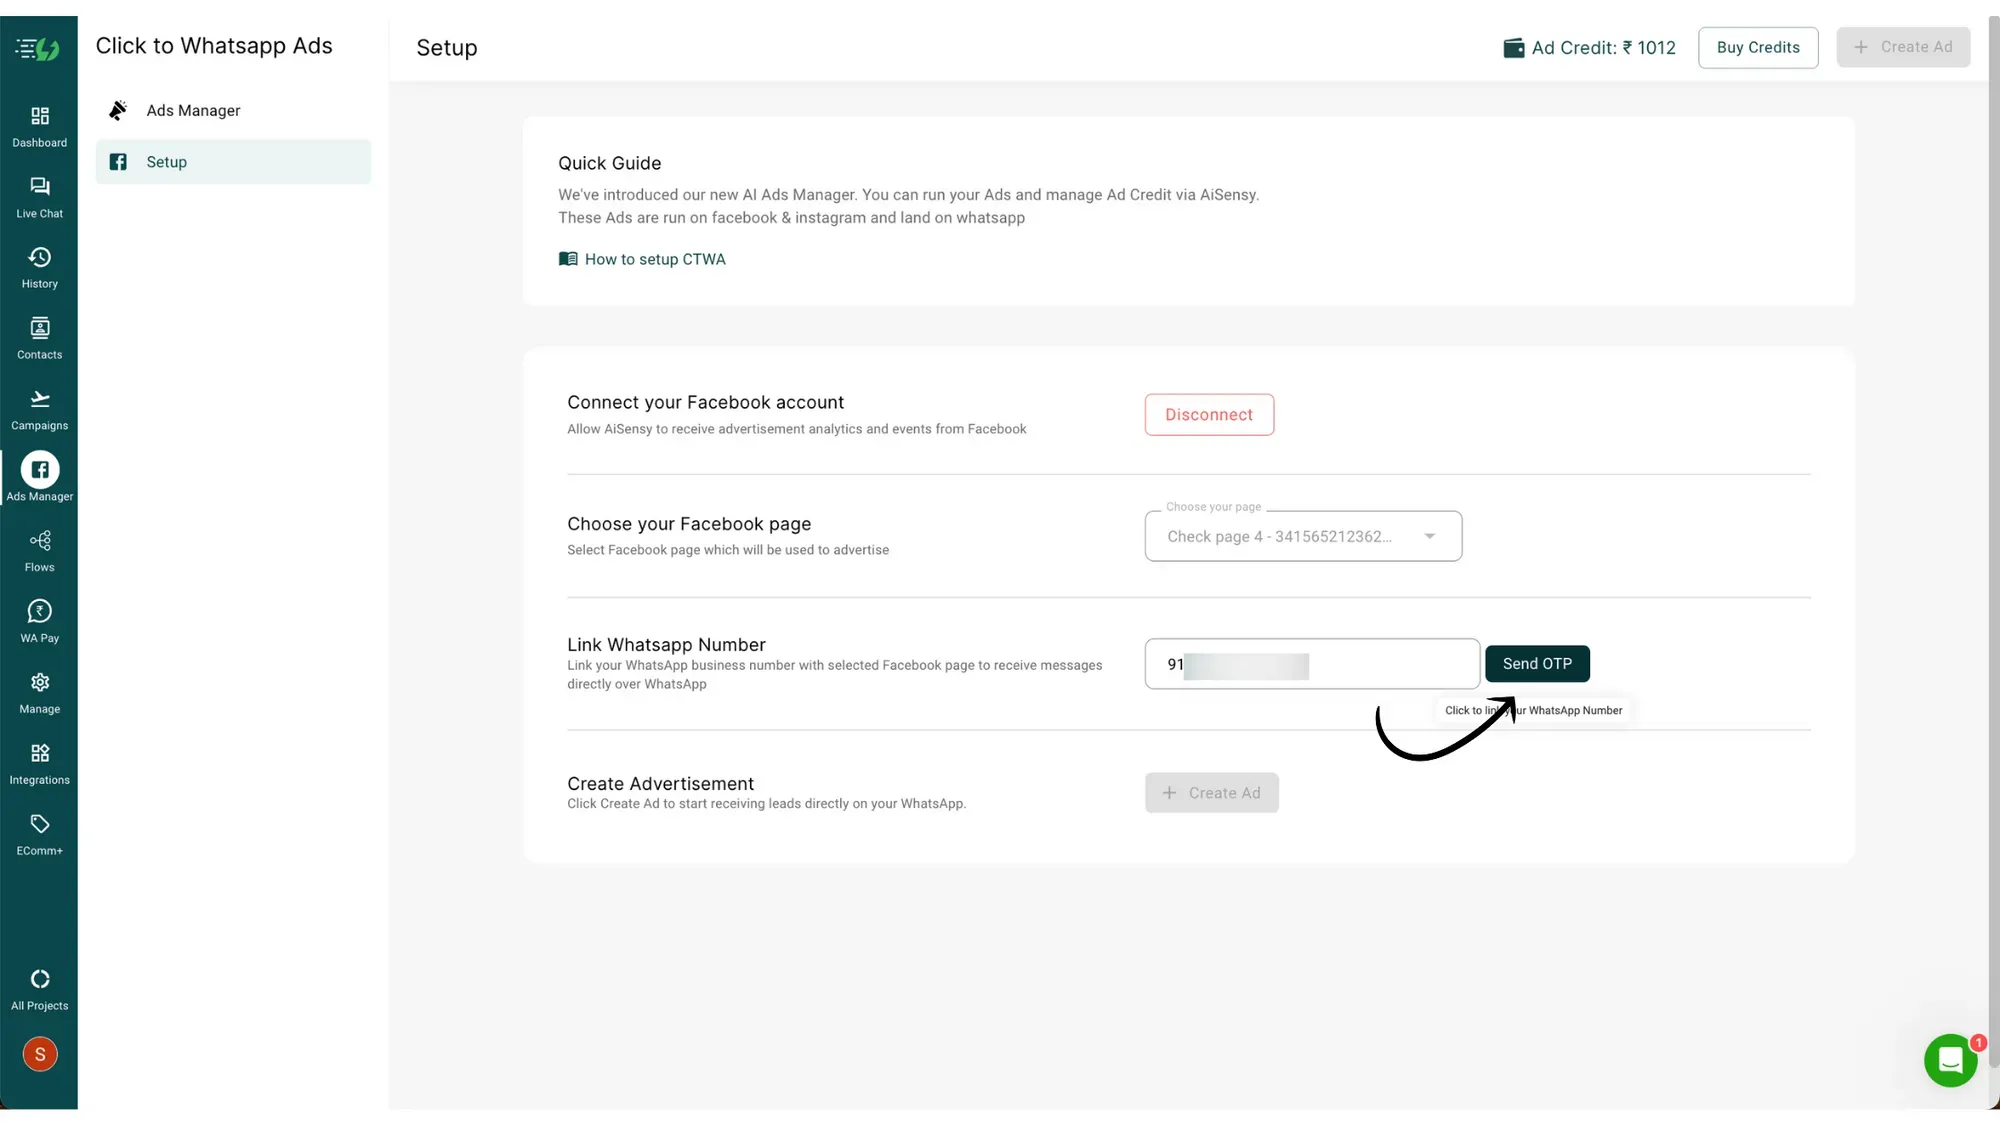
Click "Send OTP" to link your WhatsApp API number to your Facebook page.
4. Link your WhatsApp API Number
An OTP will be automatically sent and fetched, connecting the Facebook page with the API number set as the primary number.
5. WhatsApp Number Linked successfully
Linking your WhatsApp API number will enable the "Create Ad" button.
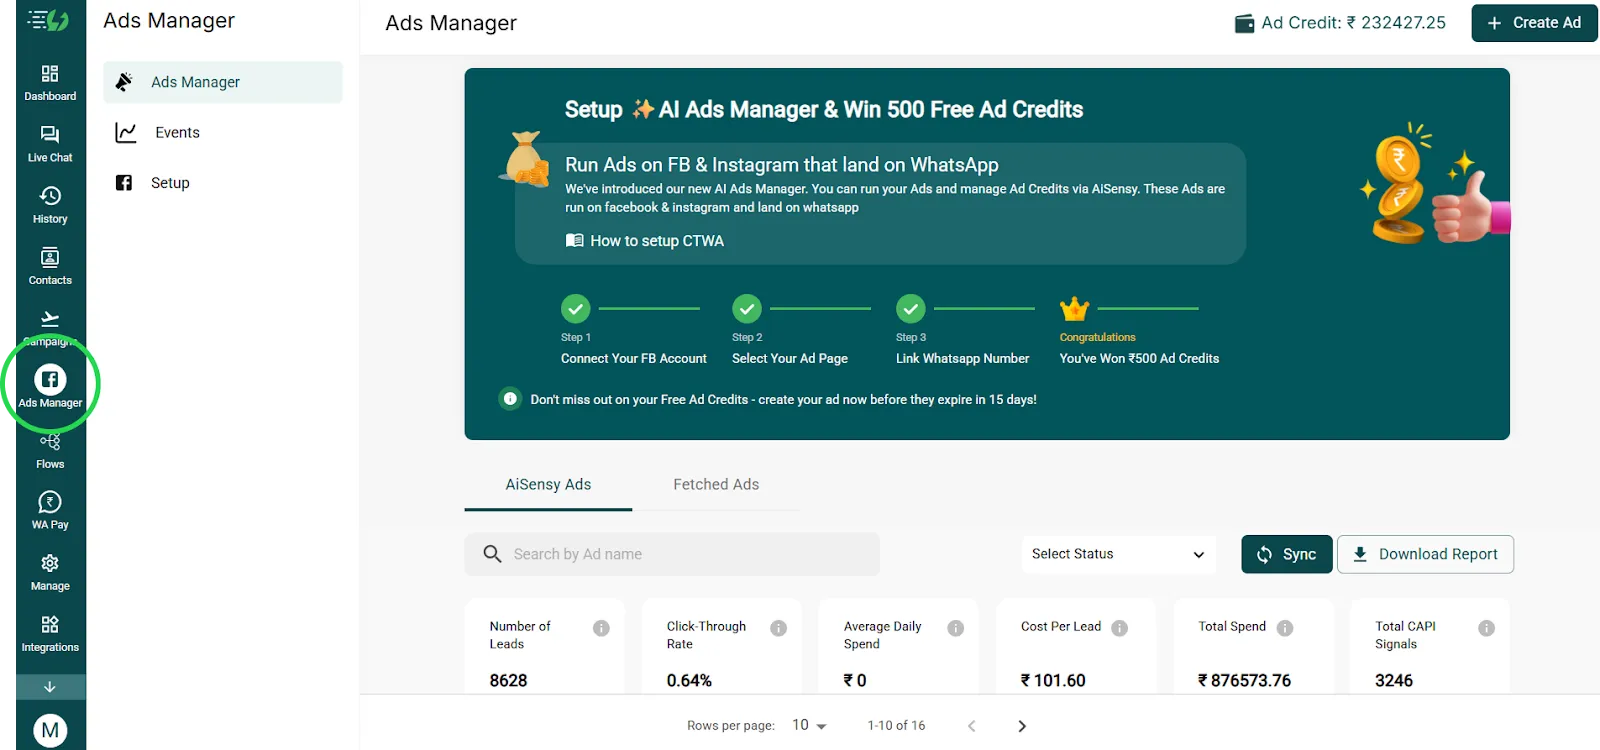
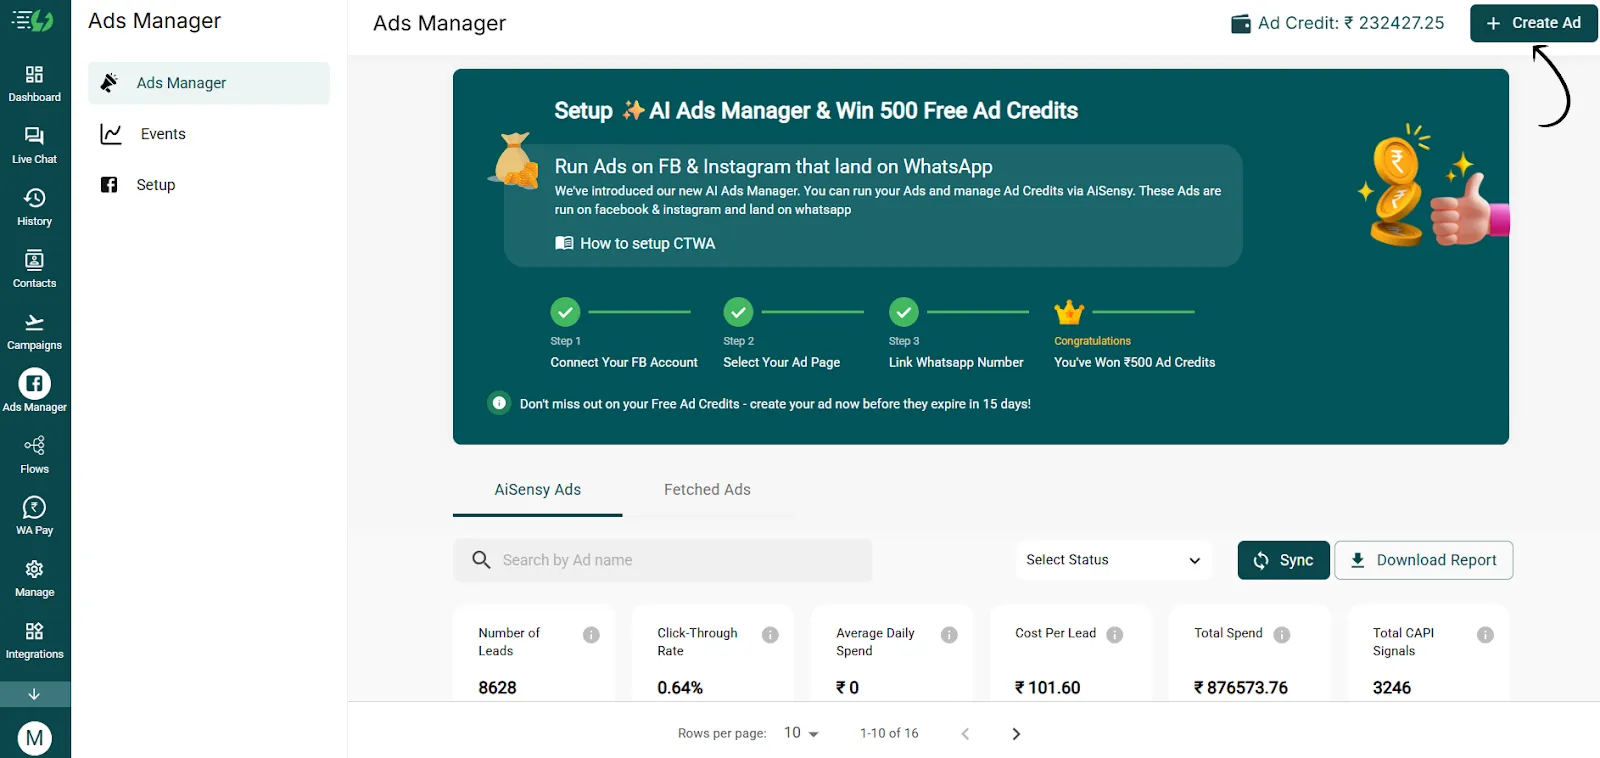
This completes your Meta Ads setup. Now, let's create Click to WhatsApp ads for your business. Click the "Create Ad" button at the bottom or top of the page.
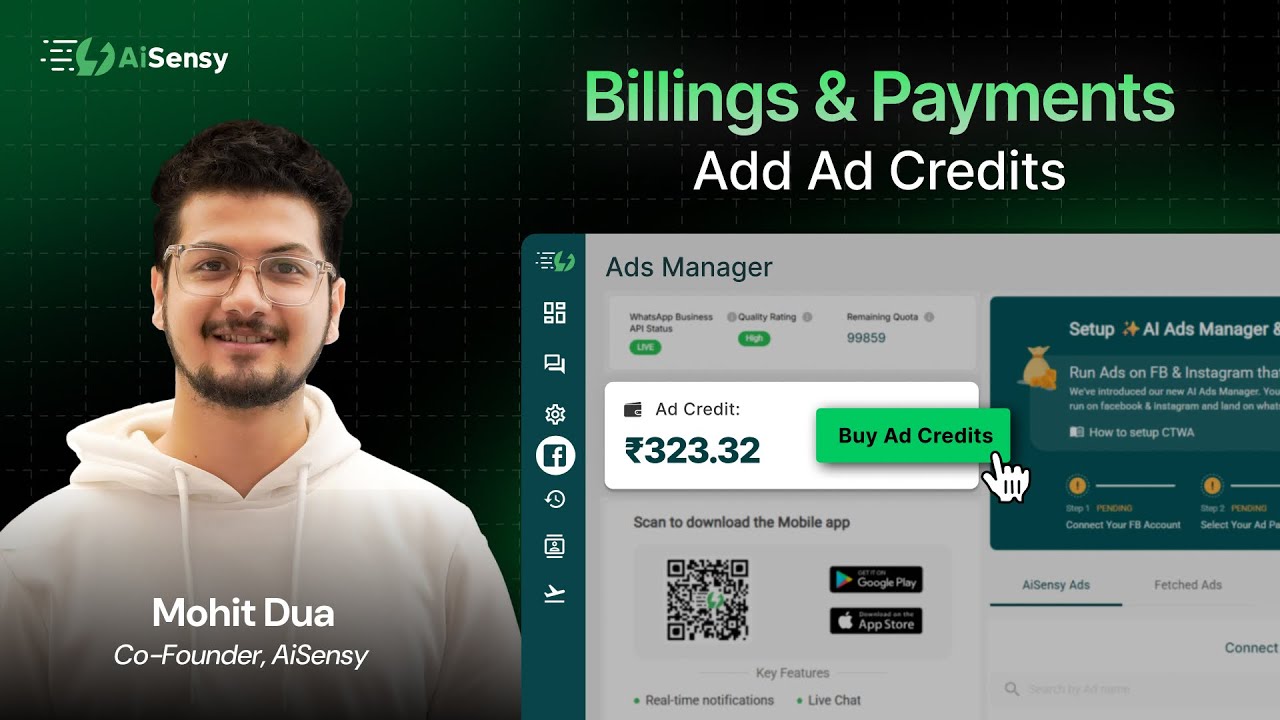
6. Purchase Ad credits
Installing Meta Pixel code to your Website (Optional)
If you wish to track data from your website ads, your Meta Pixel must be installed and active.
Without the Pixel:
Meta cannot track link clicks or landing page views
AiSensy cannot optimise your ads
Think of the Pixel as a small snippet of code that helps Meta understand what visitors do on your website. It ensures your ads reach people who are most likely to load your page and engage with your business.
To install the Meta pixel code to your website, go to CTWA tab in AiSensy 👉 Click events 👉 Setup 👉 Copy Meta Pixel Code
2. Install the Pixel code before the closing head tag on your website
You need to install the pixel code before the closing head tag of every page of the website where you wish to capture a particular event.
Make sure to publish the changes on your website before testing.

How to Create Website Ads in AiSensy
Follow the guided workflow inside AiSensy to set your targeting, budget, schedule, and creative.
Step 1: Choose Ad Type and Objective
1. Open the Ads Manager section in the AiSensy dashboard.
2. Click Create Ad
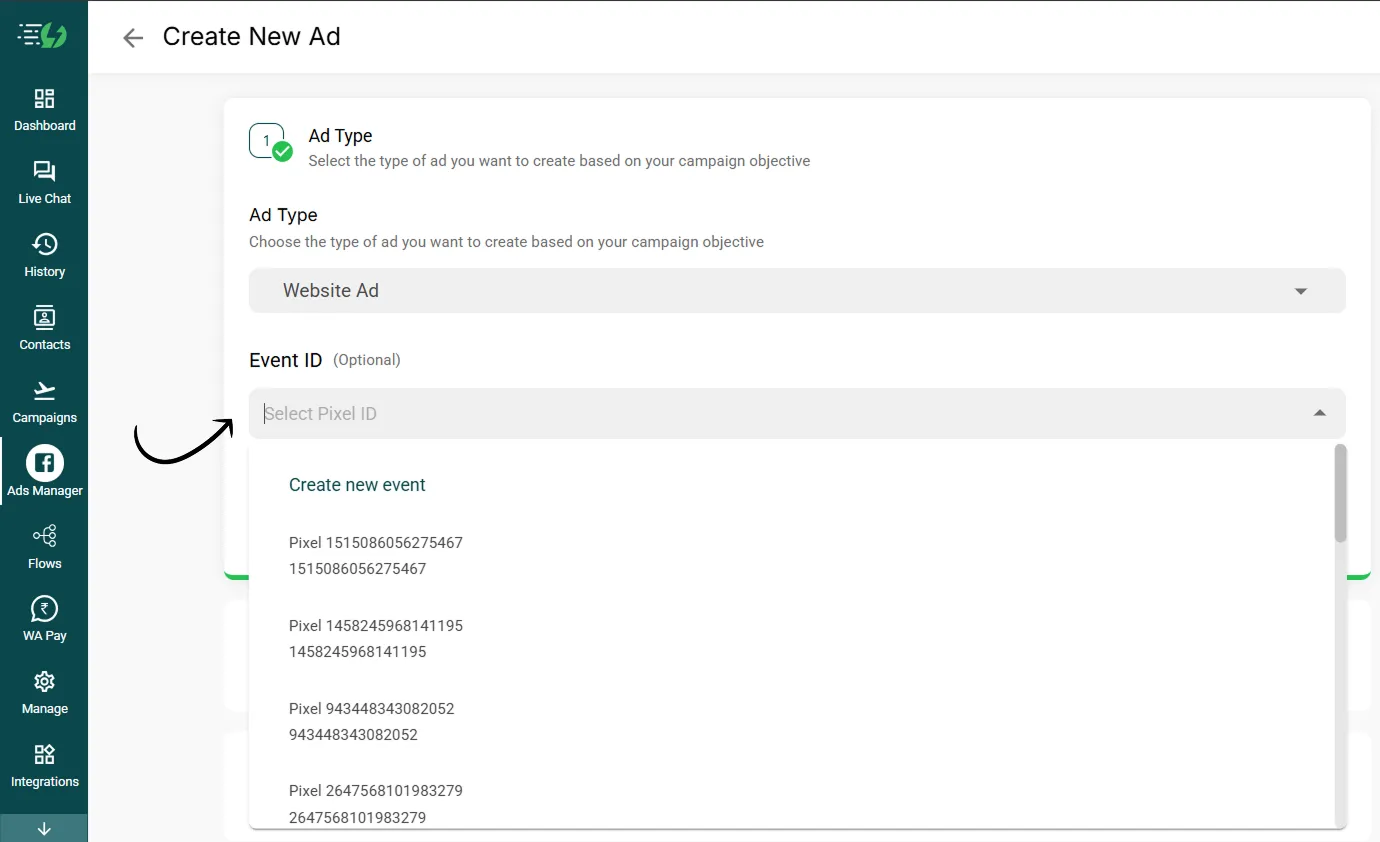
3. Under Ad Type, select Website Ad. This automatically switches the campaign to Meta’s Traffic objective.

4. Select your Meta Pixel
Here, choose the pixel that you've just added to your website. In case you've added multiple pixel codes, select the one that you wish to utilitze while running ads.
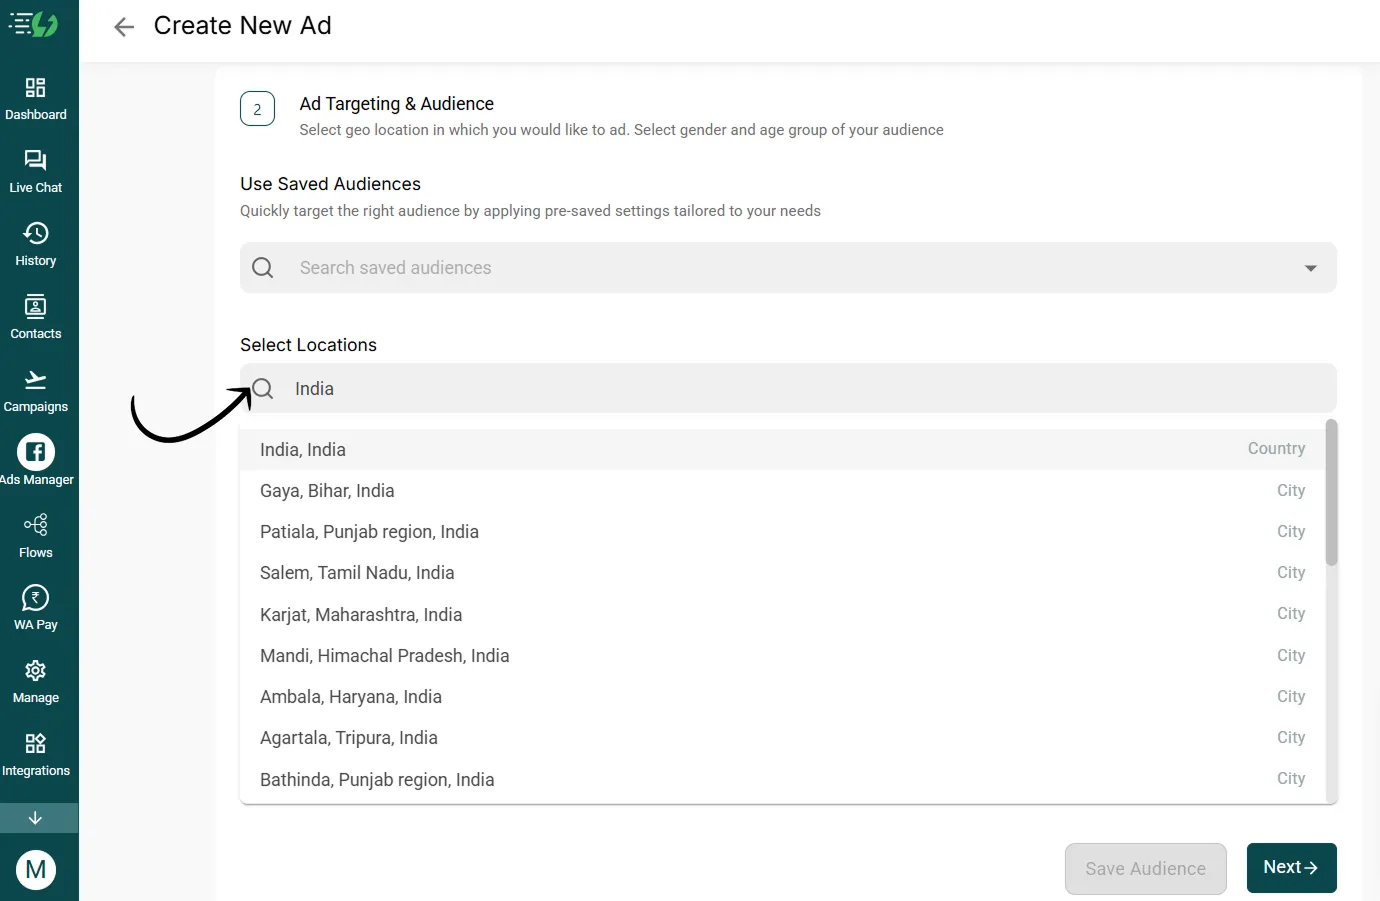
Step 2: Define Your Target Audience
1. Choose a saved audience or create one from scratch

2. Location: Select the countries, cities, or regions where your ad should appear
3. Demographics: Select the gender and age range you want to target for the website ad
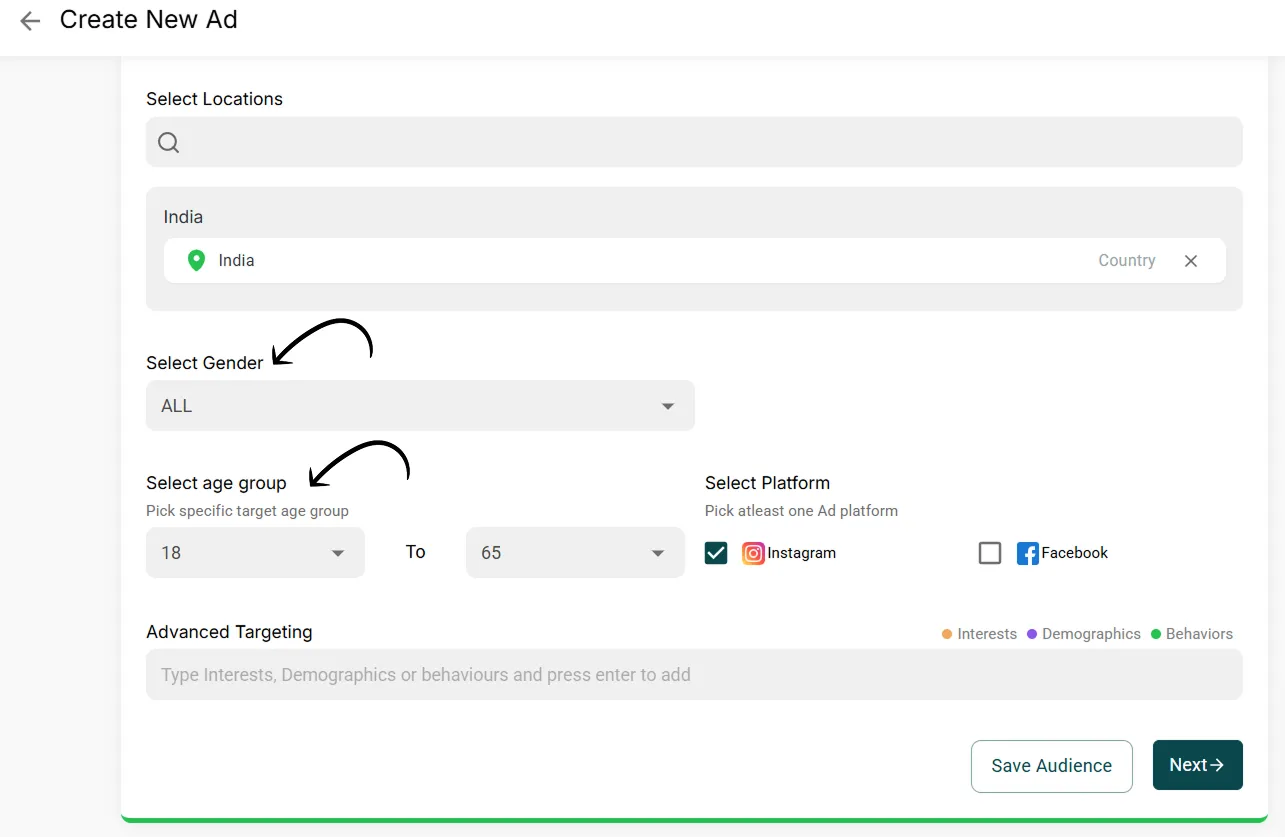
4. Select the Meta Platforms (Facebook or Instagram) on which you want to run the website ad

5. Advanced Targeting (Optional)

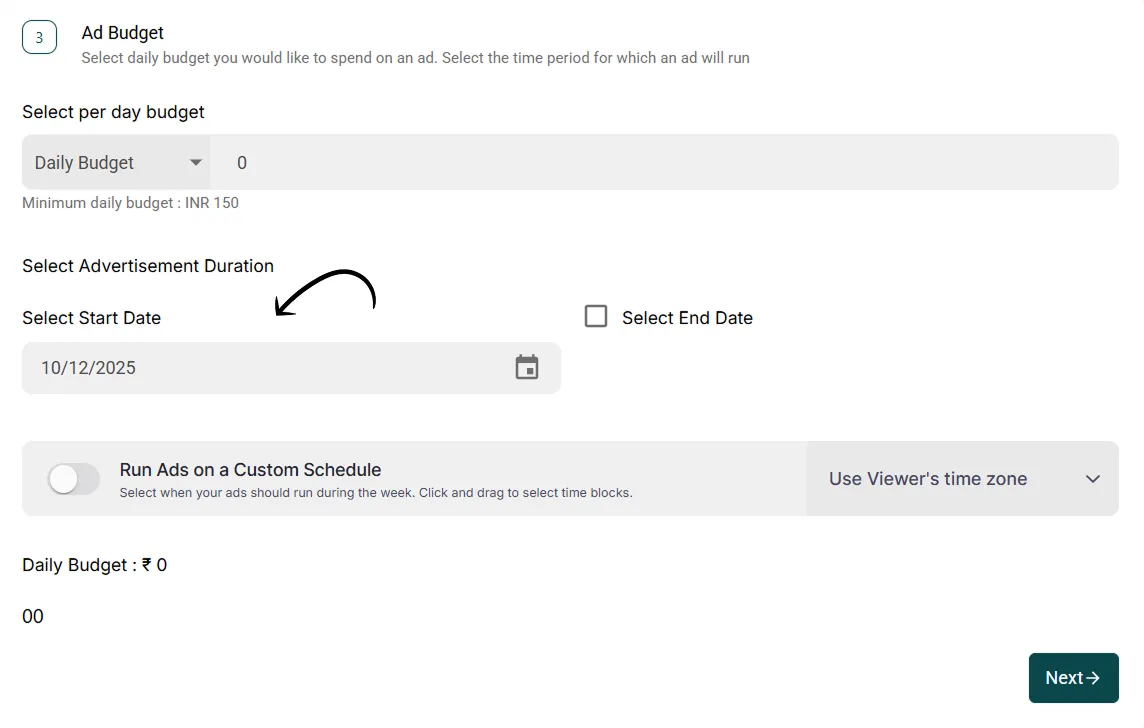
Step 3: Set Your Budget and publish your ad
1. Pick your Meta ad budget
Choose how you want Meta to allocate your ad spend by selecting either a Daily Budget or a Lifetime Budget.
A Daily Budget sets the amount you want to spend per day, while a Lifetime Budget sets the total amount you plan to spend for the entire duration of the campaign.
AiSensy distributes the Lifetime Meta ad budget spend across the selected date range to achieve the best possible delivery.

2. Schedule your Meta ad
Set a Start Date
Add an End Date (optional)
Or enable Custom Schedule to run ads at specific times or dates.
After scheduling, hit Next to proceed.
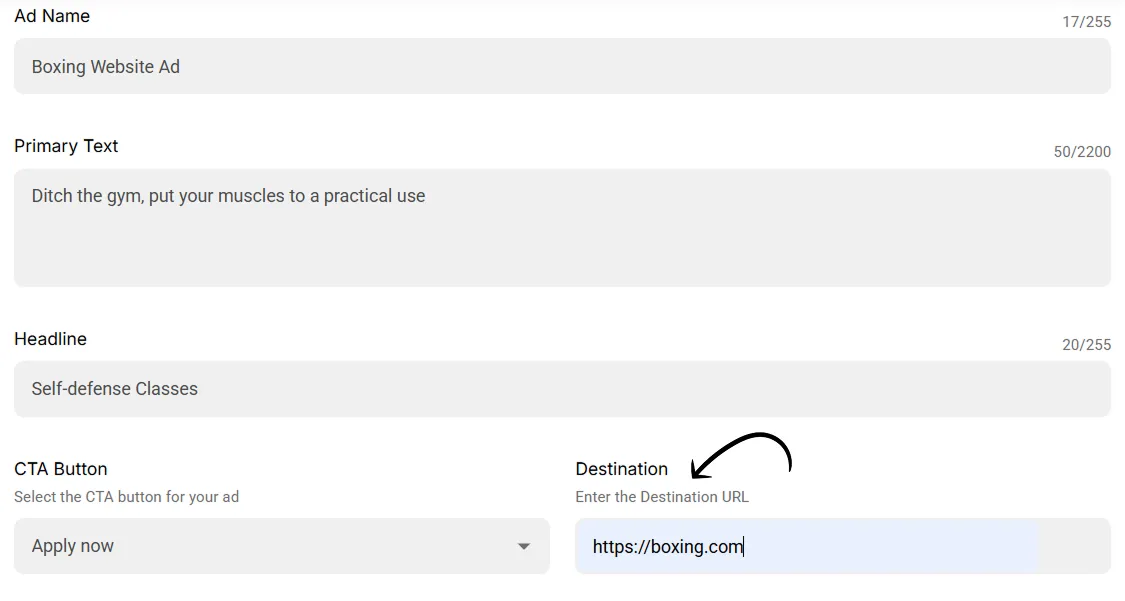
3. Add Your Ad Creative
Ad Name: Set a label for internal tracking.
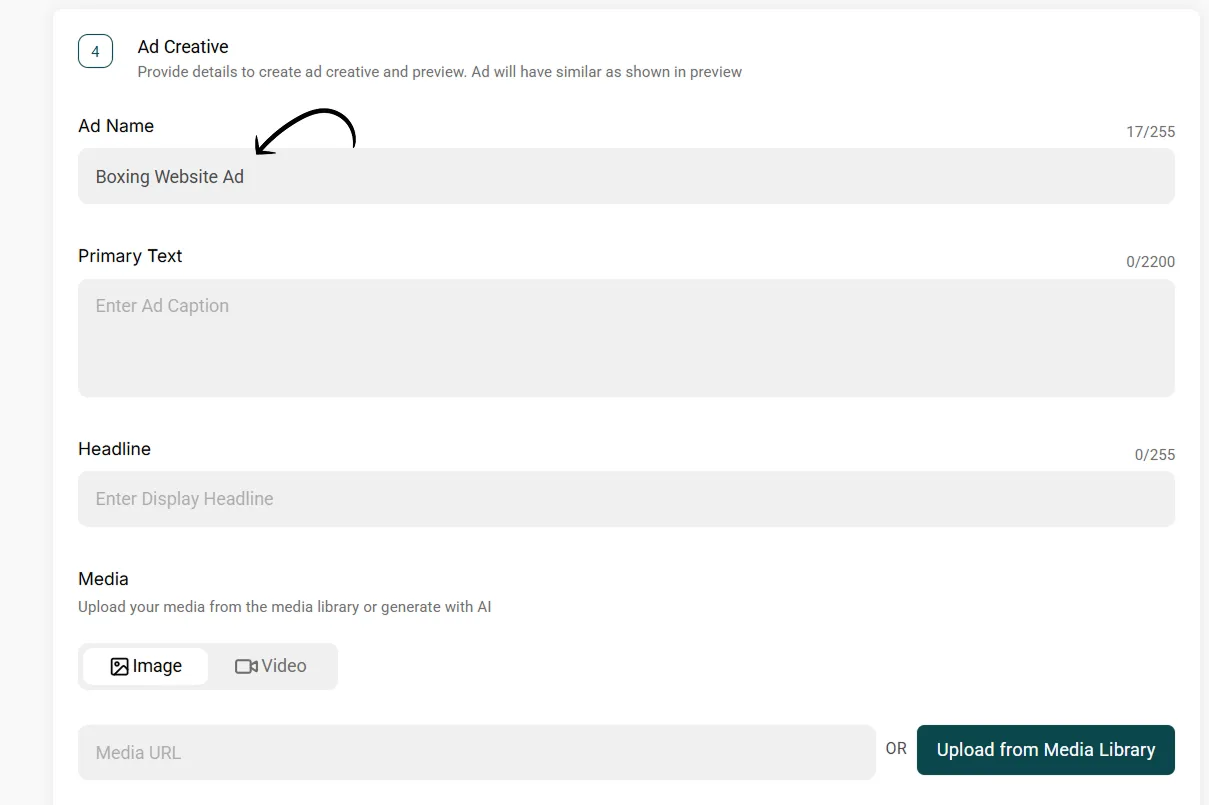
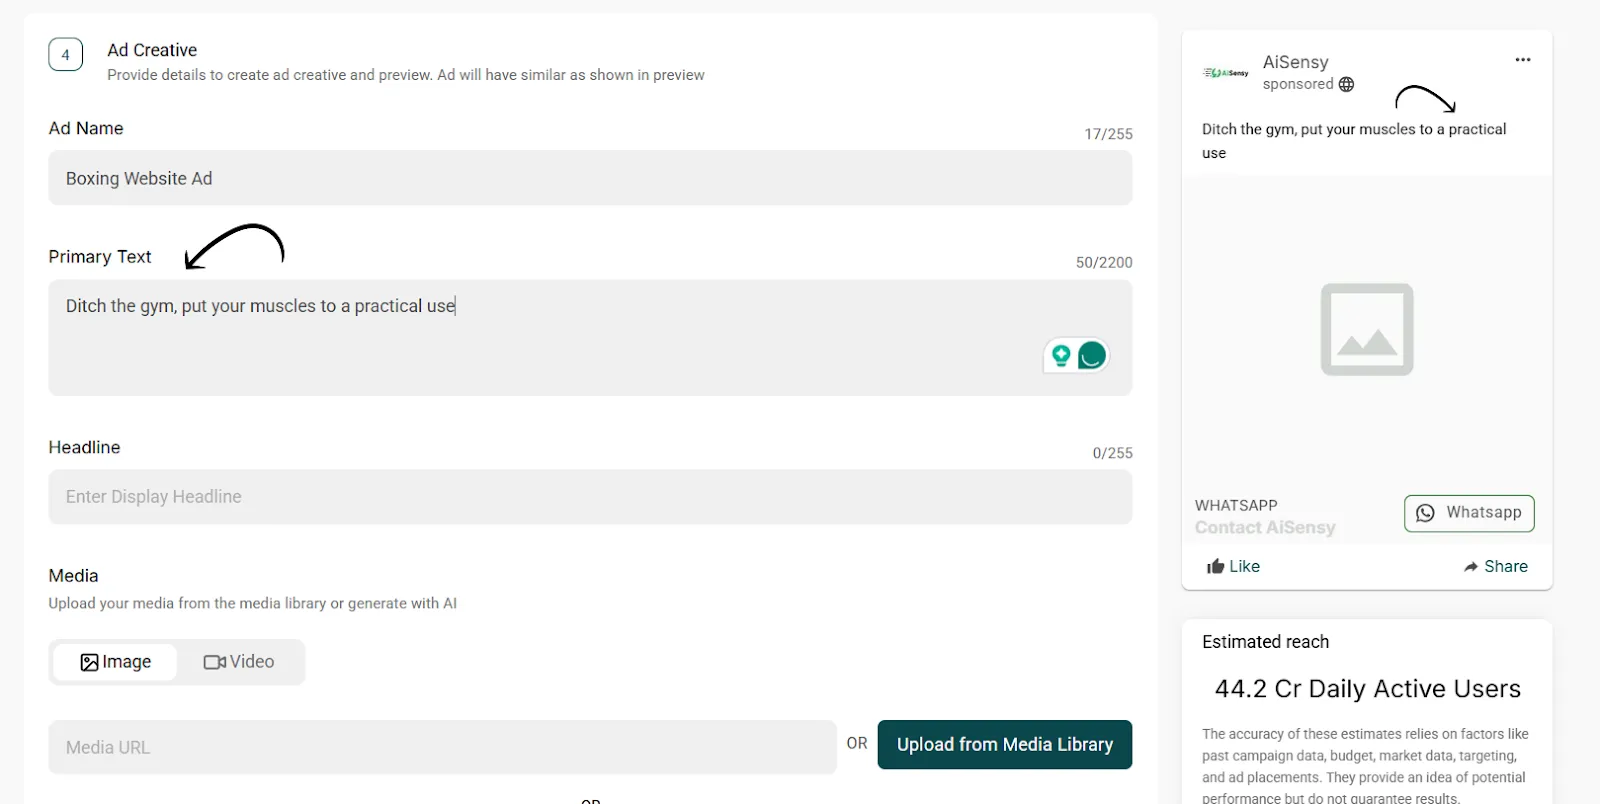
Primary Text: The caption that appears above your image or video.
Headline: A short, supportive line displayed below the media.
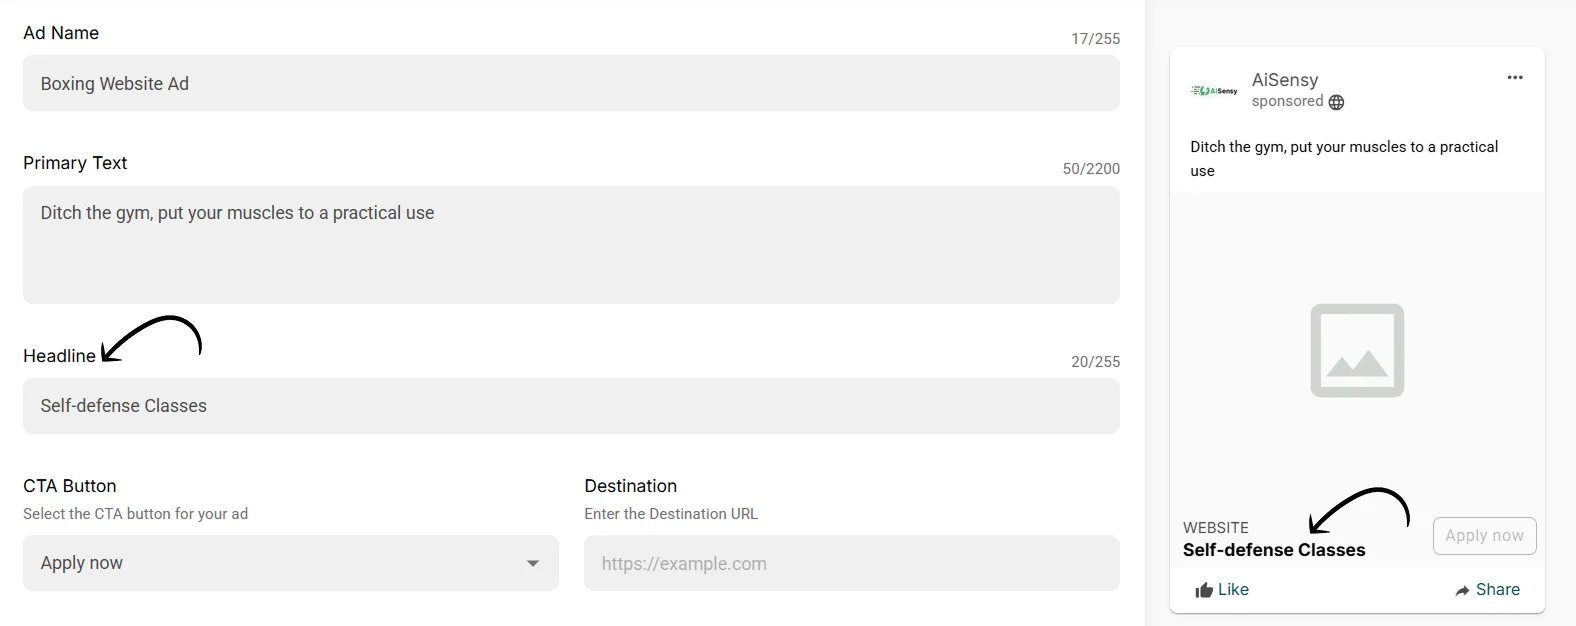
Call-to-Action (CTA): Choose a button such as “Learn More”, “Shop Now”, “Apply Now”, etc.
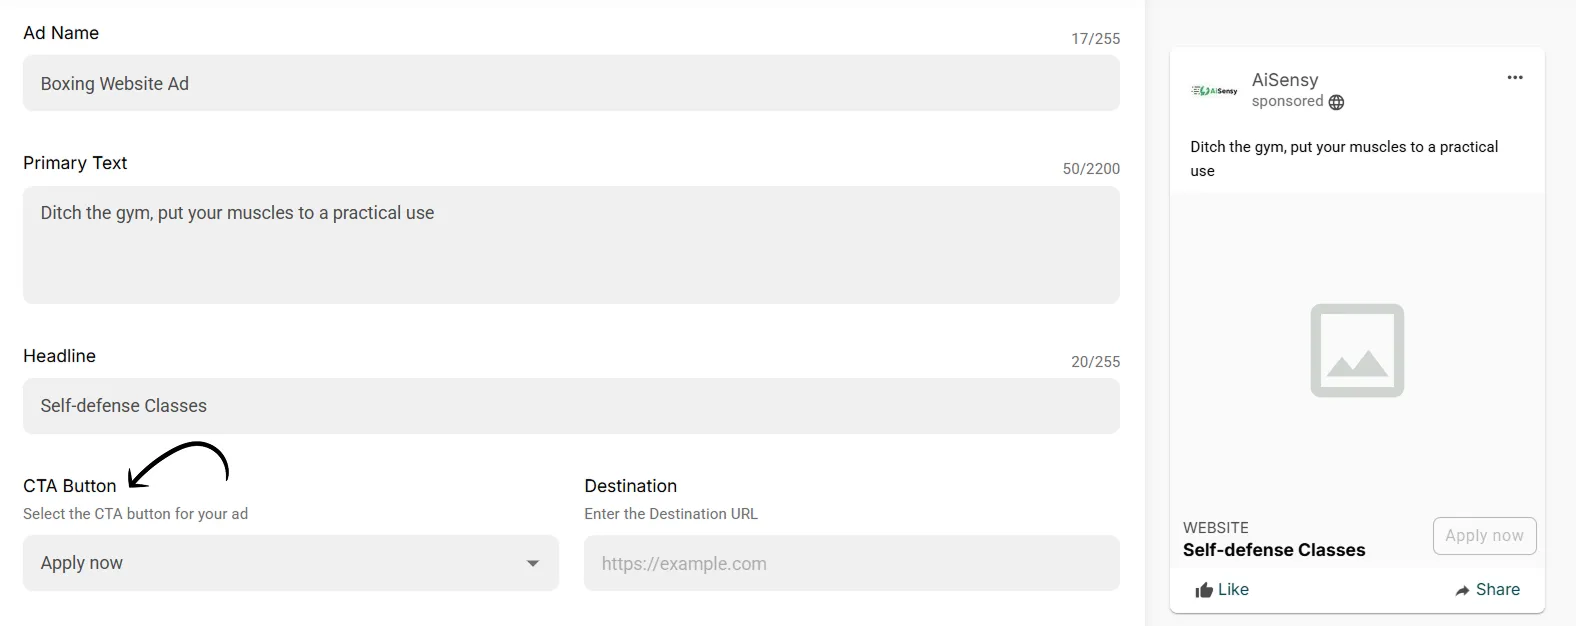
Destination URL: Enter the webpage where users will be redirected.
Double-check that the link is correct and secured with https://.
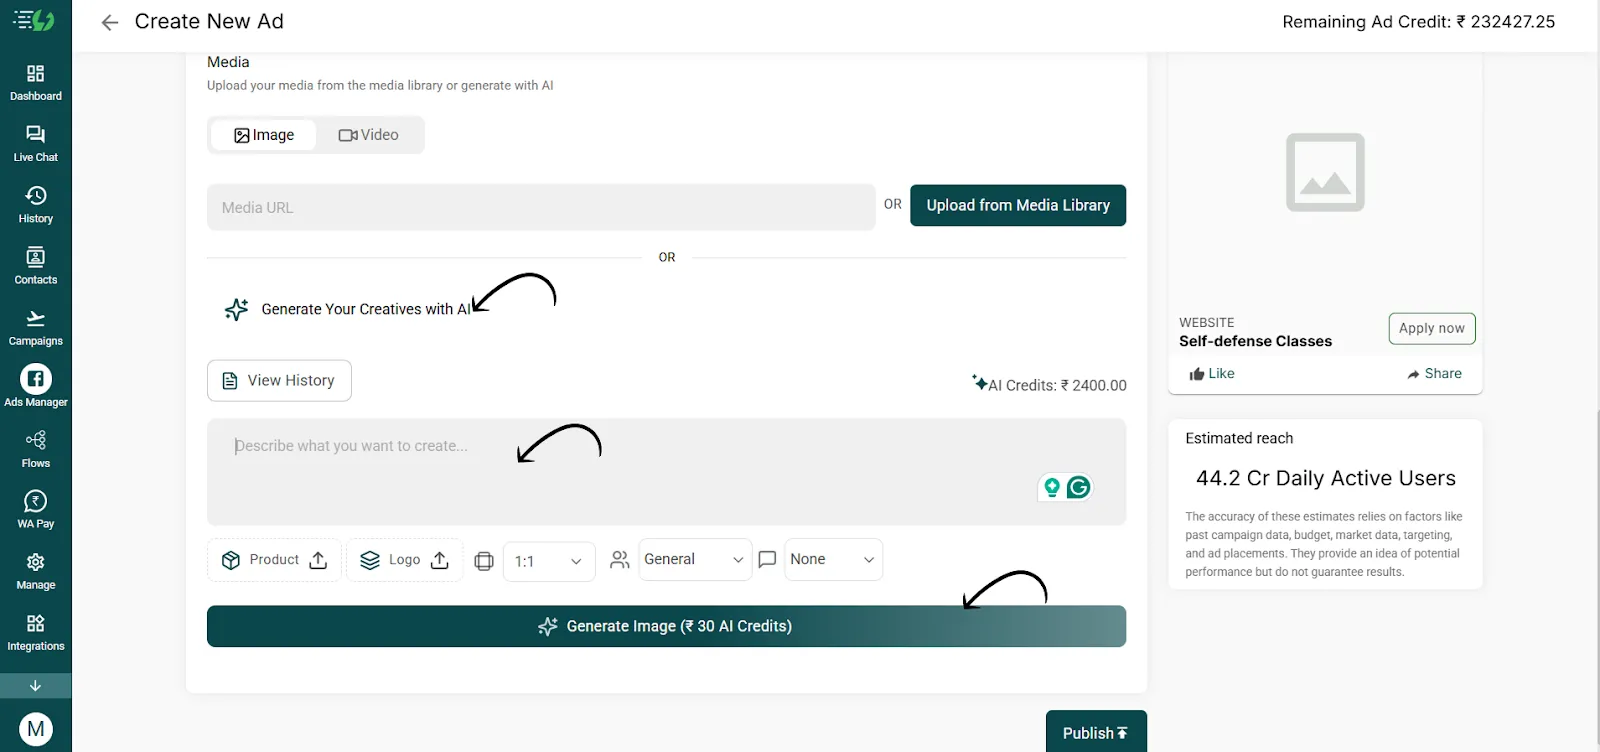
Upload a Media
Media: Per your convenience, upload your creative using:
Media Library
Upload from device
Media URL
A preview on the right shows how your ad will appear across placements.
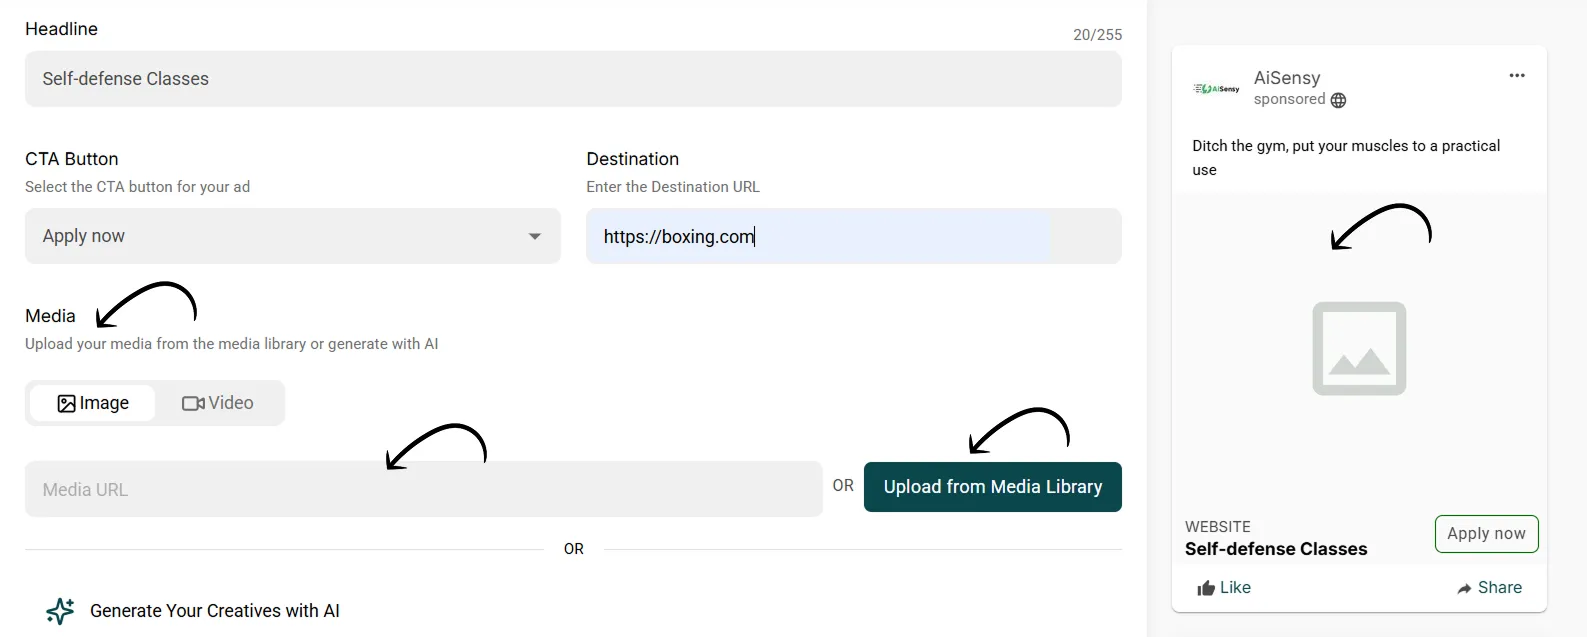
(Optional) AI Ad Creative Generator
You can also create your ad just with a prompt using the AI Ad Creative Generator in AiSensy. You can find it below the media option on the same page.
Once you've verified your ad details, click Publish to submit your Ad for approval.