INTRODUCING
AI Agent Builder for WhatsApp
Complete tutorial on how to build your first AI Agent on WhatsApp using AiSensy's AI Agent Builder.

INTRODUCING
AI Agent Builder for WhatsApp
Complete tutorial on how to build your first AI Agent on WhatsApp using AiSensy's AI Agent Builder.
Automate Sales & Support on WhatsApp,the smart way!
The AiSensy AI Agent Builder now lets you create AI-powered chatbots that understand intent, learn from your business data, and take real actions, all without a single line of code. This tutorial will tell you how to build your first AI Agent using AiSensy's AI Agent Builder.
Before we dive into how to build the AI Agent, let's first understand how it works and what makes it different from a traditional keyword-based chatbot.
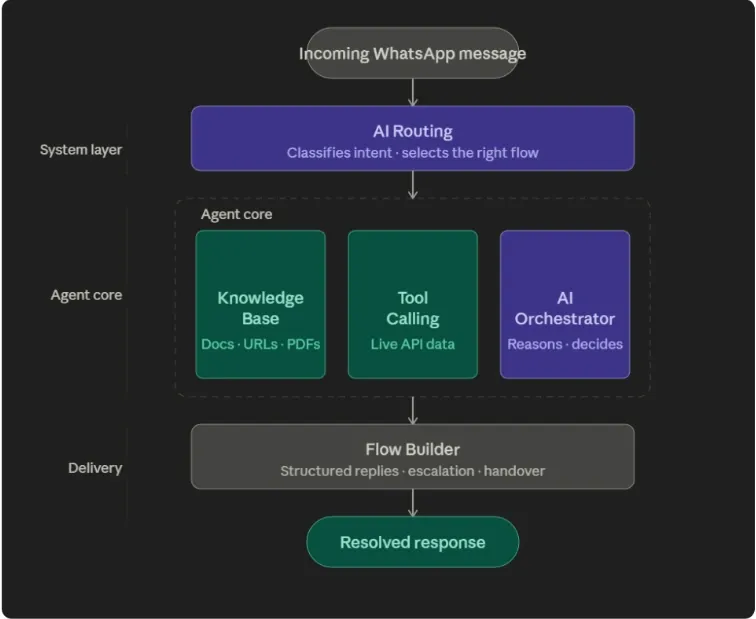
Architecture Overview
Before we get into the steps, let's first understand the two pillars you'll be working with inside AiSensy.
Agent Core
This is where you train the agent. It has three parts: the Knowledge Base where you feed your data, Tool Calling where you connect your APIs, and the AI Orchestrator where you define how the agent should behave and respond.
AI Routing
This is the brain that reads every incoming WhatsApp message and decides which agent or flow should handle it. This is optional and if you only have one single flow active, you don’t need agent routing.
Now that you know the pieces, here's how to put them together.
But, before we dive in, let's see some important terminologies.
Important Terminologies At a Glance
The seven core concepts that power every AI Agent you build on AiSensy.

AI Agent
A WhatsApp chatbot that understands intent in natural language, learns from your business data, and takes real actions through APIs — without keywords, scripts, or a single line of code.

Knowledge Base
The memory of your AI Agent. Train it on websites, articles, FAQs, or PDFs, and it answers customer queries using your real business content instead of generic AI replies.

AI Orchestrator
The brain of your AI Agent. Define your business context, tone, workflow rules, and restrictions so the agent knows exactly how to think, behave, and respond on every conversation.

Tool Calling
The hands of your AI Agent. Connect any REST API, CRM, or eCommerce platform to fetch live data, book appointments, look up orders, and reply with formatted WhatsApp messages.

Ai Routing
The traffic controller of your account. Reads every incoming message, classifies user intent, and routes the conversation to the most relevant flow — even when no keyword matches.

Confidence Score
A 0 to 1 rating the AI assigns to every routing decision. Above 0.95 is an exact match, below 0.75 it won't route — keeping your agent accurate instead of guessing.

AI Messages
The credits that fuel every intelligent response. Each KB answer, tool call, or Orchestrator reply consumes one message from your monthly pack — track and top up anytime.
How AI Agent Builder Works
Every AI Agent built on AiSensy runs on two layers working together to deliver one seamless WhatsApp experience.

How to set up the Knowledge Base
The Knowledge Base is where you teach your AI Agent everything it needs to know about your business, without writing a single line of code.
You can create multiple knowledge bases inside a single flow and toggle each one on or off as needed. Here's how to set one up.

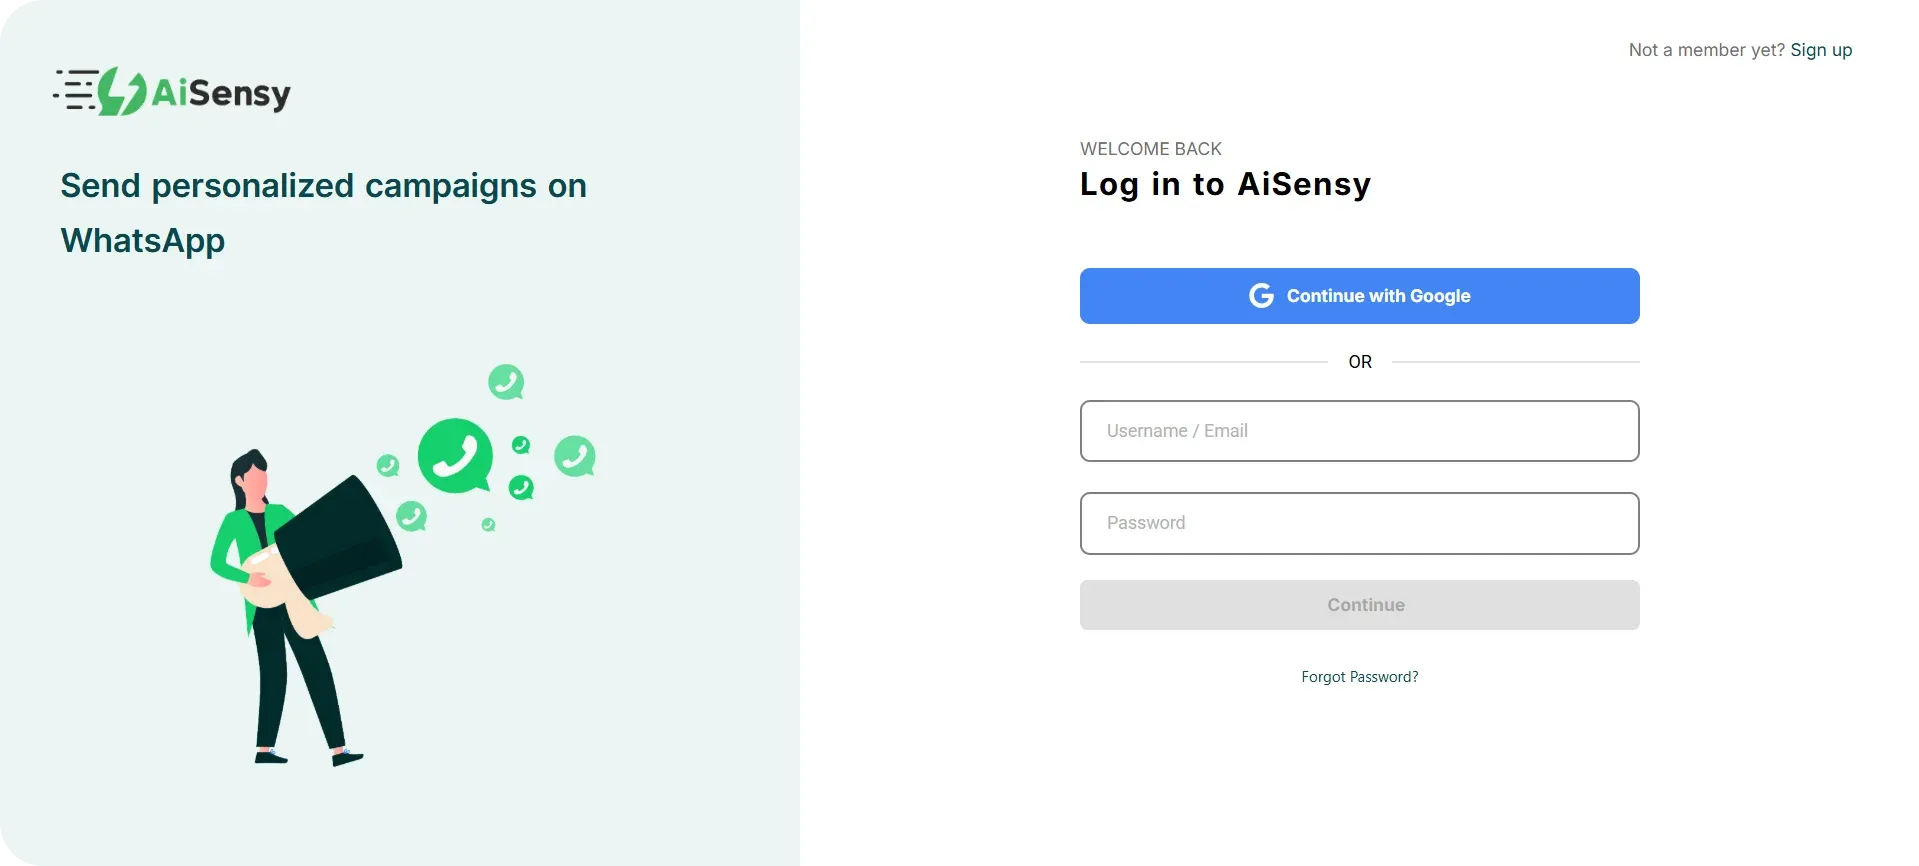
1. Login to your AiSensy account
Once you log in, you'll land on AiSensy dashboard, your home screen for everything WhatsApp Business API. Here, you'll see your API status, quality rating, remaining quota, current plan, and quick links.
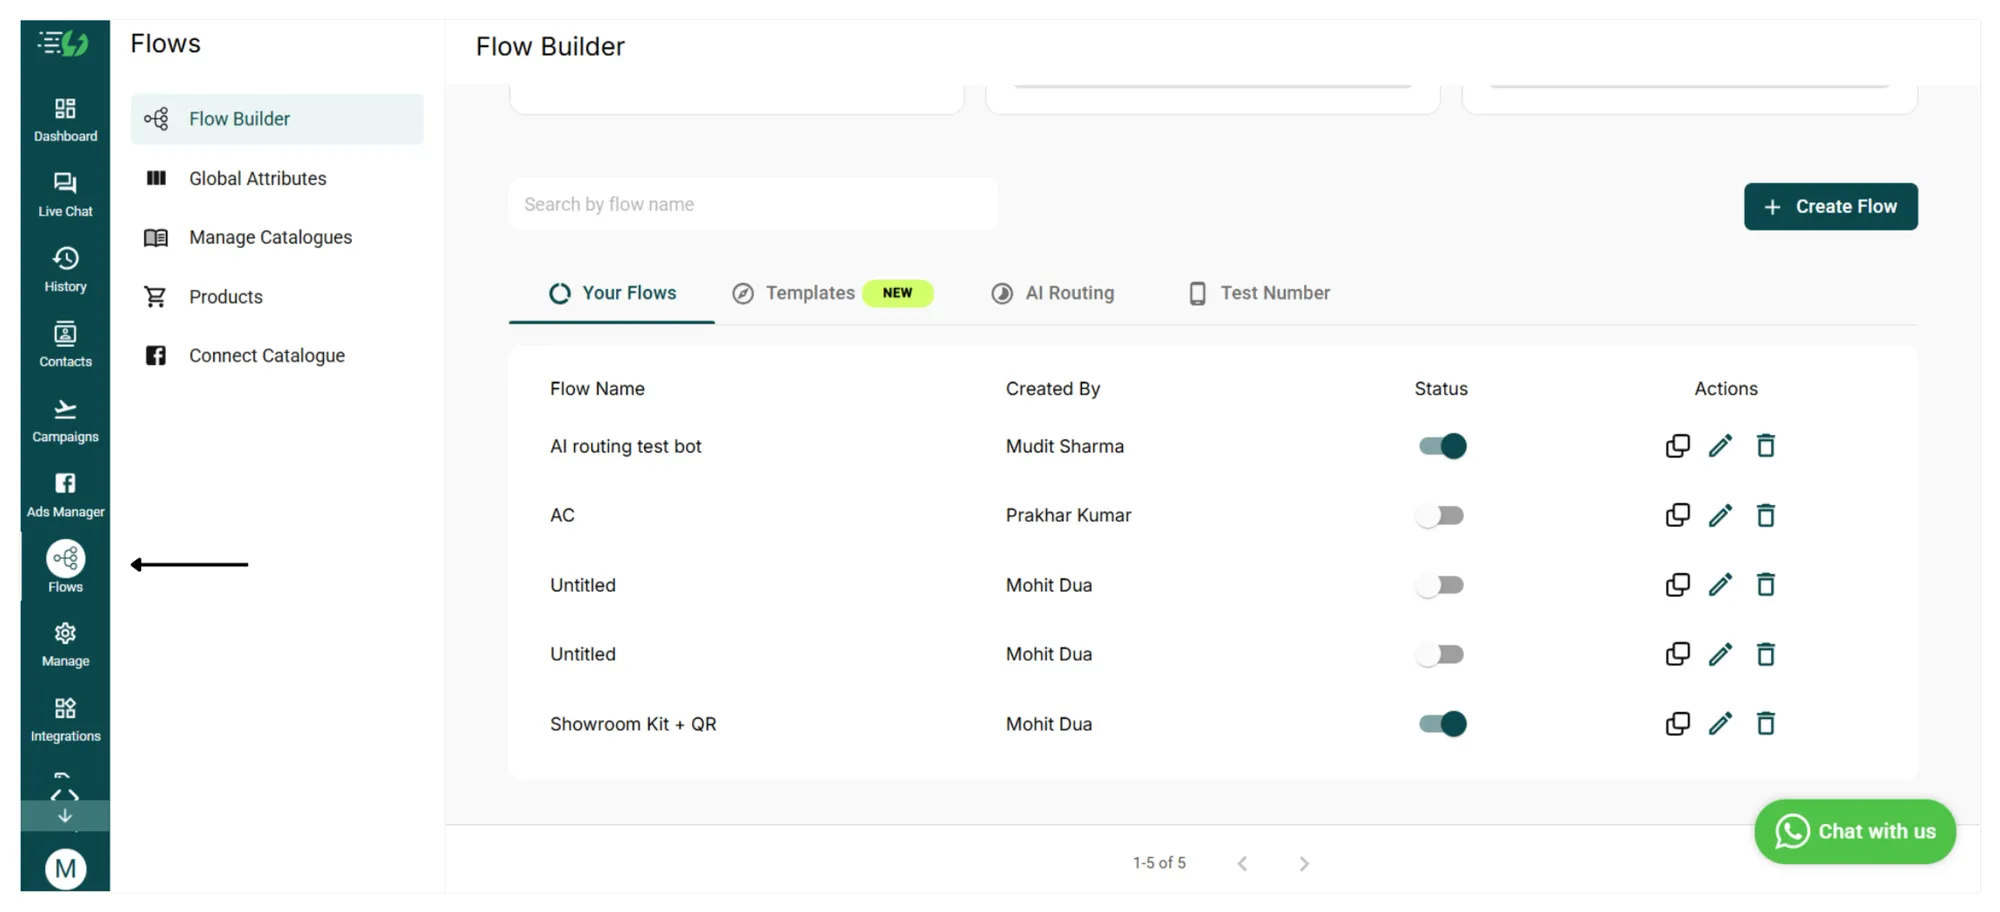
2. Click on Flows in the left sidebar
Click the Flows icon in the left navigation rail. This opens the Flow Builder index page, your home for all chatbot flows and the new AI Agent capabilities.
On this page you'll see the Active Flows card (tracks how many flows are live and how many are AI-Enabled), the AI Messages card (where you purchase the AI Messages addon that fuels intelligent responses), tabs for Your Flows | Templates | AI Routing | Test Number, and a + Create Flow button.
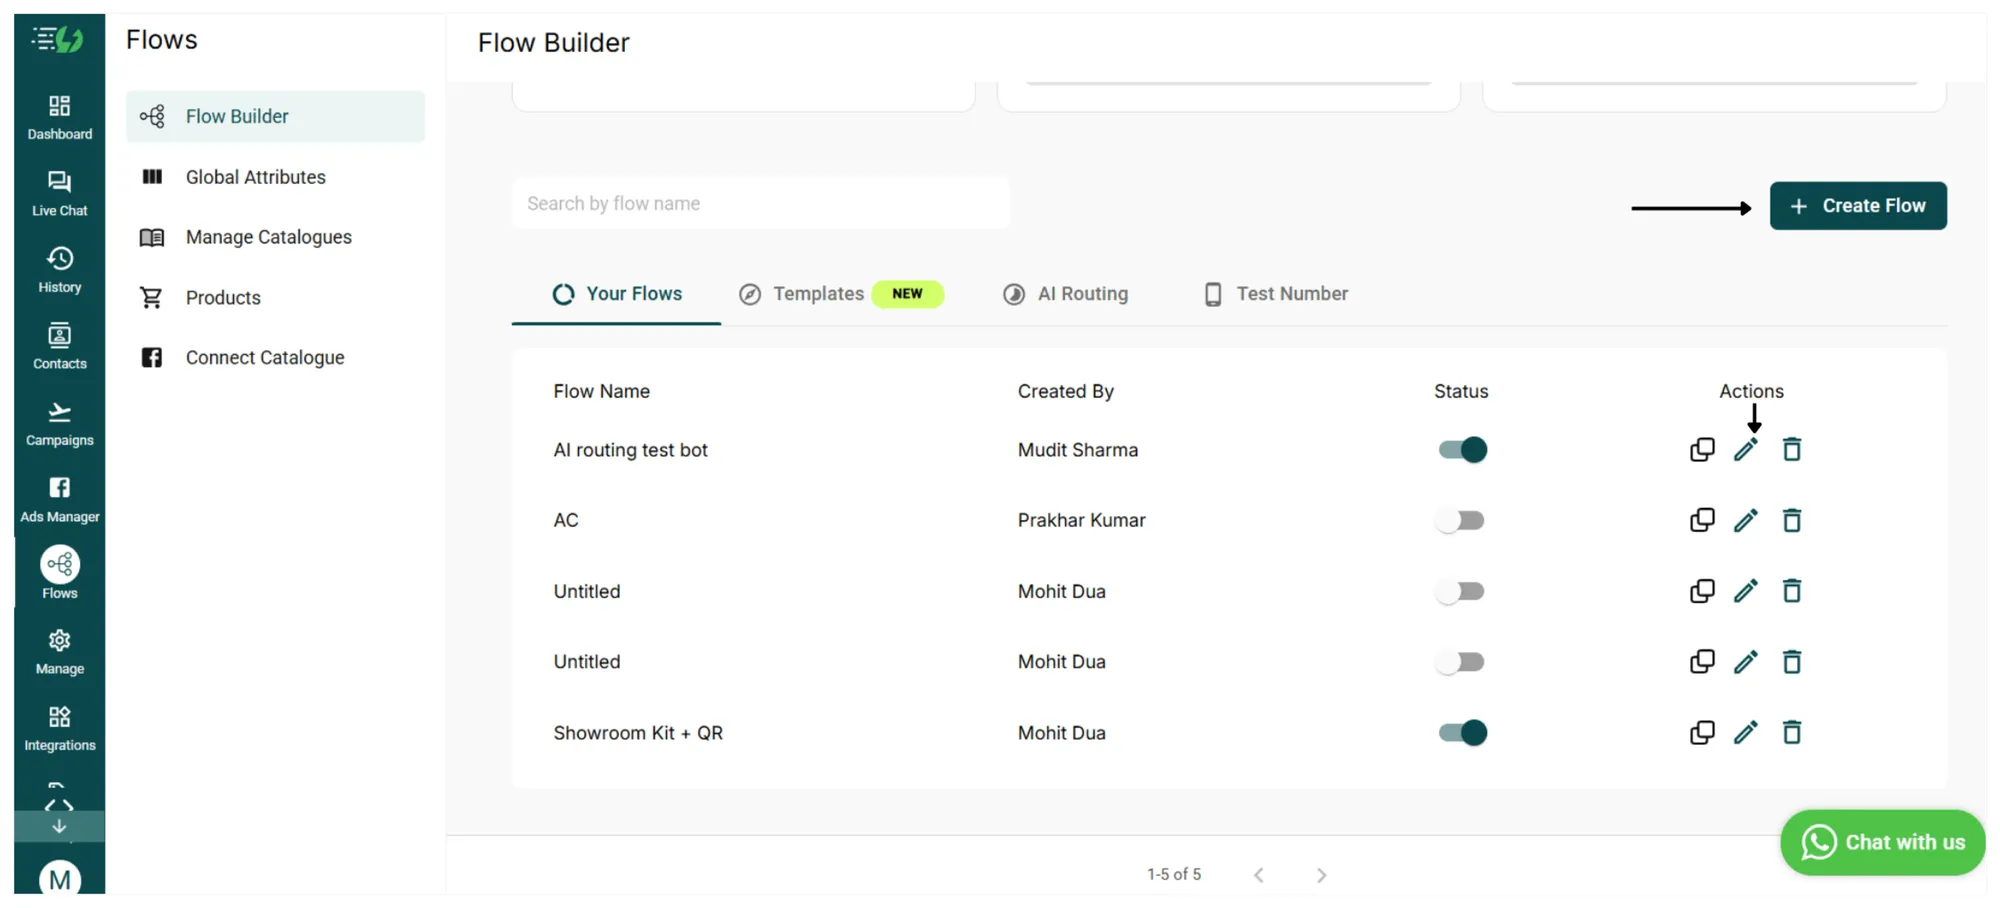
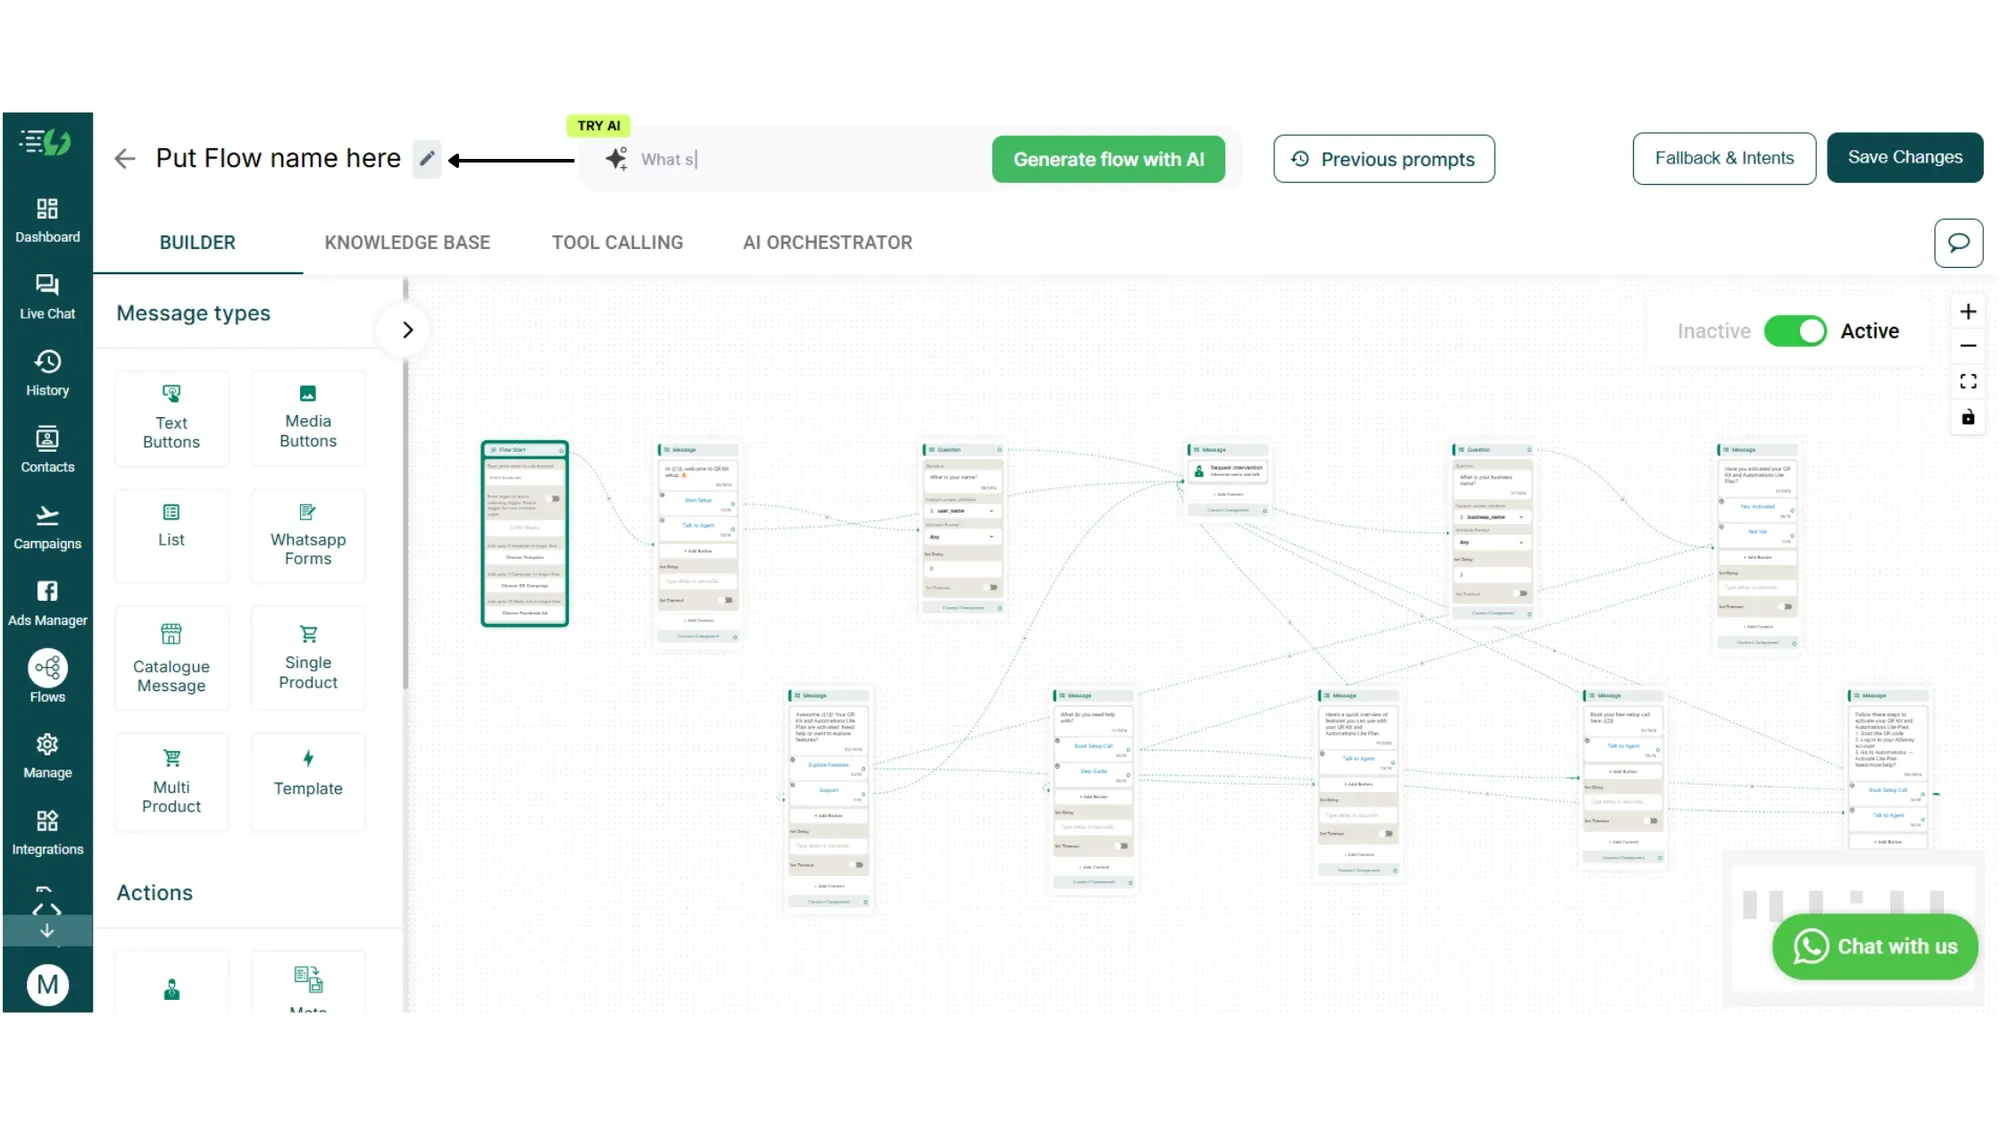
3. Click "+ Create Flow"
Click on + Create Flow to start a new flow.
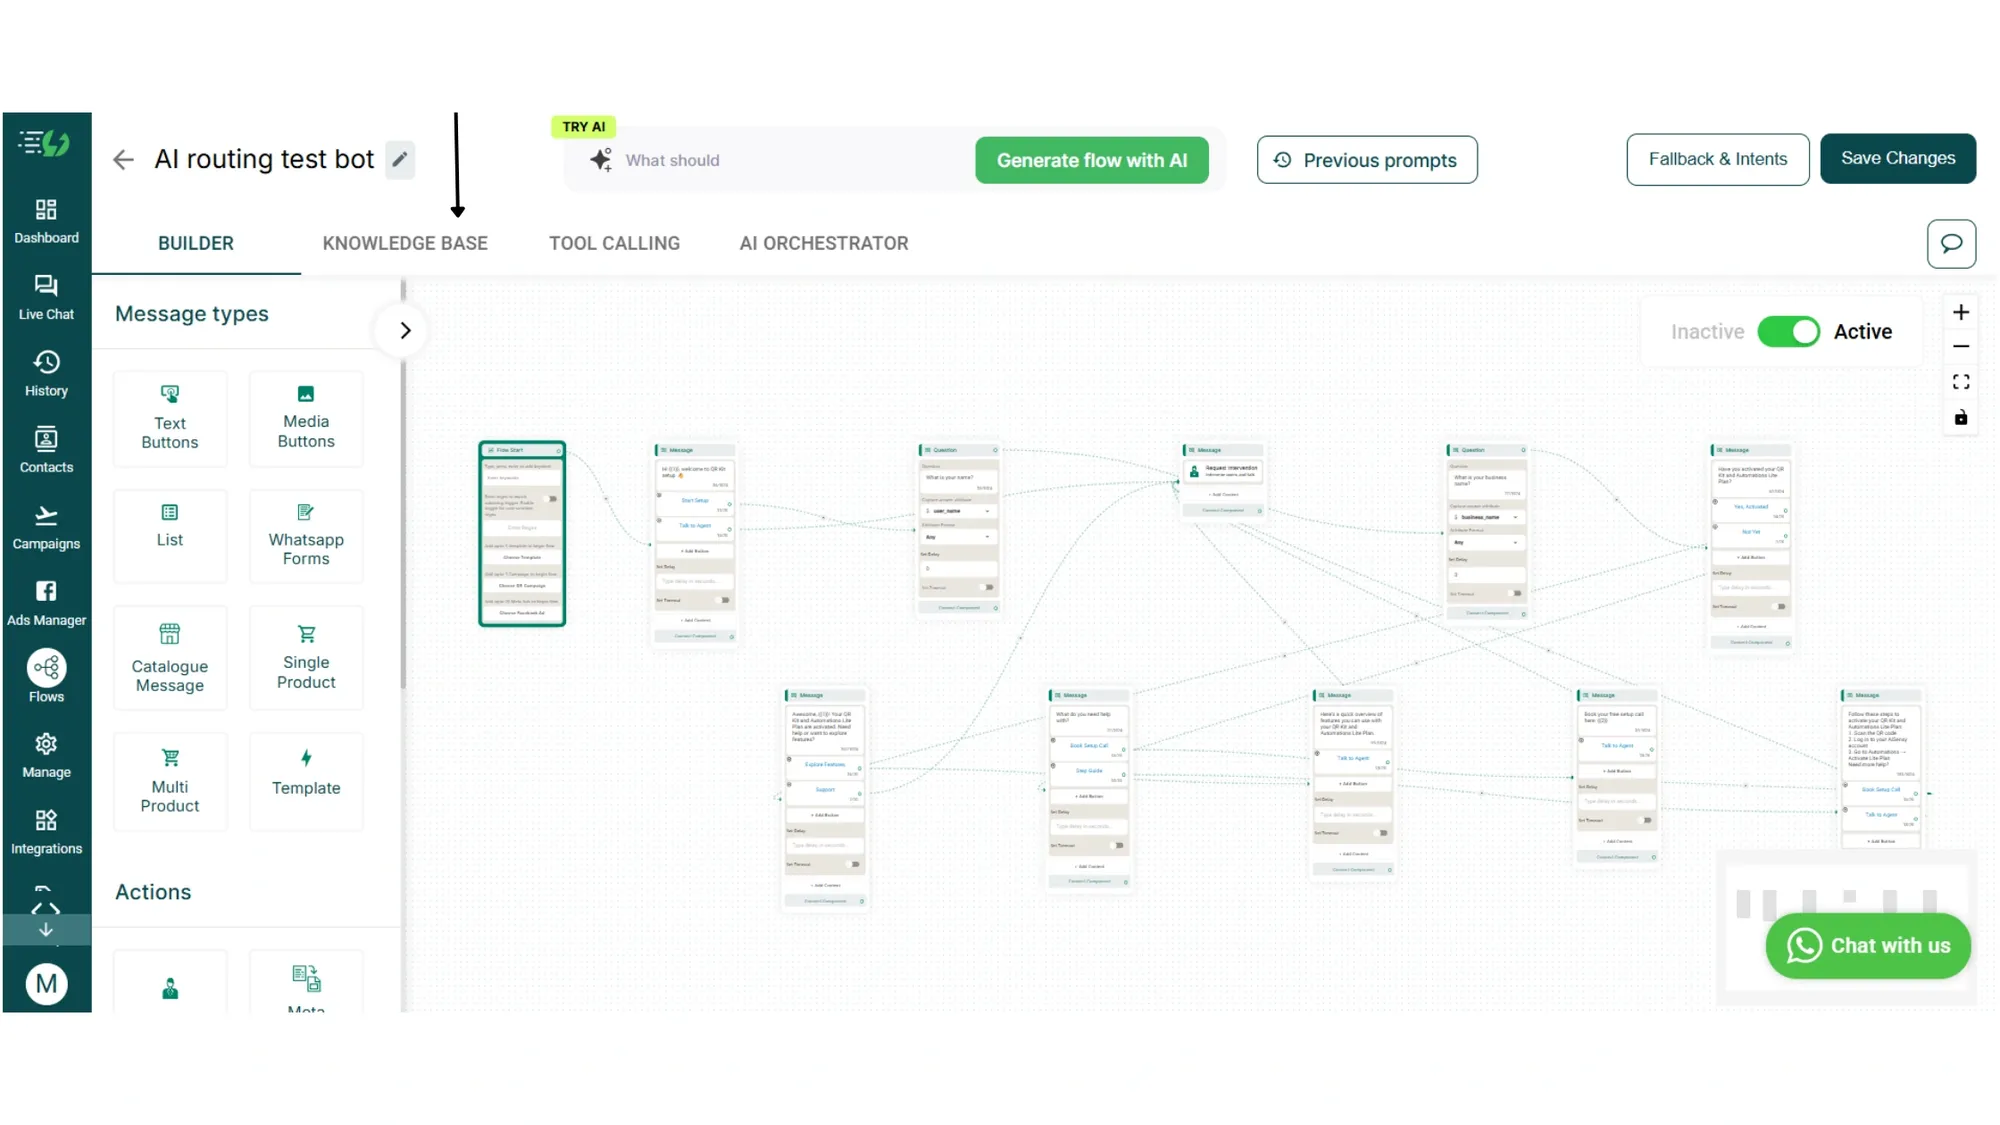
4. Open the Knowledge Base tab
Once a flow is open, four tabs appear at the top:
• BUILDER: the familiar drag-and-drop canvas where you design conversation flows.
• KNOWLEDGE BASE: train this flow's AI on your business data.
• TOOL CALLING: configure API integrations the AI can trigger.
• AI ORCHESTRATOR: tell the AI how to behave with structured instructions.
Click on KNOWLEDGE BASE tab.
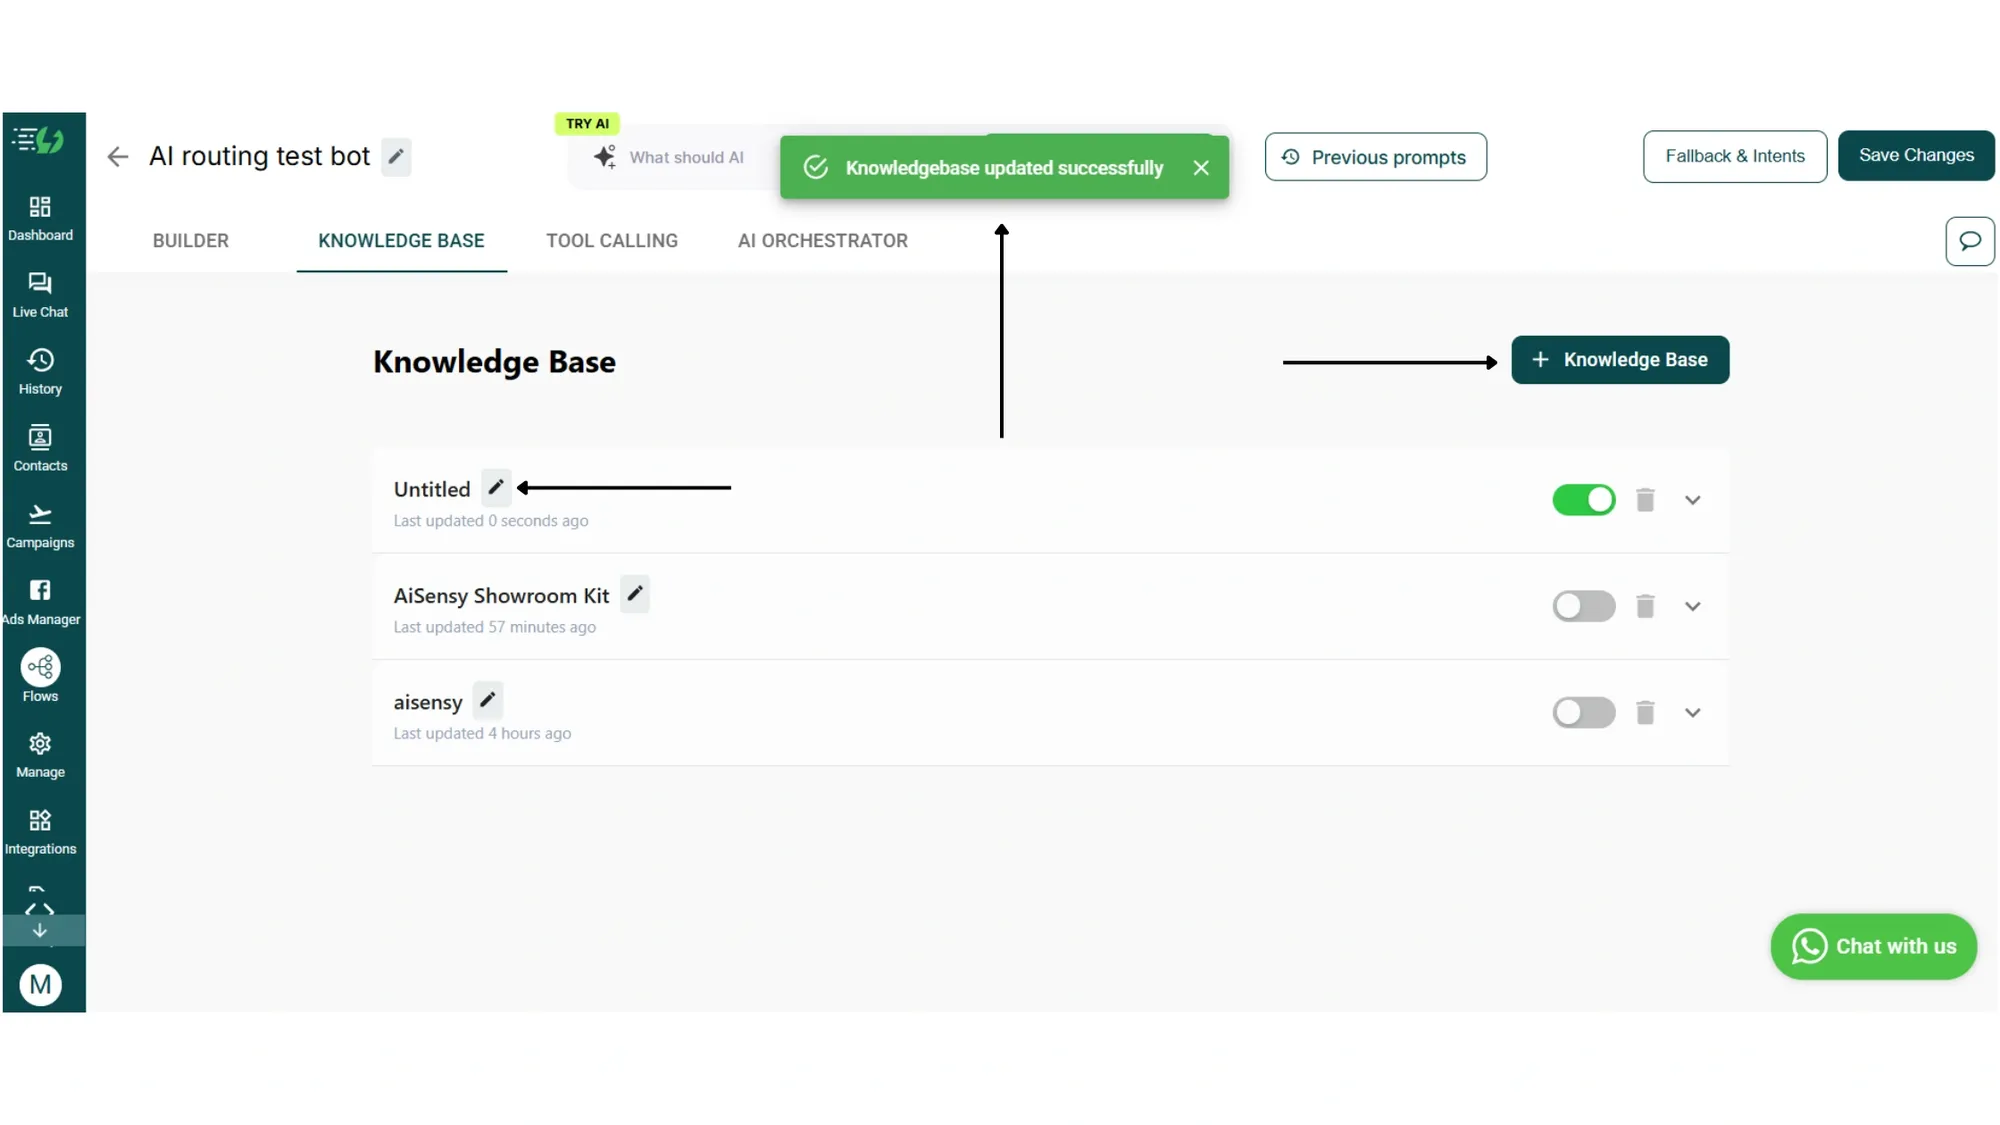
2. Click + Knowledge Base
Click the + Knowledge Base button on the top-right to create a new one. Give it a clear name like "Product FAQs" or "Pricing Policies" so you can identify it later.
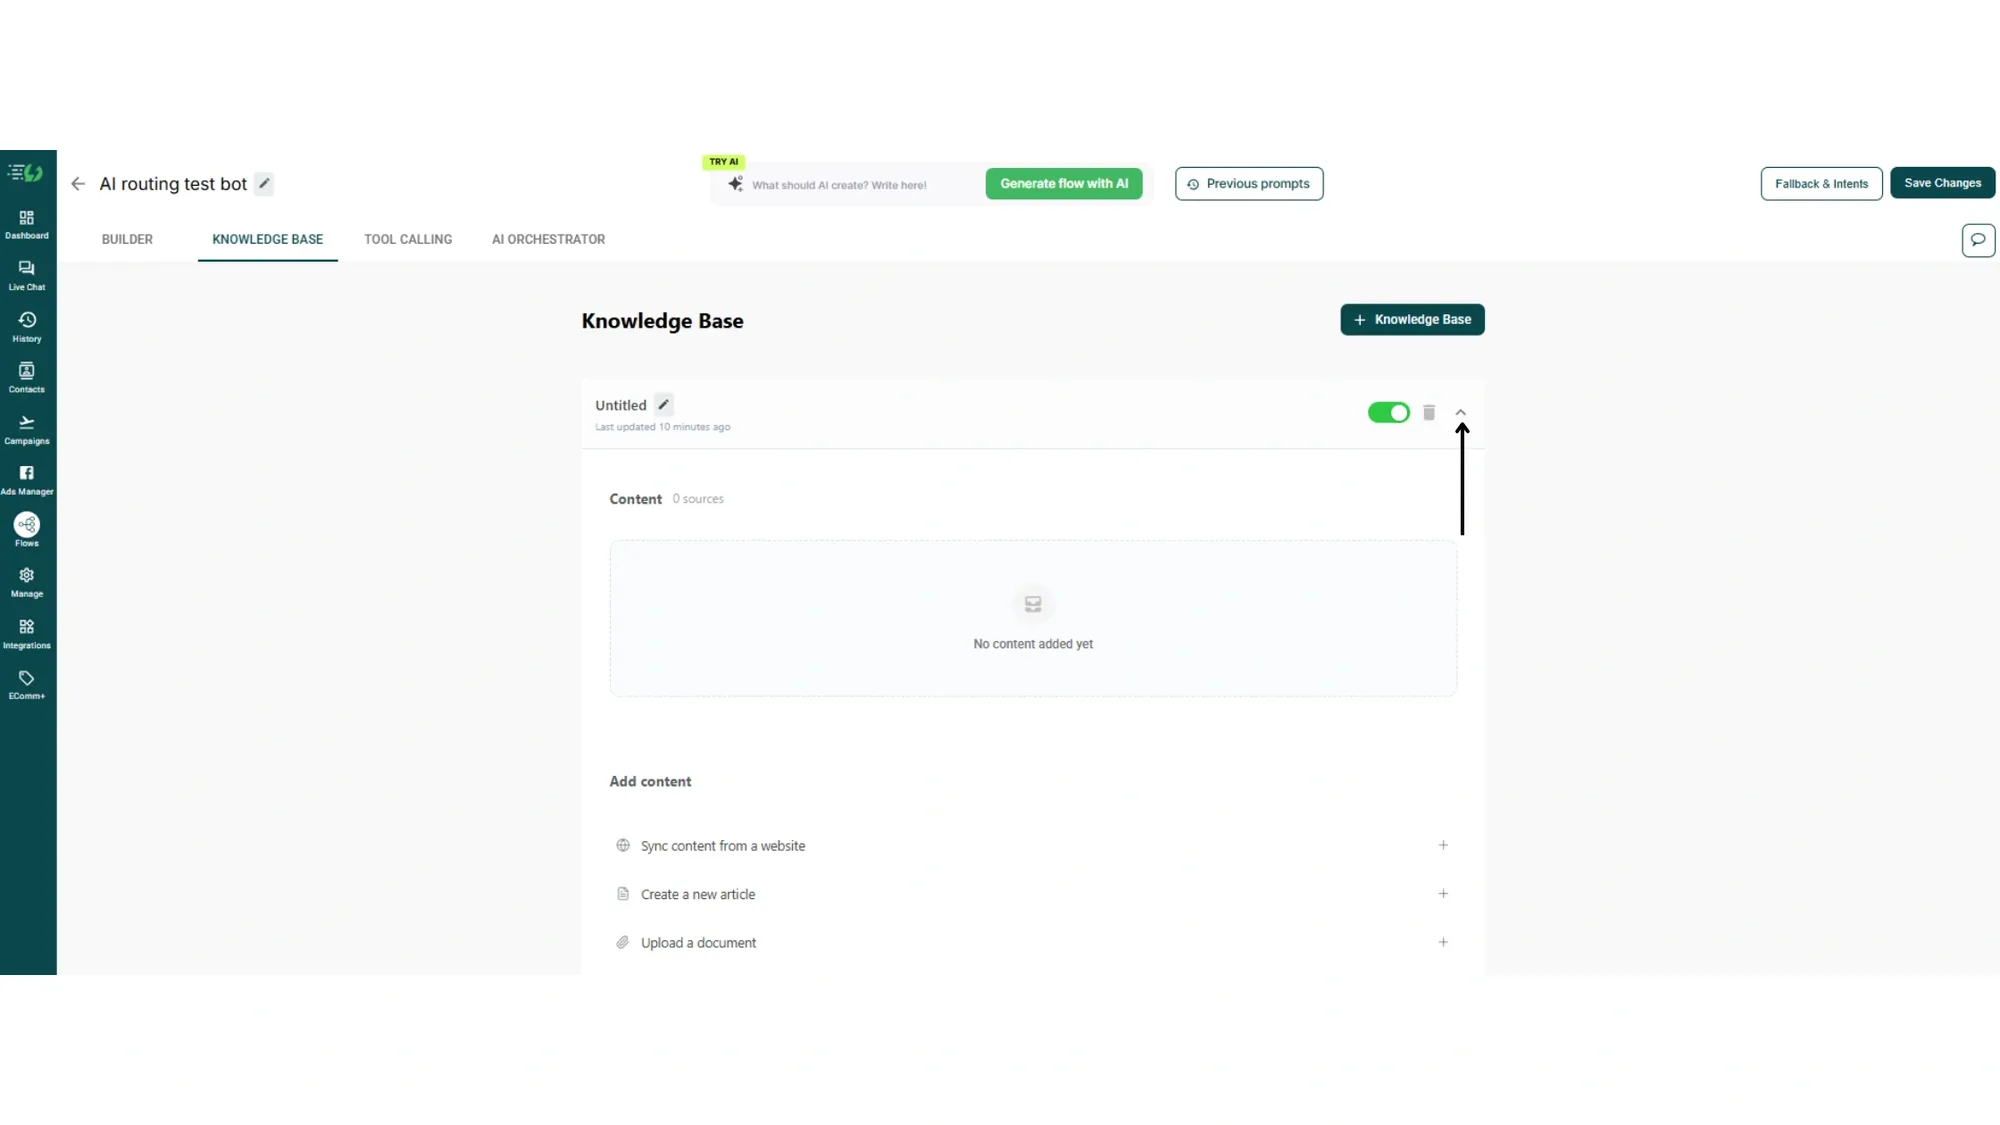
3. Add your content
Expand your new knowledge base by clicking the chevron. You'll see a Content counter (showing the number of sources added) and an Add content section with three options:
• 🌐 Sync content from a website: Paste your URL and AiSensy will auto-discover and crawl every child page on your site. Each discovered page is processed and indexed as a separate document.
•📄 Create a new article: Write content directly inside AiSensy. Great for FAQs, policies, or any custom information you want the agent to know.
•📎Upload a document: Drop in PDFs, DOCX files, product catalogues, brochures, or any policy documents. Text is extracted and indexed automatically.
Click the + next to the option you want and add your source.
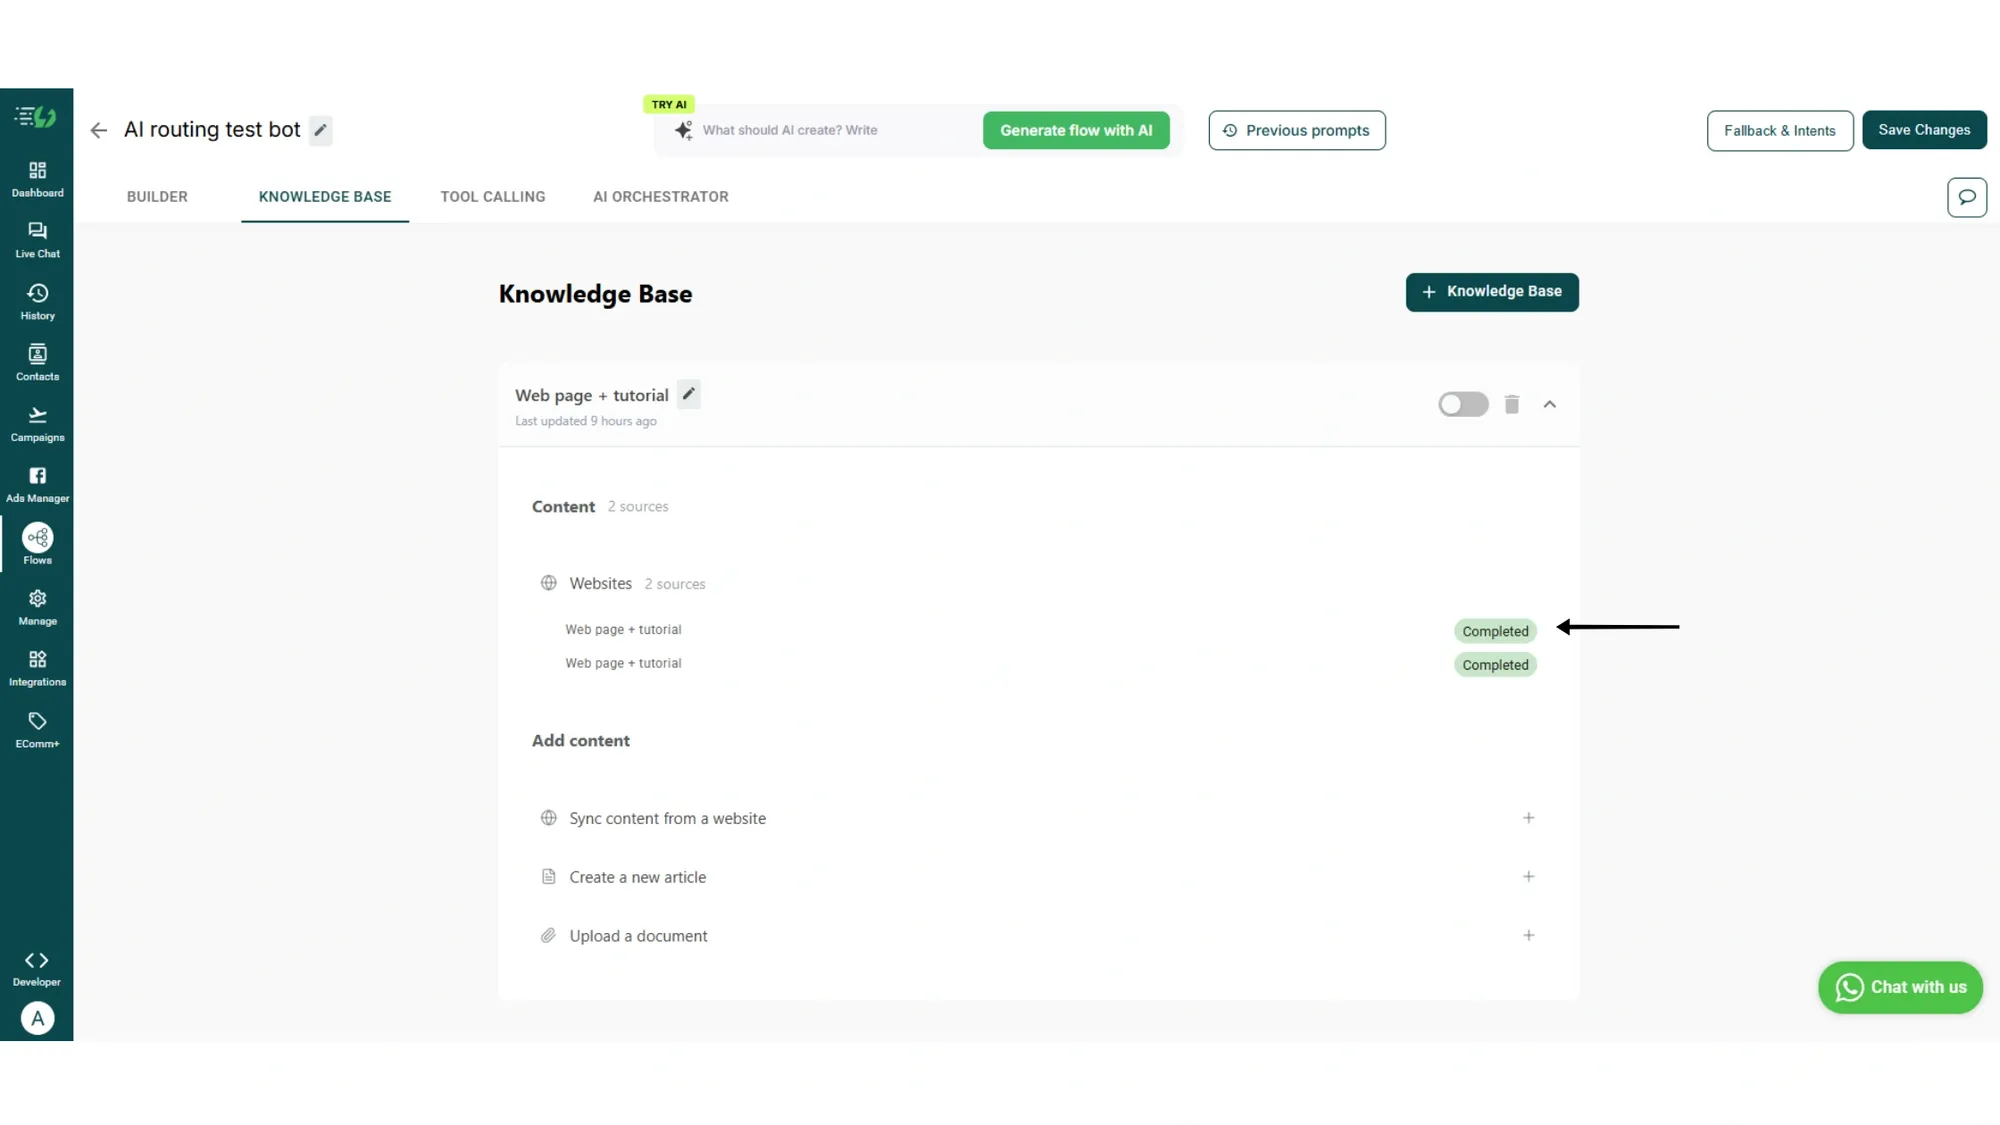
4. Wait for indexing
Once added, AiSensy processes the data in the background. Each source goes through three statuses:
• Processing: content is being parsed and indexed. Not yet available for retrieval.
• Completed: content is fully indexed and ready for the AI to use.
• Failed: processing hit an error. Check the error message and retry.
You'll see the source count update under Content once your knowledge base is ready to use.
Note: When a user asks a question, AiSensy searches your knowledge base using three complementary methods: semantic search (matches meaning), keyword search (matches exact terms), and topic search (matches intent). Results are combined and ranked to surface the most relevant content.
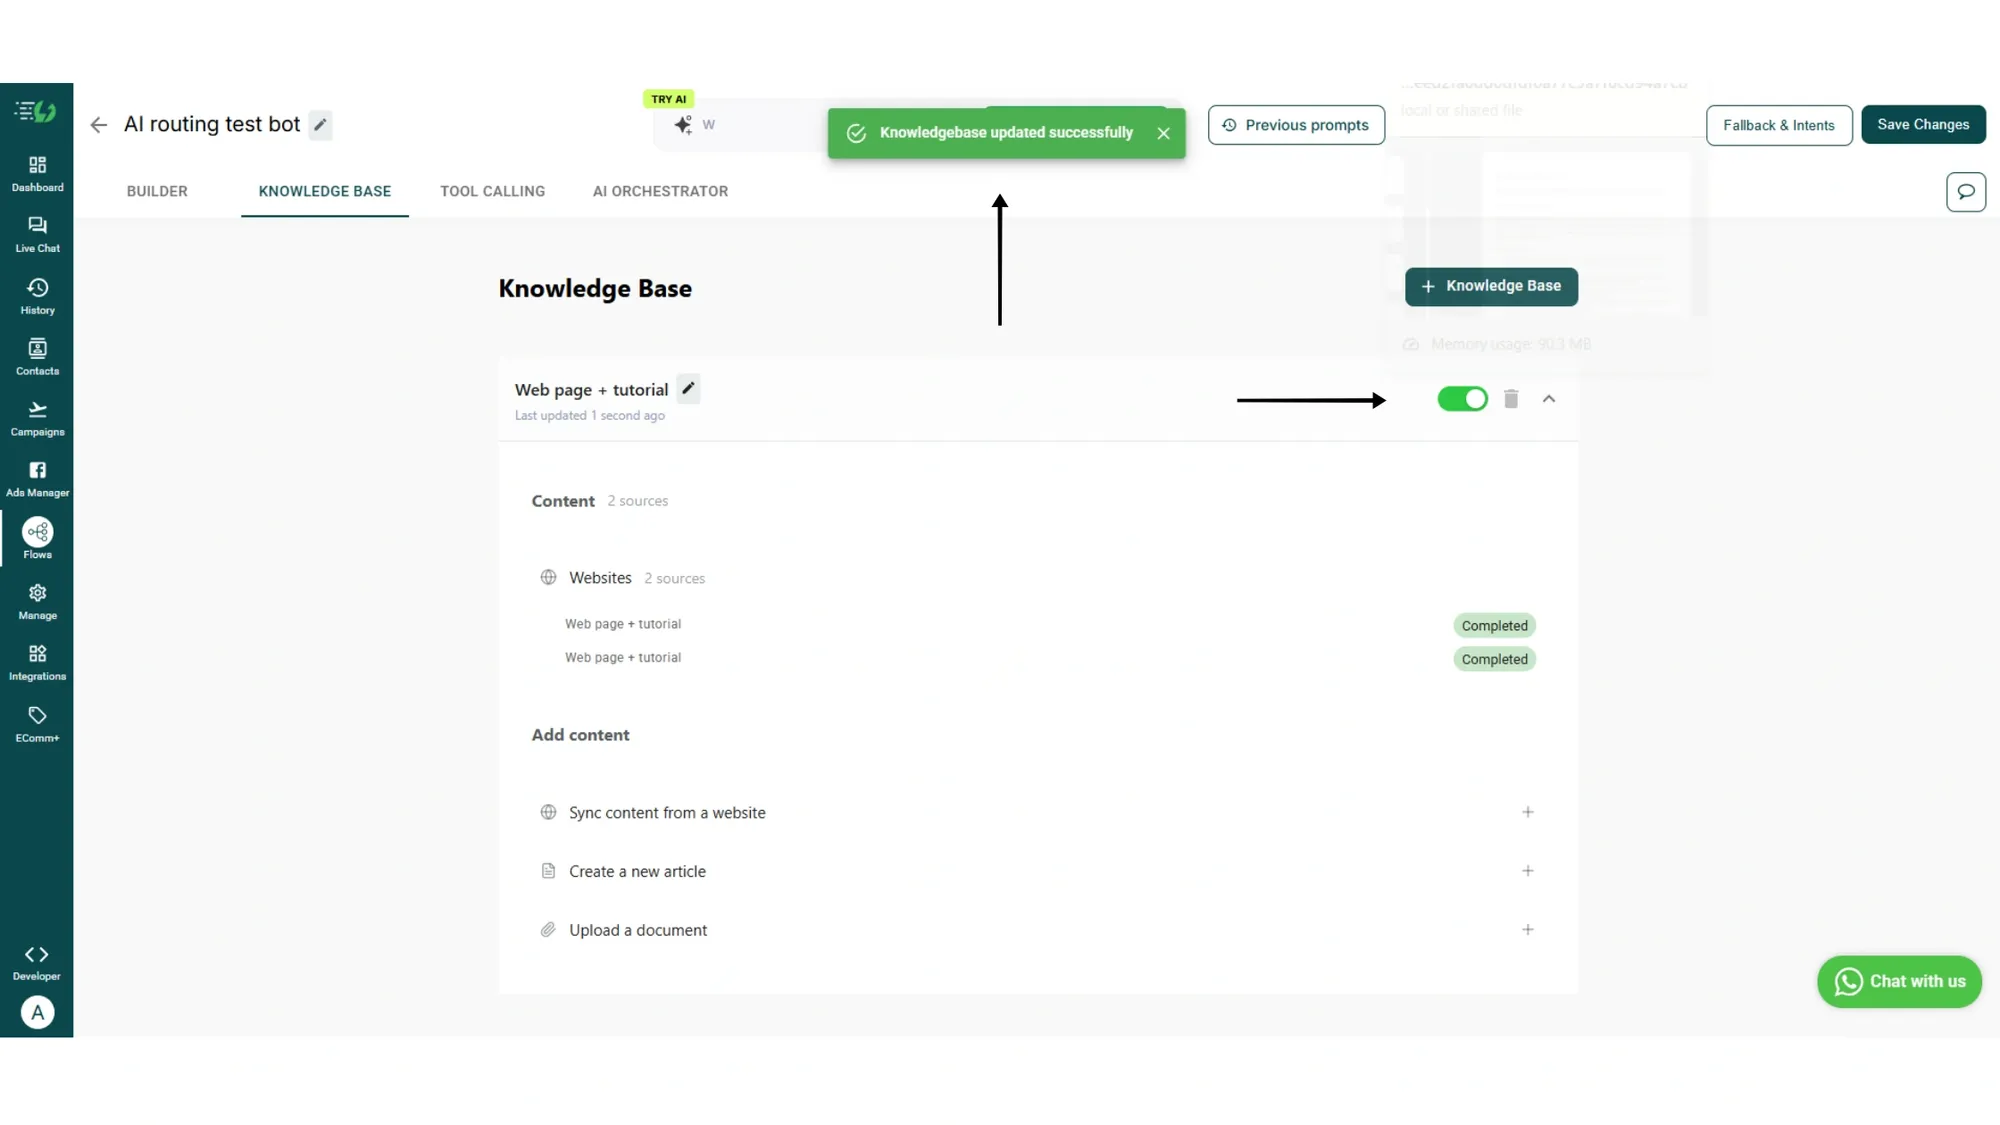
5. Toggle it live
Use the toggle next to your knowledge base to enable or disable it anytime. Use the edit pencil to rename it. Use the trash icon to delete it. Click the chevron to expand and add more sources.
You'll see a success toast at the top: "Knowledge base updated successfully."
That's it. Your AI Agent can now answer questions using your actual business content!
How to set up Tool Calling (Optional)
A great agent doesn't just answer questions, it gets things done. Tool Calling lets your AI Agent trigger API integrations to fetch live data, book appointments, check order status, update CRMs, and send the result back as a properly formatted WhatsApp message.
Follow the steps below to configure your first tool.

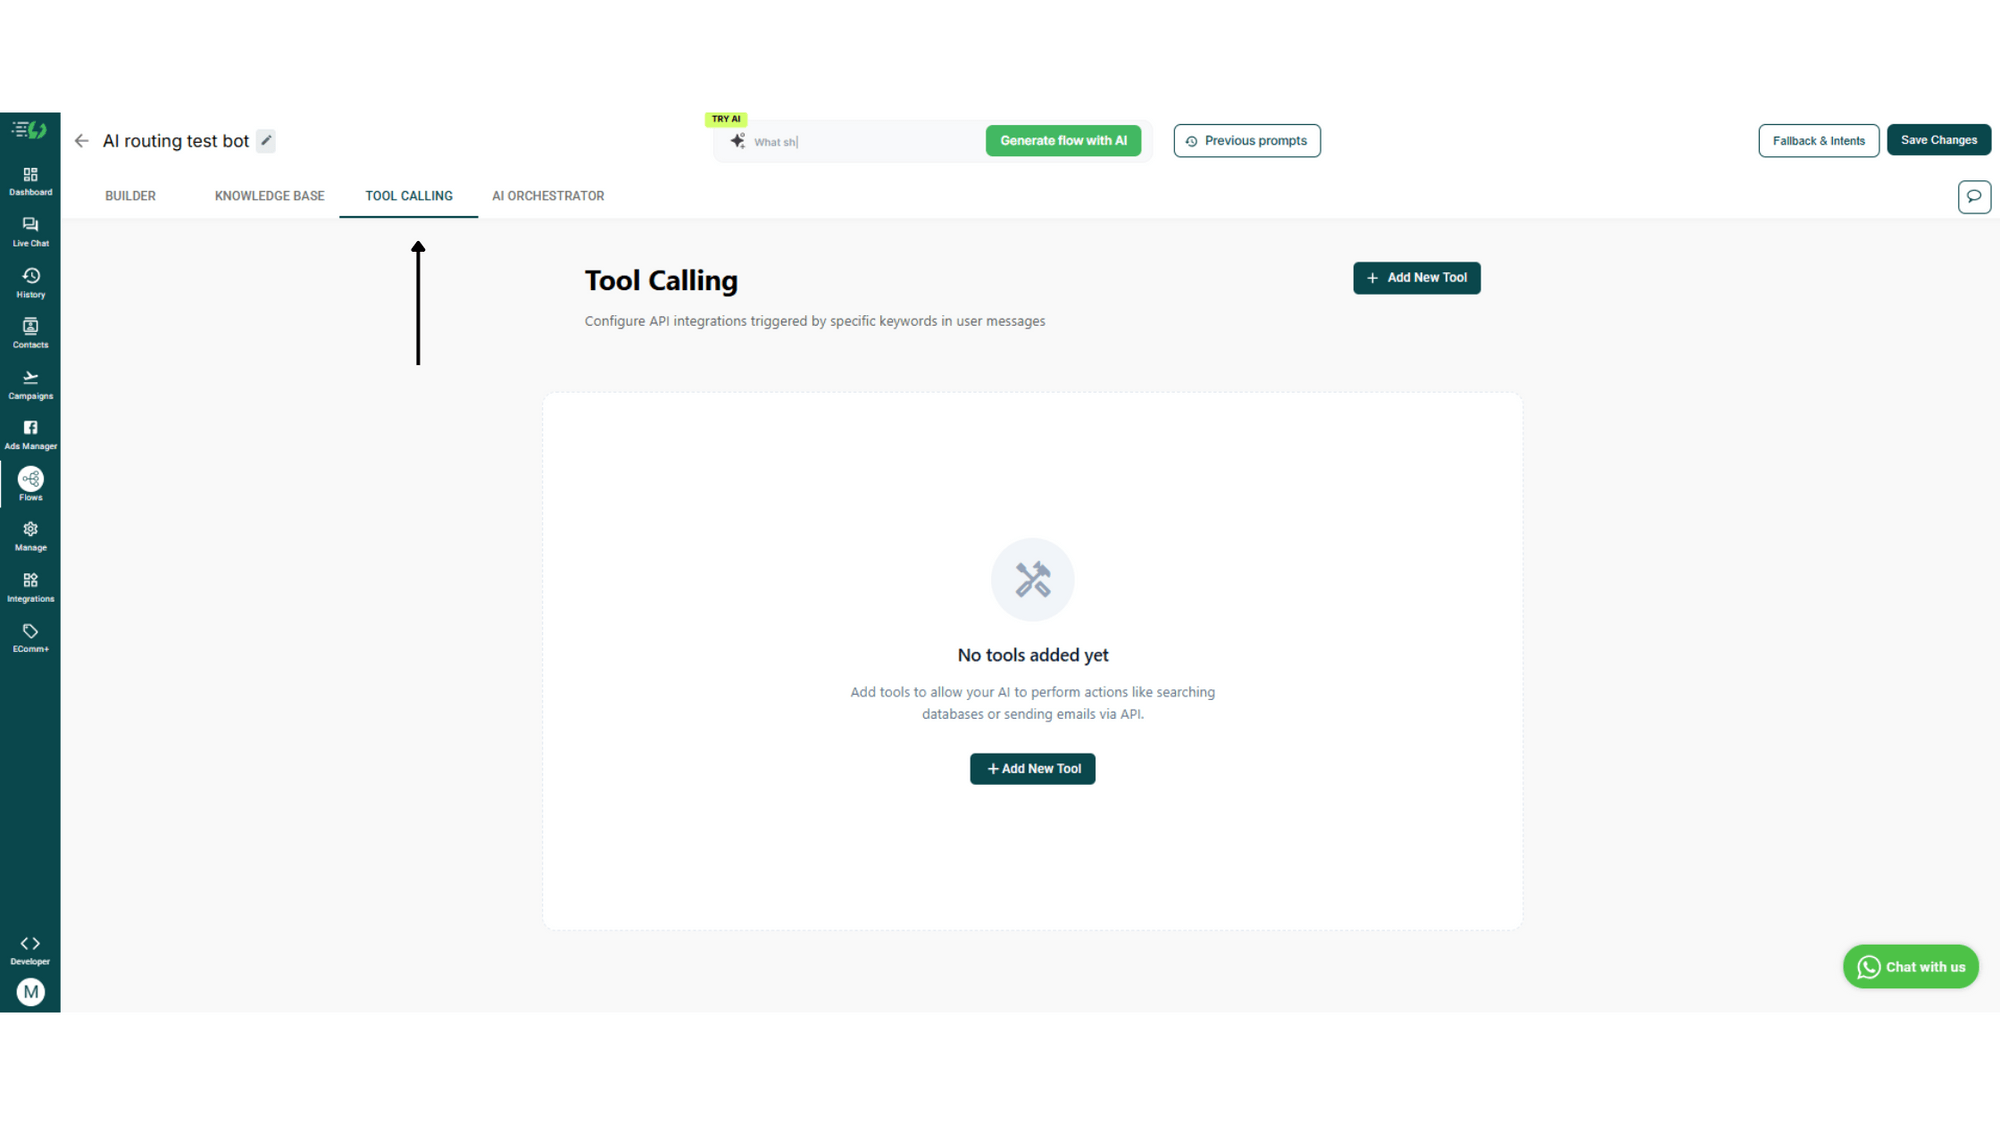
1. Open the Tool Calling tab
Inside the flow editor, click the TOOL CALLING tab. The page header reads Tool Calling with the subtitle "Configure API integrations triggered by specific keywords in user messages."
If you haven't added any tools yet, you'll see the empty state with a centered + Add New Tool button. You can also click the + Add New Tool button on the top-right at any time.
2. Name your tool and add a description
Give your tool a clear, intent-based name like "Calendly", "Order Status", or "CRM Lookup".
In the Tool Description field, describe what the tool does in plain English. The AI uses this description to decide when to call it and to extract the right parameters from the user's message. Be specific.
For example: "Fetches available time slots from Calendly for the next 7 days."
![2. Name your tool and add a description.png [ SCREENSHOT: Tool Calling expanded form, Tool name field with green lightning icon in header, ▶ Test / Save / Cancel buttons; Tool Description textarea; API Endpoint with GET dropdown and URL field; Headers table with Key/Value columns; Request Fields with Auto-detect button ]](https://umsousercontent.com/lib_lacsTWppKdqyqnSP/rdj1485rowca1z59.png?dpr=2)
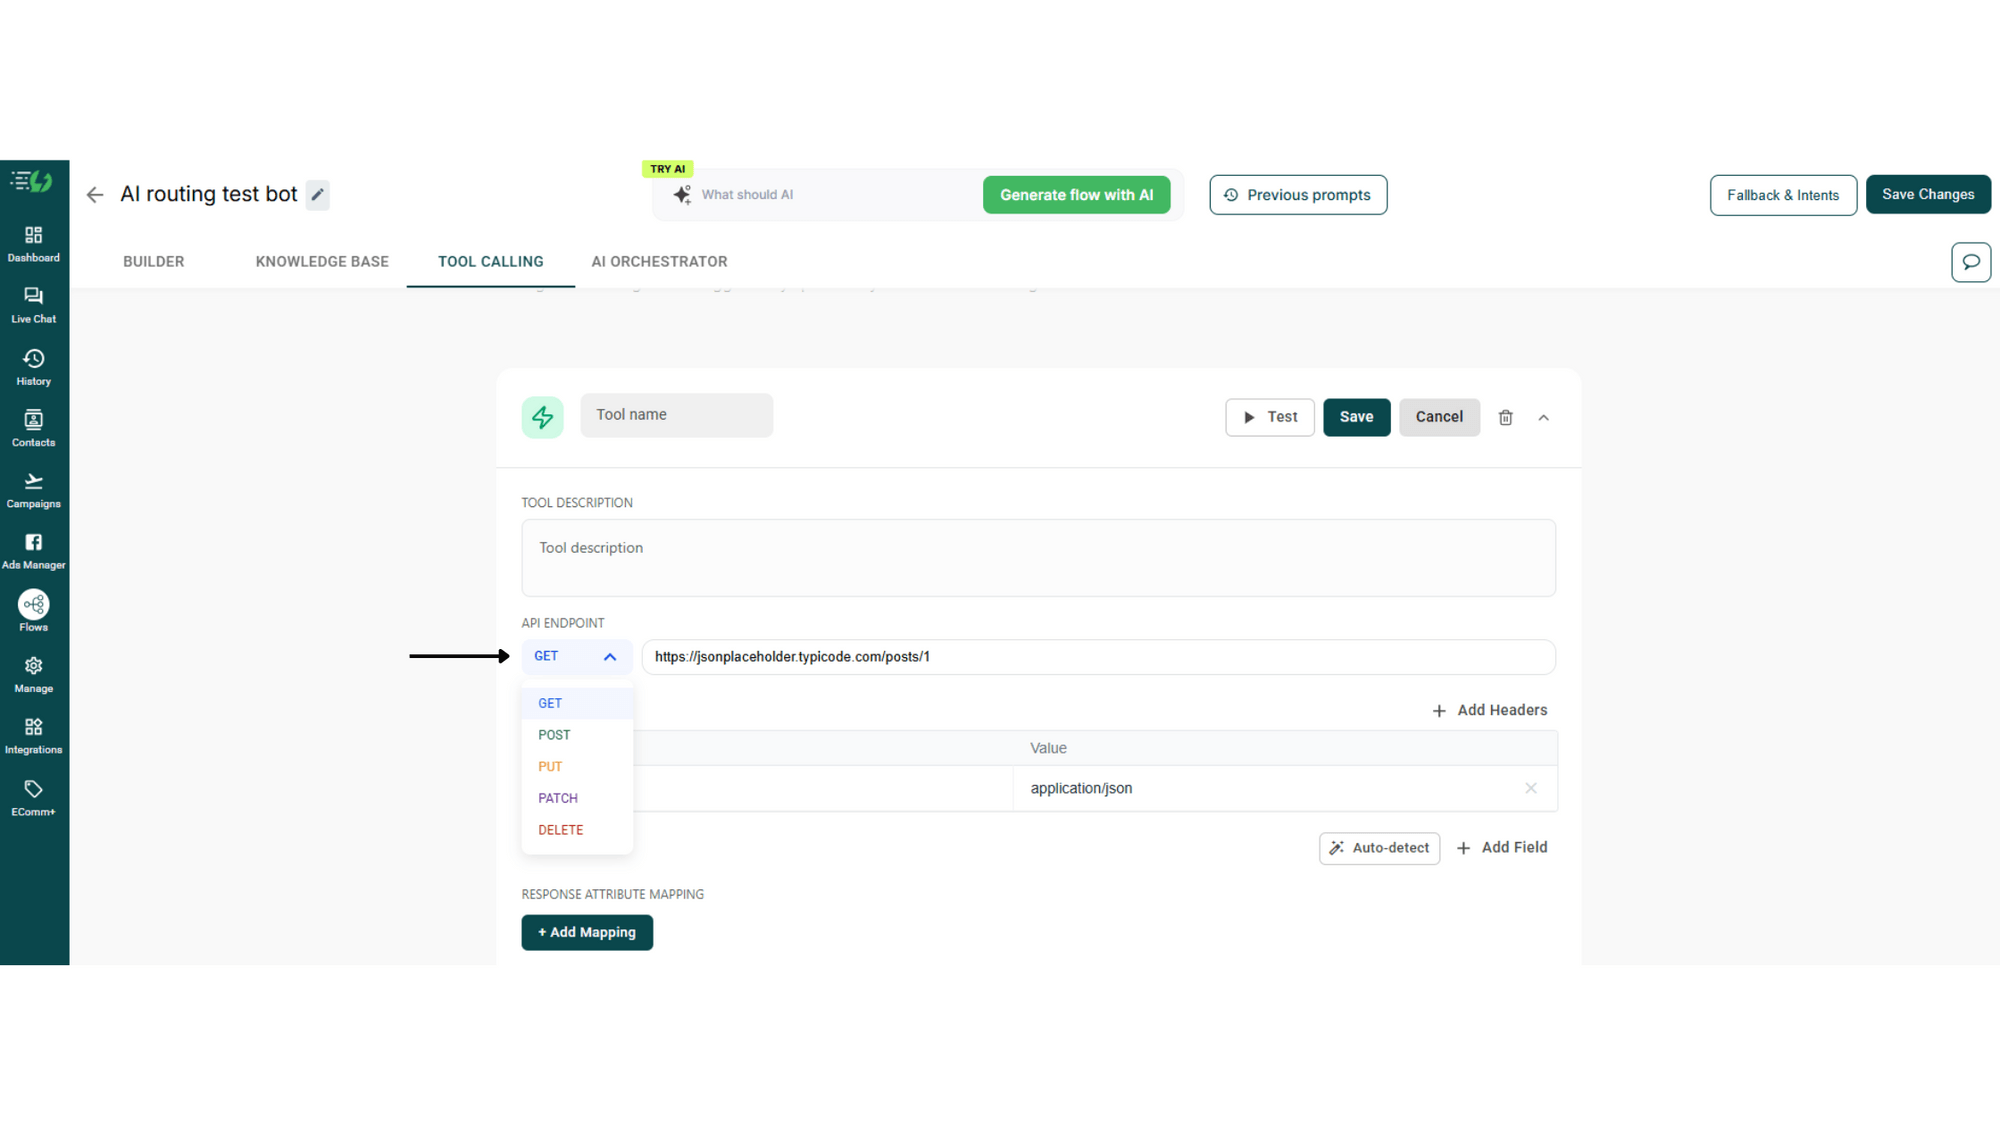
3. Configure the API Endpoint
Choose the request type from the dropdown, GET, POST, PUT, PATCH, or DELETE, and paste your API endpoint URL.
You can use dynamic placeholders like {book_call} to pass user data into the call.
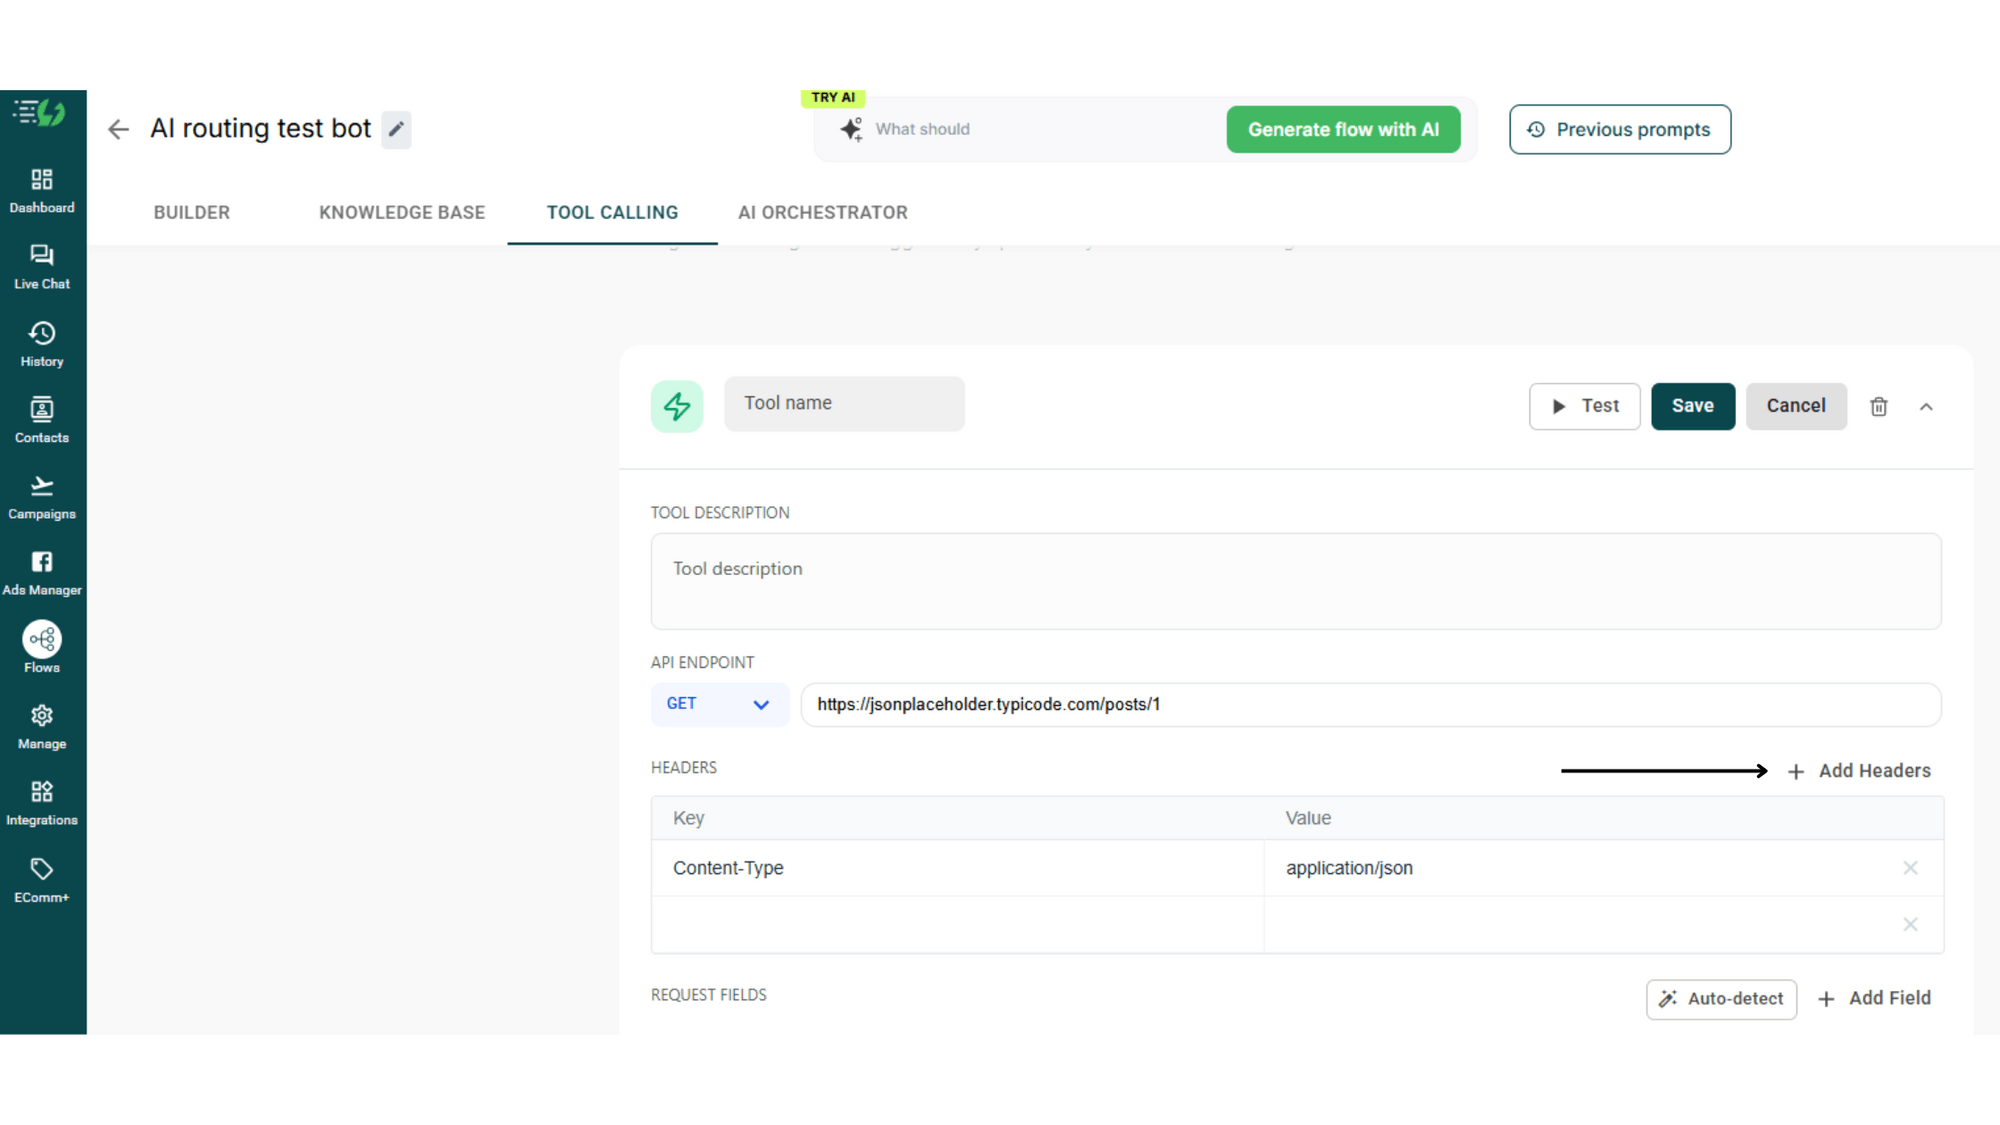
4. Add Headers
Under HEADERS, click + Add Headers and enter any required headers, like authentication tokens or Content-Type: application/json.
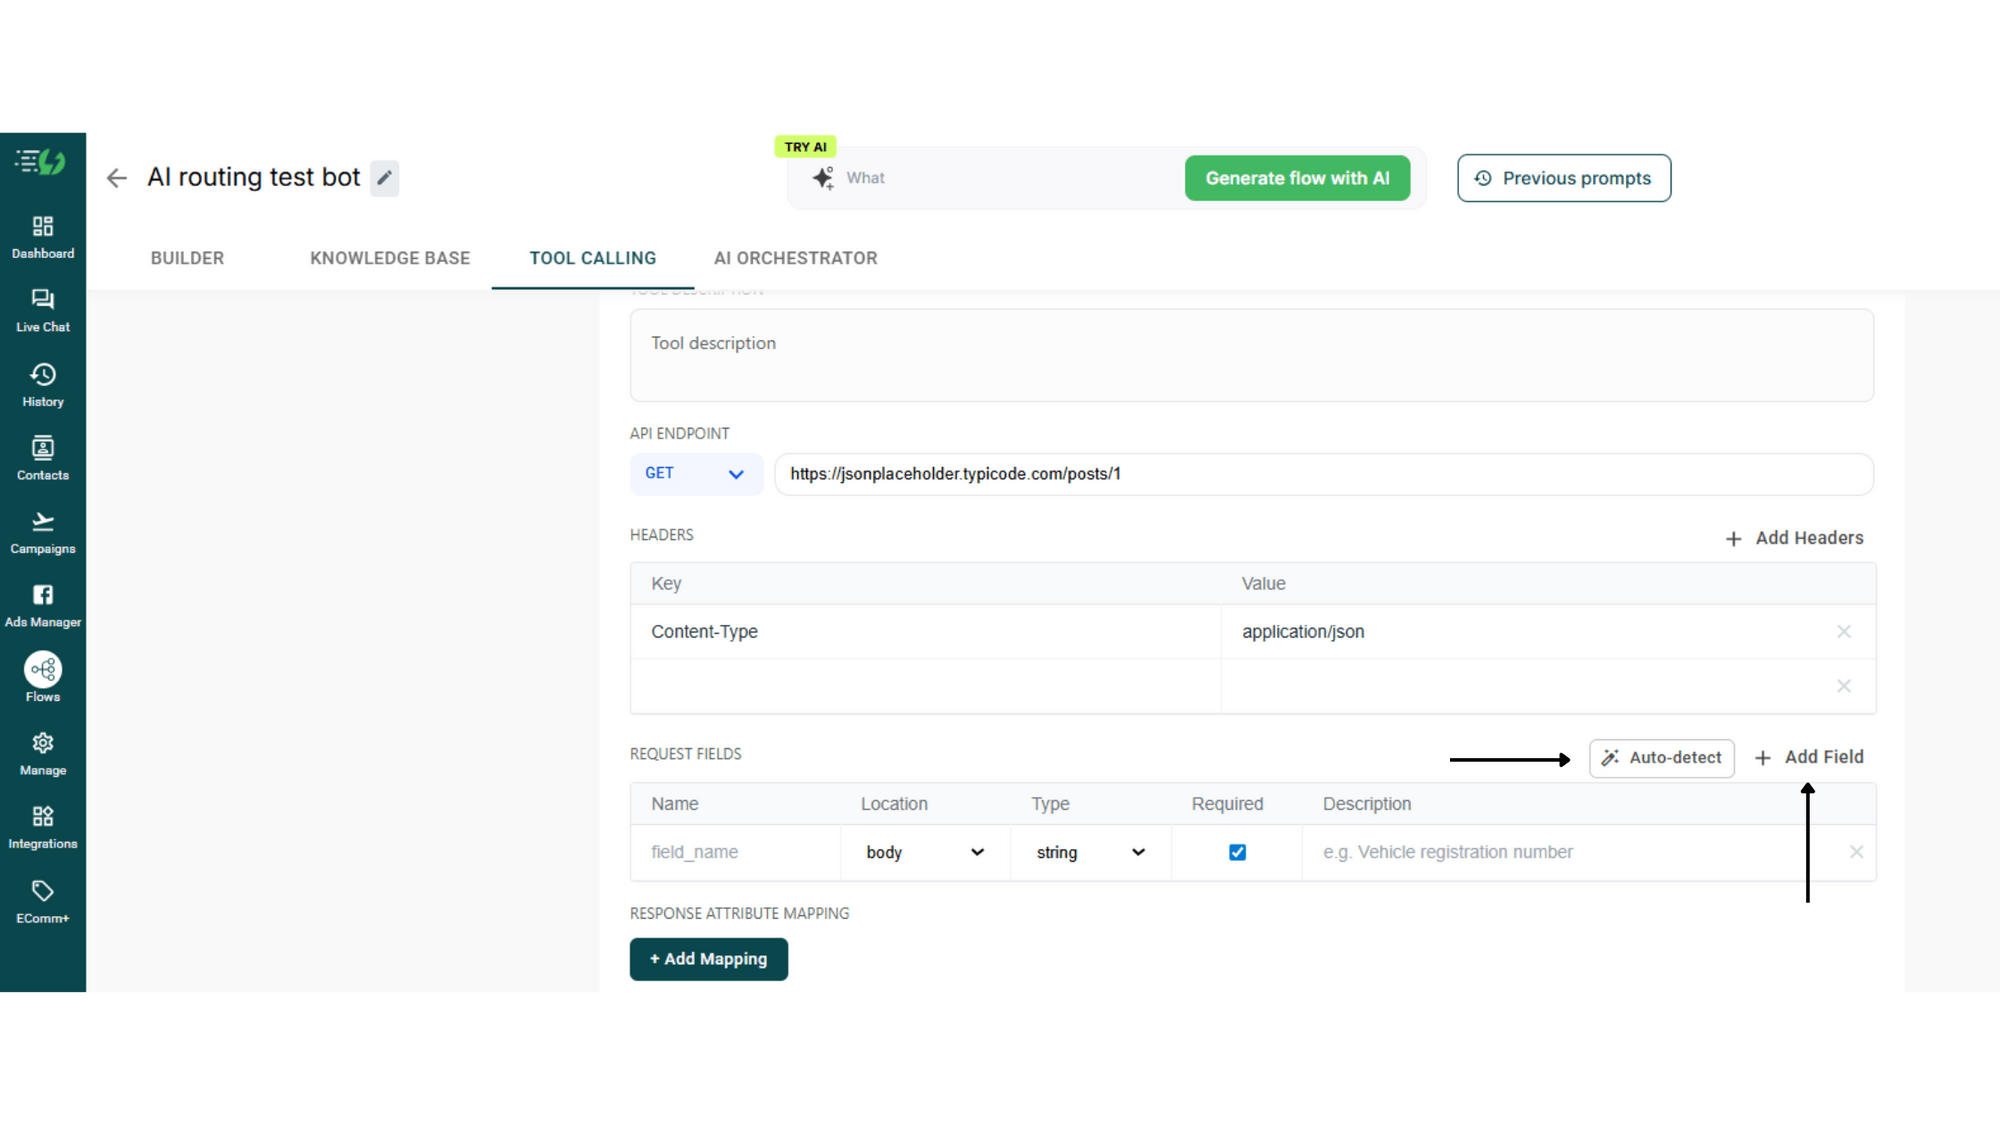
5. Add Request Fields
Under REQUEST FIELDS, click 🪄 Auto-detect to let AiSensy auto-fill the fields from your endpoint, or click + Add Field to add them manually.
Specify each field's name and type. These are the values your tool sends to your API. The AI will automatically extract them from the conversation when the tool is called.
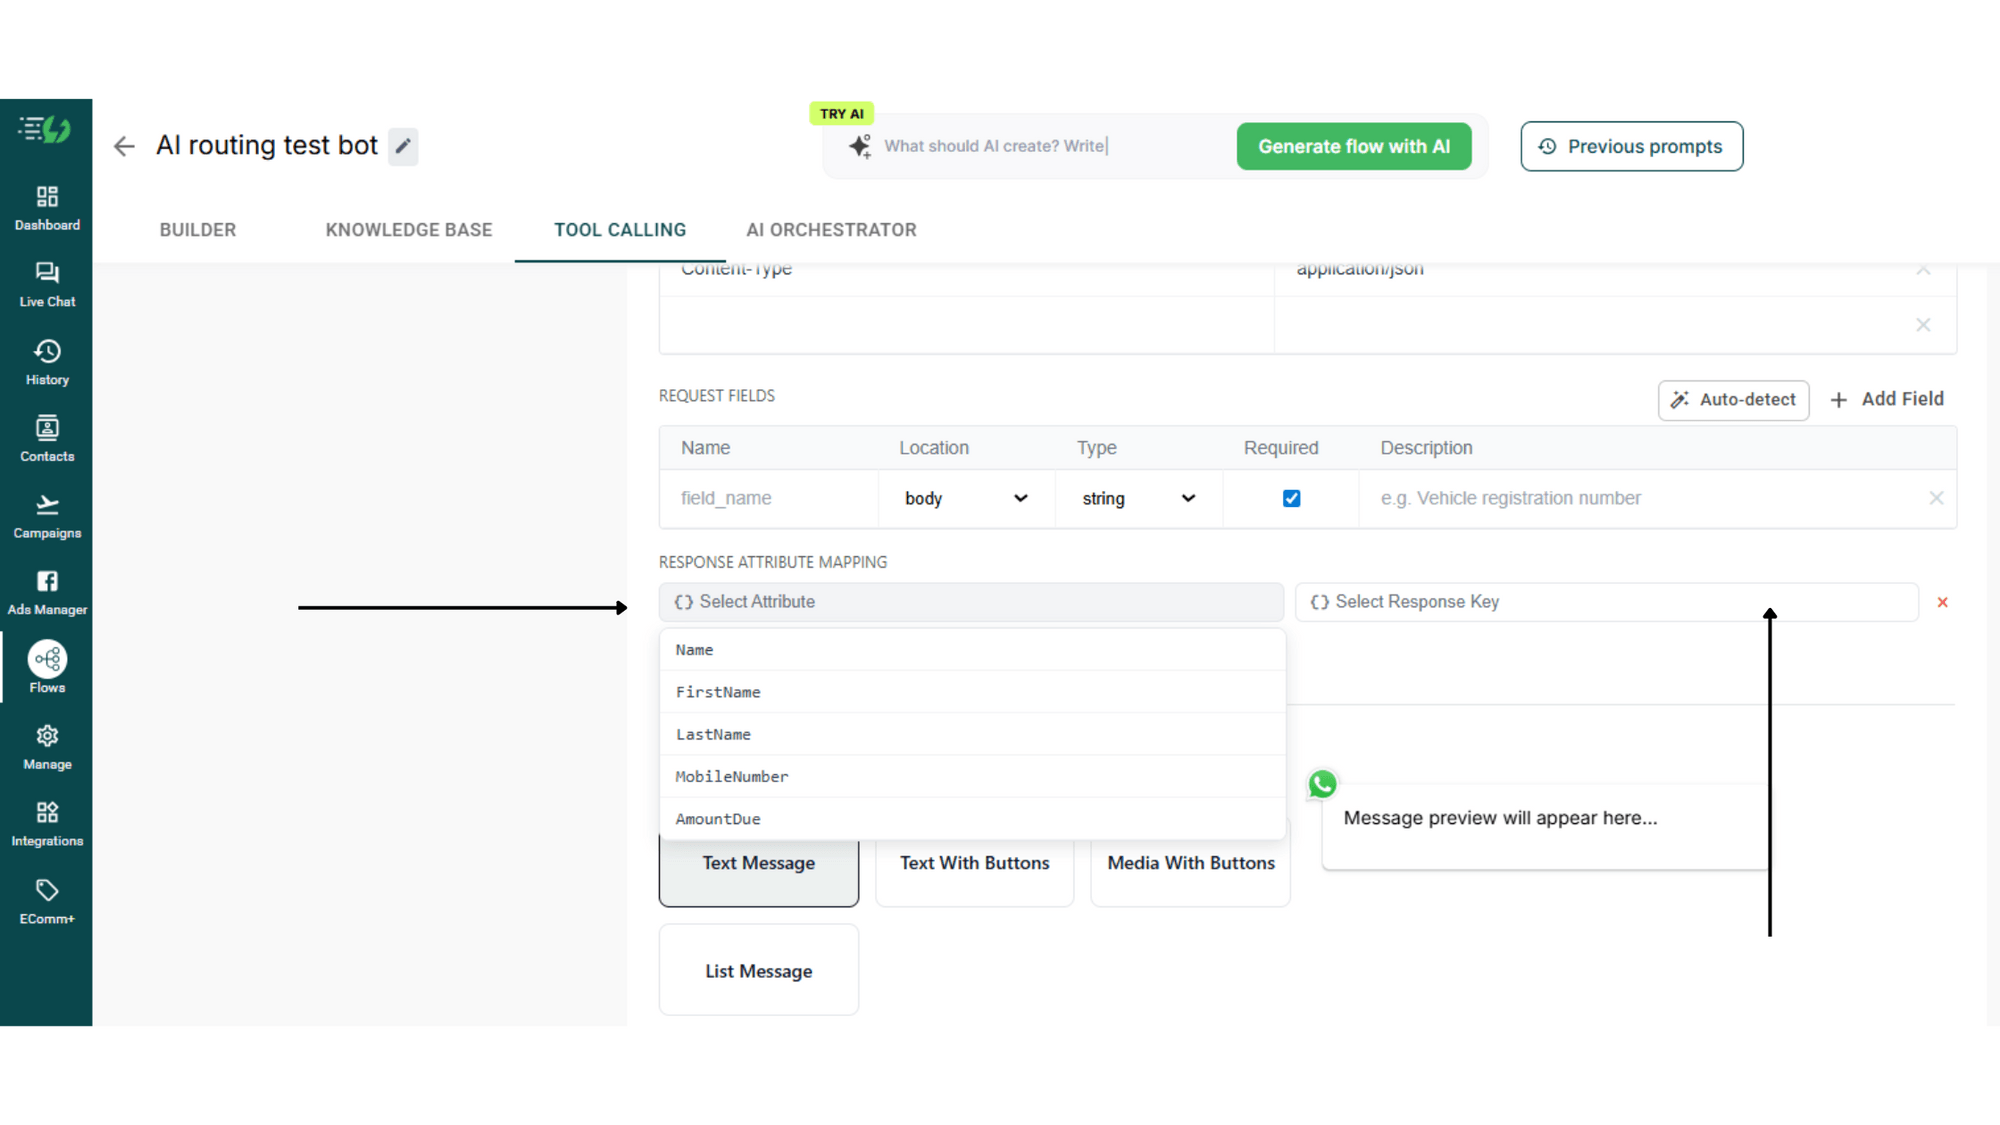
6. Map the API response to attributes
Under RESPONSE ATTRIBUTE MAPPING, click + Add Mapping to capture specific values from the API response and save them as attributes.
For example, you can map response.policy_number to a policy_number attribute, then use that attribute later in the flow.
7. Configure how the response shows up on WhatsApp
Under RESPONSE CONFIGURATION, choose your WhatsApp Message Type:
• Text Message: A simple text reply.
• Text With Buttons: Text plus interactive quick reply buttons.
• Media With Buttons: Image or document plus quick reply buttons.
• List Message: A WhatsApp List for users to choose from multiple options.

8. Fill in the message content
• HEADER (OPTIONAL): A short top line. Click {} Insert Variable to add response values. Example: 🚗 Policy: {{policy.vehicle_number}}.
• BODY: The main message. Use {{field}} syntax or click Insert Variable to pull in mapped response values. Example: Policy No: {{policy.policy_number}}.
• FOOTER (OPTIONAL): A short bottom line. Example: {{policy.days_remaining}} days remaining.
A live WhatsApp message preview on the right shows exactly how your message will look.
9. Test the tool
Click the ▶ Test button at the top to validate your tool configuration. This makes sure your endpoint works and your variables resolve correctly.
10. Save the tool
Hit Save to activate the tool. Your AI Agent will now call this API whenever the conversation calls for it, and reply with the WhatsApp message you've designed.
Note: Tool Calling supports any REST API. If you can call it from Postman, you can call it from your AI Agent.
How to set up the AI Orchestrator
The AI Orchestrator is where your agent really comes alive. It reads the conversation, considers the user's history, weighs the available knowledge and tools, and decides the best next step.
Follow the steps below to set up your AI Orchestrator.

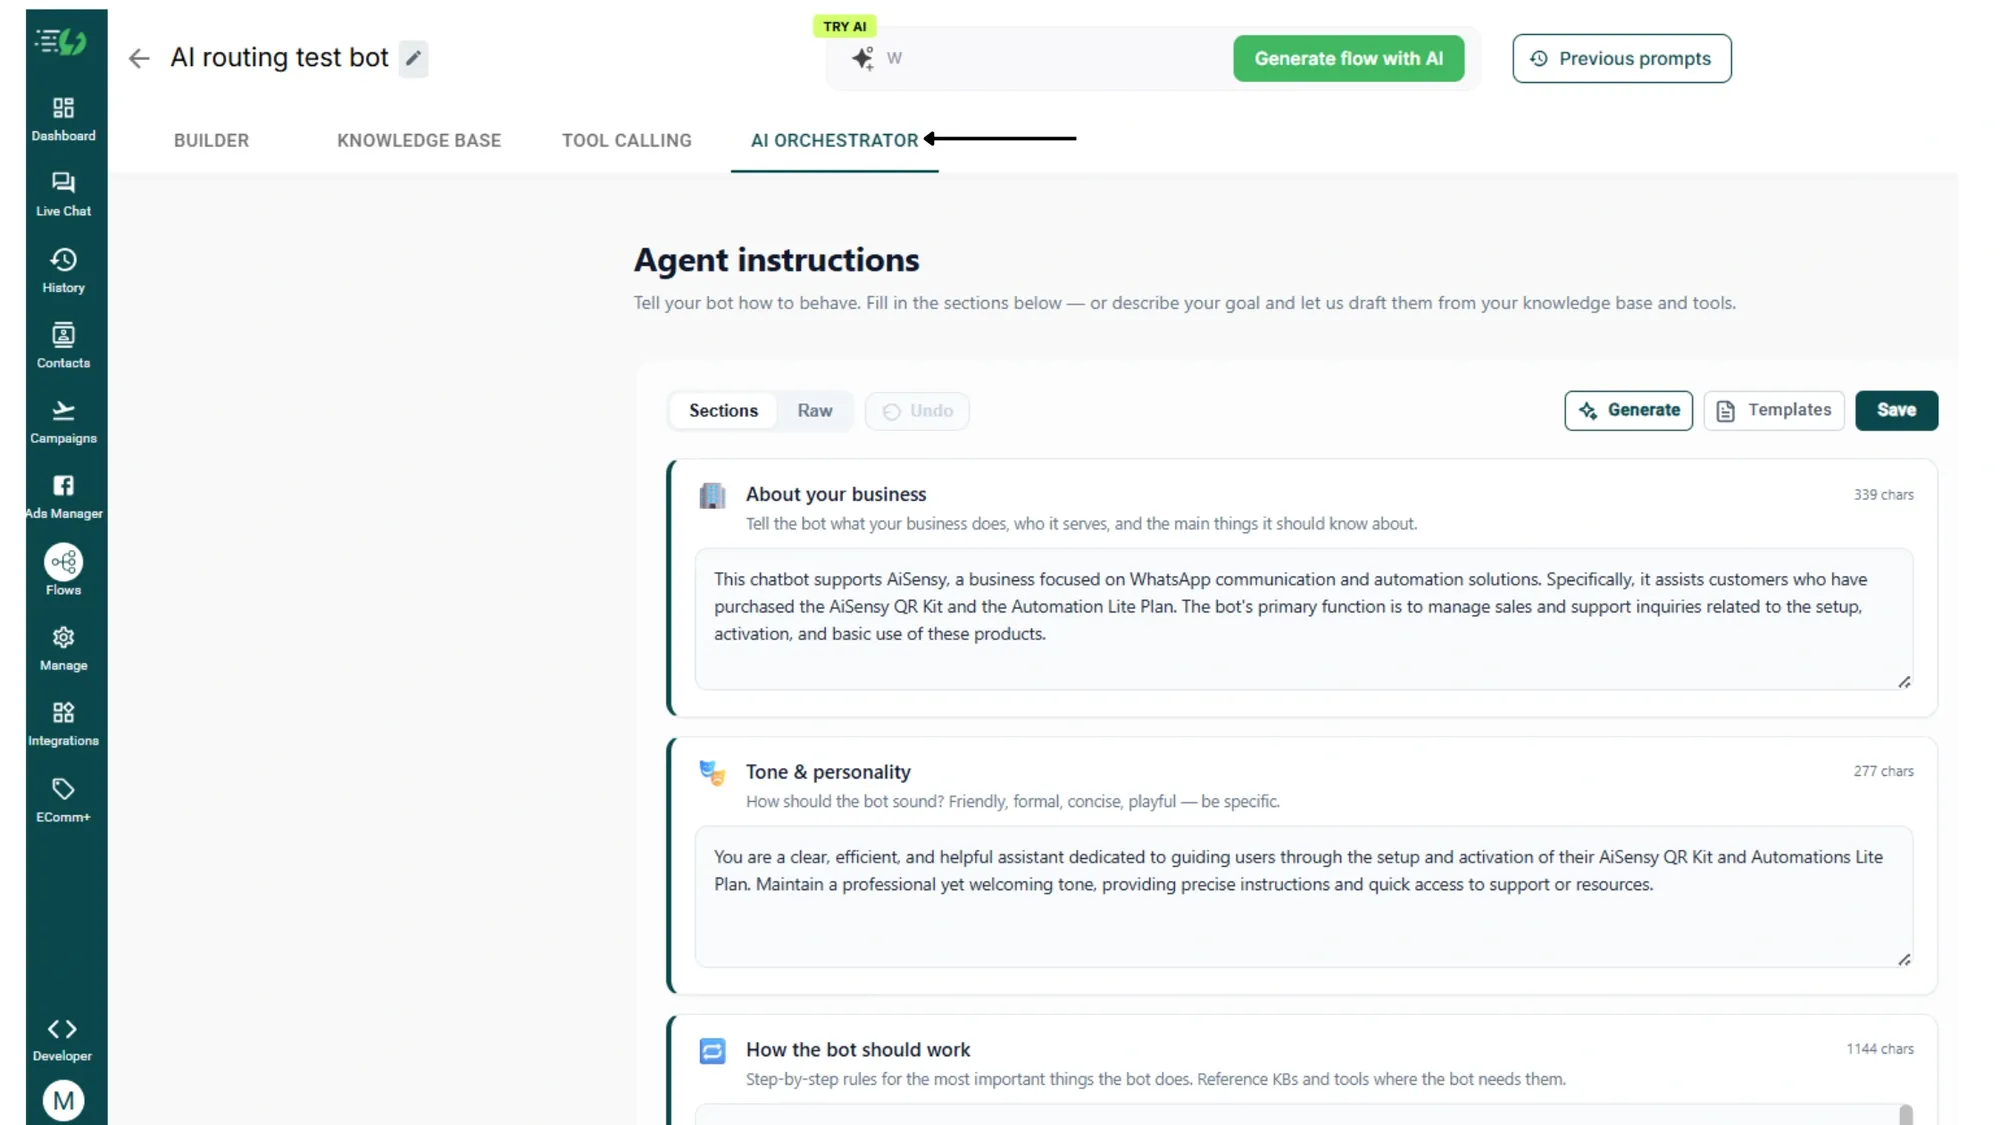
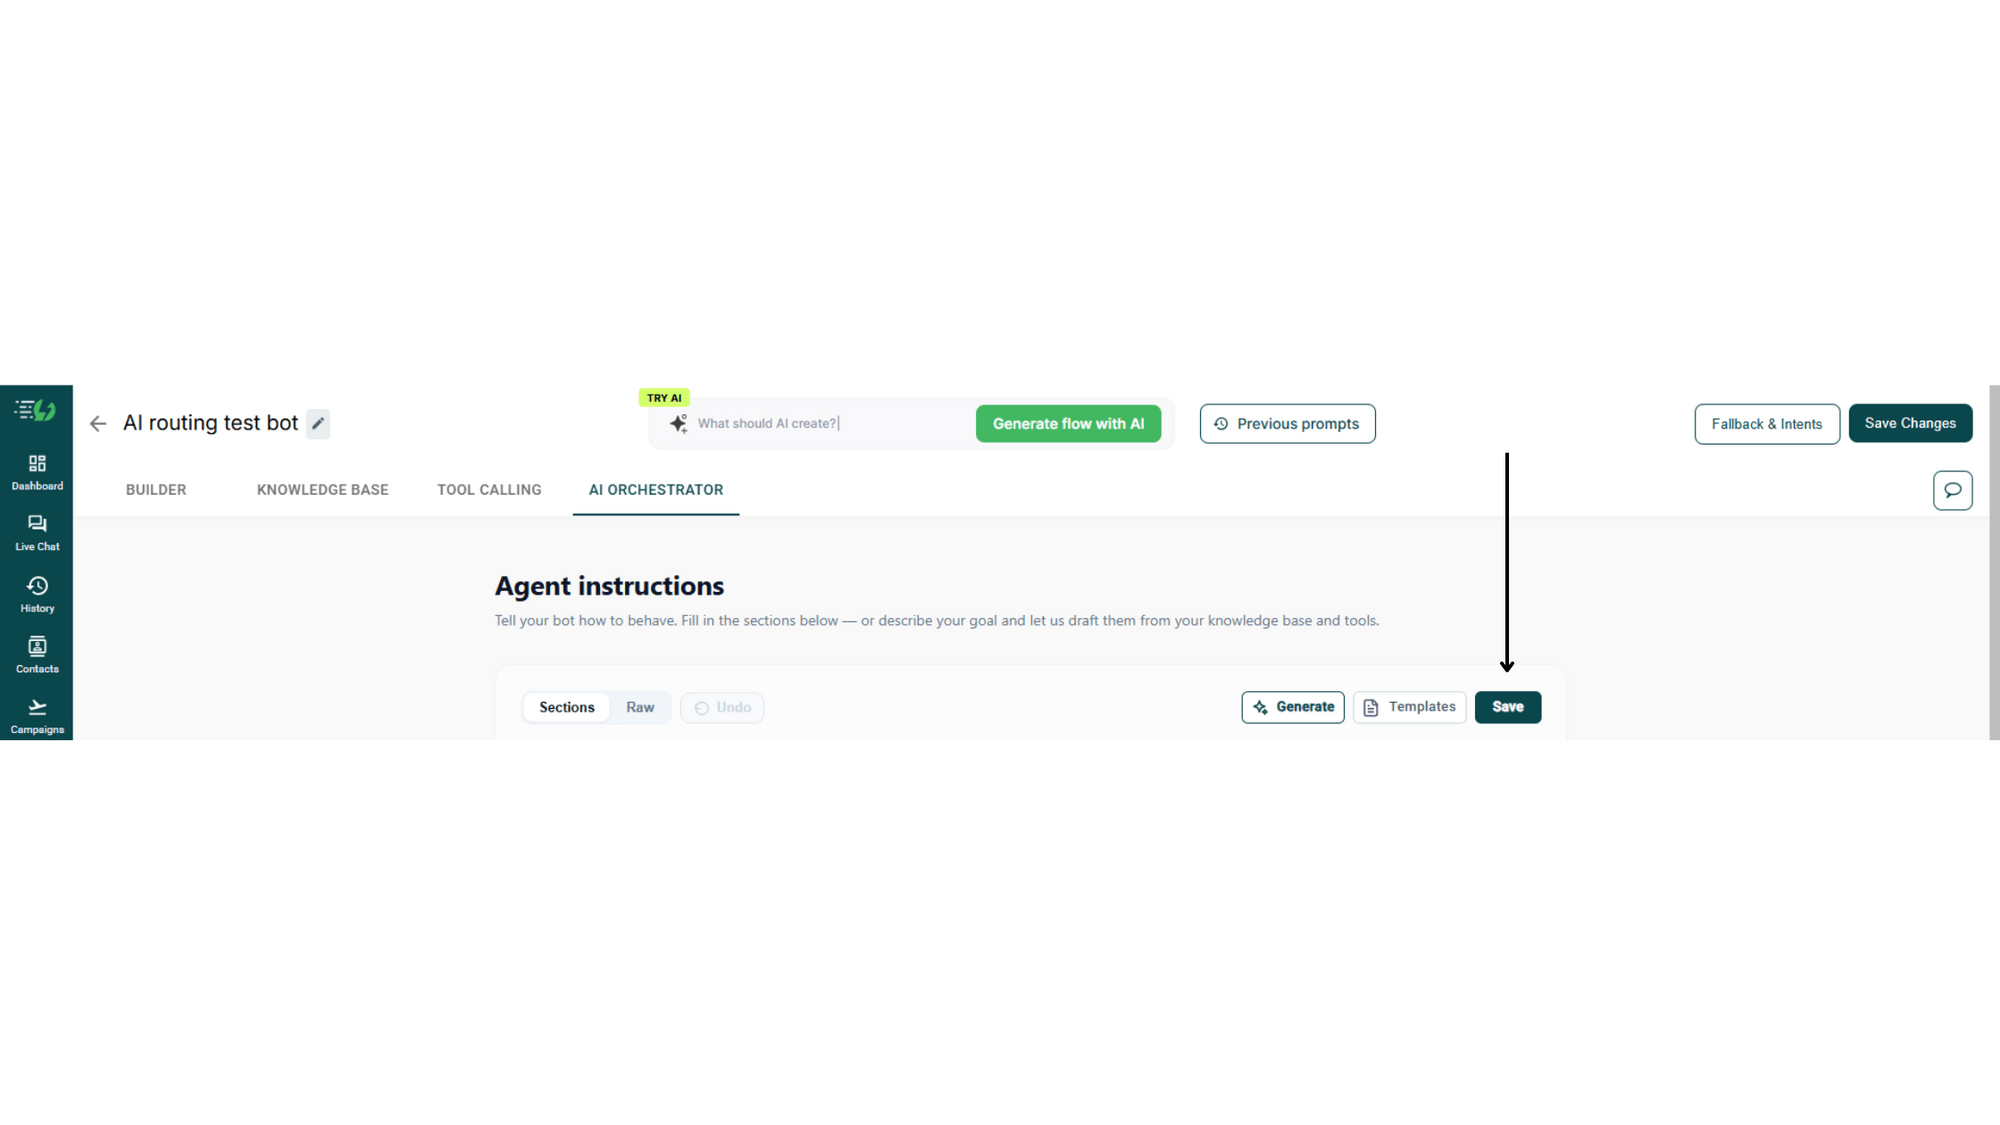
1. Open the "AI Orchestrator" tab
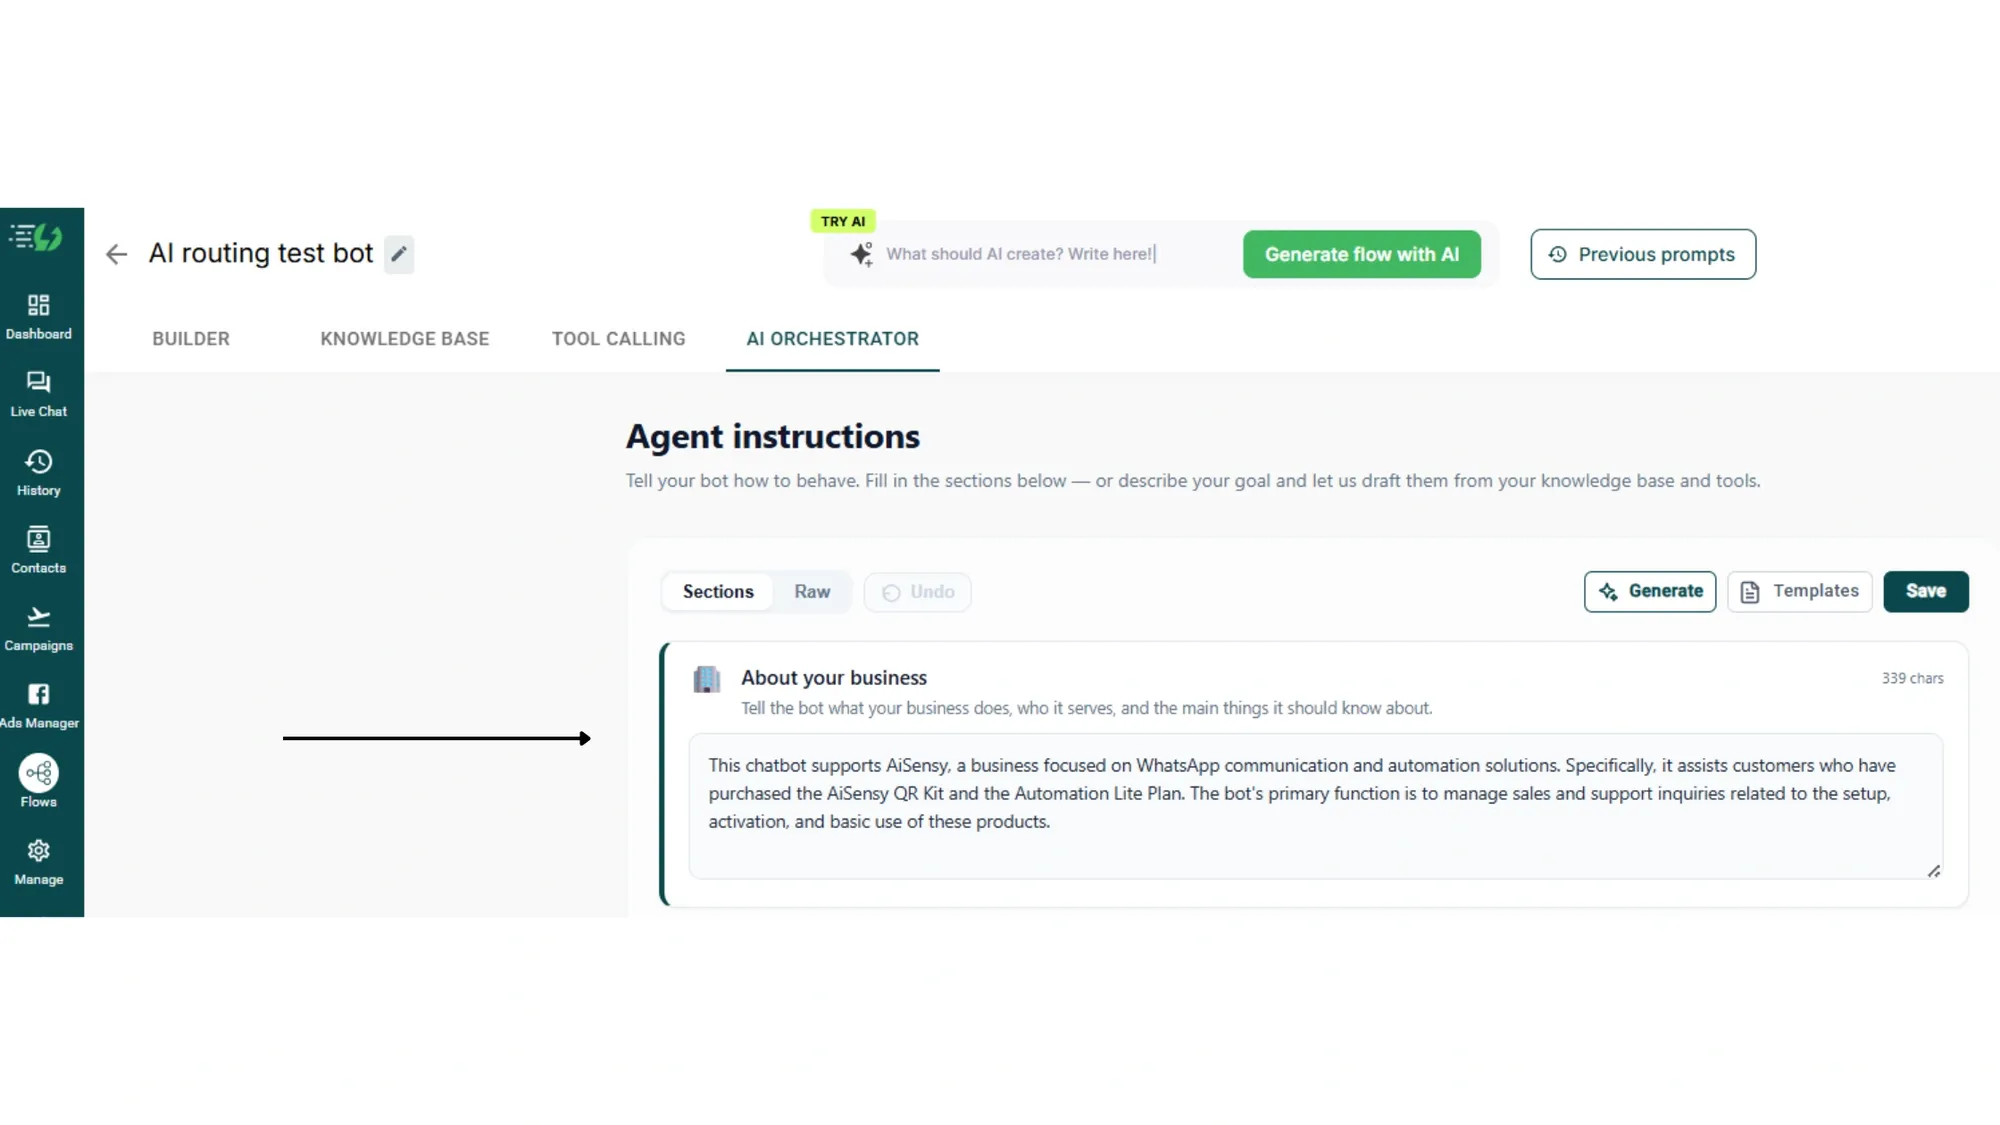
Inside the flow editor, click the AI ORCHESTRATOR tab. You'll see the Agent instructions screen with the subtitle "Tell your bot how to behave. Fill in the sections below, or describe your goal and let us draft them from your knowledge base and tools."
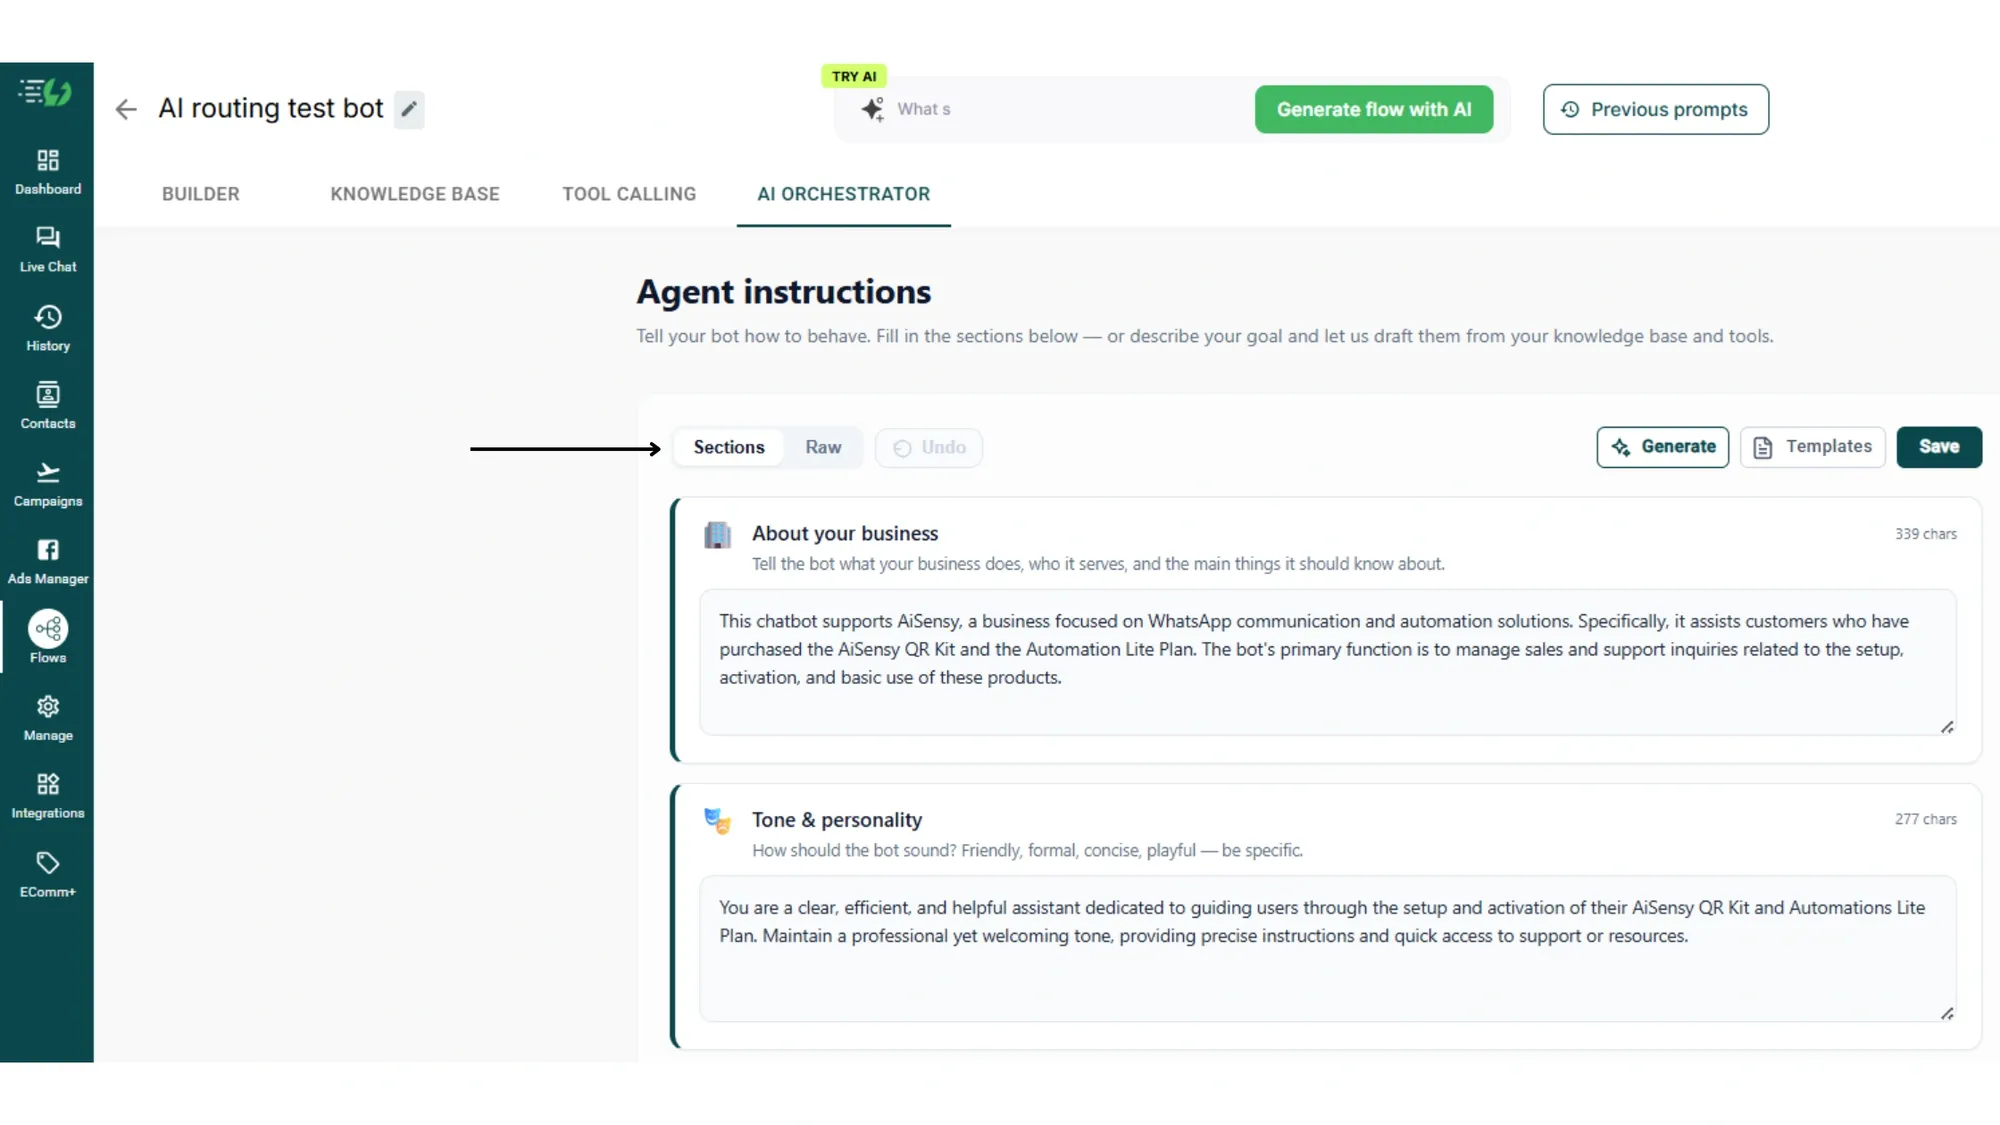
2. Choose "Sections" or "Raw" mode
Use Sections mode for a structured, guided setup with separate fields for each part of your agent's brain. Switch to Raw if you'd rather write the full prompt yourself.
Tip: Switch to Raw mode to insert knowledge bases or tools directly using the / slash menu.
3. Fill in "About your business"
Tell the bot what your business does, who it serves, and the main things it should know about.
For example:
"We are a motor insurance provider in India. Customers reach out for policy lookups, quotes, purchases, KYC, and claims. Most users buy two-wheeler and four-wheeler policies."
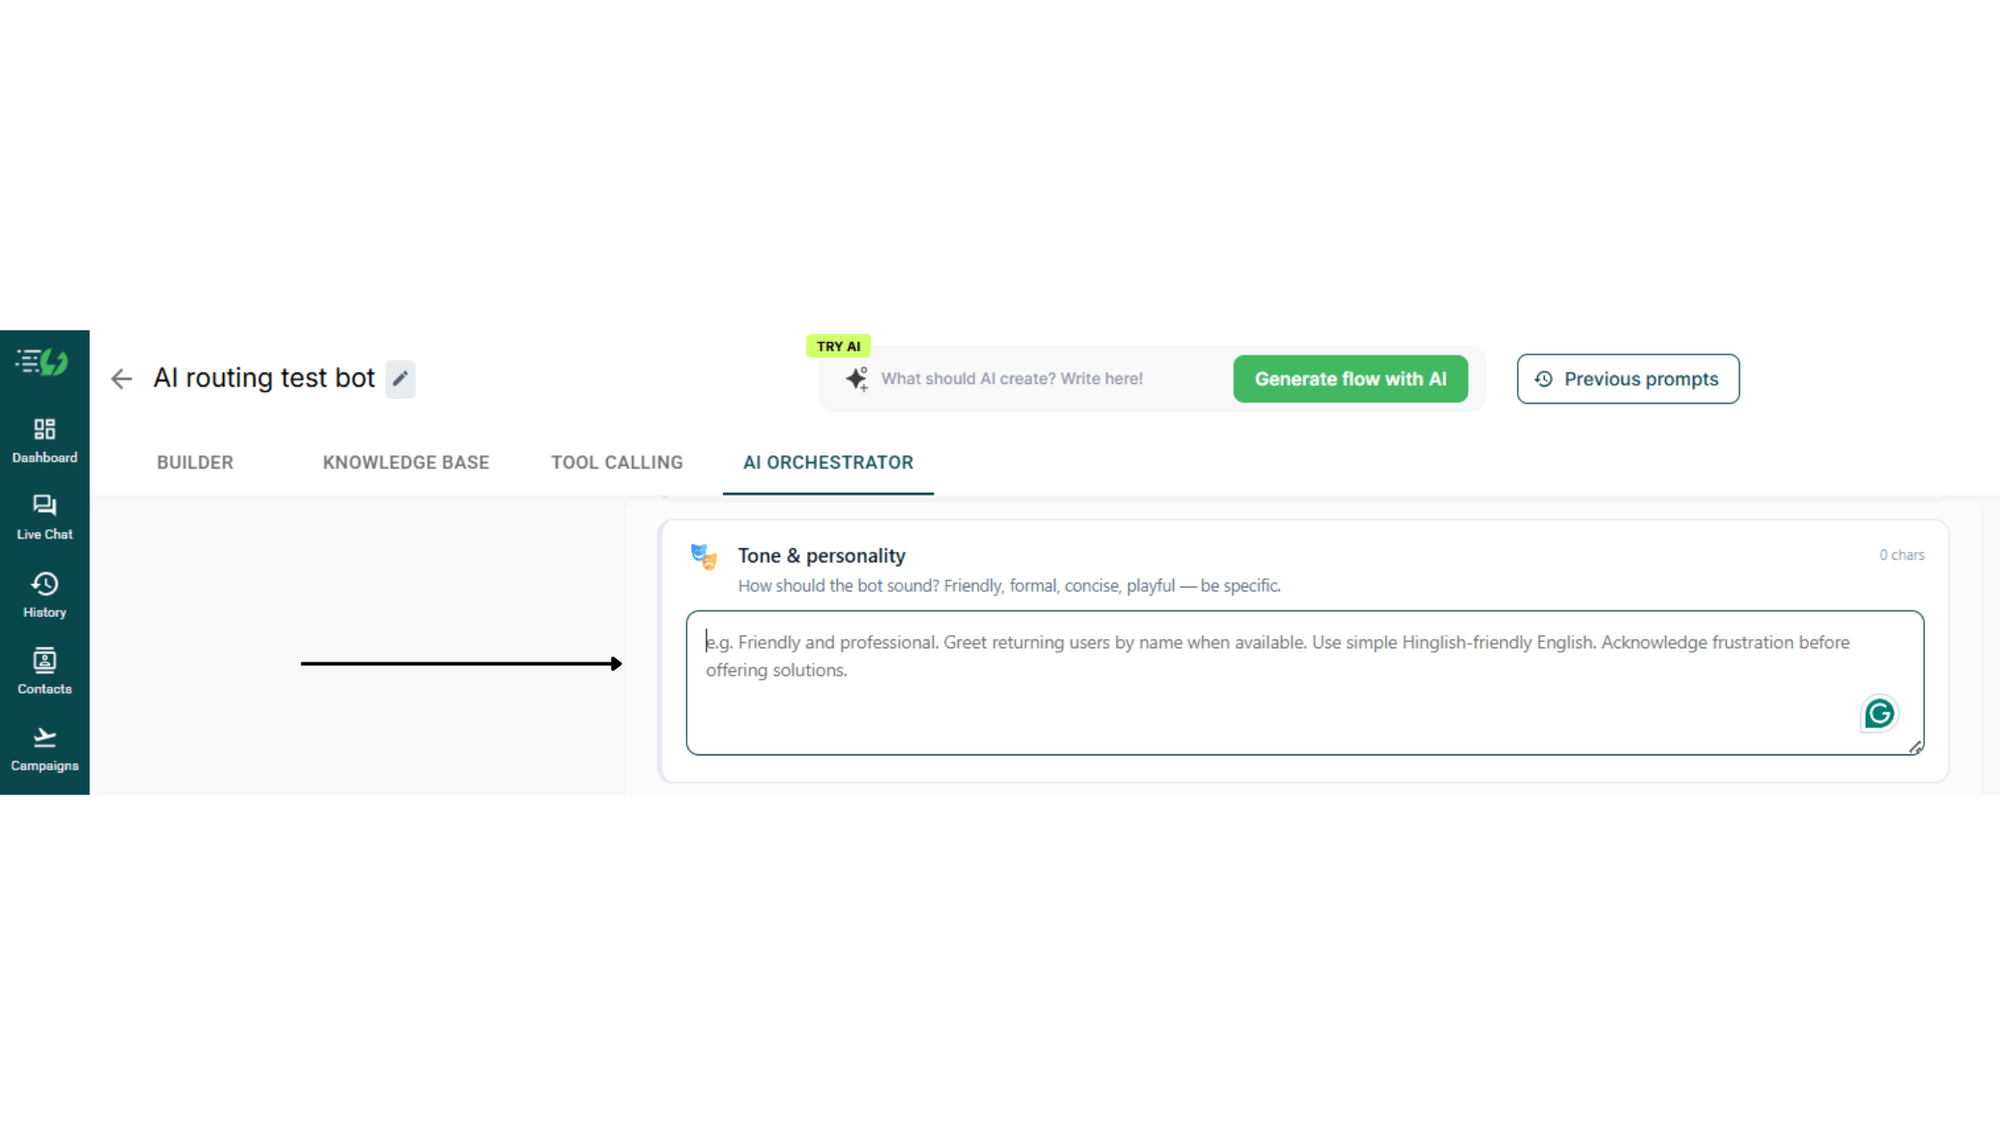
4. Fill in Tone & personality
How should the bot sound? Friendly, formal, concise, playful, be specific.
For example:
"Friendly and professional. Greet returning users by name when available. Use simple Hinglish-friendly English. Acknowledge frustration before offering solutions."
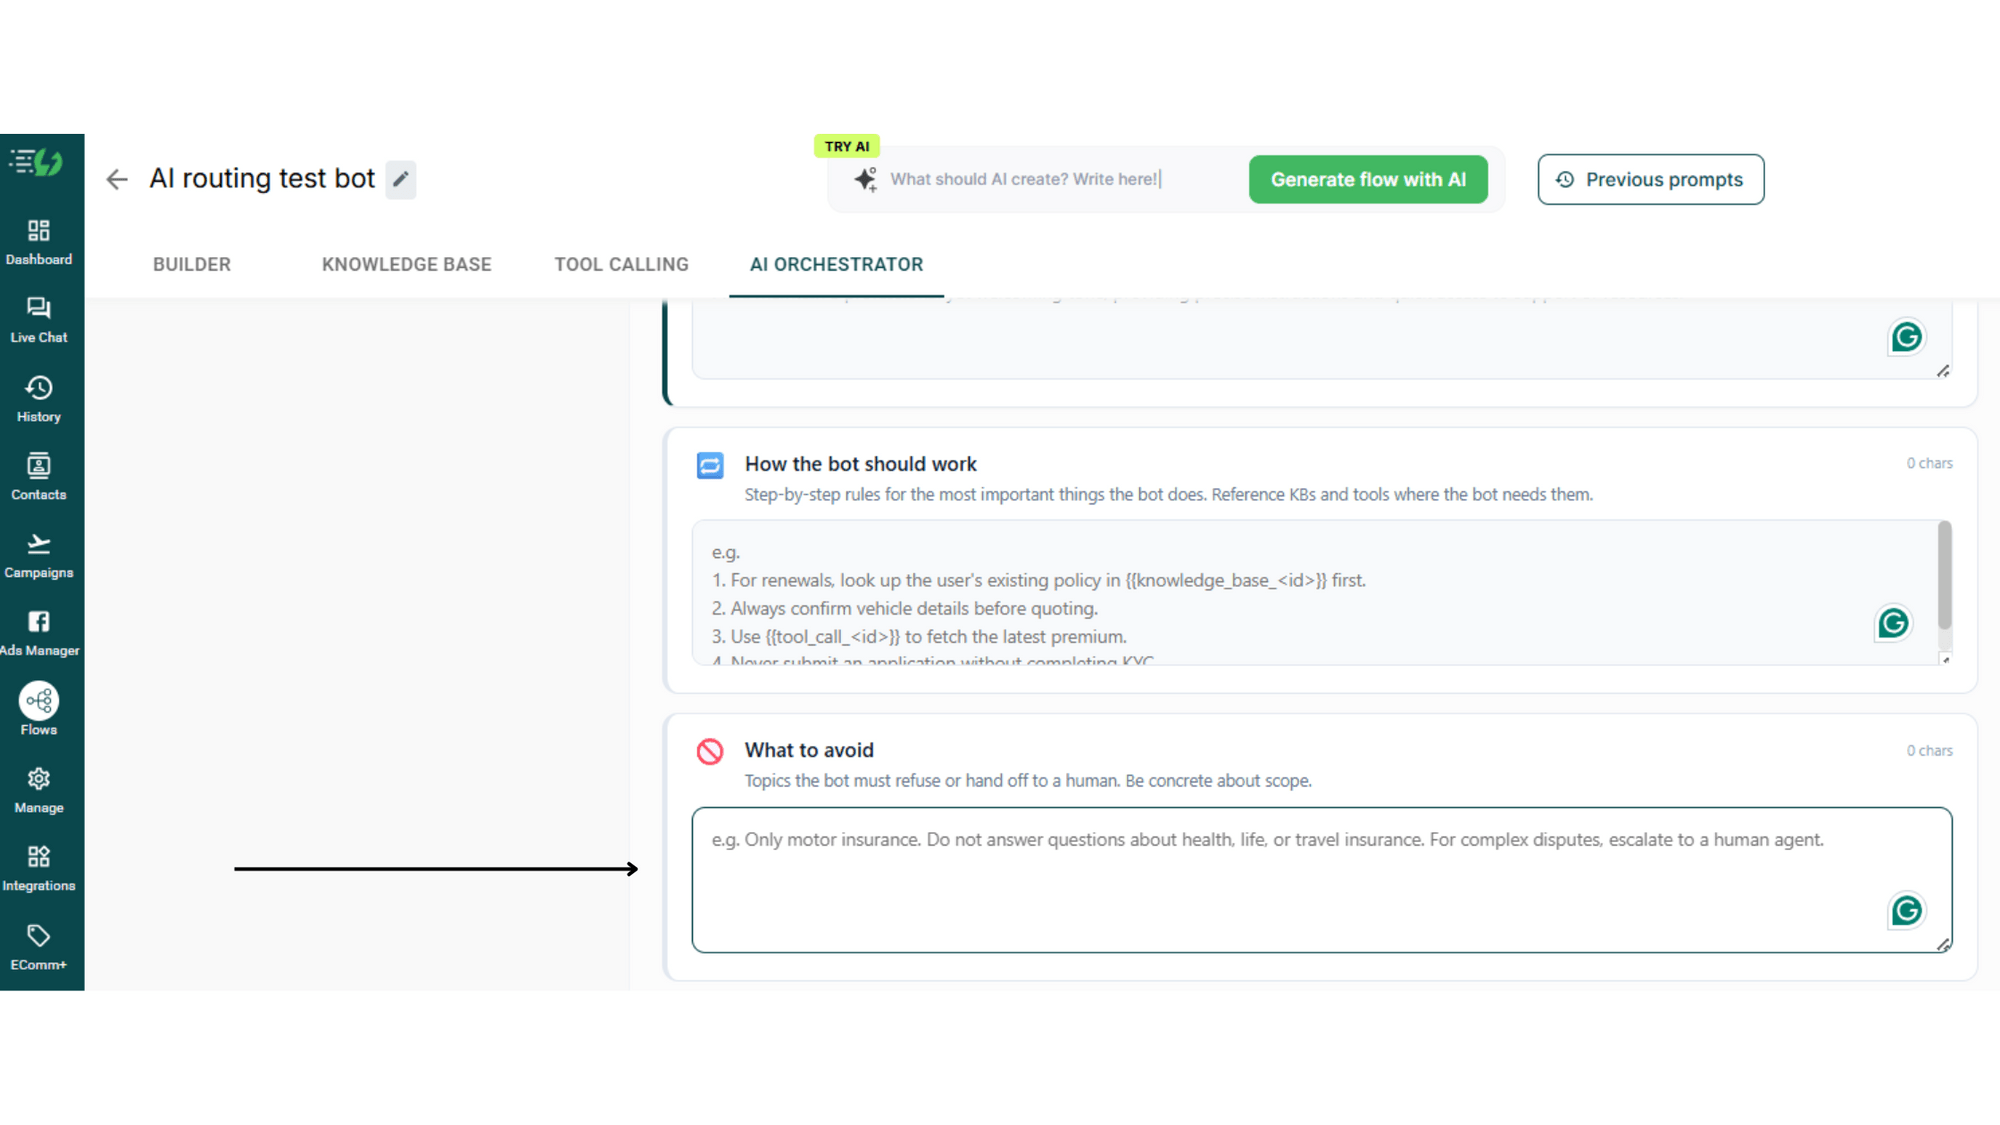
5. Fill in "How the bot should work"
Step-by-step rules for the most important things the bot does. Reference your knowledge bases and tools where the bot needs them.
For example:
"1. For renewals, look up the user's existing policy in {{knowledge_base_<id>}} first.
2. Always confirm vehicle details before quoting.
3. Use {{tool_call_<id>}} to fetch the latest premium.
4. Never submit an application without completing KYC."

6. Fill in "What to avoid"
Topics the bot must refuse or hand off to a human. Be concrete about scope.
For example:
"Only motor insurance. Do not answer questions about health, life, or travel insurance. For complex disputes, escalate to a human agent."
7. Fill in "Anything else"
Other rules. Pricing display, mandatory disclosures, escalation triggers, response length, etc.
For example:
"Always show prices in INR with the GST line item. If claim amount > ₹5 lakh, escalate immediately. Keep replies under 80 words unless the user asks for more detail."
8. Use Generate or Templates
Don't want to start from scratch? Click Generate to let AiSensy auto-draft your instructions from your knowledge base and tools. Or pick a ready-made starter from Templates.
Pro Tip: Keep your instructions focused on your business domain. AiSensy already handles general conversational rules, formatting, and content safety, so you don't need to repeat them.
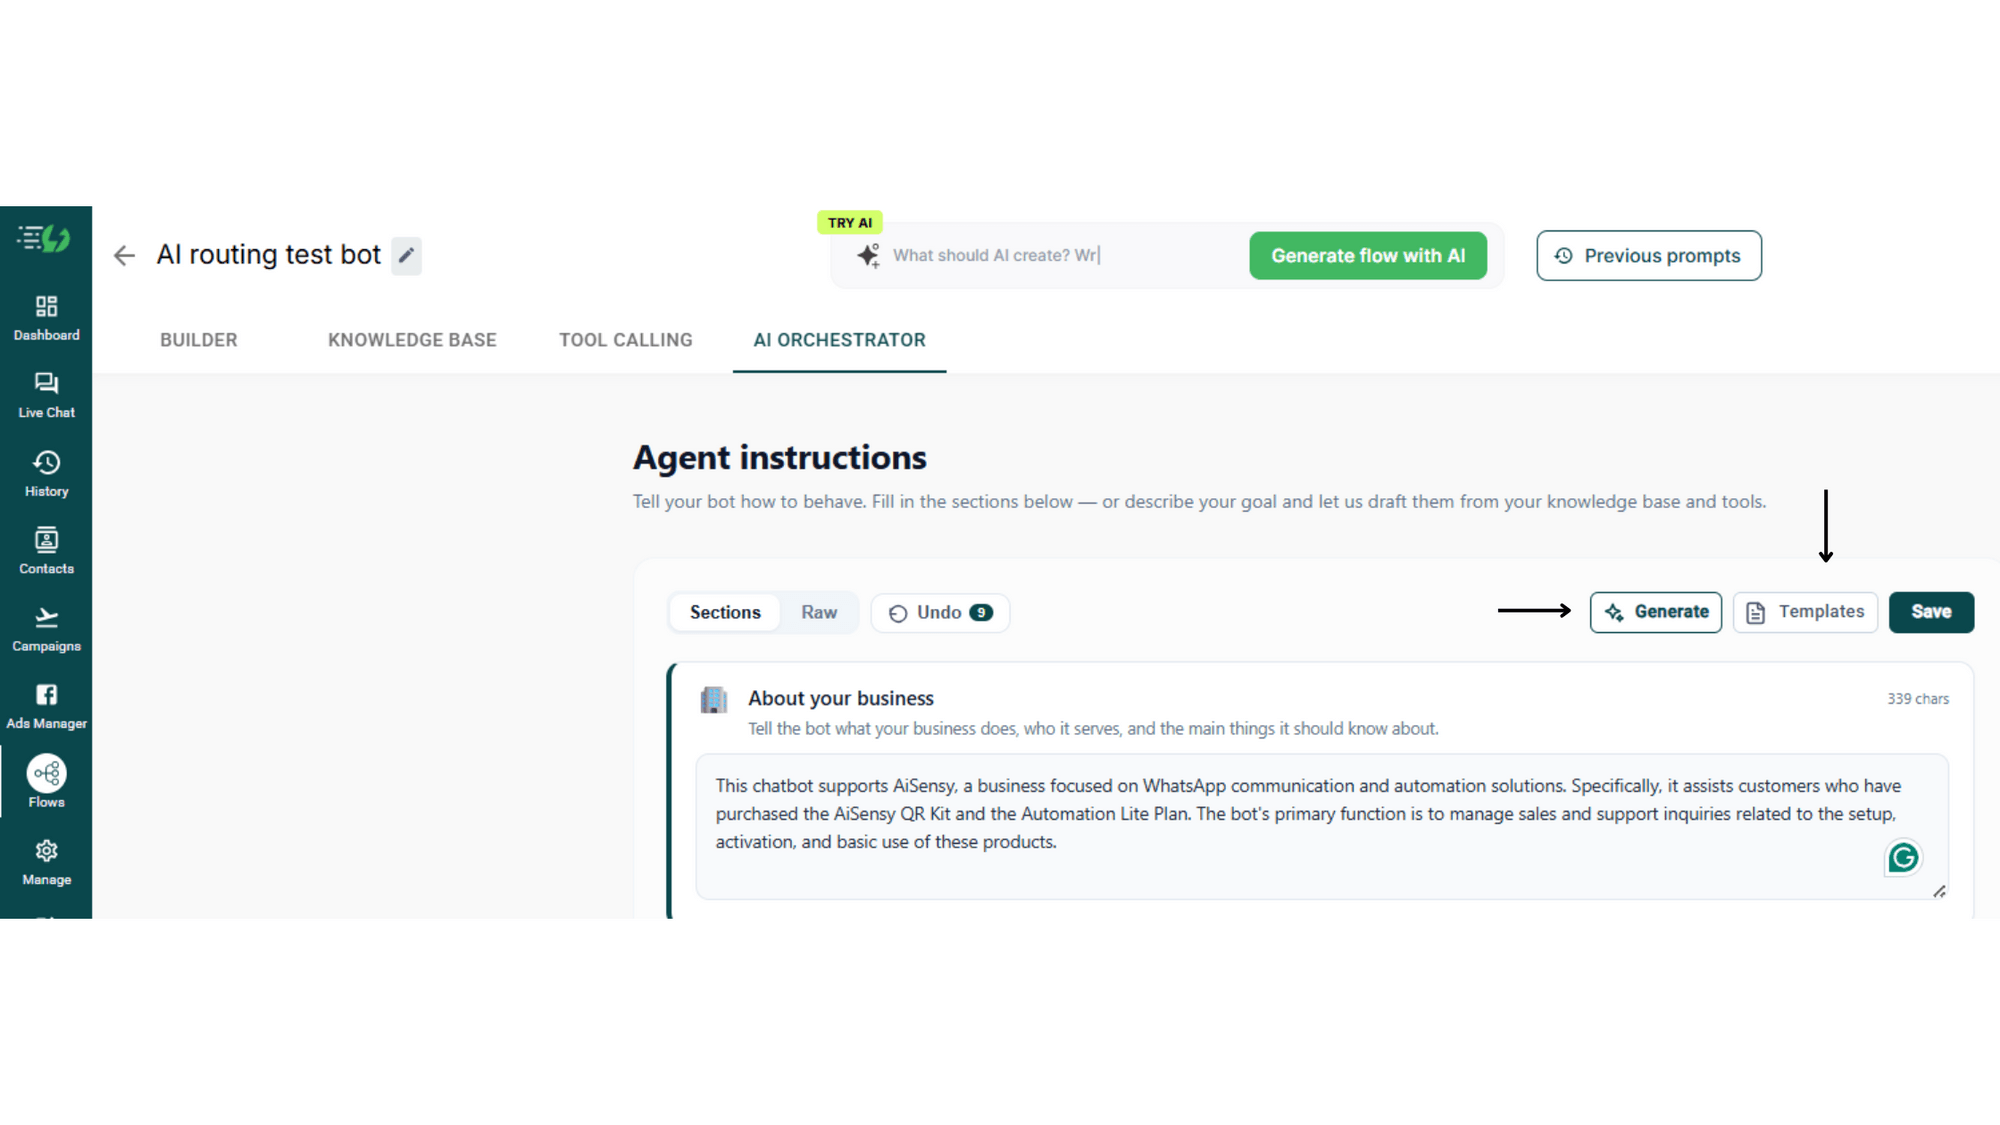
9. Save and go live
Hit Save, and your AI Orchestrator is now configured. Use Undo anytime to roll back changes.
How to set up AI Routing (Optional)
AI Routing is what makes your AI Agent smart at the top level. It reads every incoming message and connects the user to the right flow, even when they don't use any keywords.
For example, if a user sends "Hi, I'm looking for a 2BHK in Gurgaon," the AI Router instantly classifies the intent as Property Search and triggers that flow, even though the user never typed the word "property."
This step is optional. If you only have one single flow active, you don’t need agent routing.
Follow the steps below to set up AI Routing.

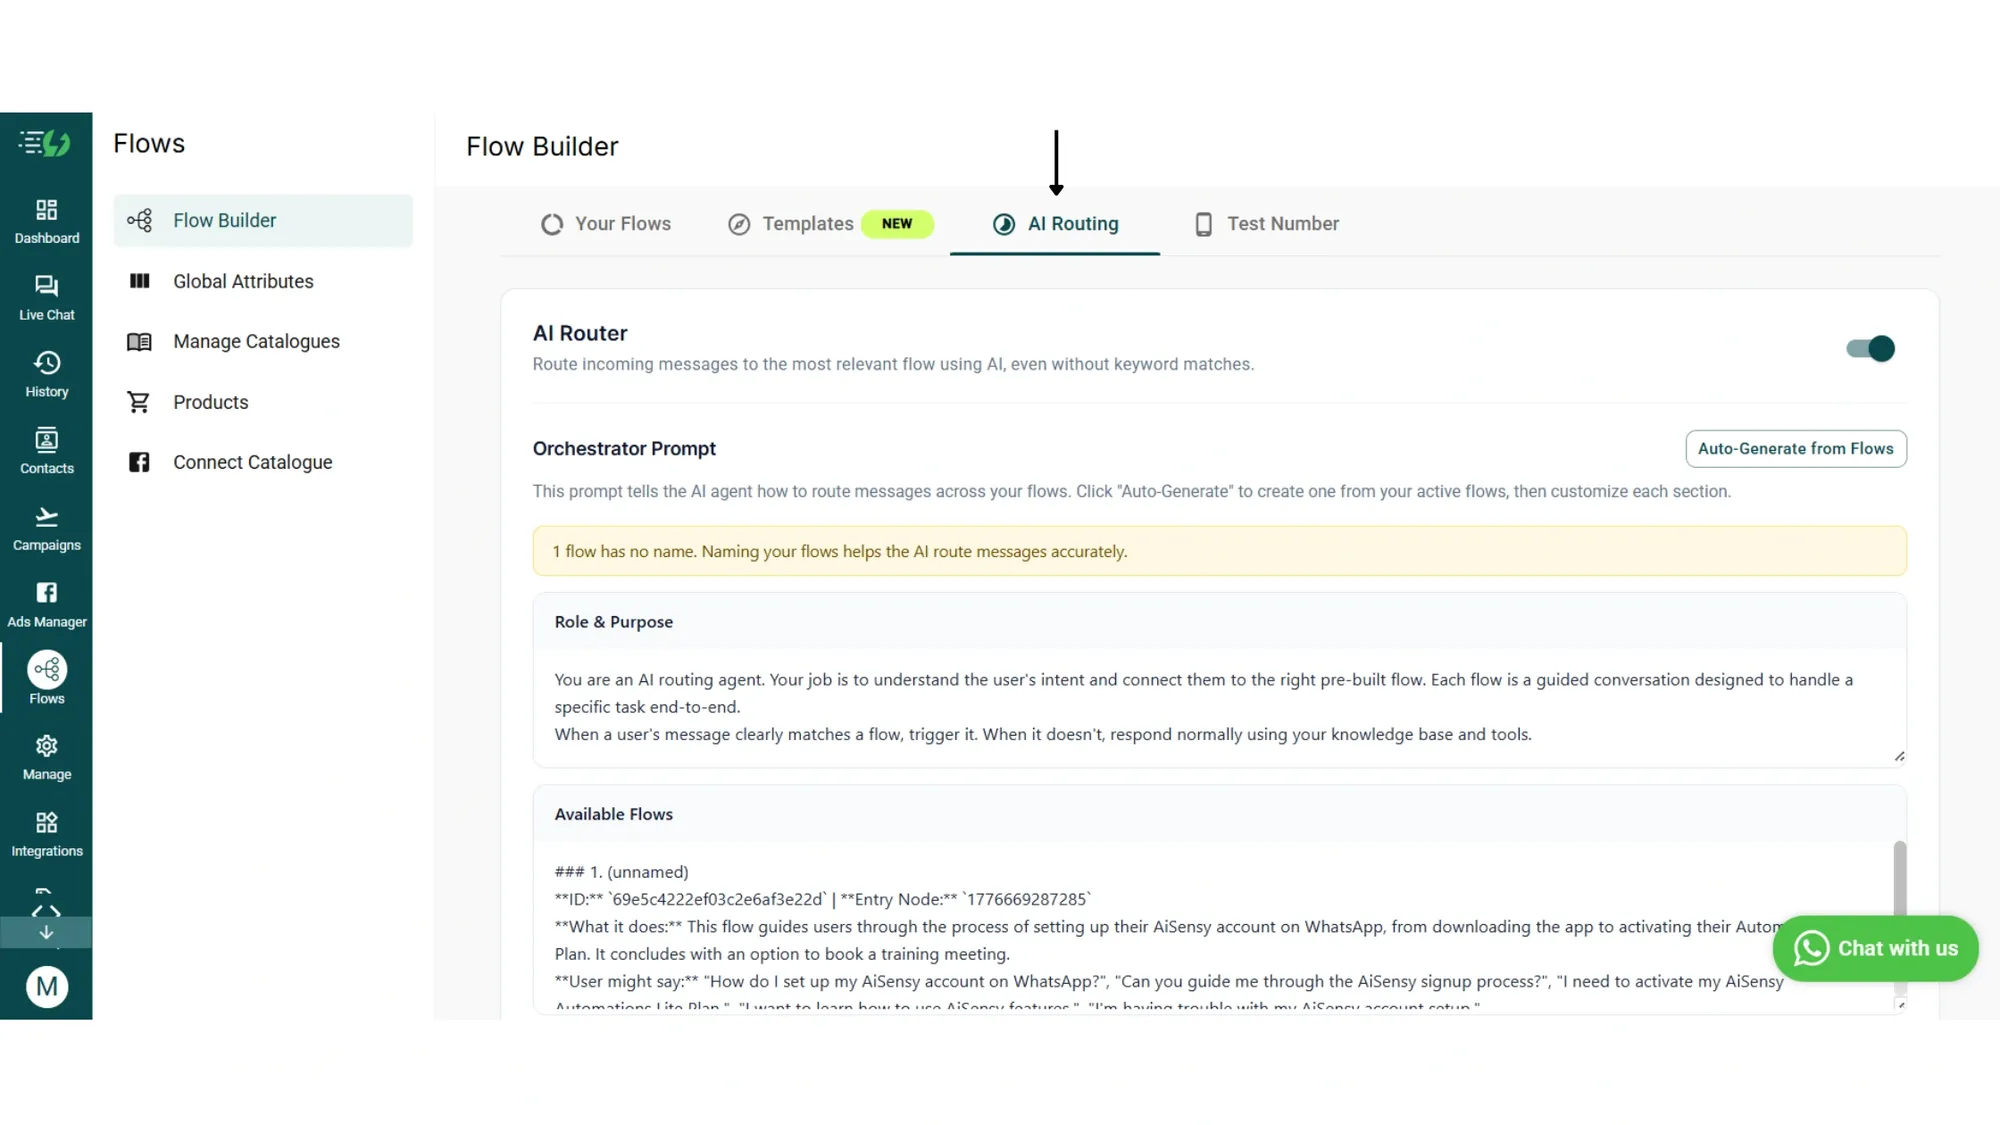
1. Open the AI Routing tab
On the Flow Builder index page, click the AI Routing tab. You'll see the AI Router toggle at the top with the description: "Route incoming messages to the most relevant flow using AI, even without keyword matches."
2. Toggle the AI Router on
Switch the AI Router toggle on to enable intent-based routing across all your flows.

3. Click Auto-Generate from Flows
The fastest way to get started is to click Auto-Generate from Flows on the right of the Orchestrator Prompt section. AiSensy will draft a complete routing prompt based on your active flows, which you can then customize.
The prompt is broken into five editable sections:
• Role & Purpose: defines what the AI router does.
• Available Flows: auto-populated list of your flows with names, IDs, descriptions, sample user phrases, and the information each flow collects.
• Routing Behaviour: defines how the AI structures its routing decisions, including confidence scores and bridge messages.
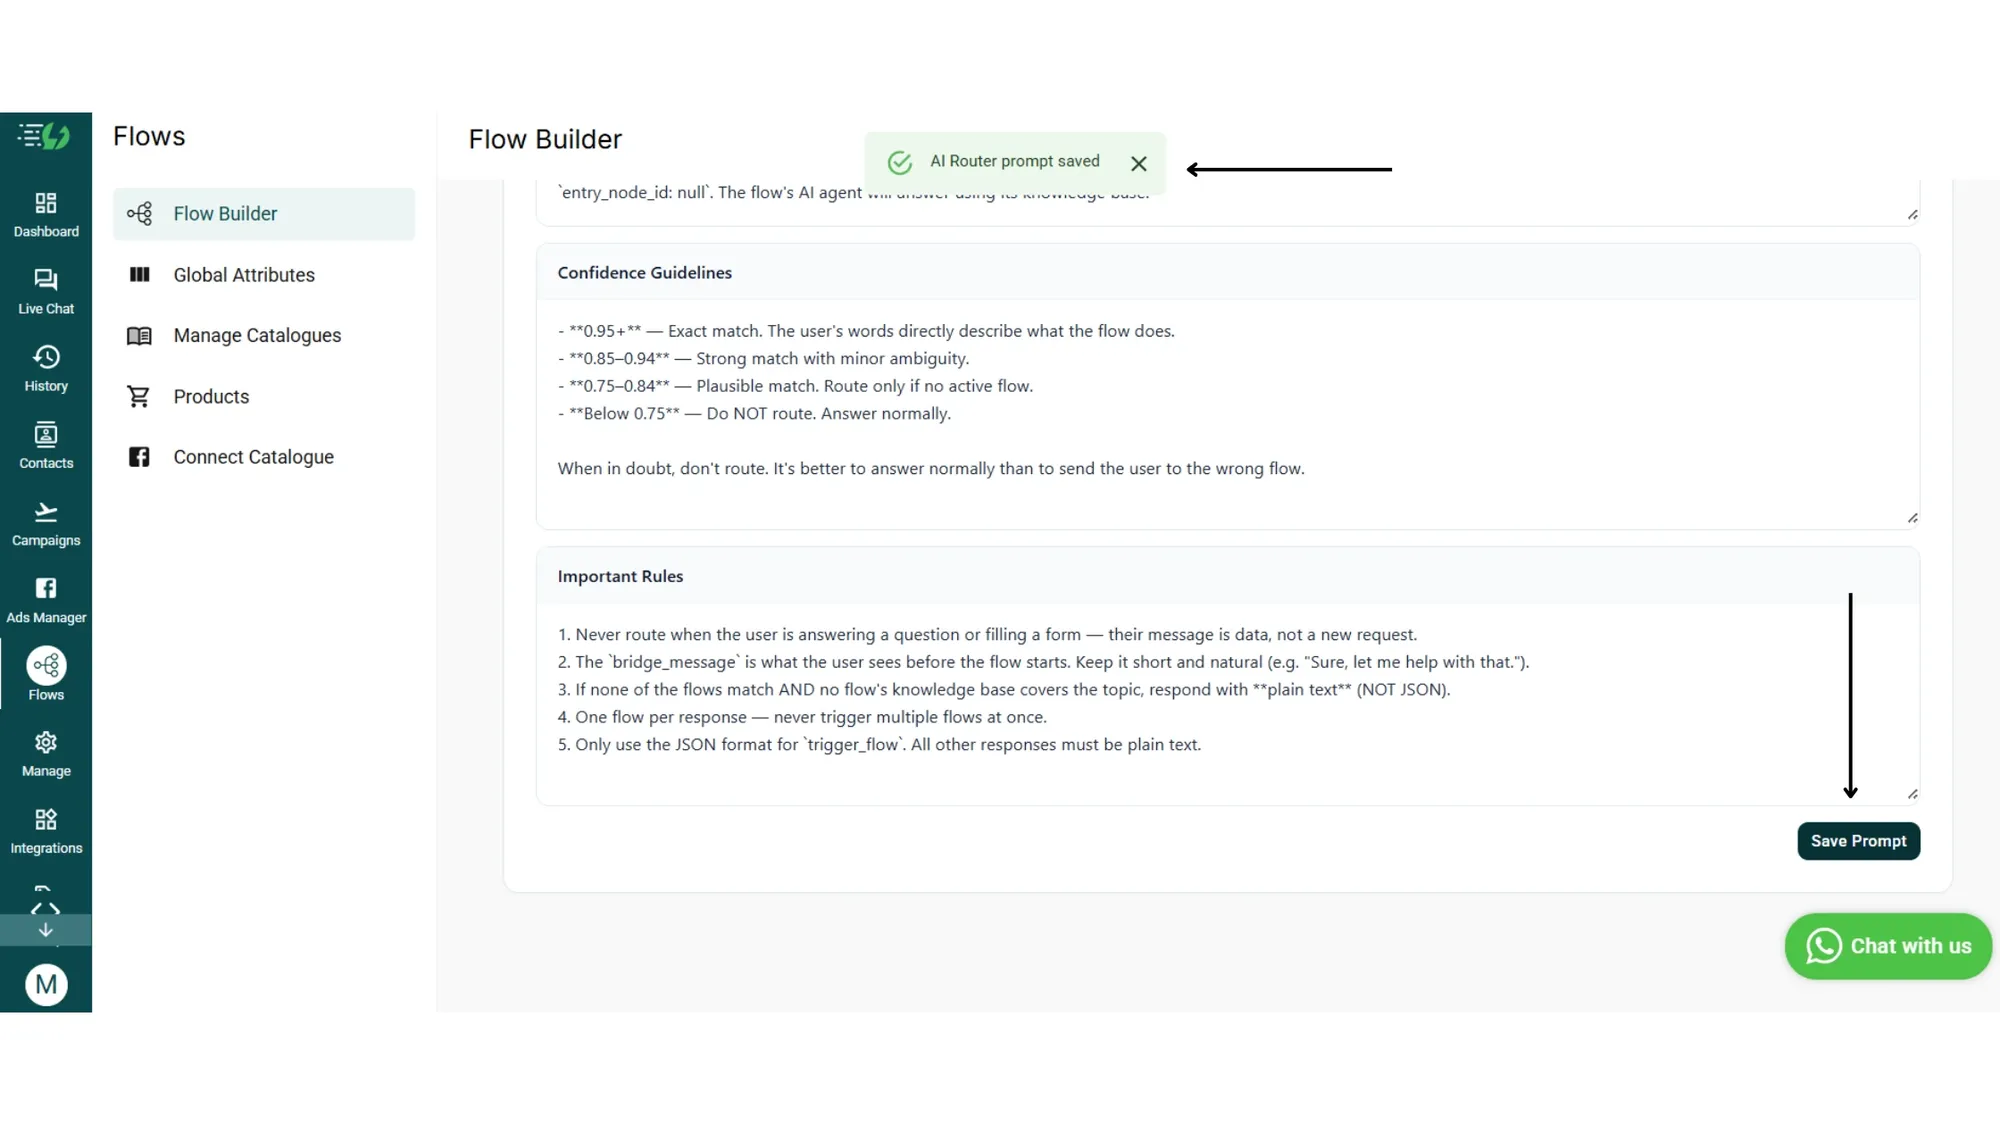
• Confidence Guidelines: sets the routing thresholds. 0.95+ is an exact match, 0.85–0.94 is a strong match with minor ambiguity, 0.75–0.84 is plausible (route only if no active flow), and below 0.75 means do not route. Answer normally instead.
• Important Rules: guardrails like "never route during a form fill," "one flow per response," and "fall back to plain text if no flow matches."
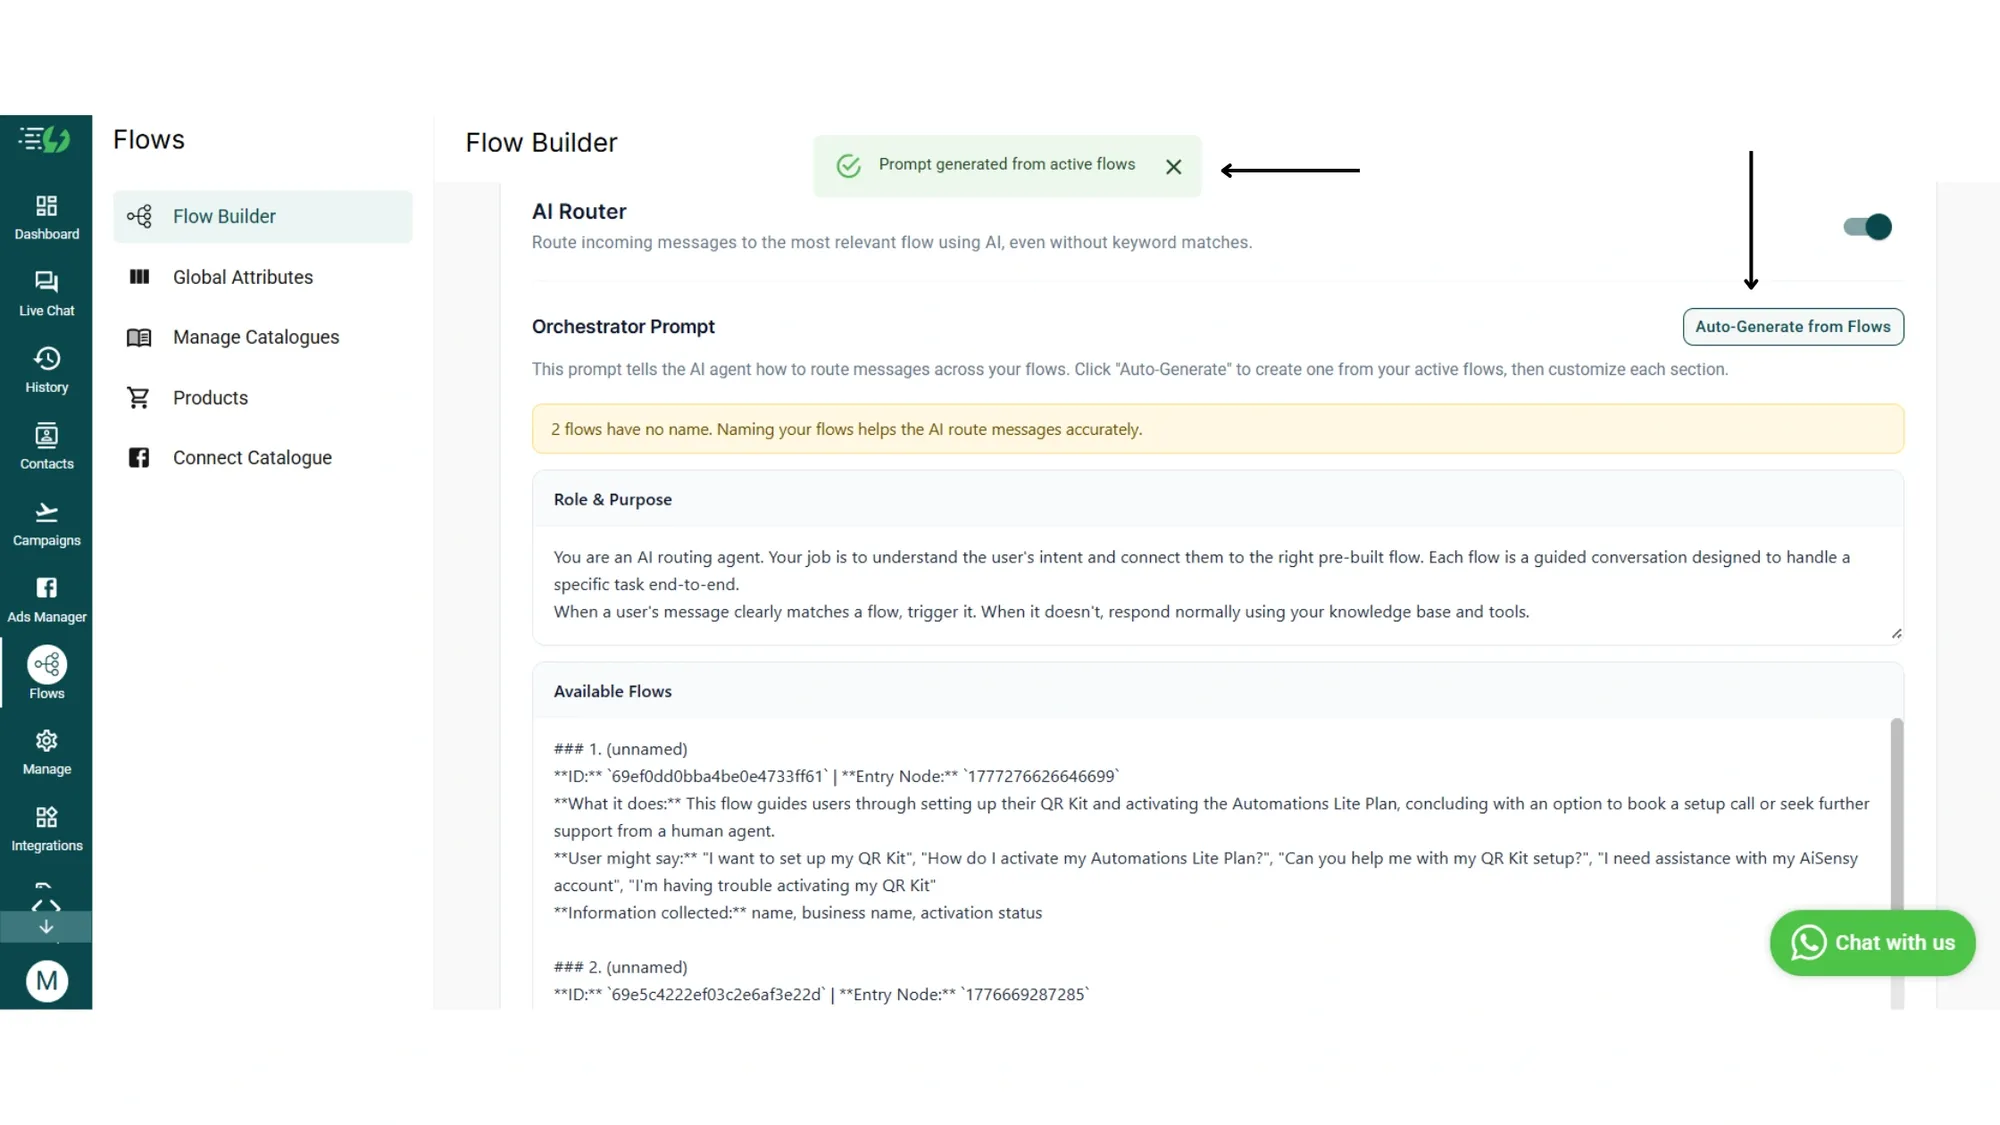
4. Name your flows clearly
If you see the warning "X flows have no name. Naming your flows helps the AI route messages accurately," go back to Your Flows and rename any untitled ones.
The AI Router uses flow names to route messages, so vague names like "Untitled" or "Flow 1" hurt accuracy.
5. Save and test
Click Save Prompt to lock in your routing logic. Then head to the Test Number tab and send a test message to see your AI Router in action.
It's that simple!!
Testing the AI Agent
Before you go live for real customers, AiSensy lets you test the full agent on a sandbox of up to 3 designated WhatsApp Testing Numbers

Pricing & access: How AI Messages work
AI Agent Builder runs on two plan tiers. Learn about them.
