How to Integrate Bolna.ai with AiSensy for WhatsApp Messaging
Connect Bolna.ai with AiSensy to send approved WhatsApp templates directly from your Bolna workflows, no code or separate WhatsApp setup required.

How to Integrate Bolna.ai with AiSensy for WhatsApp Messaging
Connect Bolna.ai with AiSensy to send approved WhatsApp templates directly from your Bolna workflows, no code or separate WhatsApp setup required.
Trusted by 210,000+ Businesses across 68+ Countries




























Connecting Bolna.ai with AiSensy
Here are the steps you need to follow to connect AiSensy with Bolna.ai and send WhatsApp messages directly from your workflows:
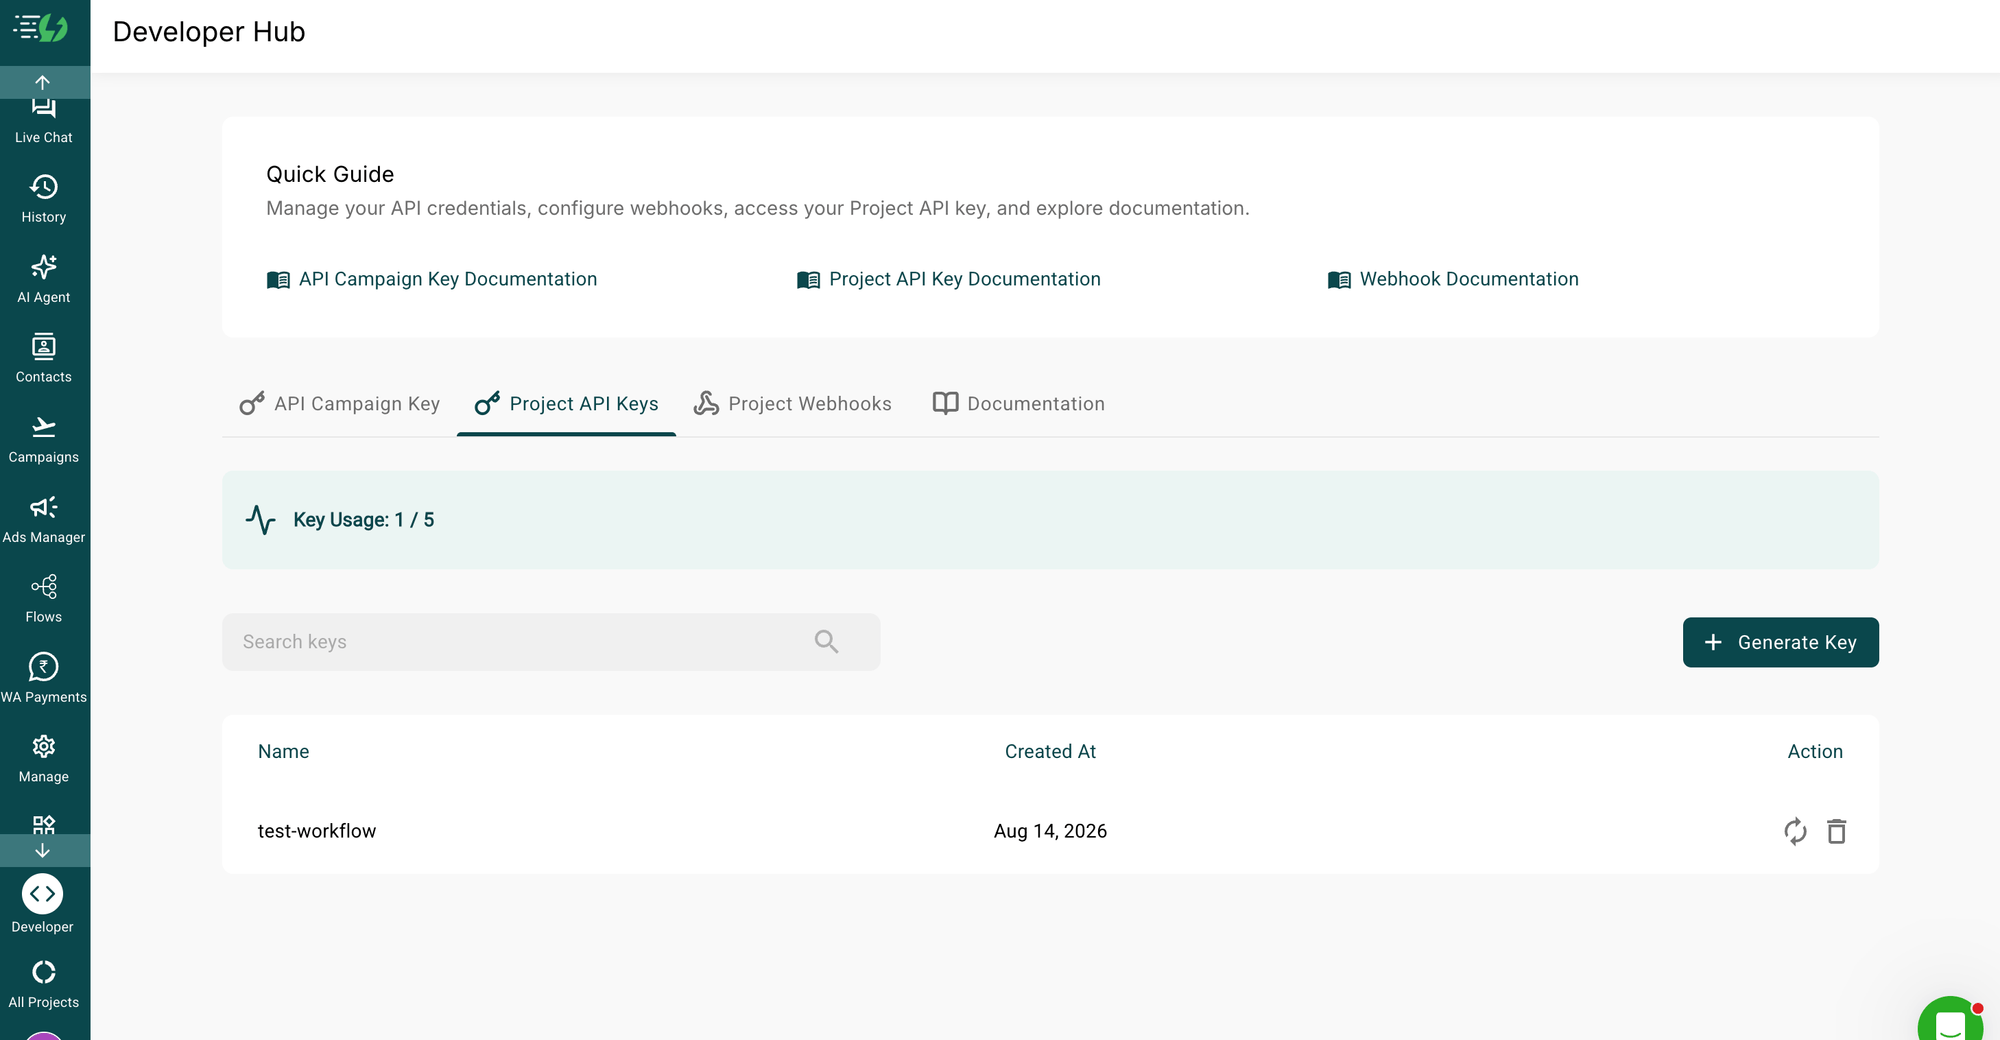
Authenticate Your AiSensy Account
First, connect your AiSensy project to Bolna using your project API key.
Open the AiSensy project you want to use.
Go to Developers → Project API Keys.
Copy your Project API Key.
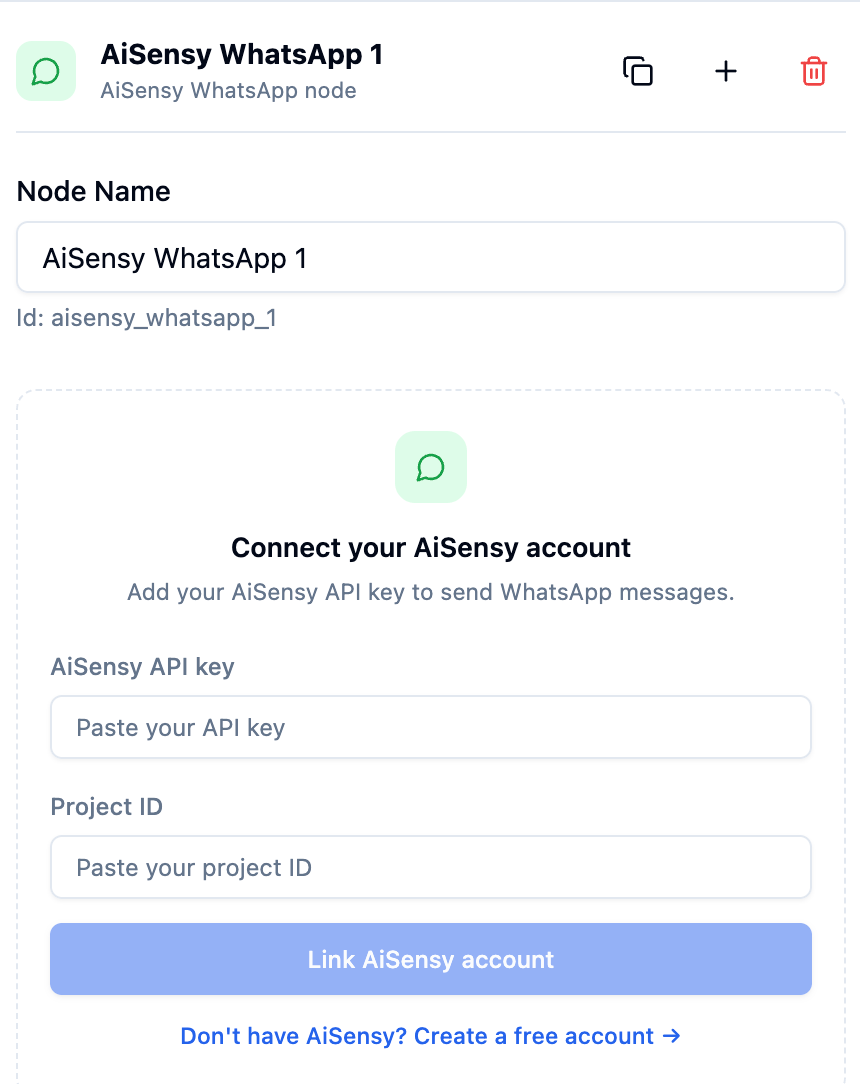
In Bolna, open your workflow and add the WhatsApp (AiSensy) node.
Enter your Project ID and paste the API key.
Click Link Account.
Once connected, Bolna will fetch the WhatsApp campaigns available in your AiSensy project.
Select Your Campaign & Send a Test Message
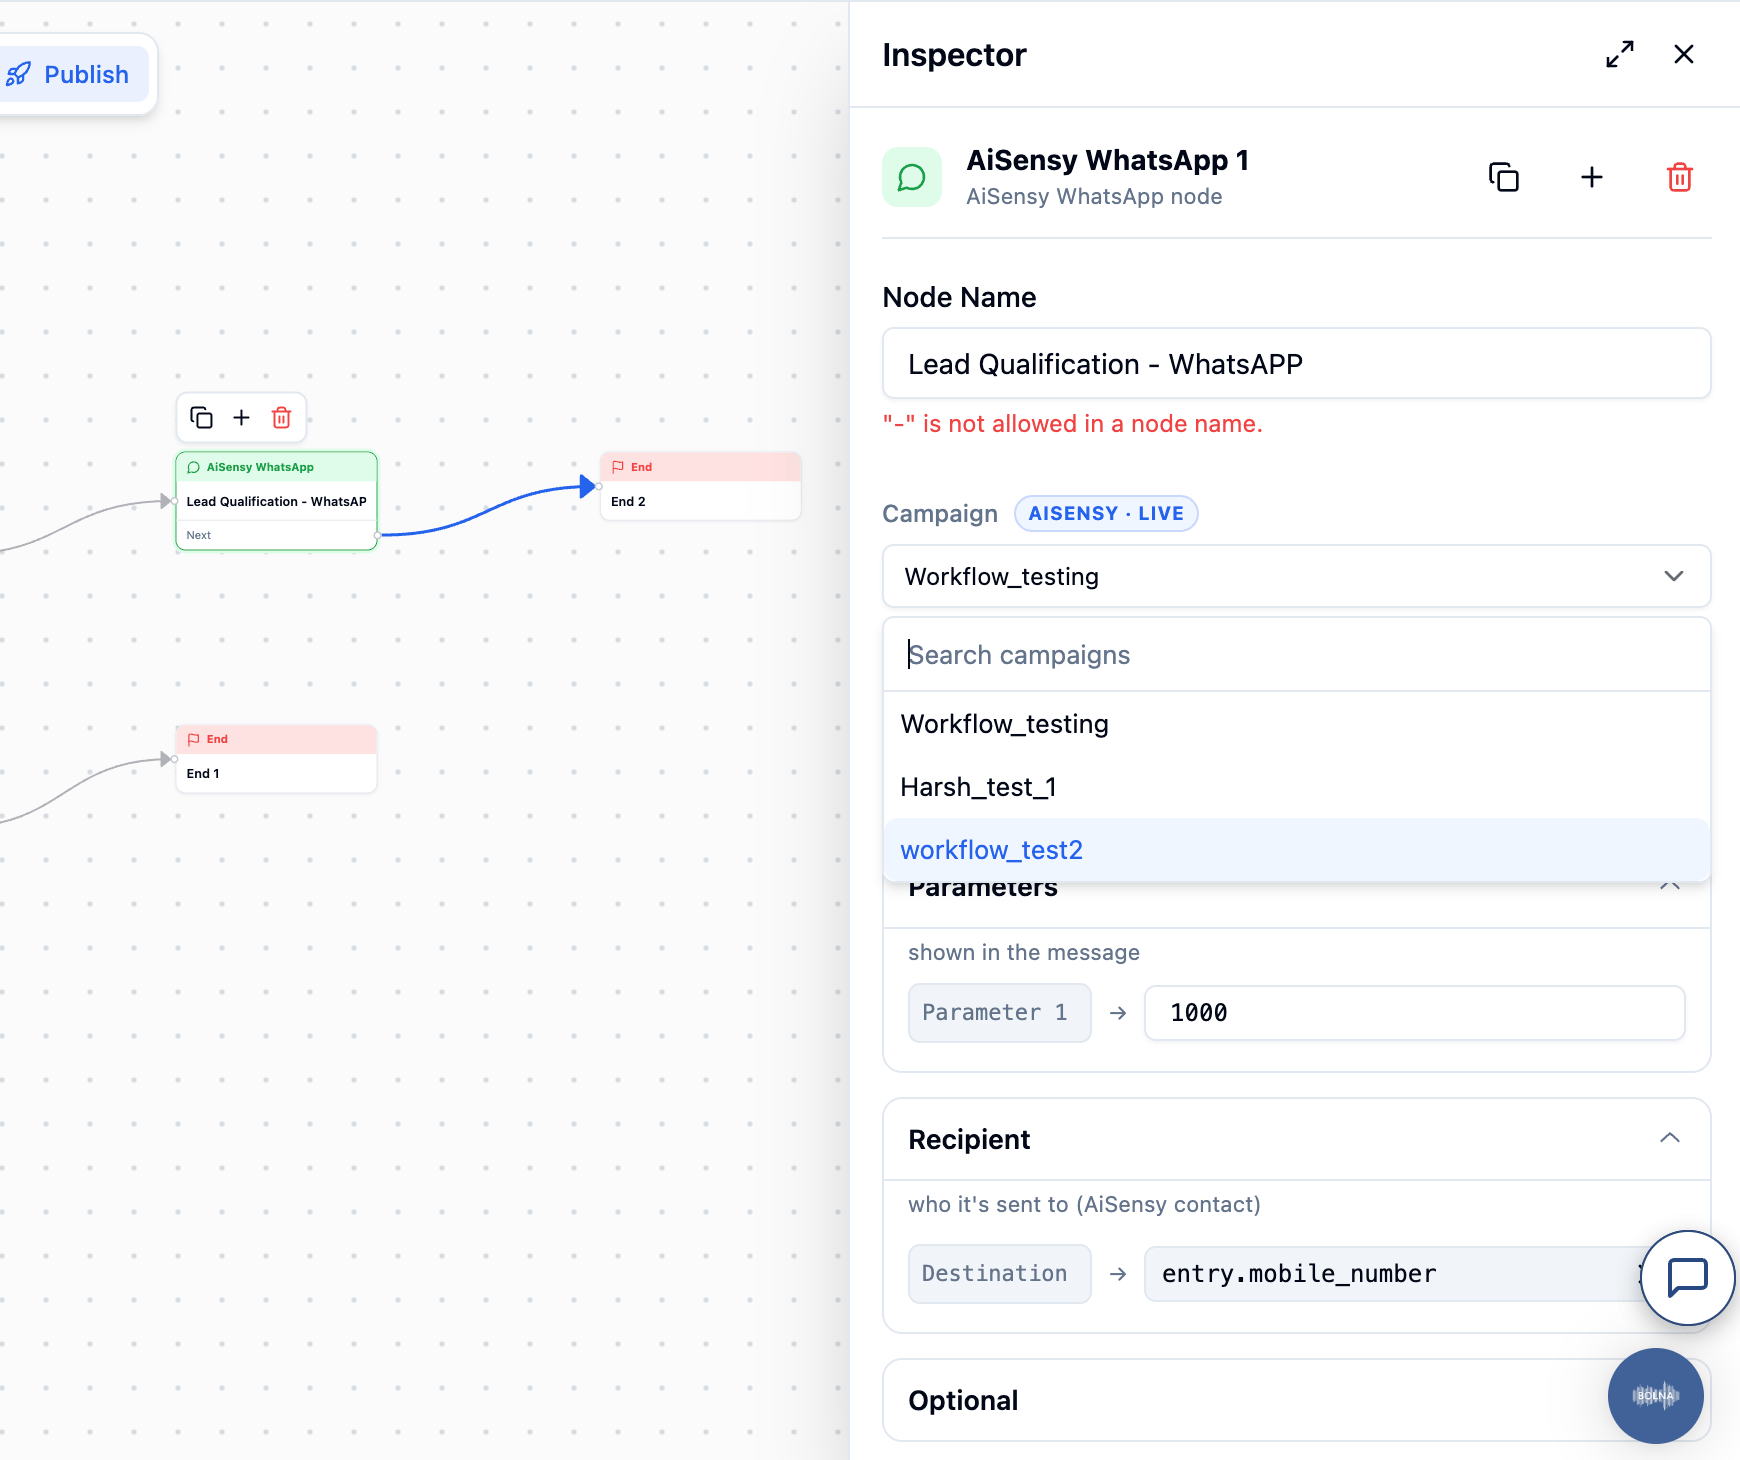
Once your AiSensy account is connected, Bolna.ai will fetch the campaigns available in your AiSensy project.
Select the WhatsApp campaign you want to use.
Add the required template variables such as name, order ID, date, or other dynamic values.
You can also map workflow fields to your template variables.
Click Send test message to send the message to your own WhatsApp number.
Always send a test message before publishing your workflow to make sure the sender, message copy, and variable values are working correctly.
Add the WhatsApp Step to Your Workflow
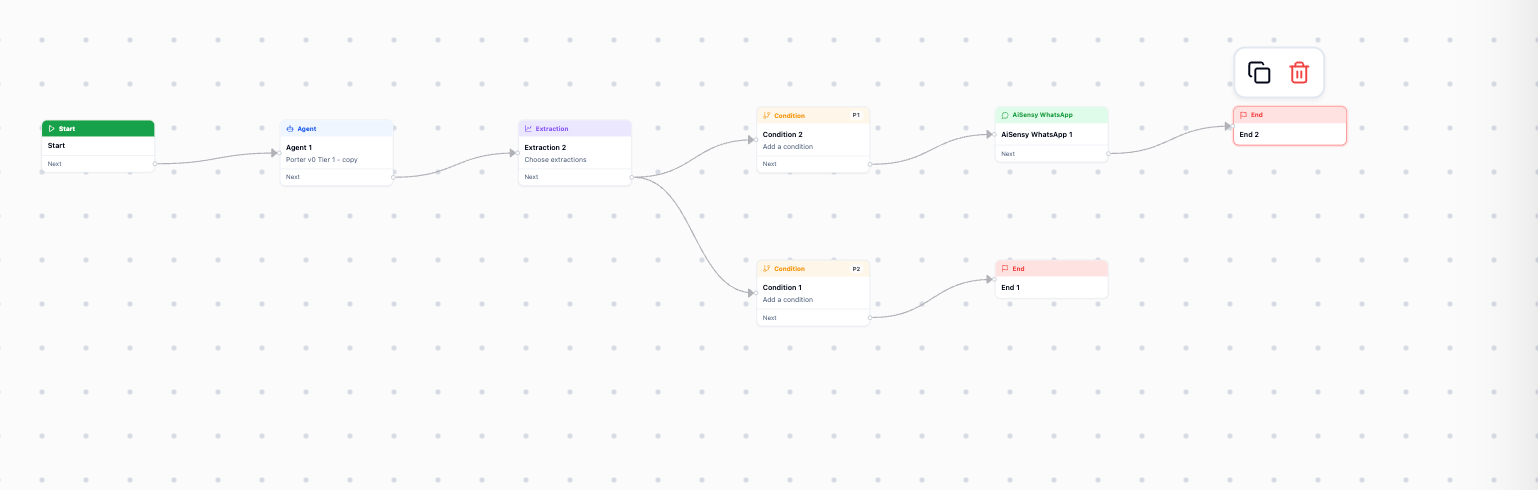
Now that your campaign is connected and tested, add the WhatsApp step to your Bolna.ai workflow.
Place the WhatsApp (AiSensy) node at the point where you want the WhatsApp message to be sent.
Select the AiSensy campaign you want to trigger.
Map any required workflow fields to the template variables.
Make sure the message and variable values look correct.
Save and publish your workflow.
Once published, Bolna will automatically send the selected WhatsApp template through AiSensy whenever the workflow reaches the WhatsApp step.
Don't Have a Campaign Yet? Create One in AiSensy
If you don't have an API Campaign ready, you can create one in AiSensy before continuing with your Bolna.ai workflow.
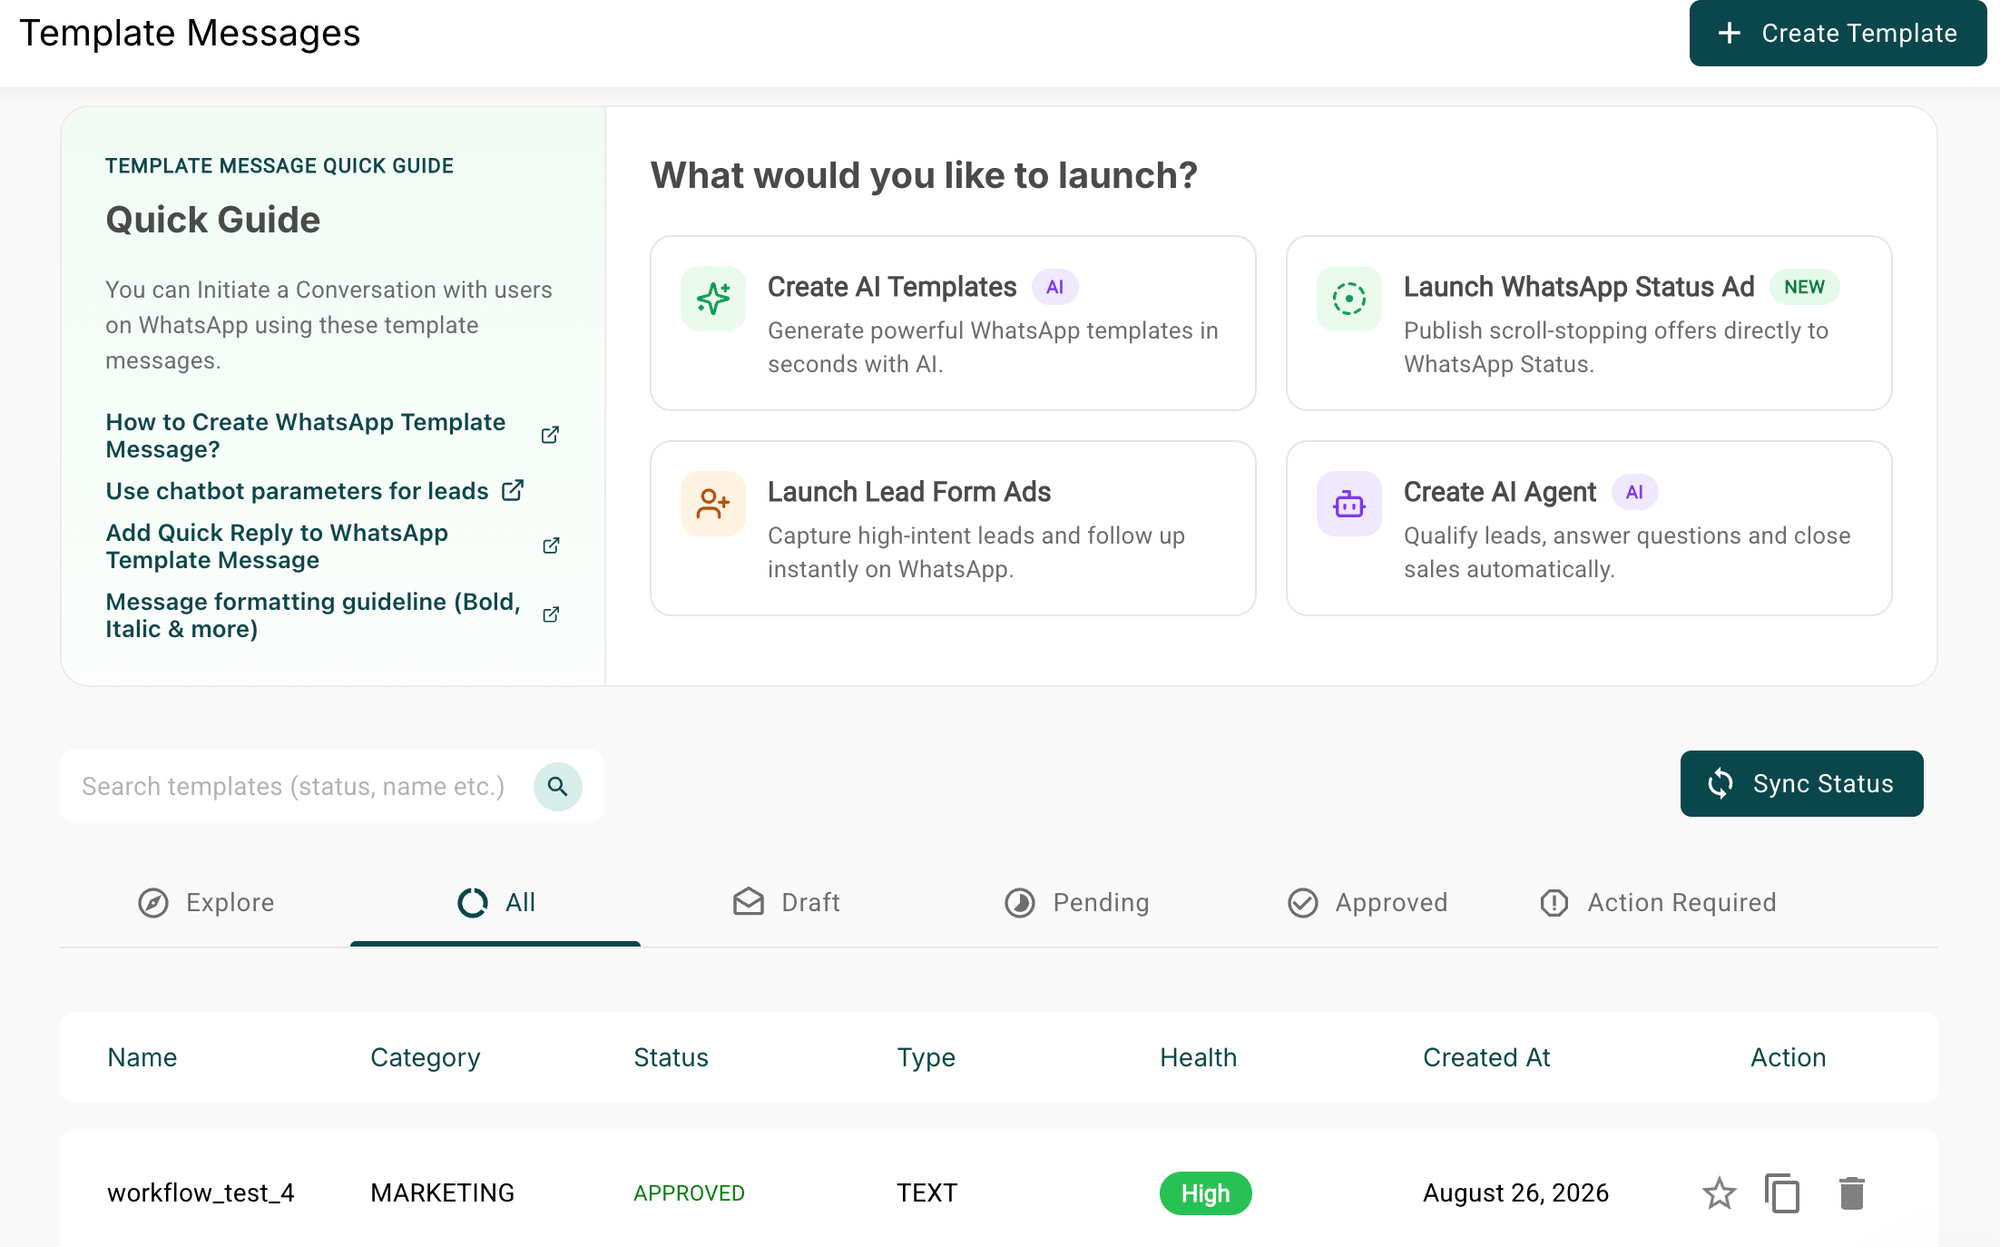
Log in to the AiSensy project you want to use.
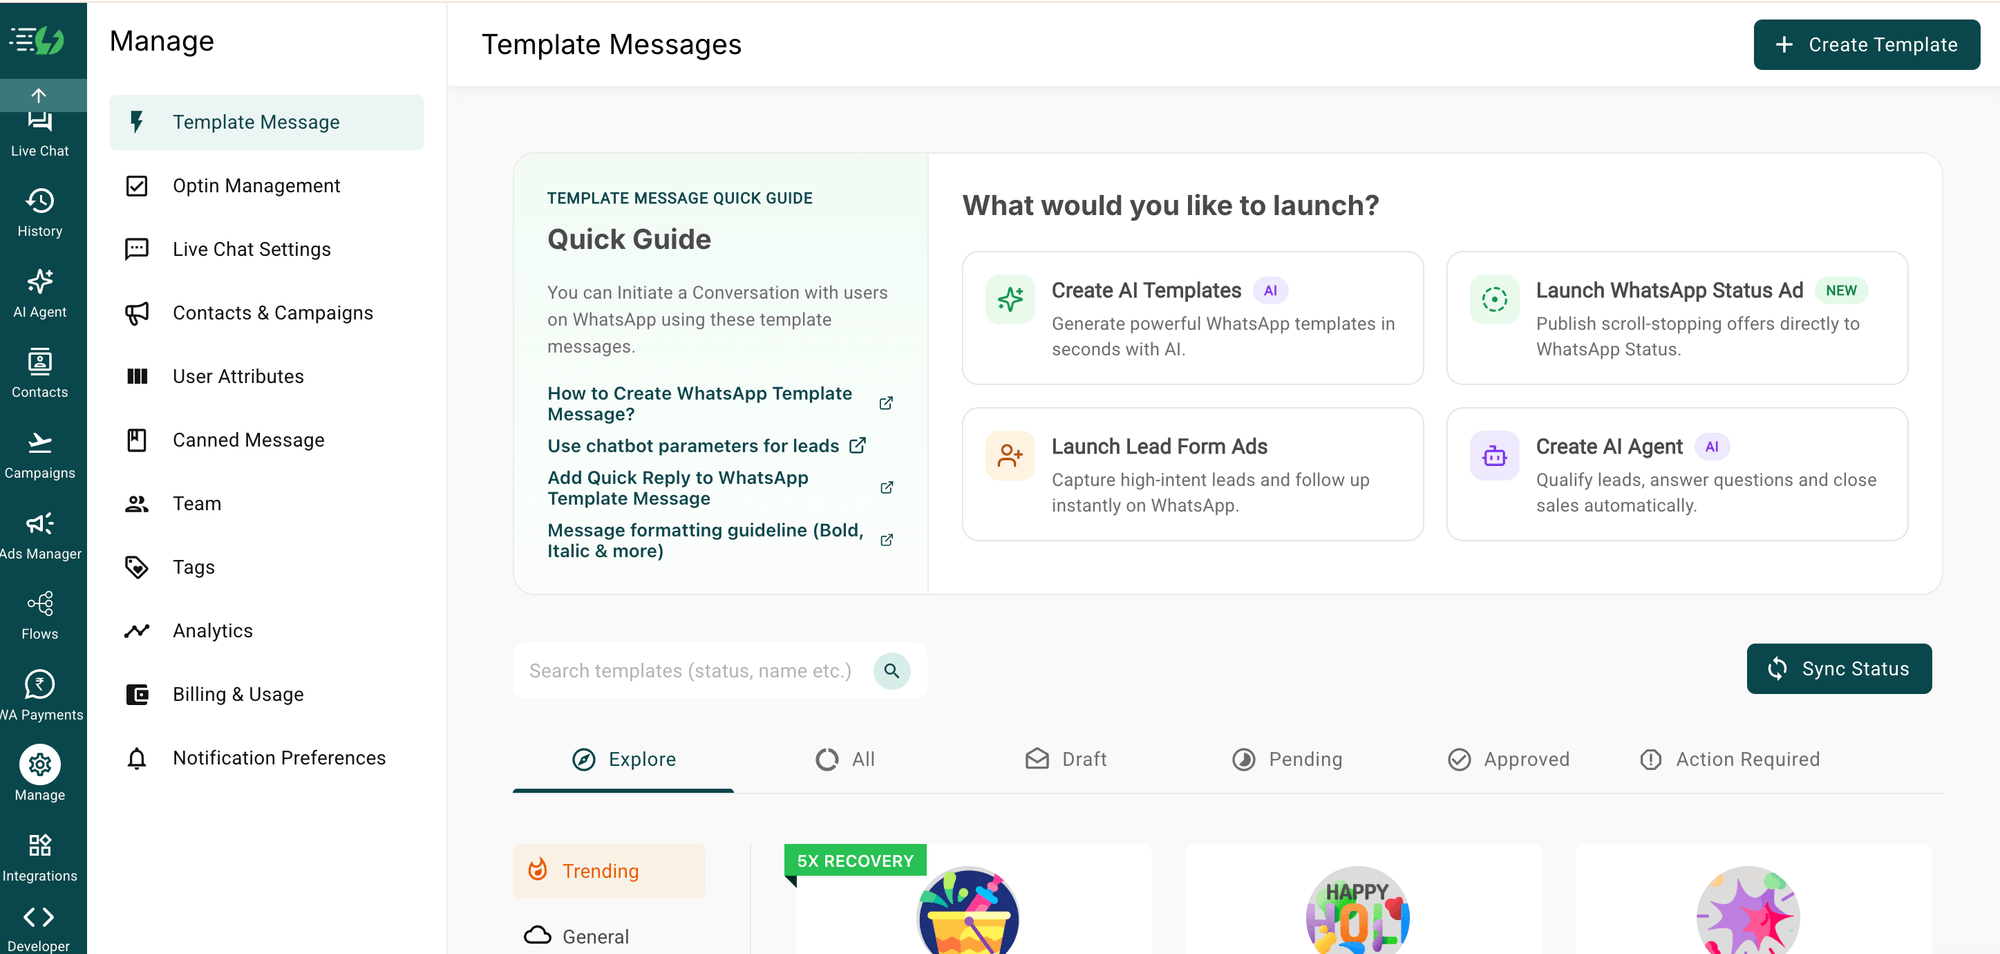
Go to Manage from the left navigation.
Click Create Template in the top-right corner.
Create your WhatsApp Template and submit it for Meta approval.
Once approved, go to Campaigns and click Launch.
Select API Campaign.
Give your campaign a name and select the approved template.
Click Set Live to activate the campaign.
Head back to Bolna and refresh the campaign list. Your new campaign will now be available for selection.
Once published, Bolna will automatically send the selected WhatsApp template through AiSensy whenever the workflow reaches the WhatsApp step.
Send a Test Message from Bolna.ai
Once your campaign is available in Bolna, select it from the WhatsApp (AiSensy) node.
Add the required template variables or map them to your Bolna.ai workflow fields.
Click Send test message to send the WhatsApp message to your own number and check that the sender, message content, and variables are working correctly.
Note: Always send a test message before publishing your workflow to catch any incorrect variable mapping or formatting issues.
Refresh Your Campaign List in Bolna.ai
Once your API Campaign is live in AiSensy, head back to Bolna and refresh the campaign list.
Your newly created campaign will now appear in the list and can be selected in your WhatsApp (AiSensy) node.
You can now use the campaign in your Bolna workflow to send WhatsApp messages automatically.
Publish Your Bolna.ai Workflow
Once you've selected your AiSensy campaign and mapped the required template variables, save and publish your Bolna workflow.
Whenever the workflow reaches the WhatsApp (AiSensy) step, the selected WhatsApp template will be sent to the recipient automatically.
Your Bolna workflow can now combine voice and WhatsApp messaging in a single customer journey.