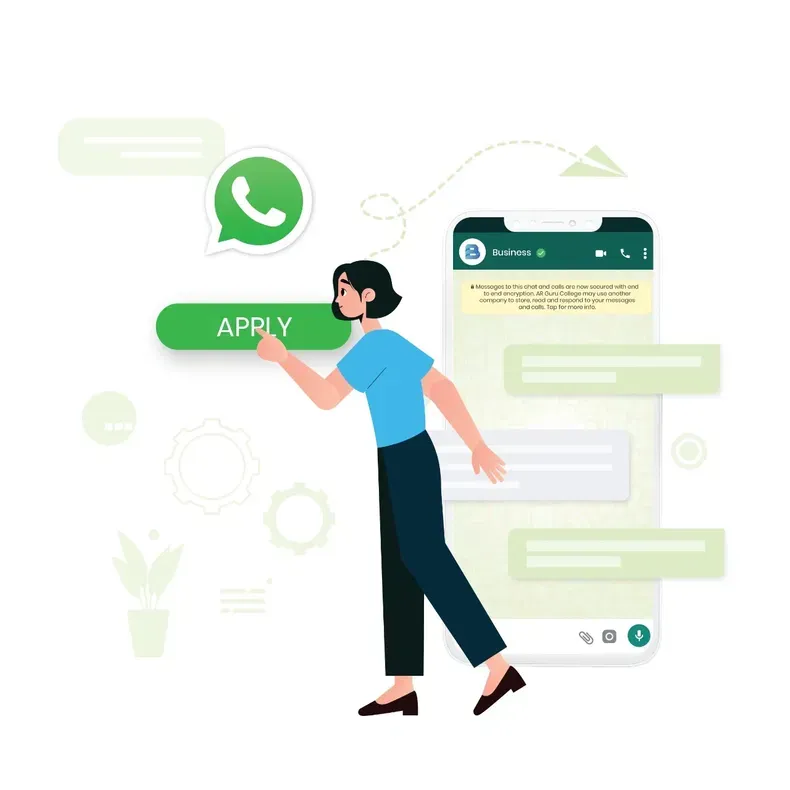
AiSensy WhatsApp Marketing Lite Setup Tutorial
Is step-by-step tutorial mein aap seekhoge ki AiSensy Lite Plan kaise setup aur activate karein, WhatsApp API live karein, aur KYC verify karke broadcasting shuru karein.
AiSensy WhatsApp Marketing Lite Setup Tutorial
Is step-by-step tutorial mein aap seekhoge ki AiSensy Lite Plan kaise setup aur activate karein, WhatsApp API live karein, aur KYC verify karke broadcasting shuru karein.
Part 1: AiSensy pe Signup Karo aur WhatsApp Marketing Lite Plan activate karo
AiSensy Mobile App Download Karo
Neeche diye link se AiSensy ka mobile app download karo. Download AiSensy on Mobile

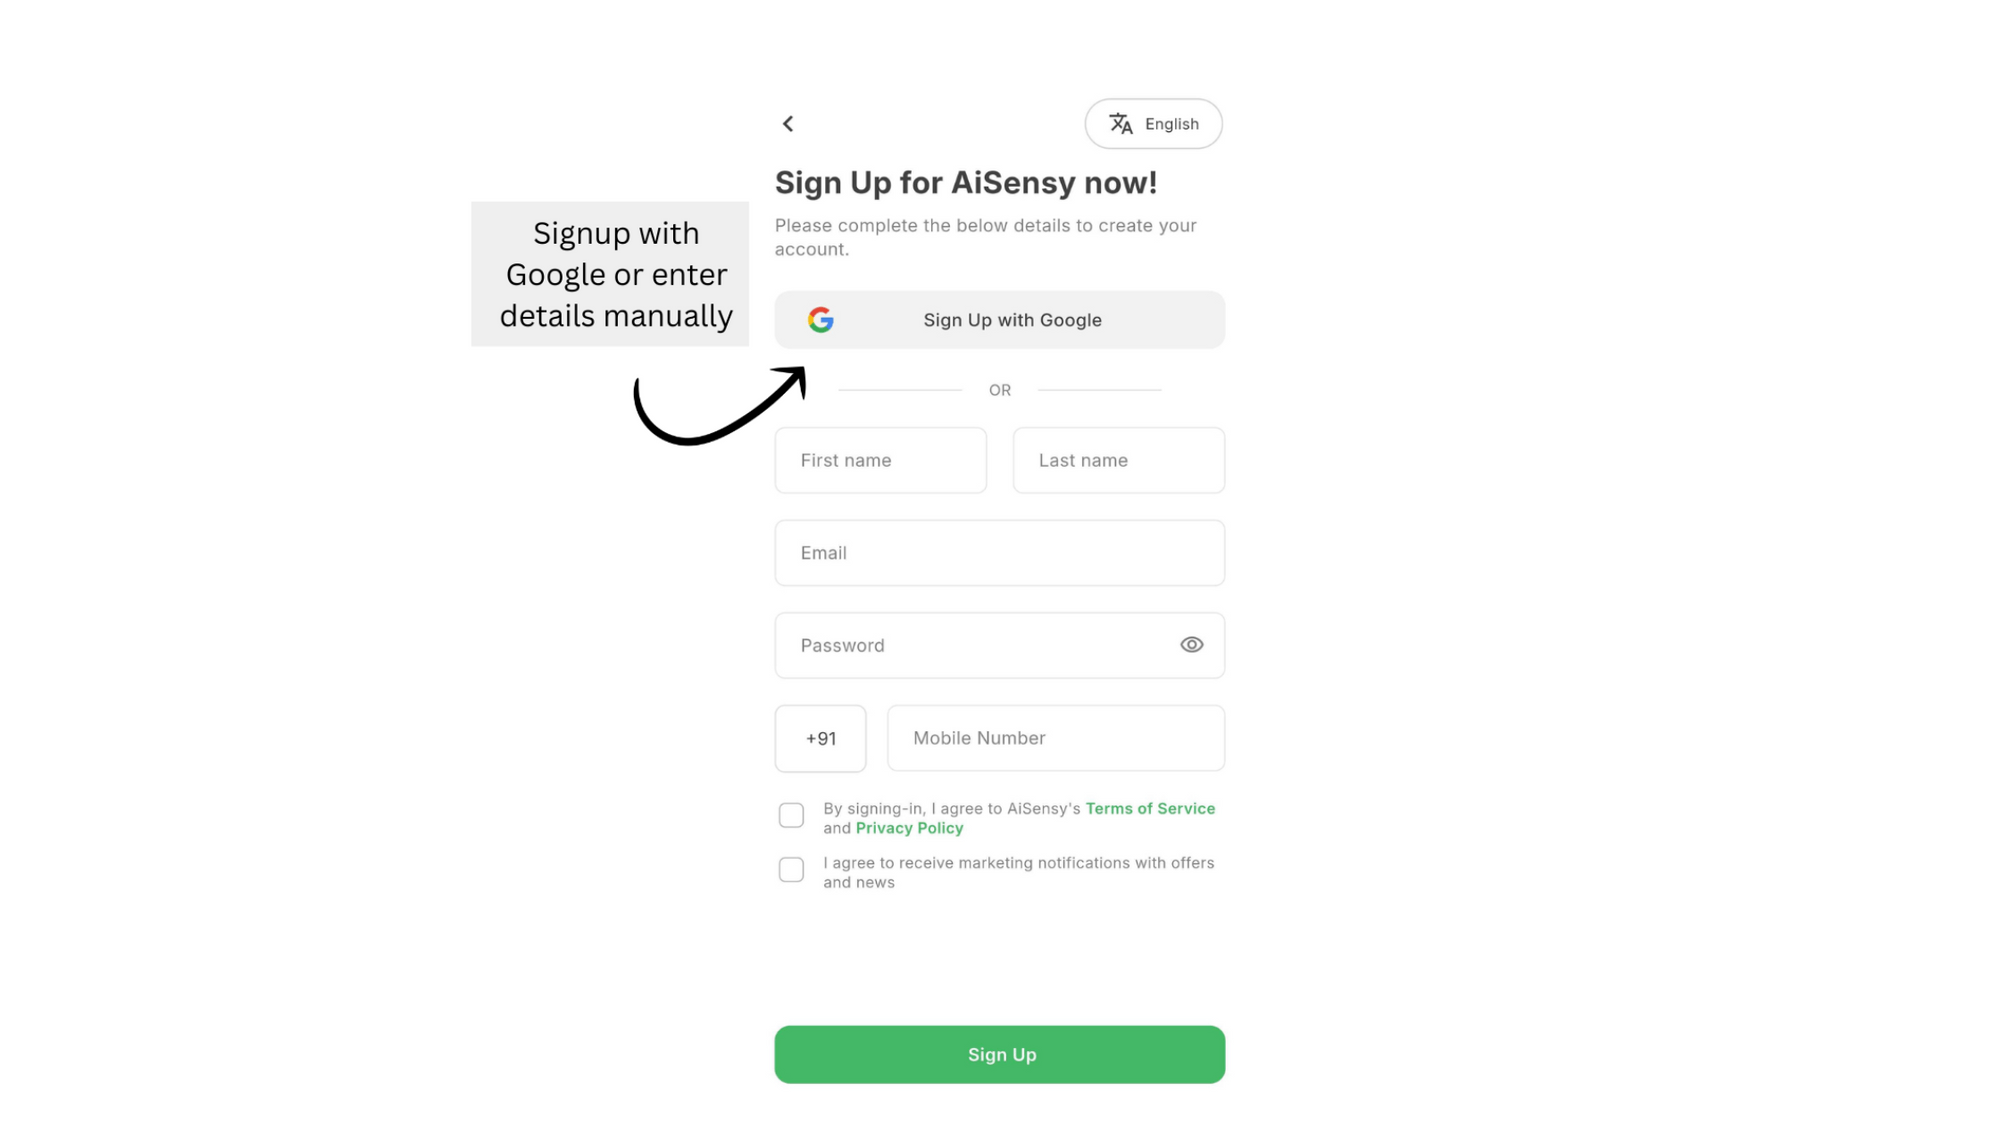
AiSensy pe Sign Up Karo
Aap apne Google account se quickly sign up kar sakte ho, ya manually bhi sign up kar sakte ho. Is tutorial mein hum Google account se sign up karna dikhayenge.
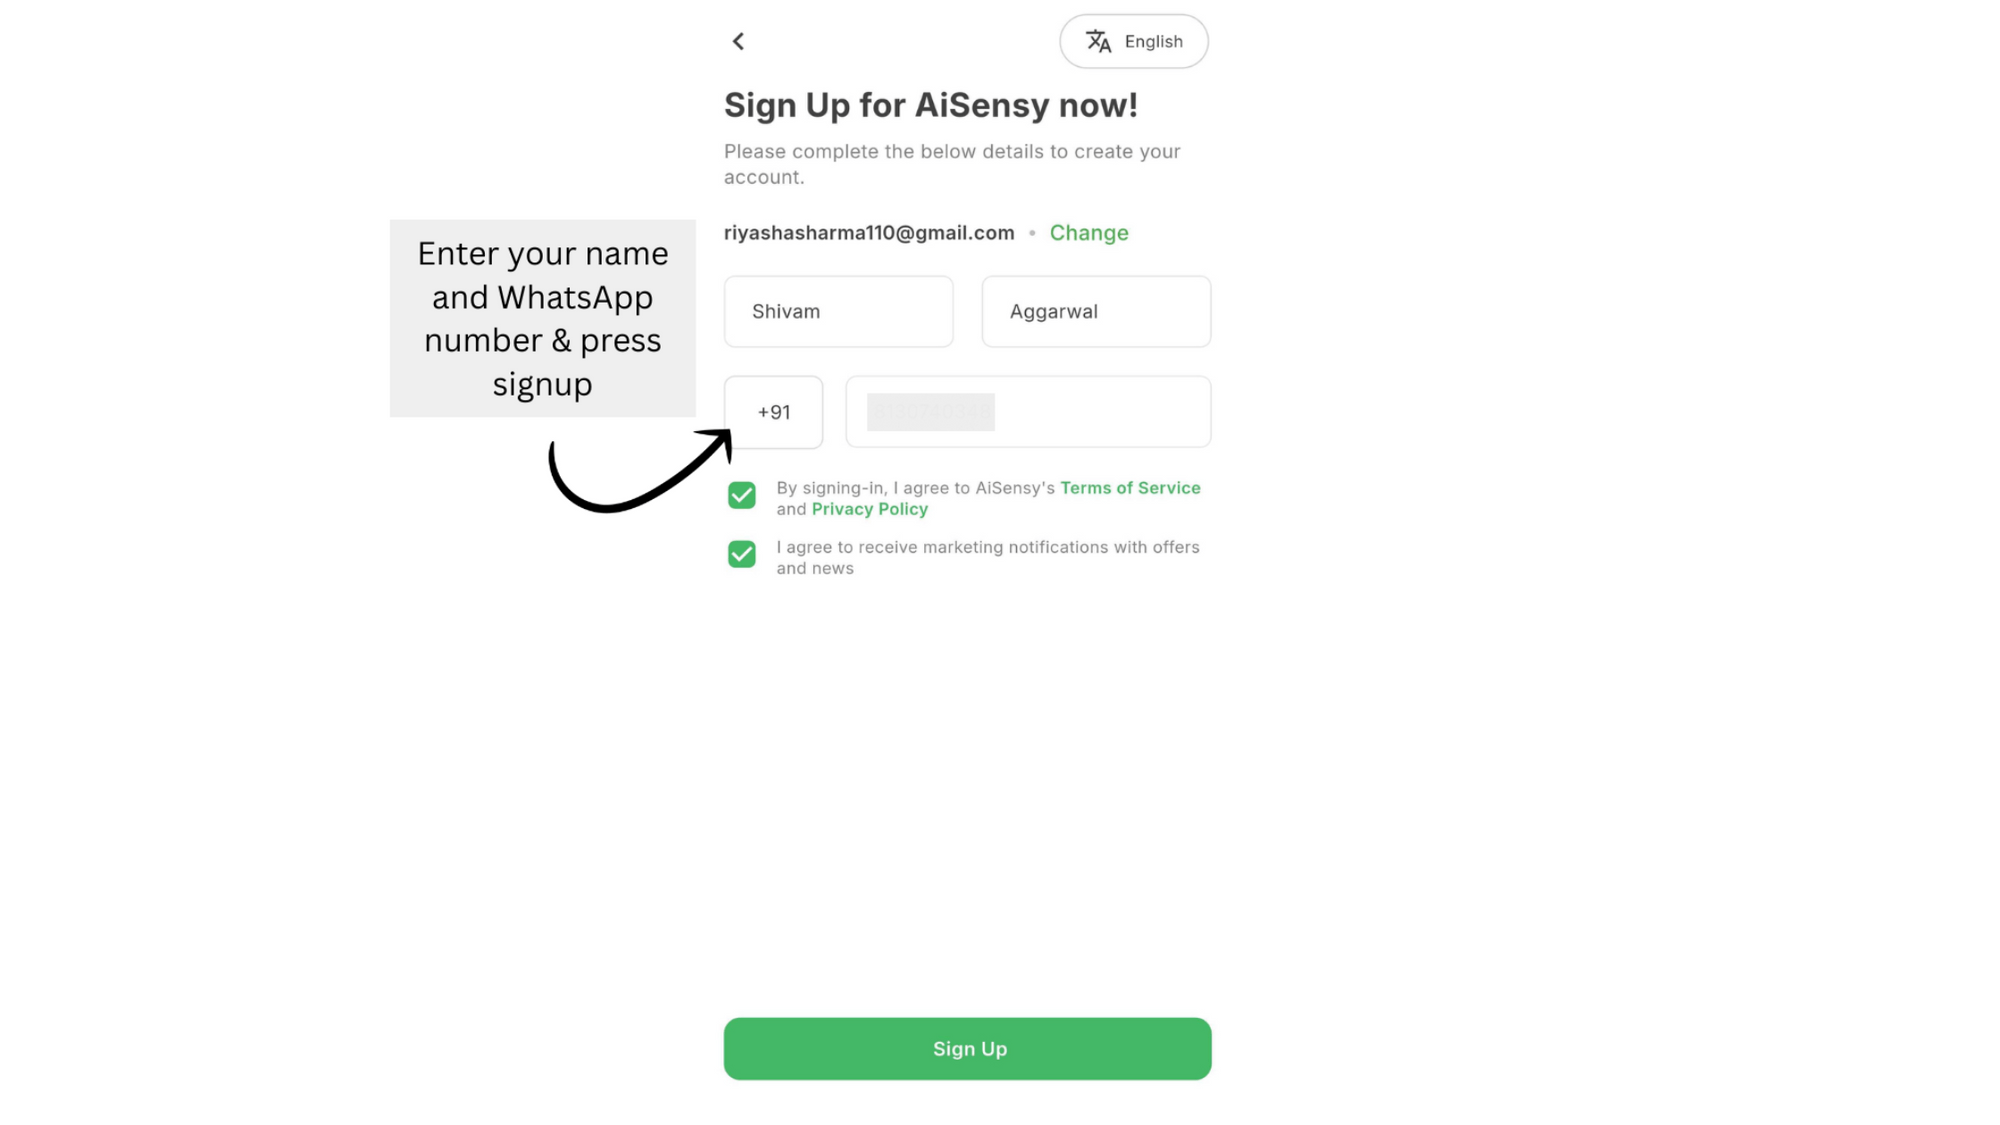
Apna WhatsApp Number Enter Karo
Apne shop ya showroom ka WhatsApp number use karo. Login confirm karne ke liye is number pe ek OTP aayega. Number add karne ke baad, AiSensy ki Terms of Service confirm karo aur Complete Signup pe tap karo.
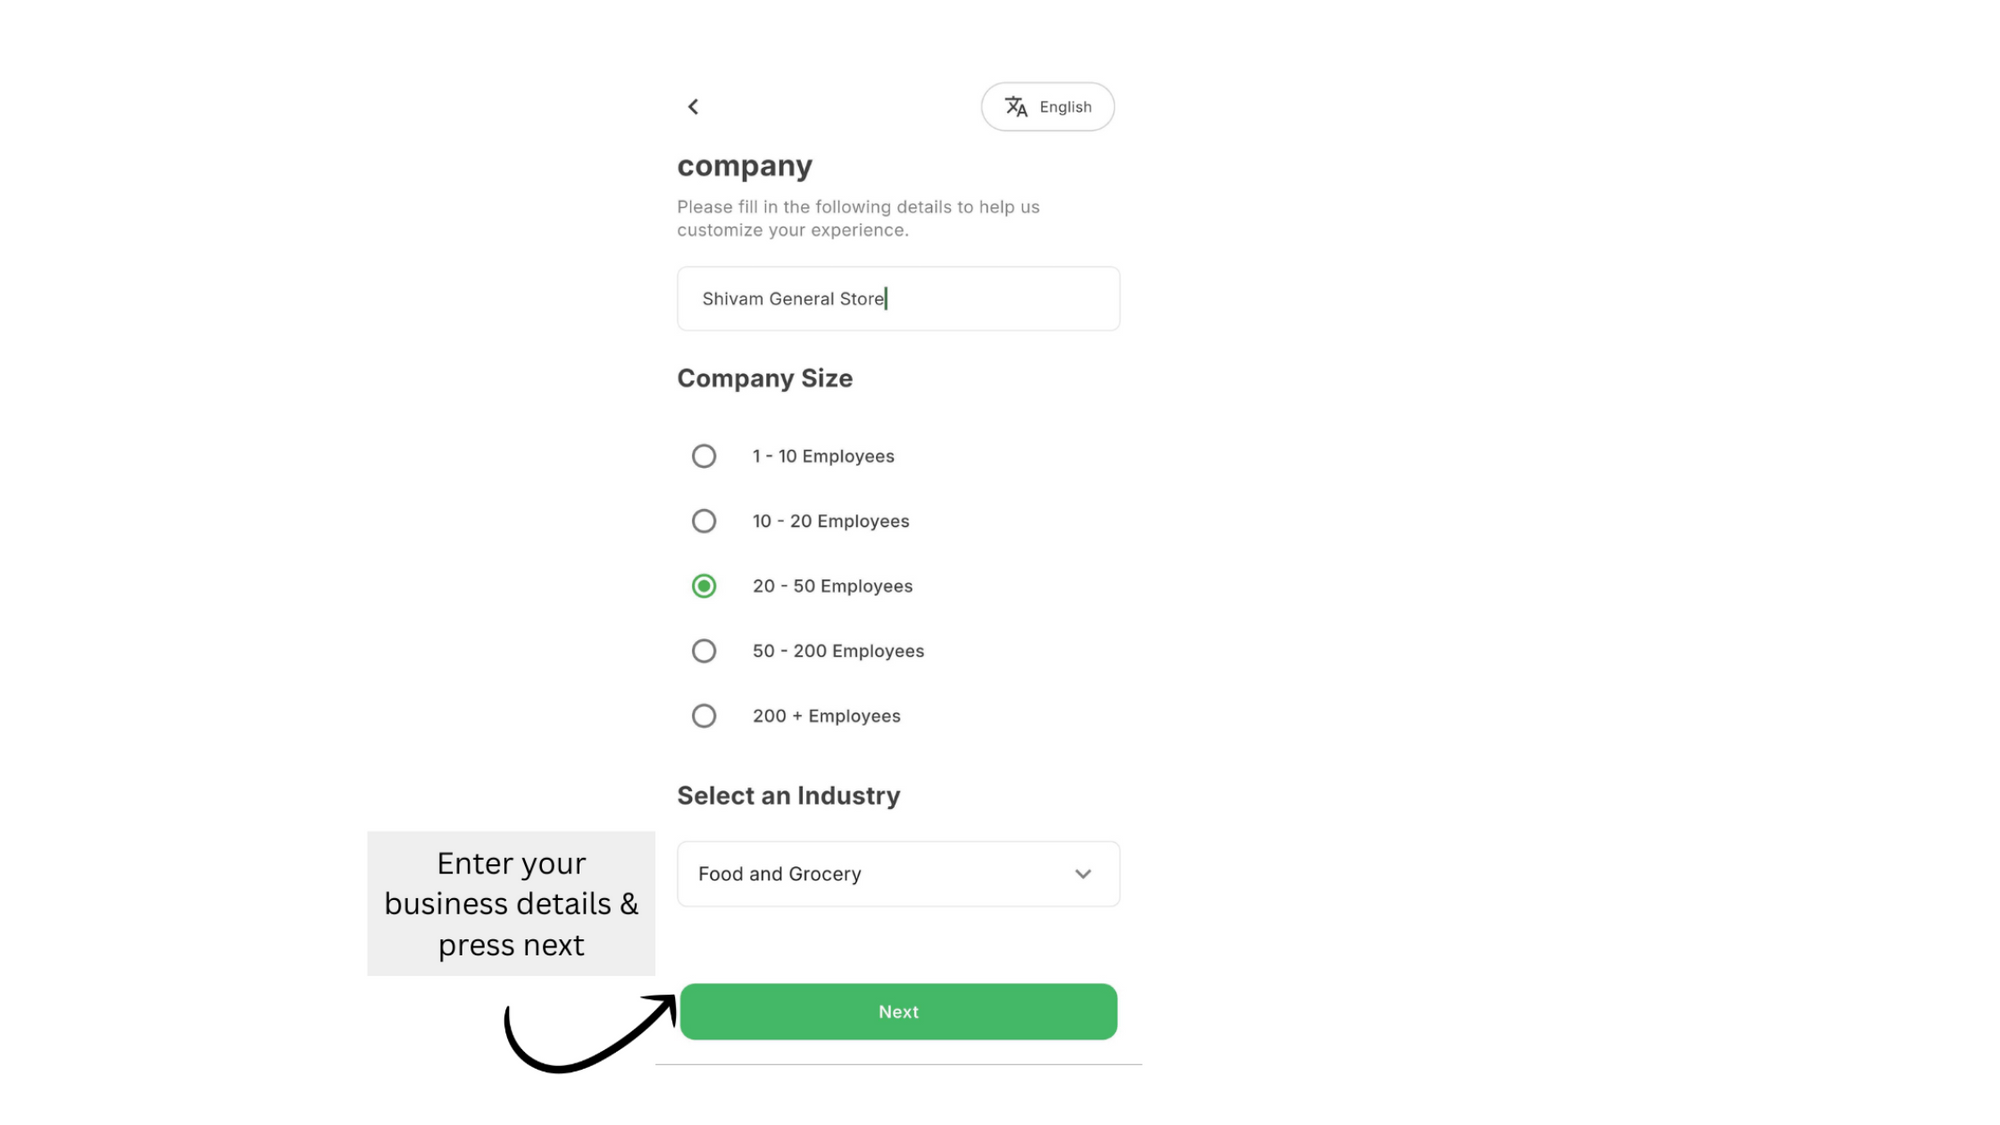
Apni Business Details Bharo
Apna business name, business type aur company size fill karo — isse aapka signup complete hoga aur aap dashboard access kar paoge.
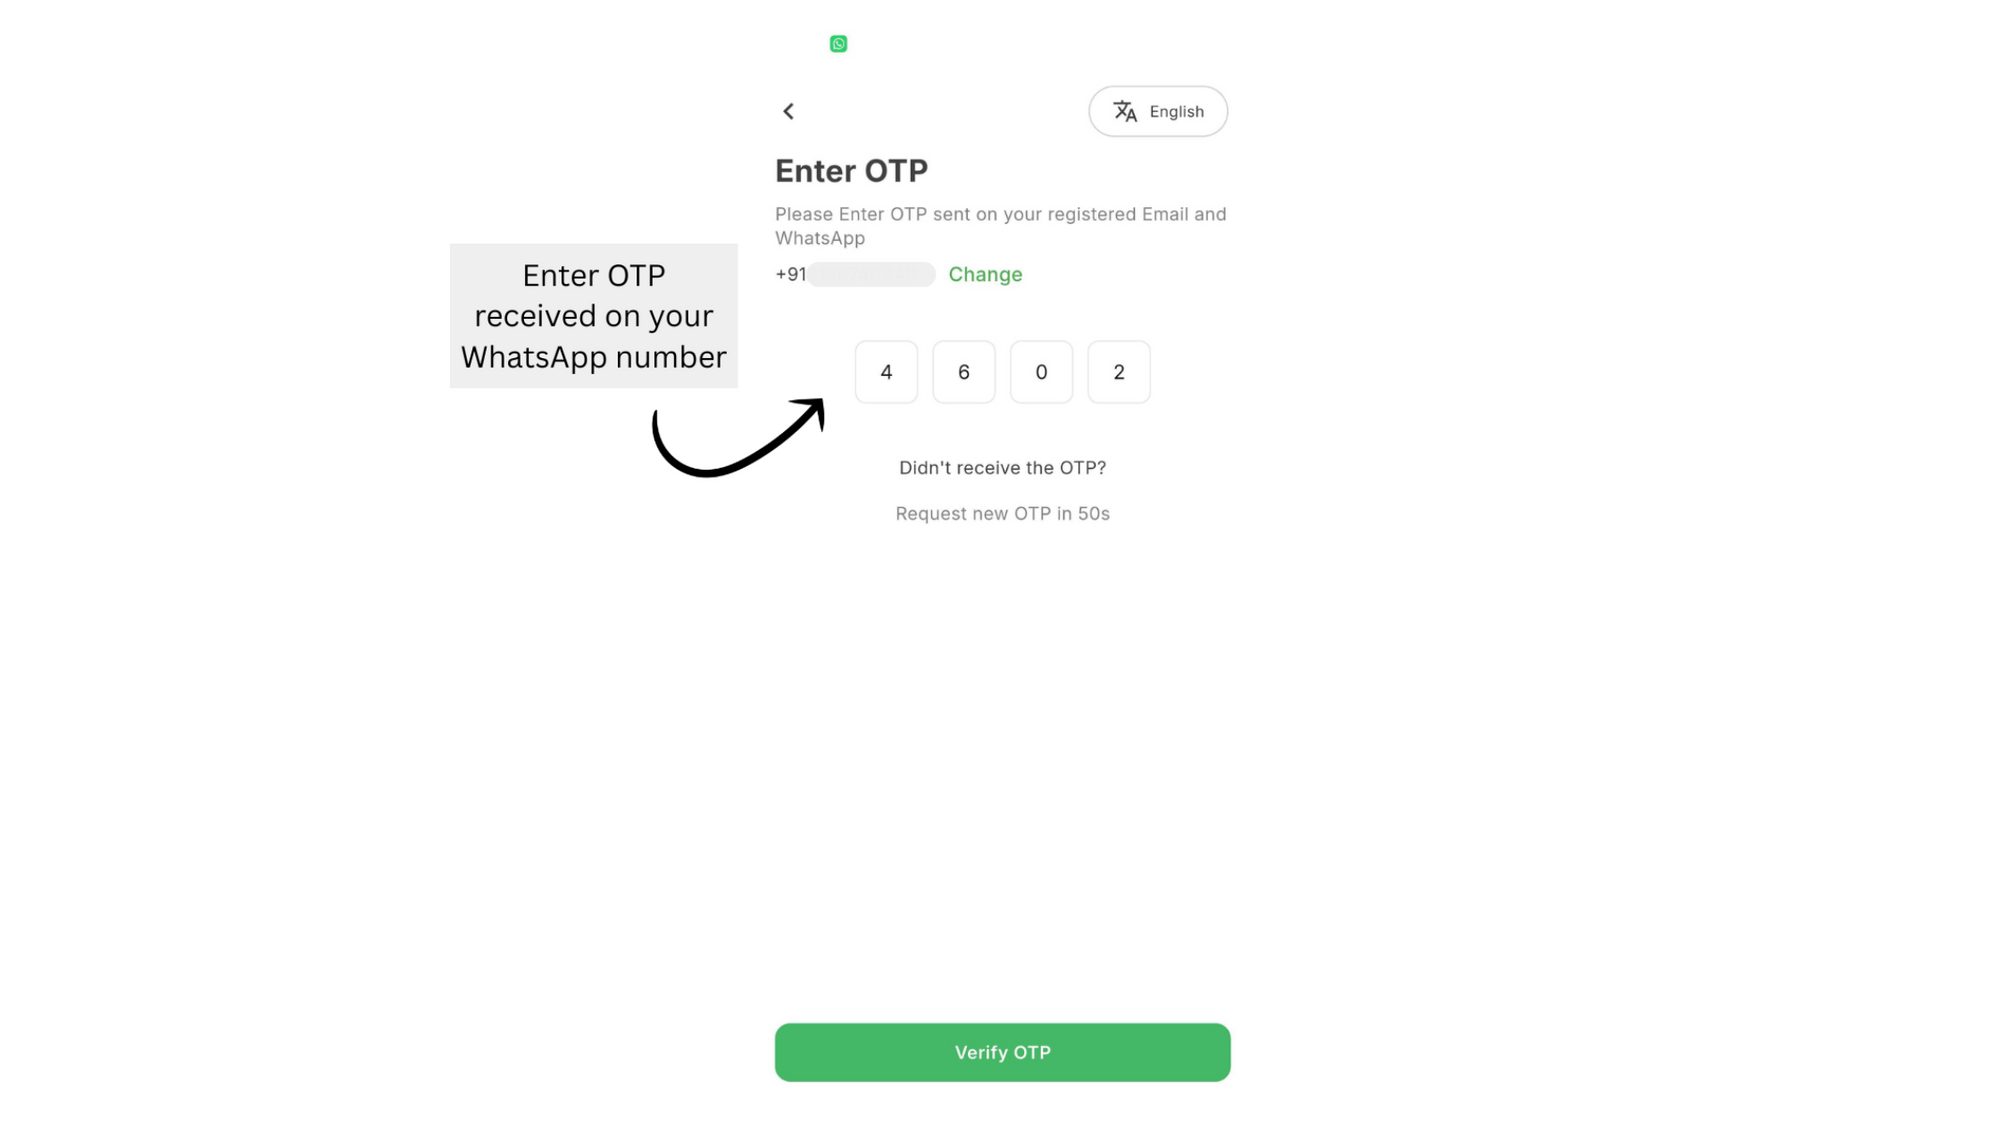
Apna WhatsApp Number Verify Karo
Apne WhatsApp number pe aaya OTP enter karo. OTP nahi aaya?
Humse contact karo:
💬 WhatsApp: 8064124245
📧 Email: shop@aisensy.com
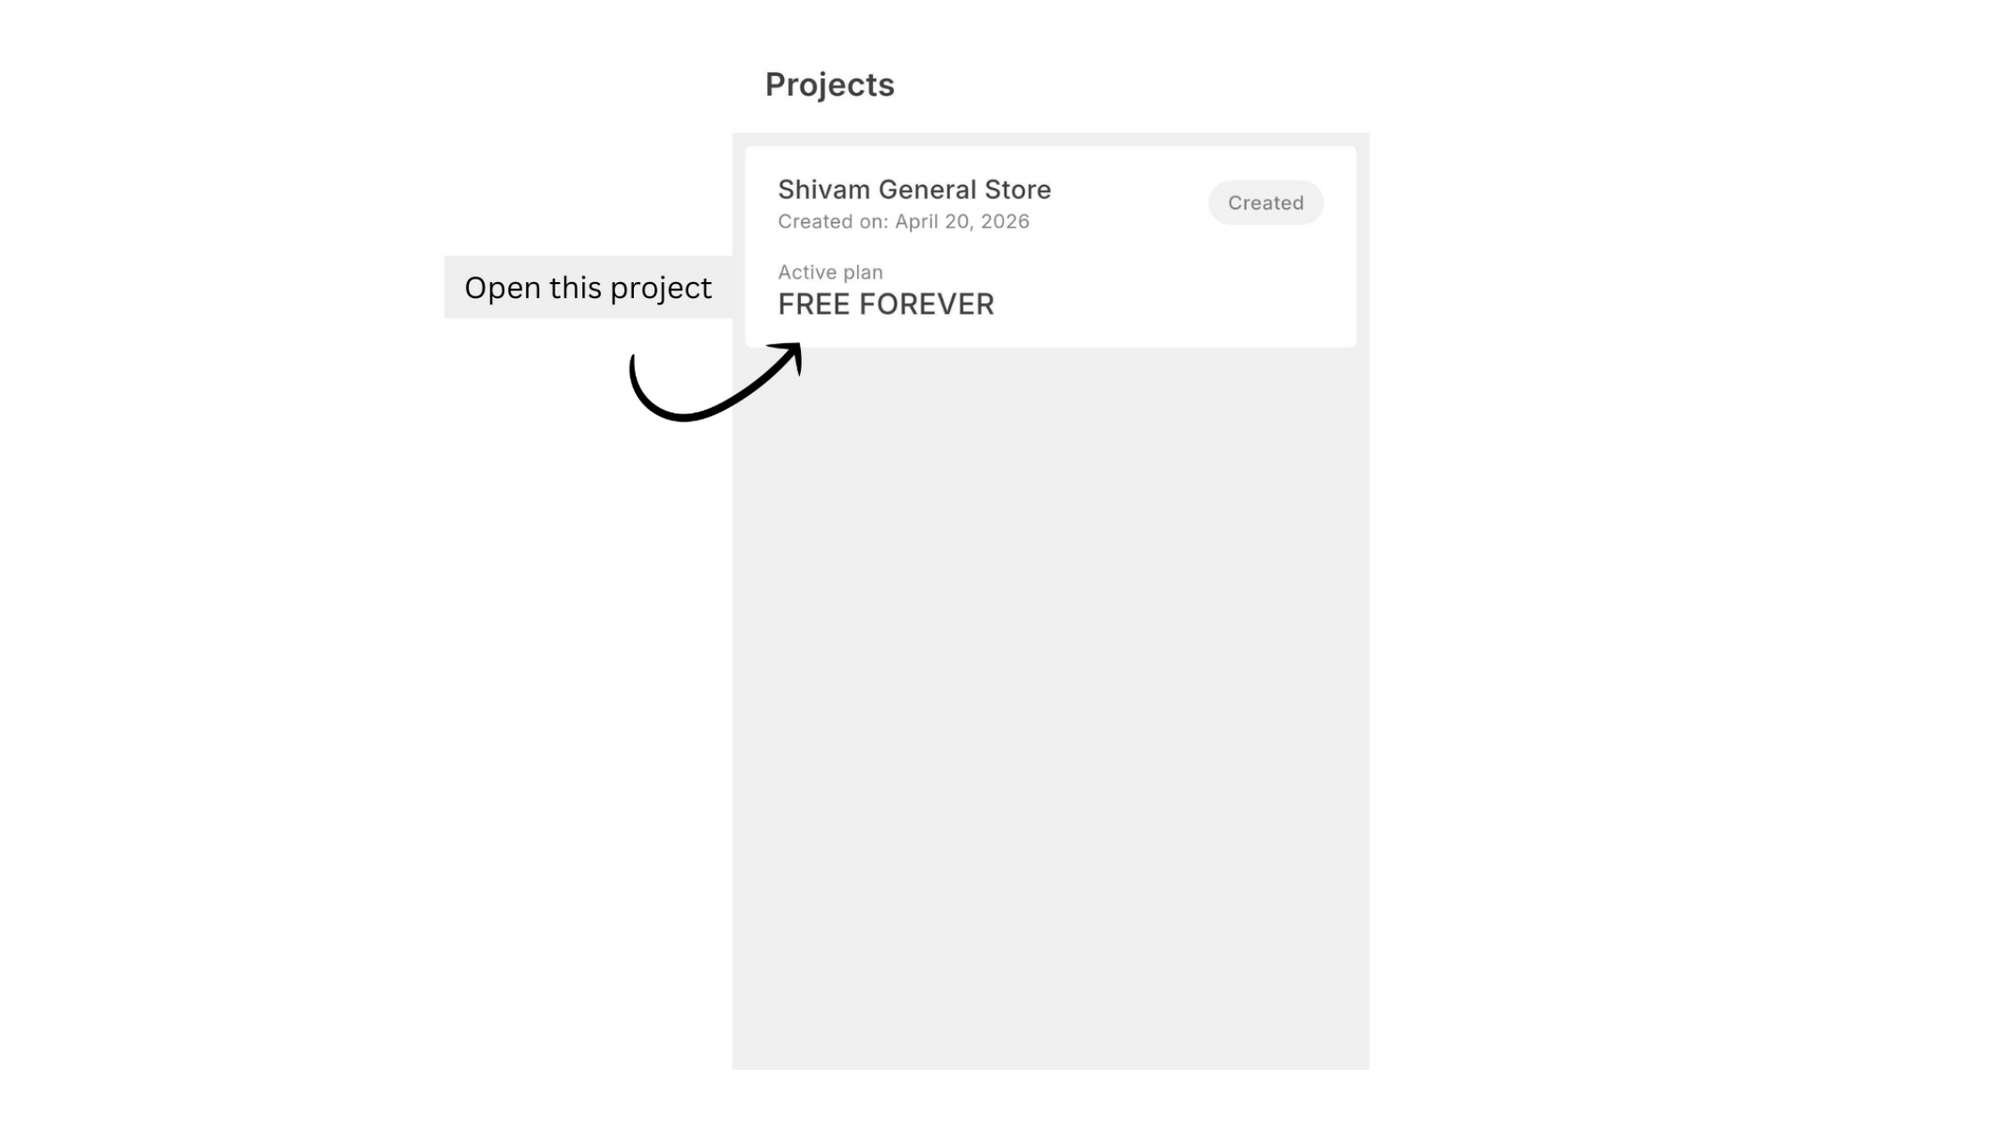
Apna Project Kholo
Upar image mein dikhaaye anusaar Project pe tap karo aur aage badhte raho.
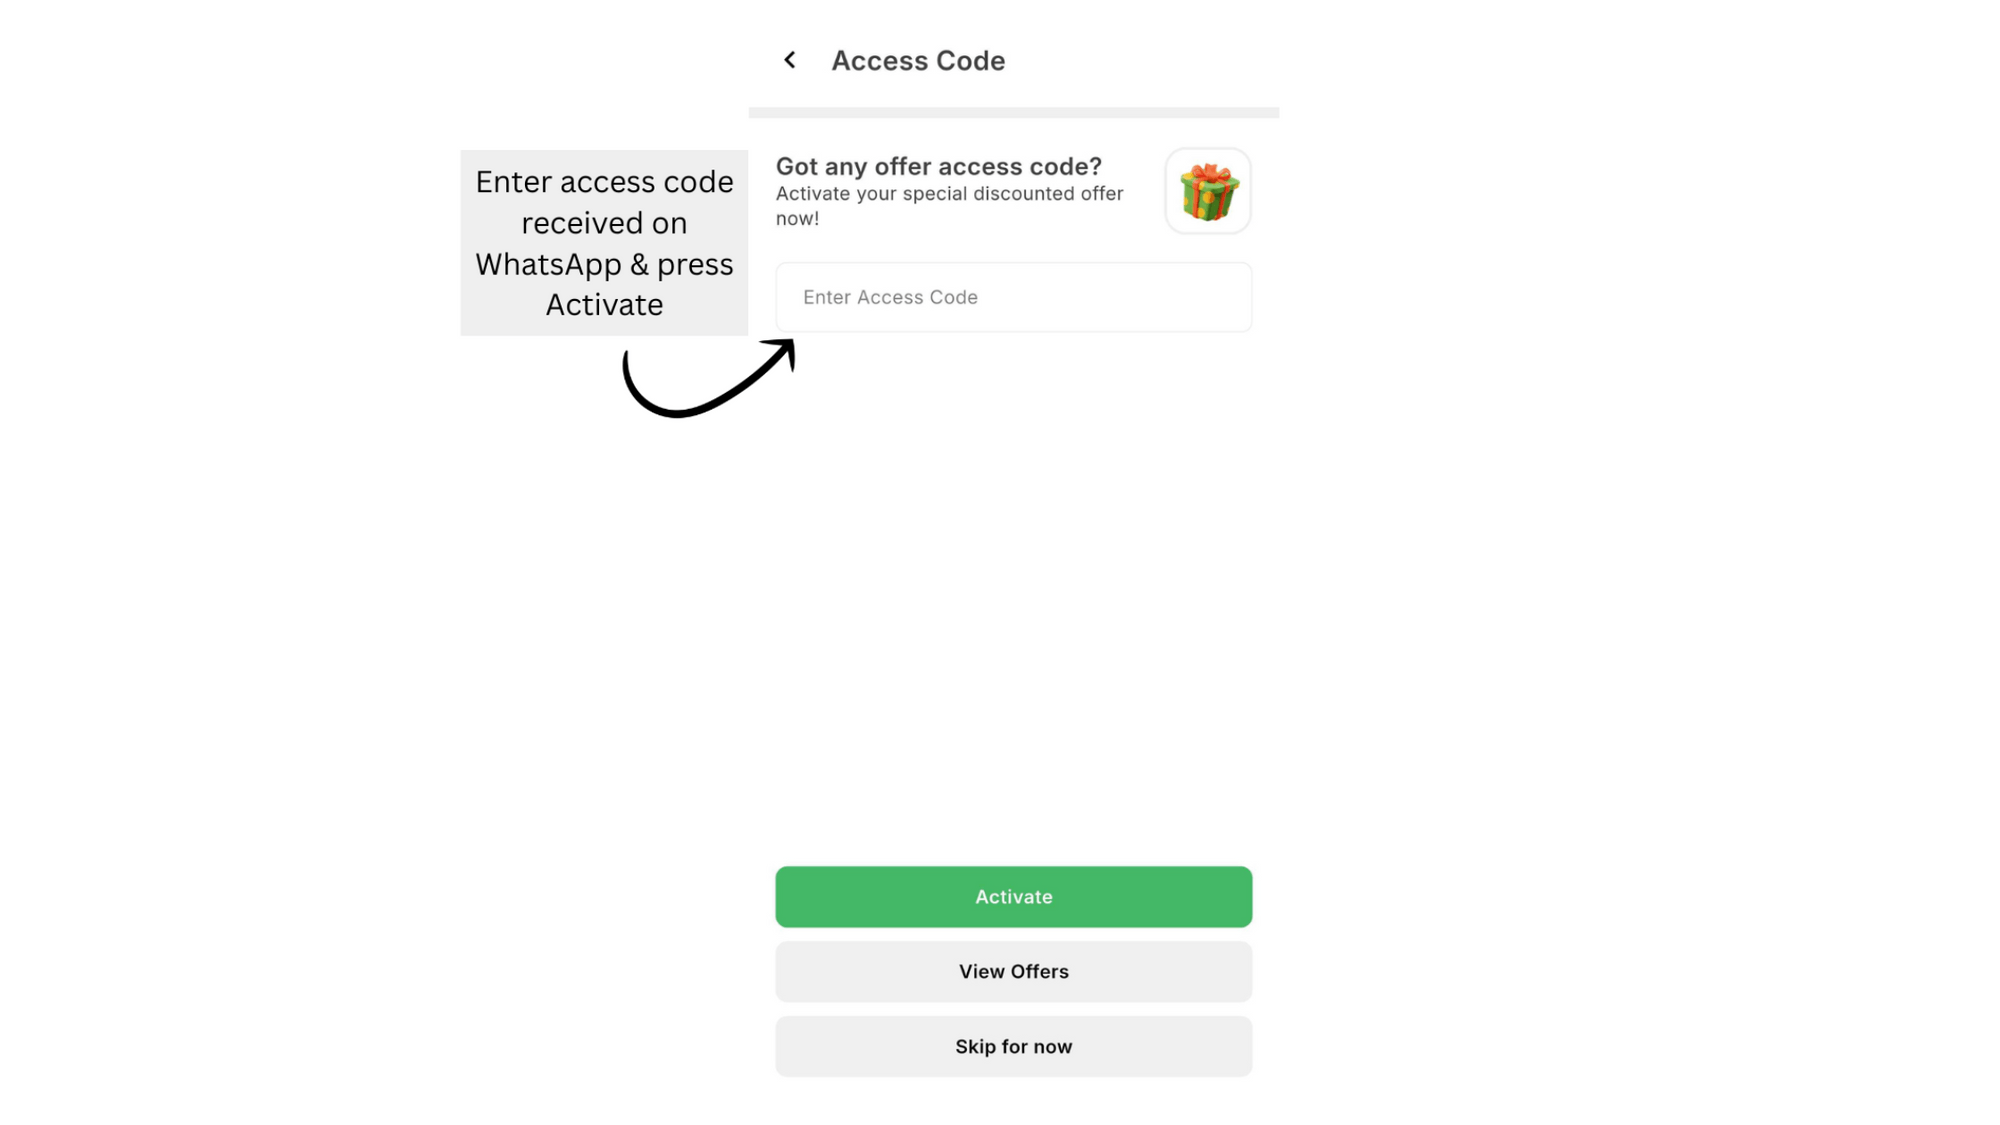
Apna Plan Activate Karo
Aapke WhatsApp ya email pe bheja gaya access code enter karo aur Activate pe tap karo — isse aapka Automations Lite Plan activate ho jaayega.
Sab set ho gaya! 🚀
Ab AiSensy ke saare features — jaise broadcasting, automations — use karne ke liye WhatsApp Business API ke liye apply karna hoga.
Step 2: WhatsApp Business API ke liye Apply Karo
Access code se AiSensy Lite Plan activate karne ke baad, ab WhatsApp Business API ke liye apply karne ka time aa gaya hai. Yeh step bahut important hai — API ke saath hi aap AiSensy ke features jaise automation, bulk WhatsApp broadcasting, live chat aur bahut kuch use kar paoge.
Neeche diye steps follow karo.
WhatsApp API ke liye Apply karne se pehle kya chahiye
Business License (GST / MSME / Incorporation Certificate)
WhatsApp Business API ke liye apply karne ke liye aapke paas ek official business verification document hona chahiye — jaise GST, MSME, Incorporation ya Udyam certificate.
Ek Fresh Phone Number
Aapko ek aisa active phone number chahiye jo kisi bhi WhatsApp account pe registered na ho. Purana number bhi use kar sakte ho, lekin pehle us number pe active WhatsApp app/account permanently delete karna hoga.
WhatsApp Business API ke liye Steps
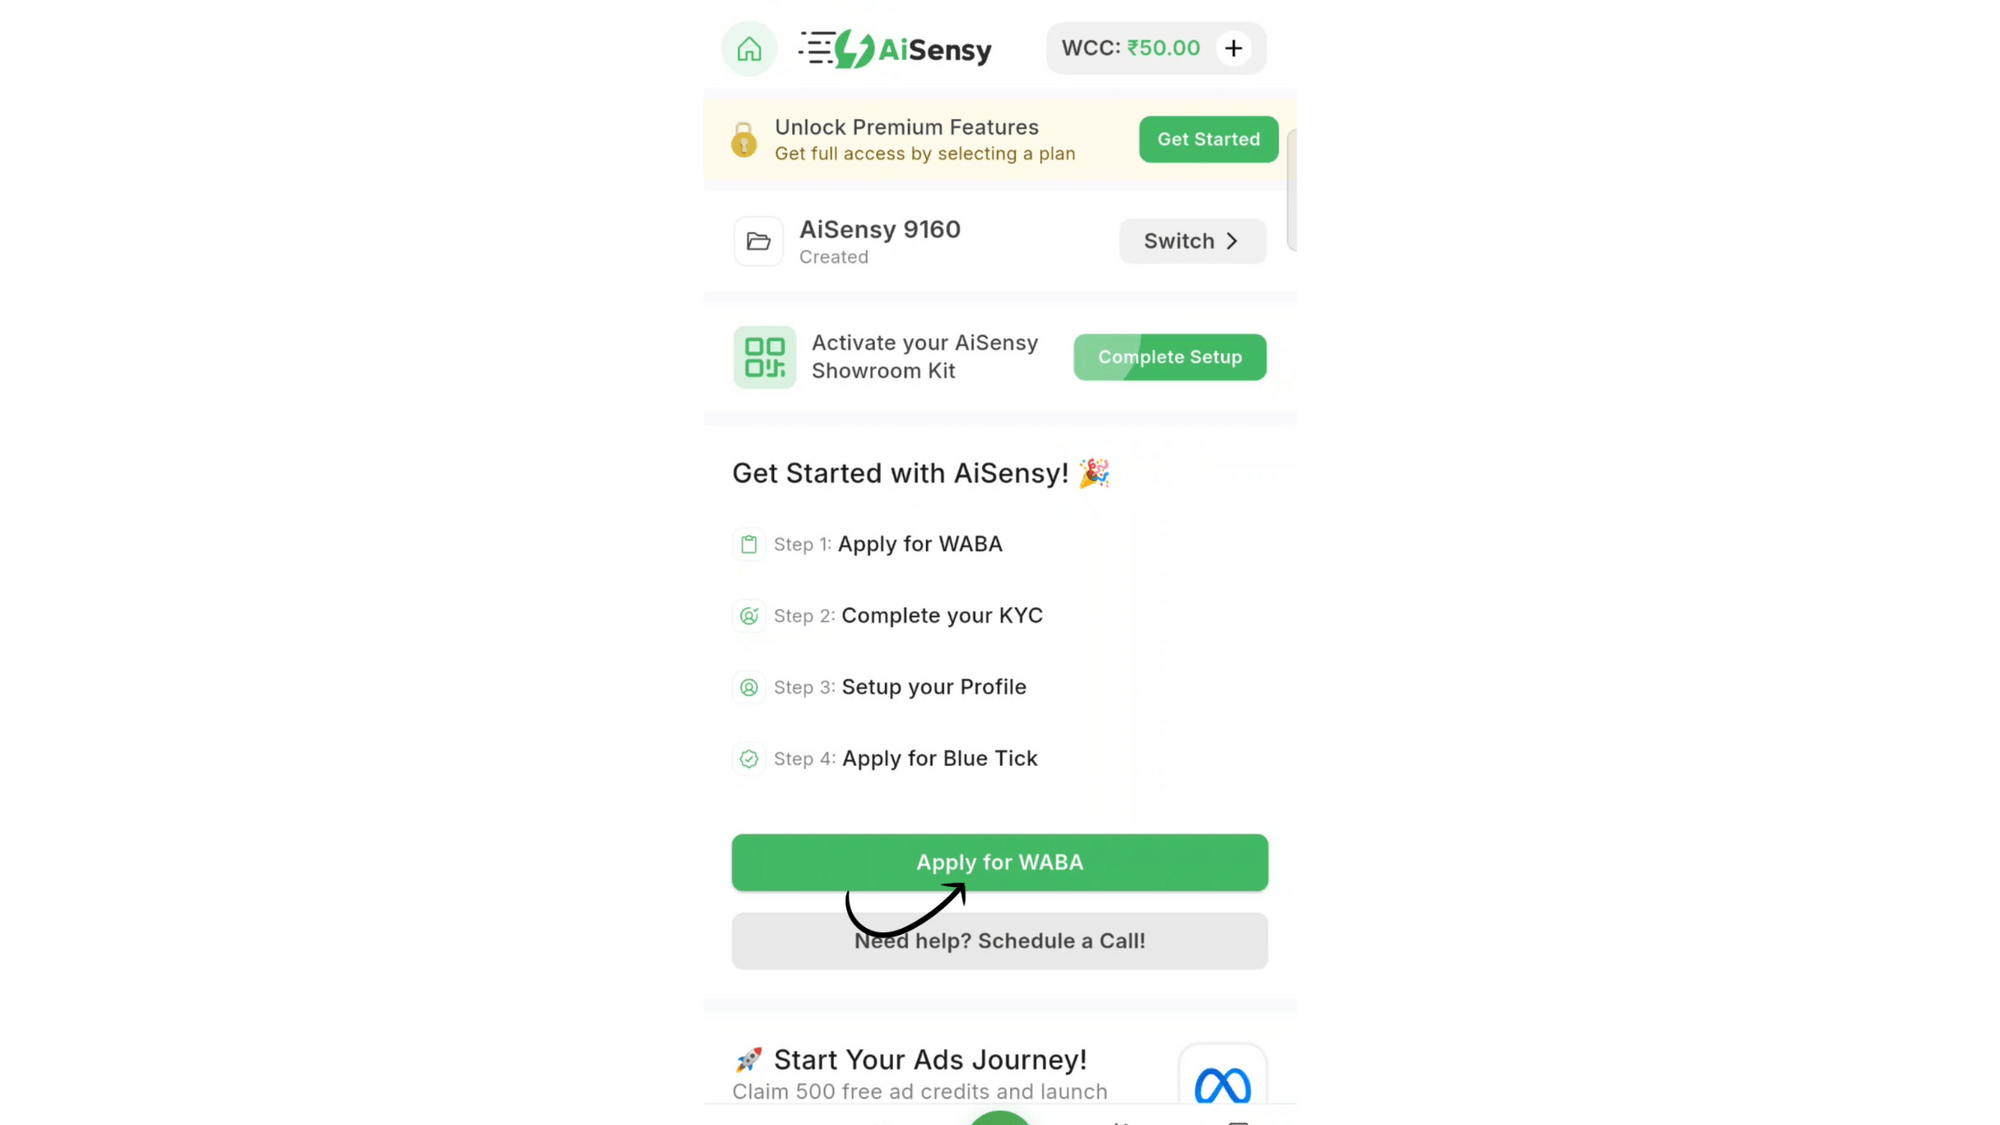
AiSensy Mobile app mein "Apply for WABA" button pe click karo (WhatsApp Business API)
Button click karte hi aap Facebook pe redirect ho jaoge, jahan "Start WhatsApp API Registration" button pe tap karna hai.
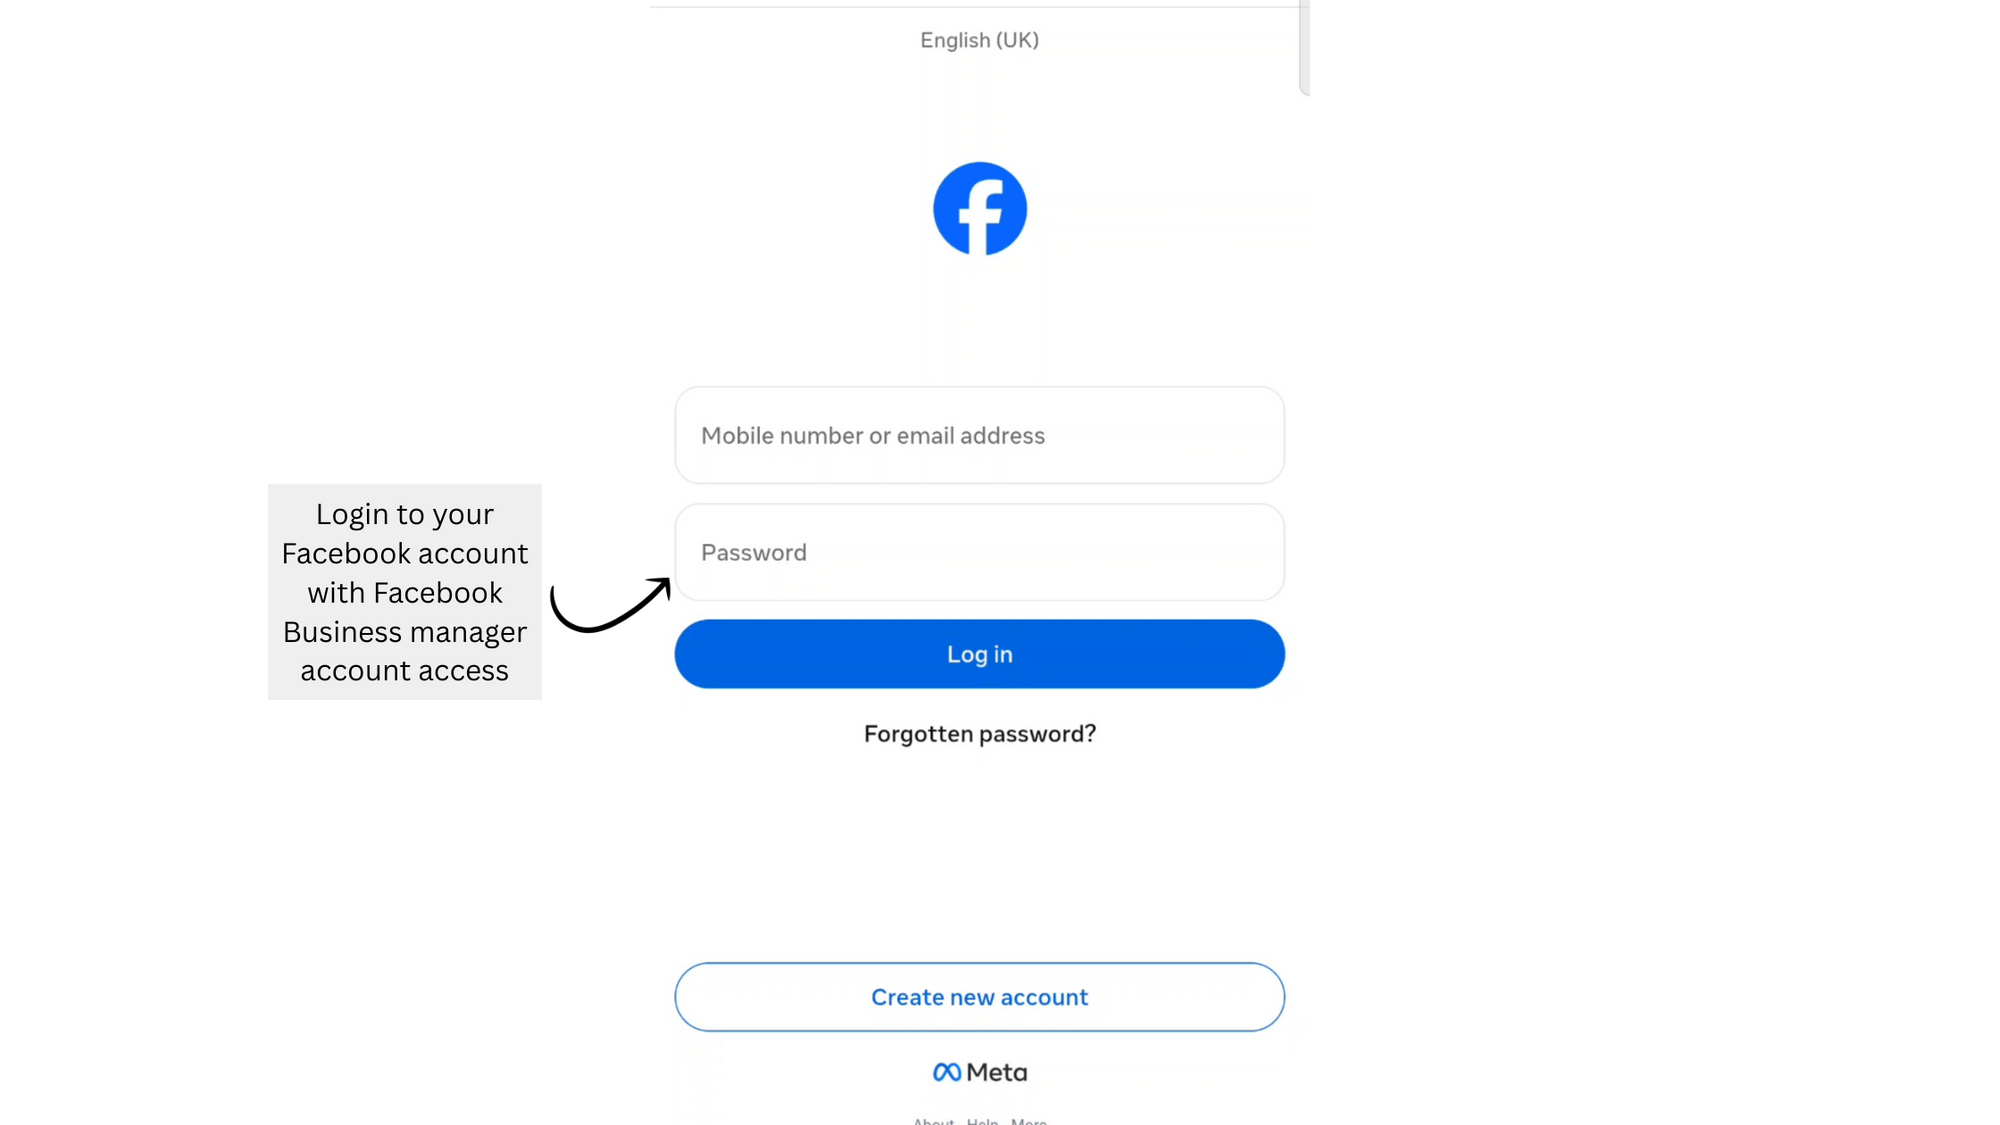
Facebook Login Karo
Facebook pe login karo aur ensure karo ki aapke paas us Facebook Business Manager account ka admin access hai.
Agar Facebook Business Manager account nahi hai, toh is doc mein diye steps follow karke bana sakte ho. Bahut simple hai — sirf 2-3 minutes lagenge.
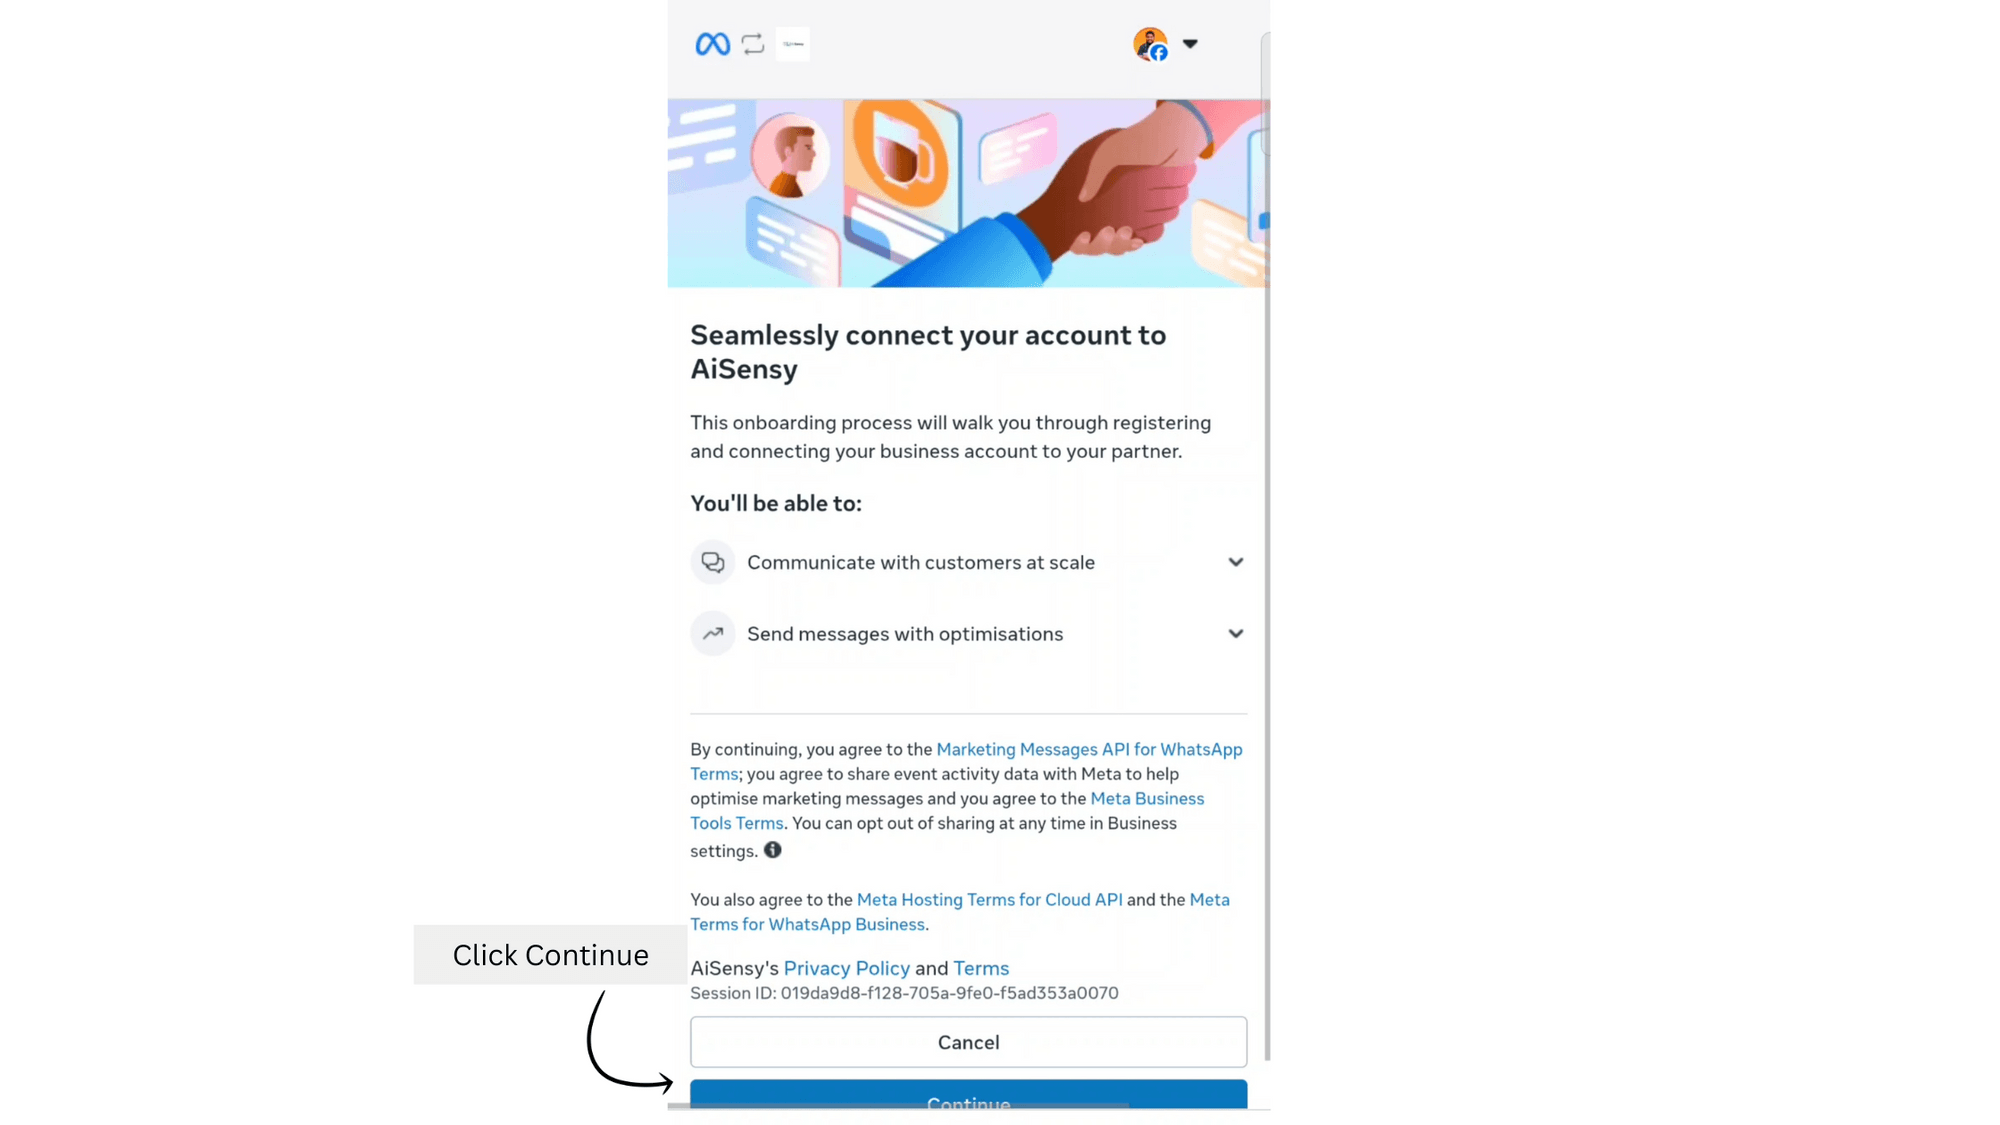
'Continue' pe Click Karo
Isse aap Meta window pe redirect ho jaoge jahan WhatsApp Business API ke liye apply kar sakte ho.
Application bharna shuru karne ke liye 'Continue' button pe click karo.
Apna Facebook Business Manager Account Select Karo
Woh FBM account select karo jise aap apne WhatsApp Business API Account ke saath associate karna chahte ho.
WhatsApp Business Account ke under "Create a WhatsApp Business account" select karo. Phir 'Next' pe click karo.

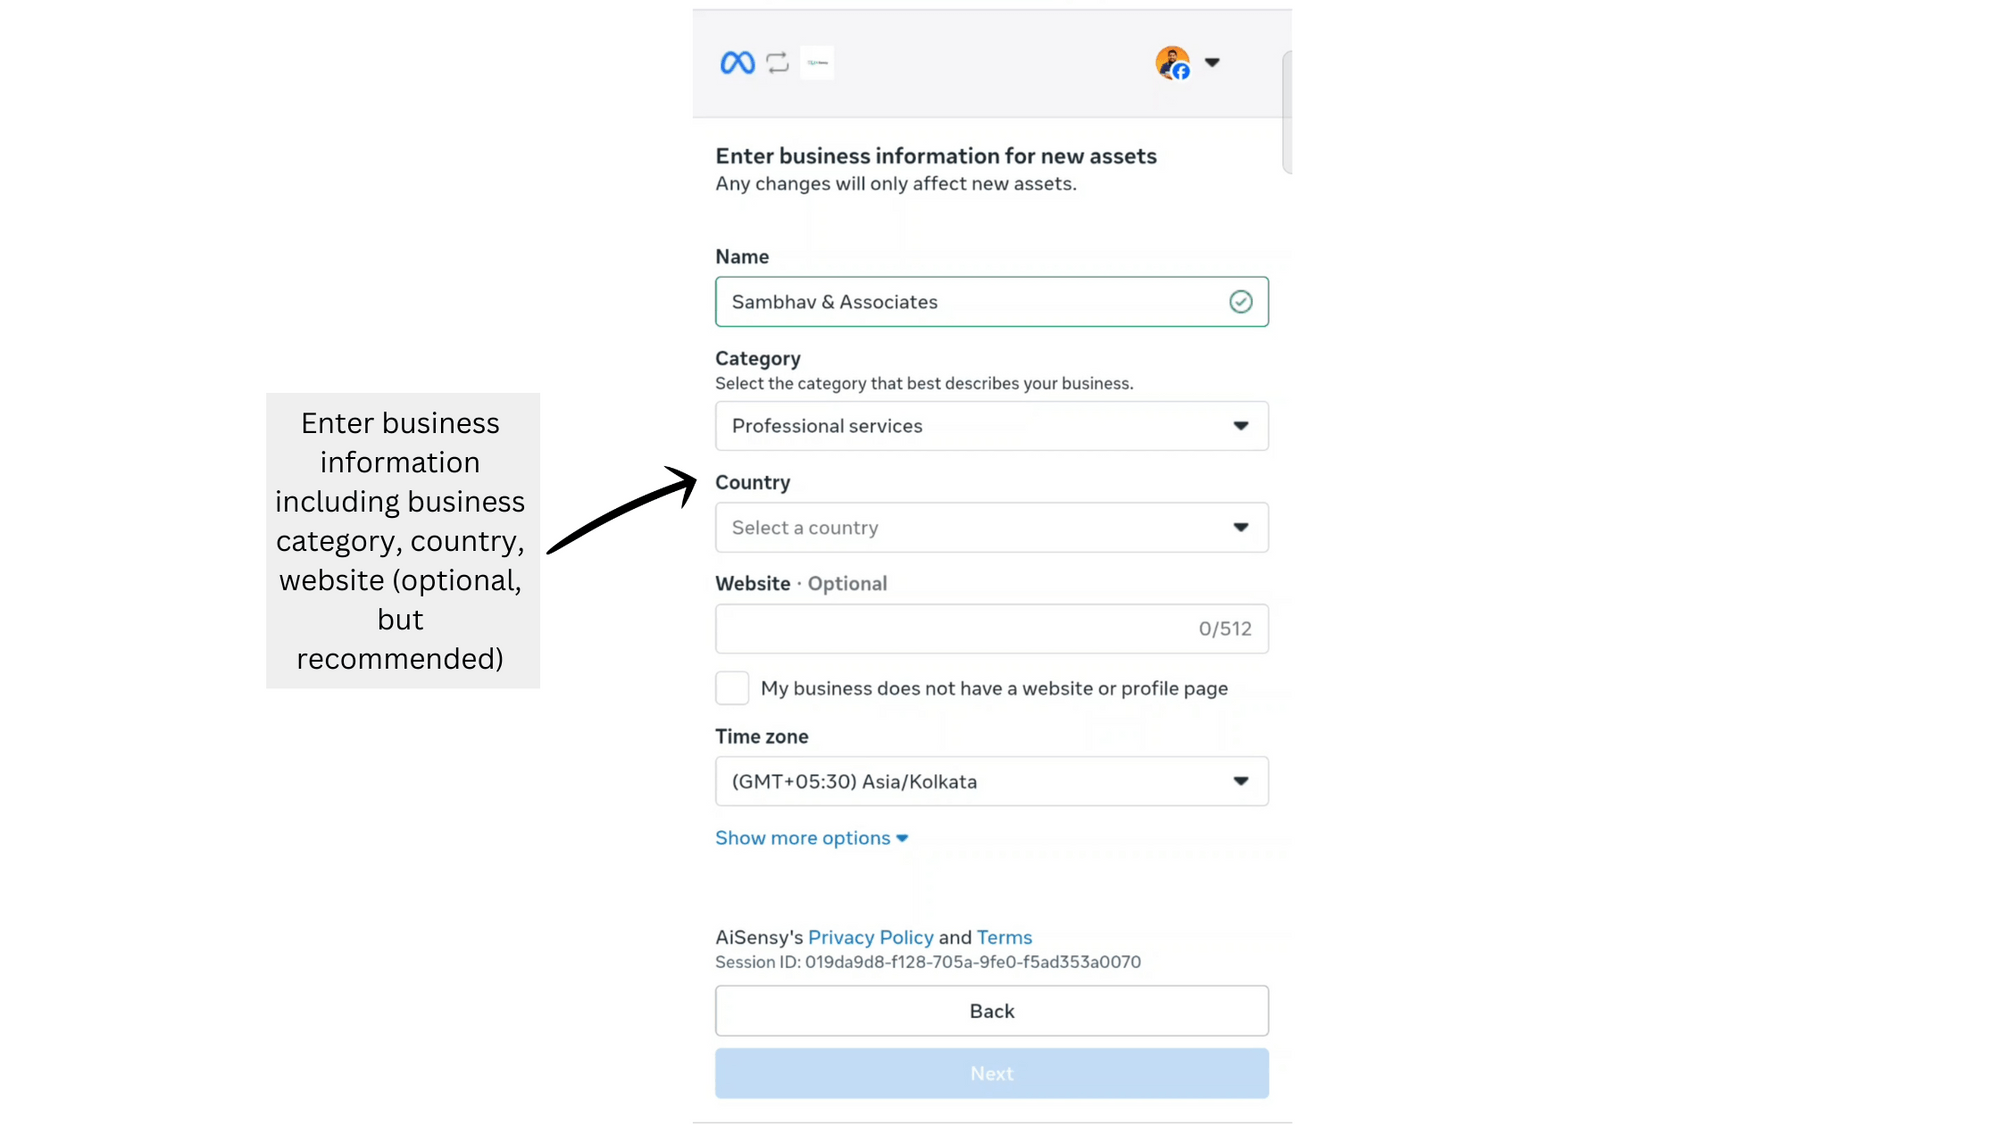
Business Address Details Add Karo
Yahan yeh details fill karo:
Name: Apna WhatsApp business account name chunno. Yeh kuch bhi business se related ho sakta hai.
Note — Yeh woh Display Name nahi hai jo end users ko dikhega. Yeh sirf FB Business Manager ke andar bana WhatsApp Business Account ka naam hai.
Business Category: Apne business ke liye sabse relevant industry select karo.
Website: Website link add karna optional hai, lekin smooth onboarding aur quick approval ke liye recommend kiya jaata hai.
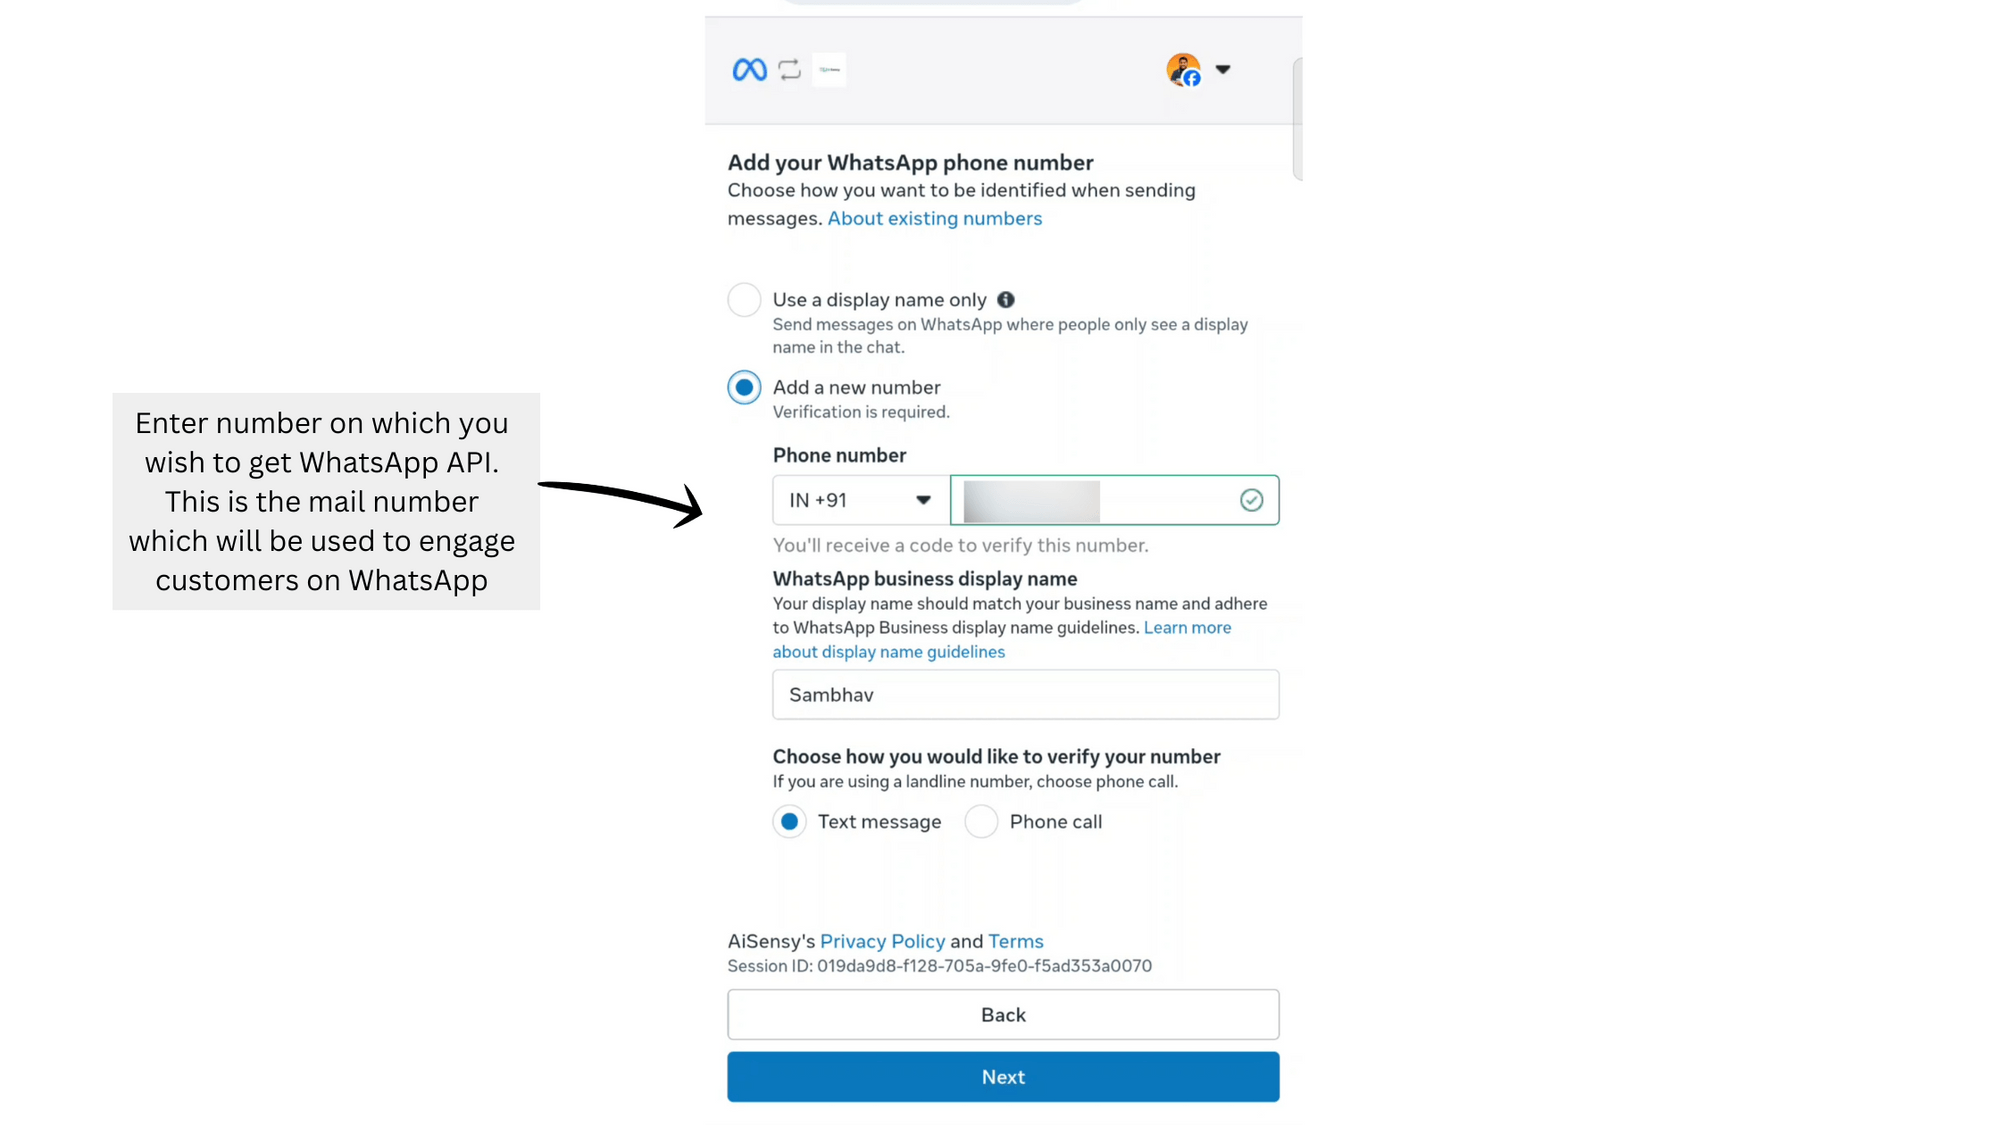
Naya ya Existing WhatsApp Business API Number Add Karo
"Add a new or existing number" select karo aur woh phone number enter karo jis par WhatsApp Business API lena hai.
Ensure karo ki number connected ho aur SMS ke through code receive kar sake.
Number add karne ke baad 'Next' press karo.
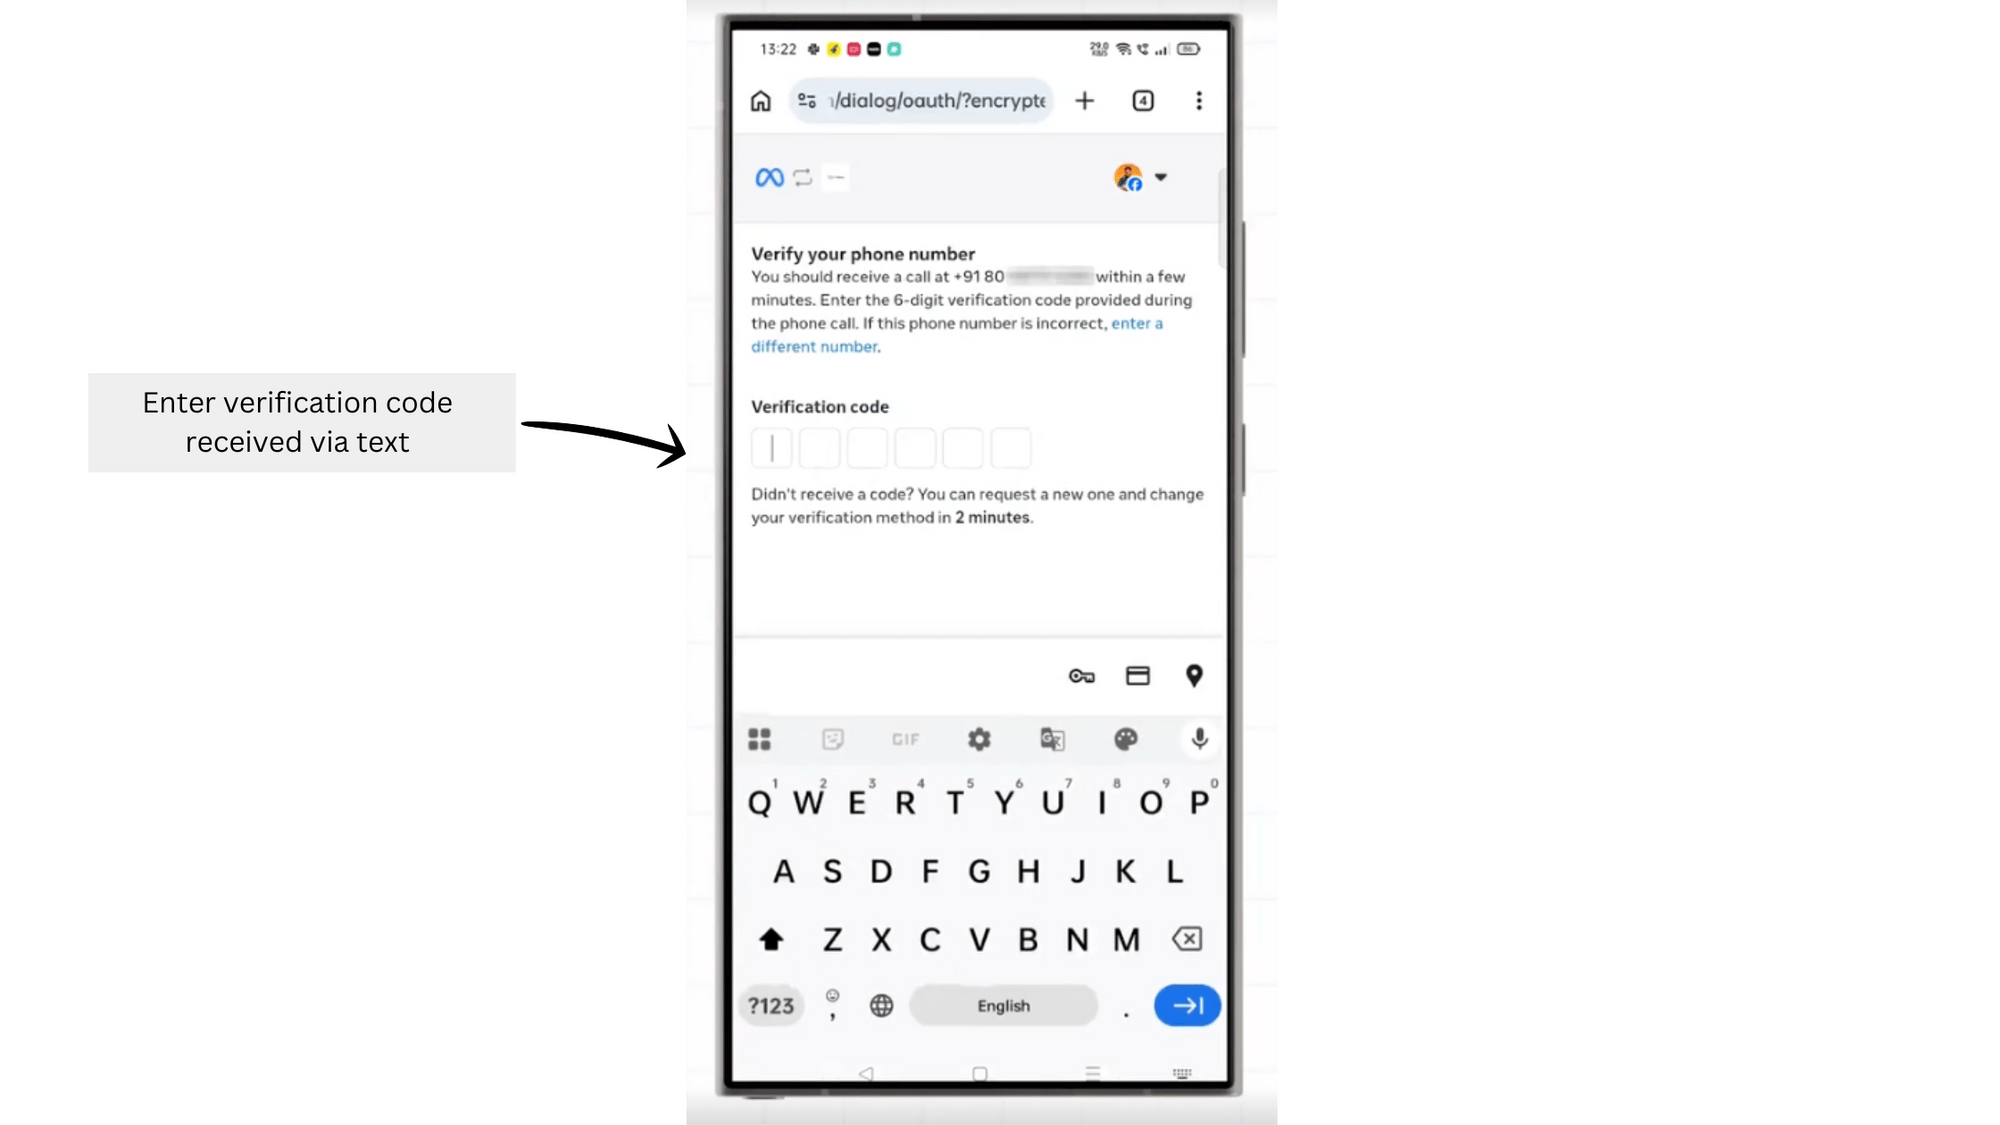
Text pe Aaya Verification Code Enter Karo
Note: Agar aap AiSensy ka WhatsApp Virtual number use kar rahe ho, toh code receive karne ke liye text option hi select karo — AiSensy ke Virtual number pe call ke through code nahi aata.
WhatsApp API Application Submit karne ke liye Confirm pe Tap Karo.
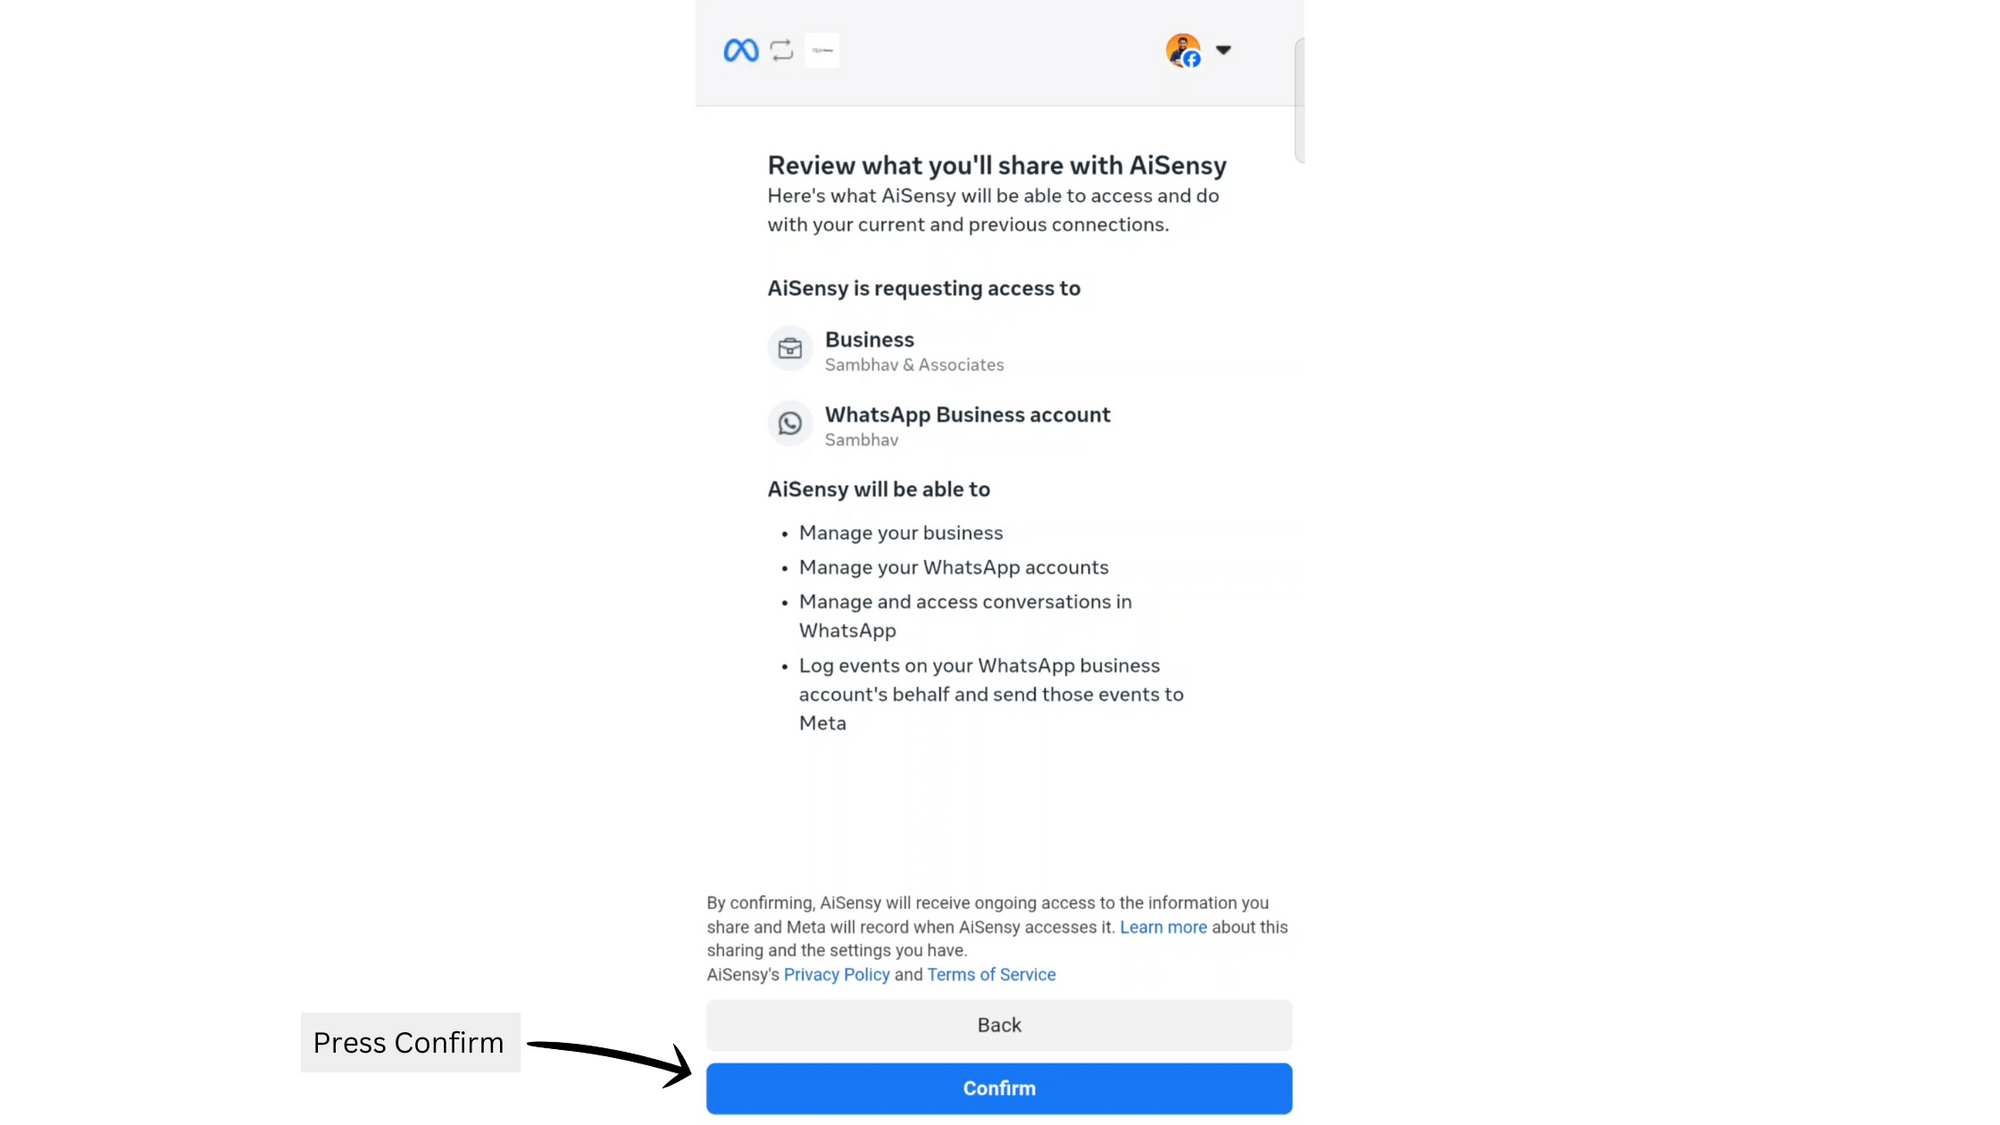
Aapki WhatsApp Business API Application ab review under hai
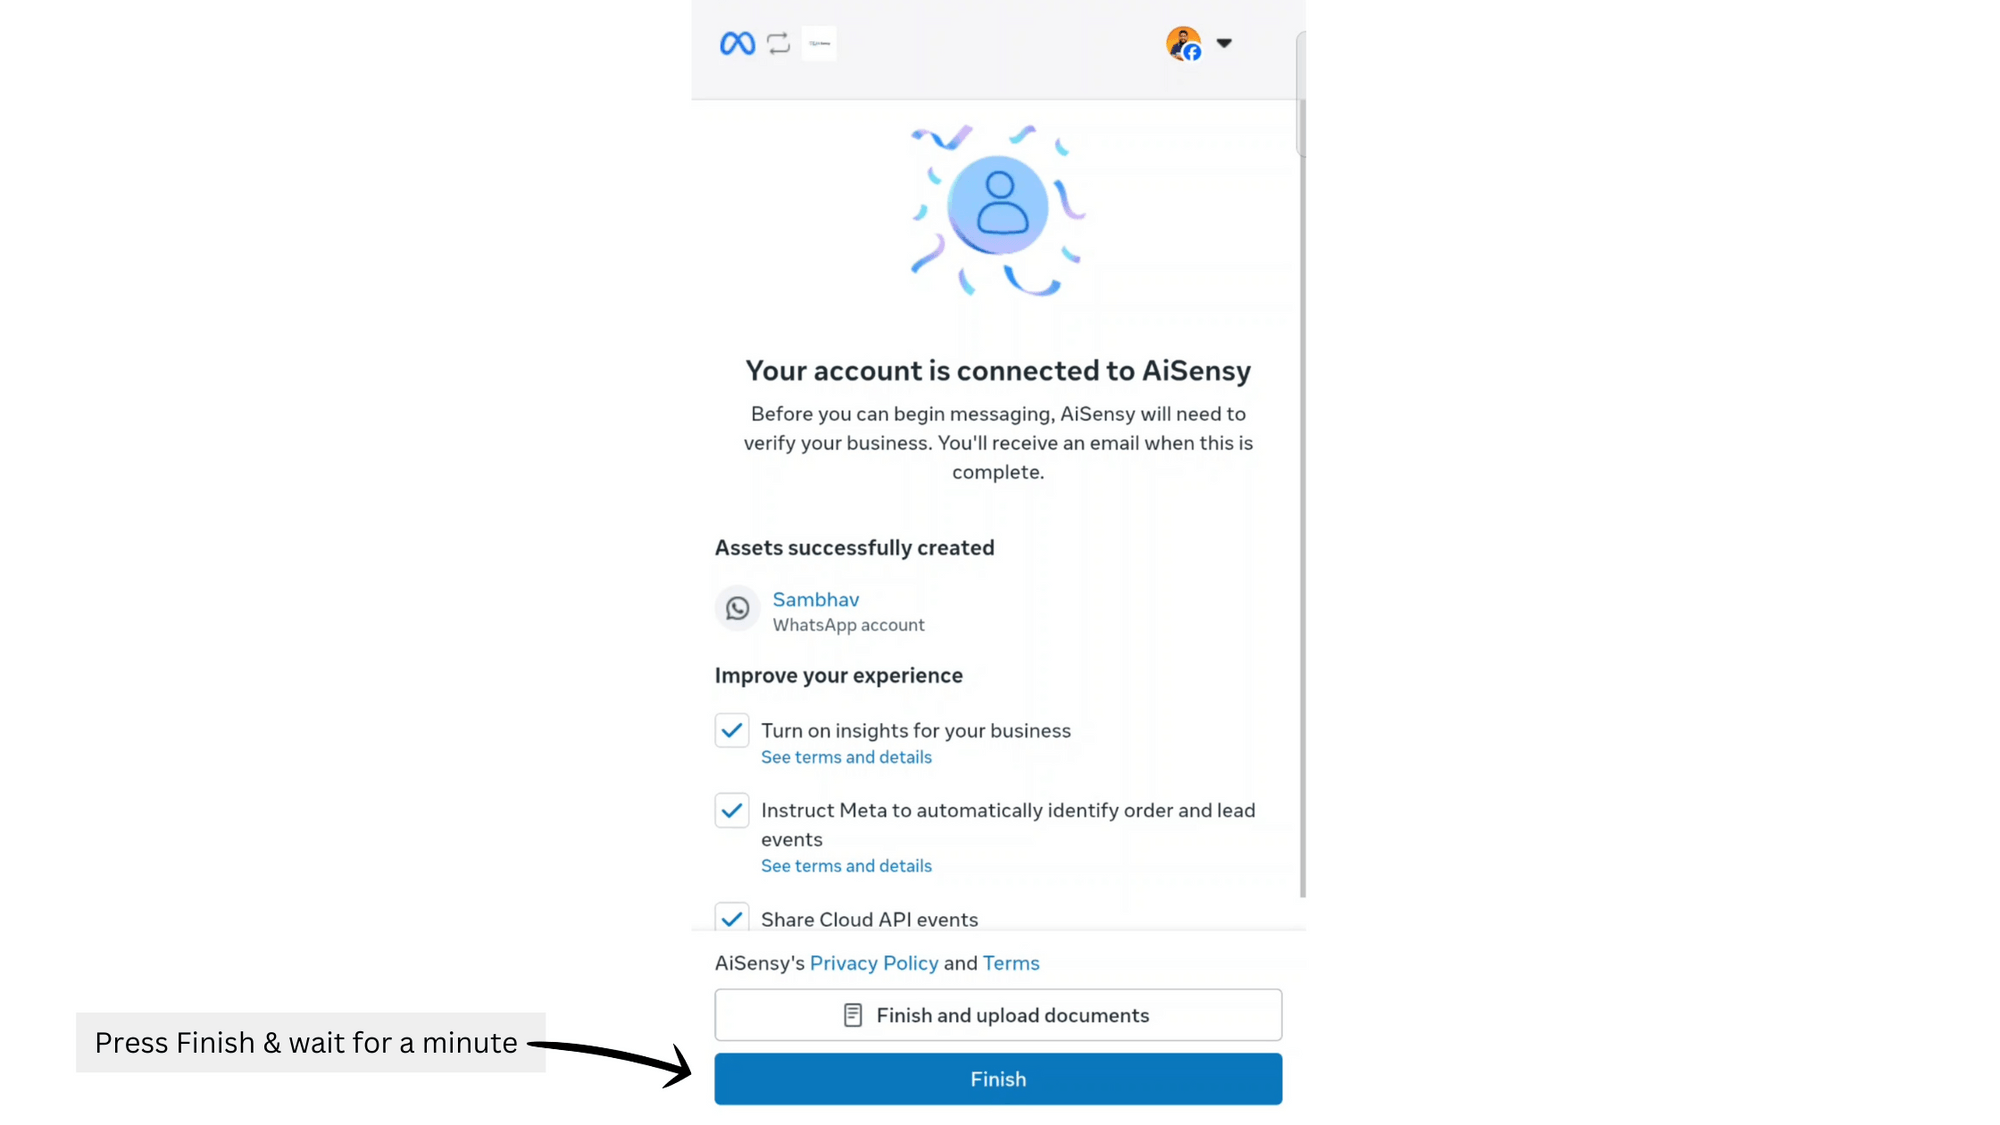
Congratulations! 🎉🎉
Bas Finish button press karo aur ek minute wait karo. Bas itna hi! Agar upar ke steps sahi se kiye hain, toh aapki API review mein jaayegi aur 10 minutes mein verify ho jaayegi. 'Finish' click karne ke baad aap automatically AiSensy app pe redirect ho jaoge — beech mein koi button press mat karna, warna WhatsApp ko API application submit karte waqt error aa sakta hai.
Zyaatar reviews turant complete ho jaate hain (10 minutes mein) — sirf Display Name ko approve hone mein max 3-4 hours lag sakte hain.
AiSensy Platform mein WhatsApp Business API ka status ab LIVE dikhne lagega.
AiSensy ke saath WhatsApp Business API ke liye kyun apply karein?
WhatsApp KYC apply karne ke steps
AiSensy app mein 'Upgrade Now' pe Tap Karo
WhatsApp API ke liye apply karne ke baad aap AiSensy app pe redirect ho jaoge. App mein 'Upgrade Now' button pe tap karo.

GST ya MSME number se KYC Verify Karo
Dono acceptable hain. Aap ya toh apna GST number add karke GST certificate upload kar sakte ho, ya MSME number se verify kar sakte ho.
Zaroori: Aapke GST / MSME pe registered company name aur Facebook Business Manager account ka naam same hona chahiye!!
Agar naam alag hai, toh pehle Facebook Business Manager account mein registered company name update karo.
Yeh wahi FBM account hai jo aapne WhatsApp Business API apply karte waqt use kiya tha.
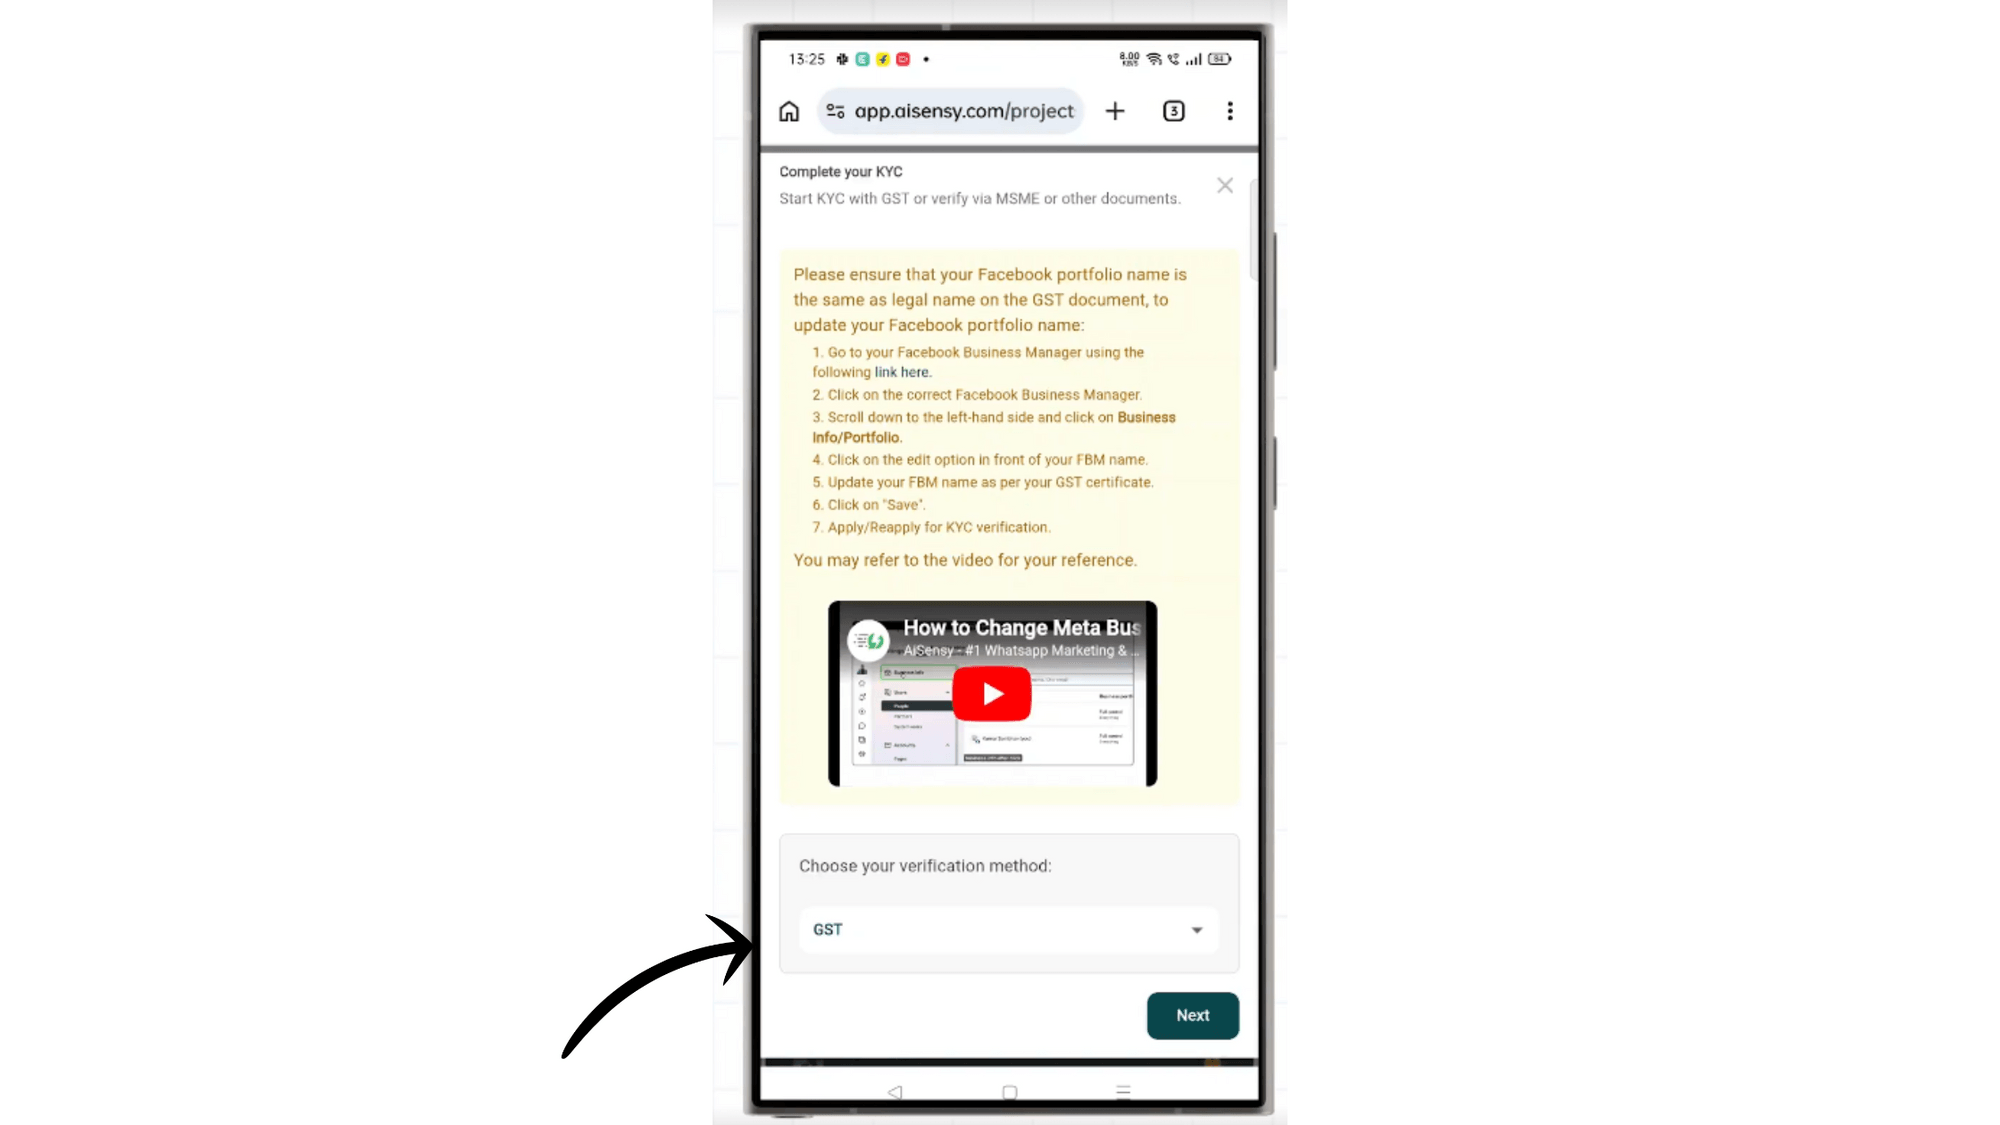
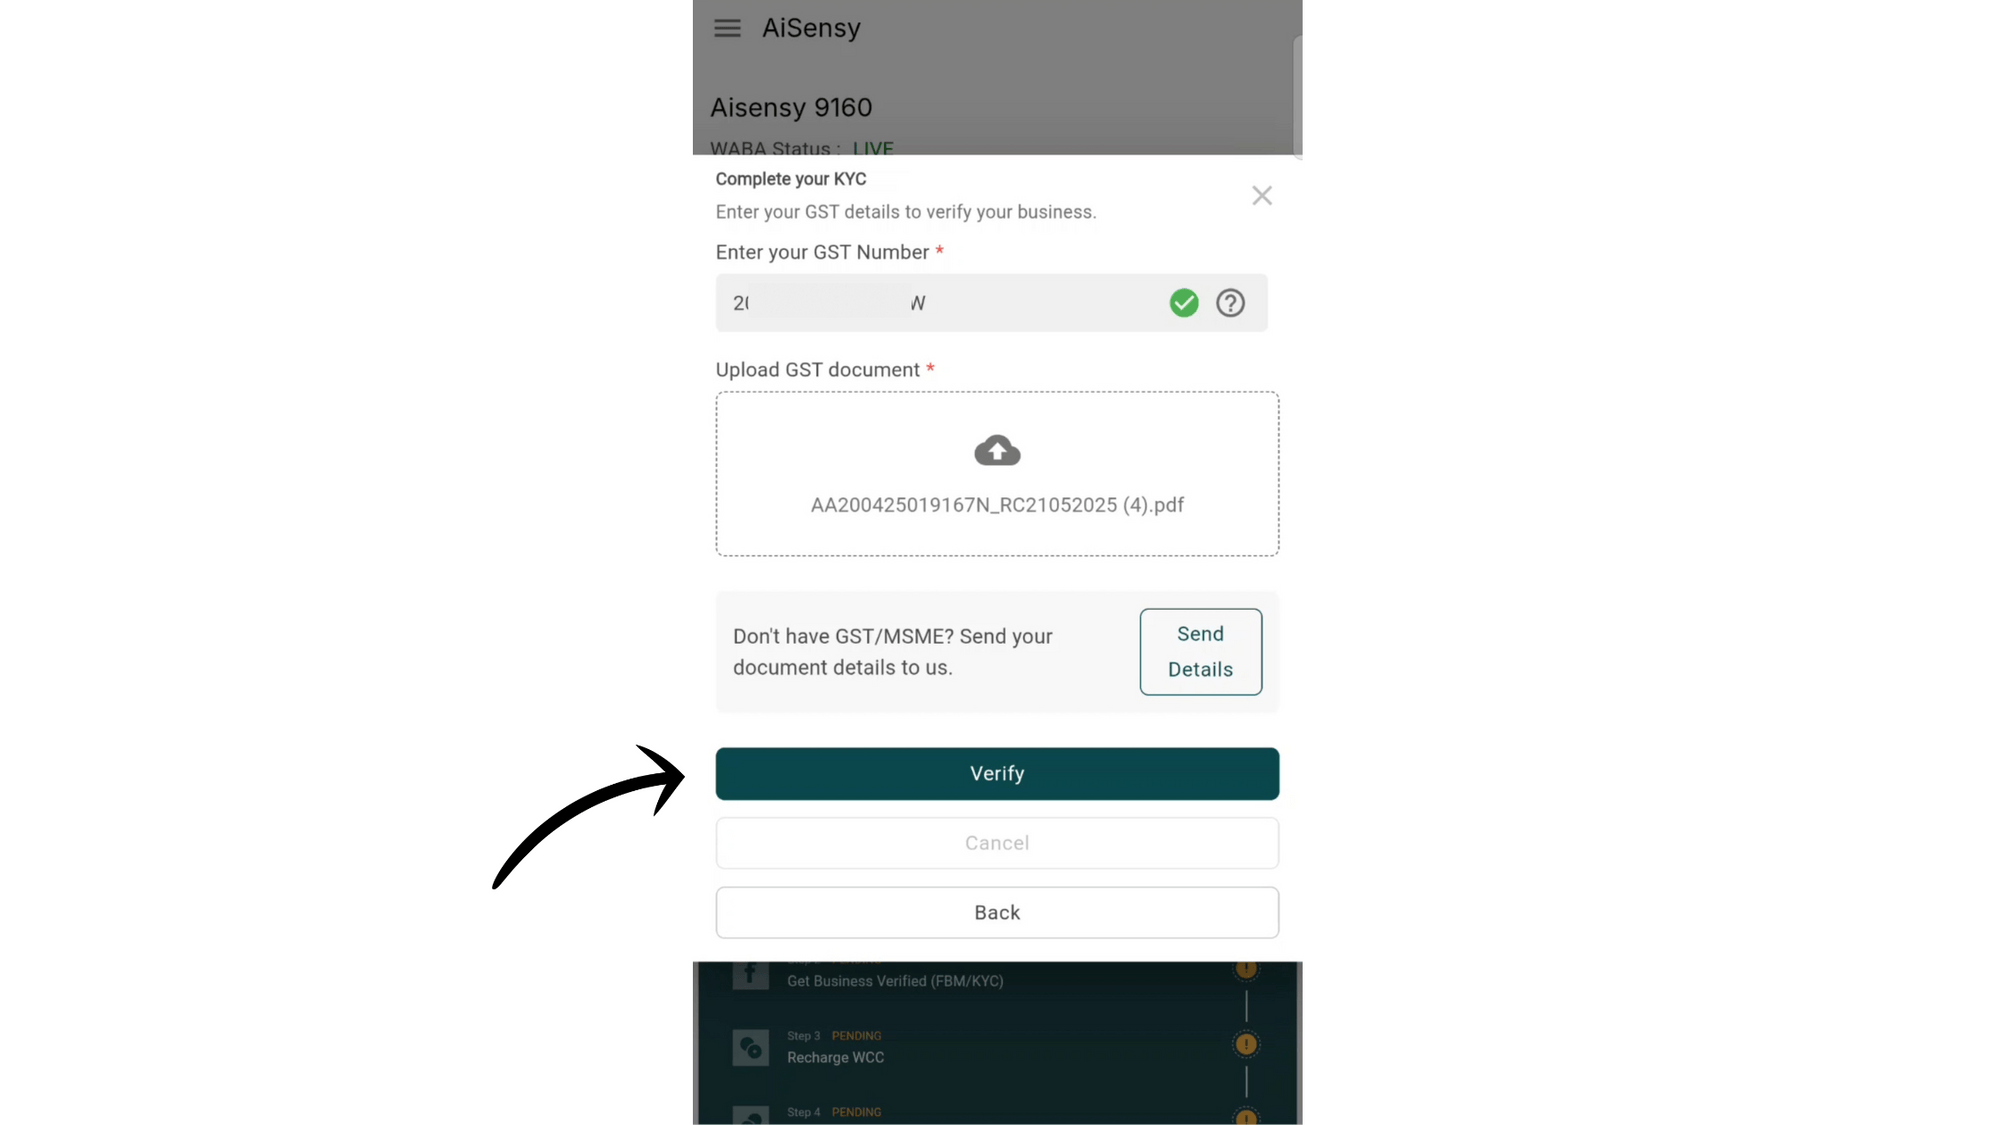
GST Number Enter Karo aur GST Document Upload Karo
GST ya MSME details add karne ke baad Verify pe click karo.
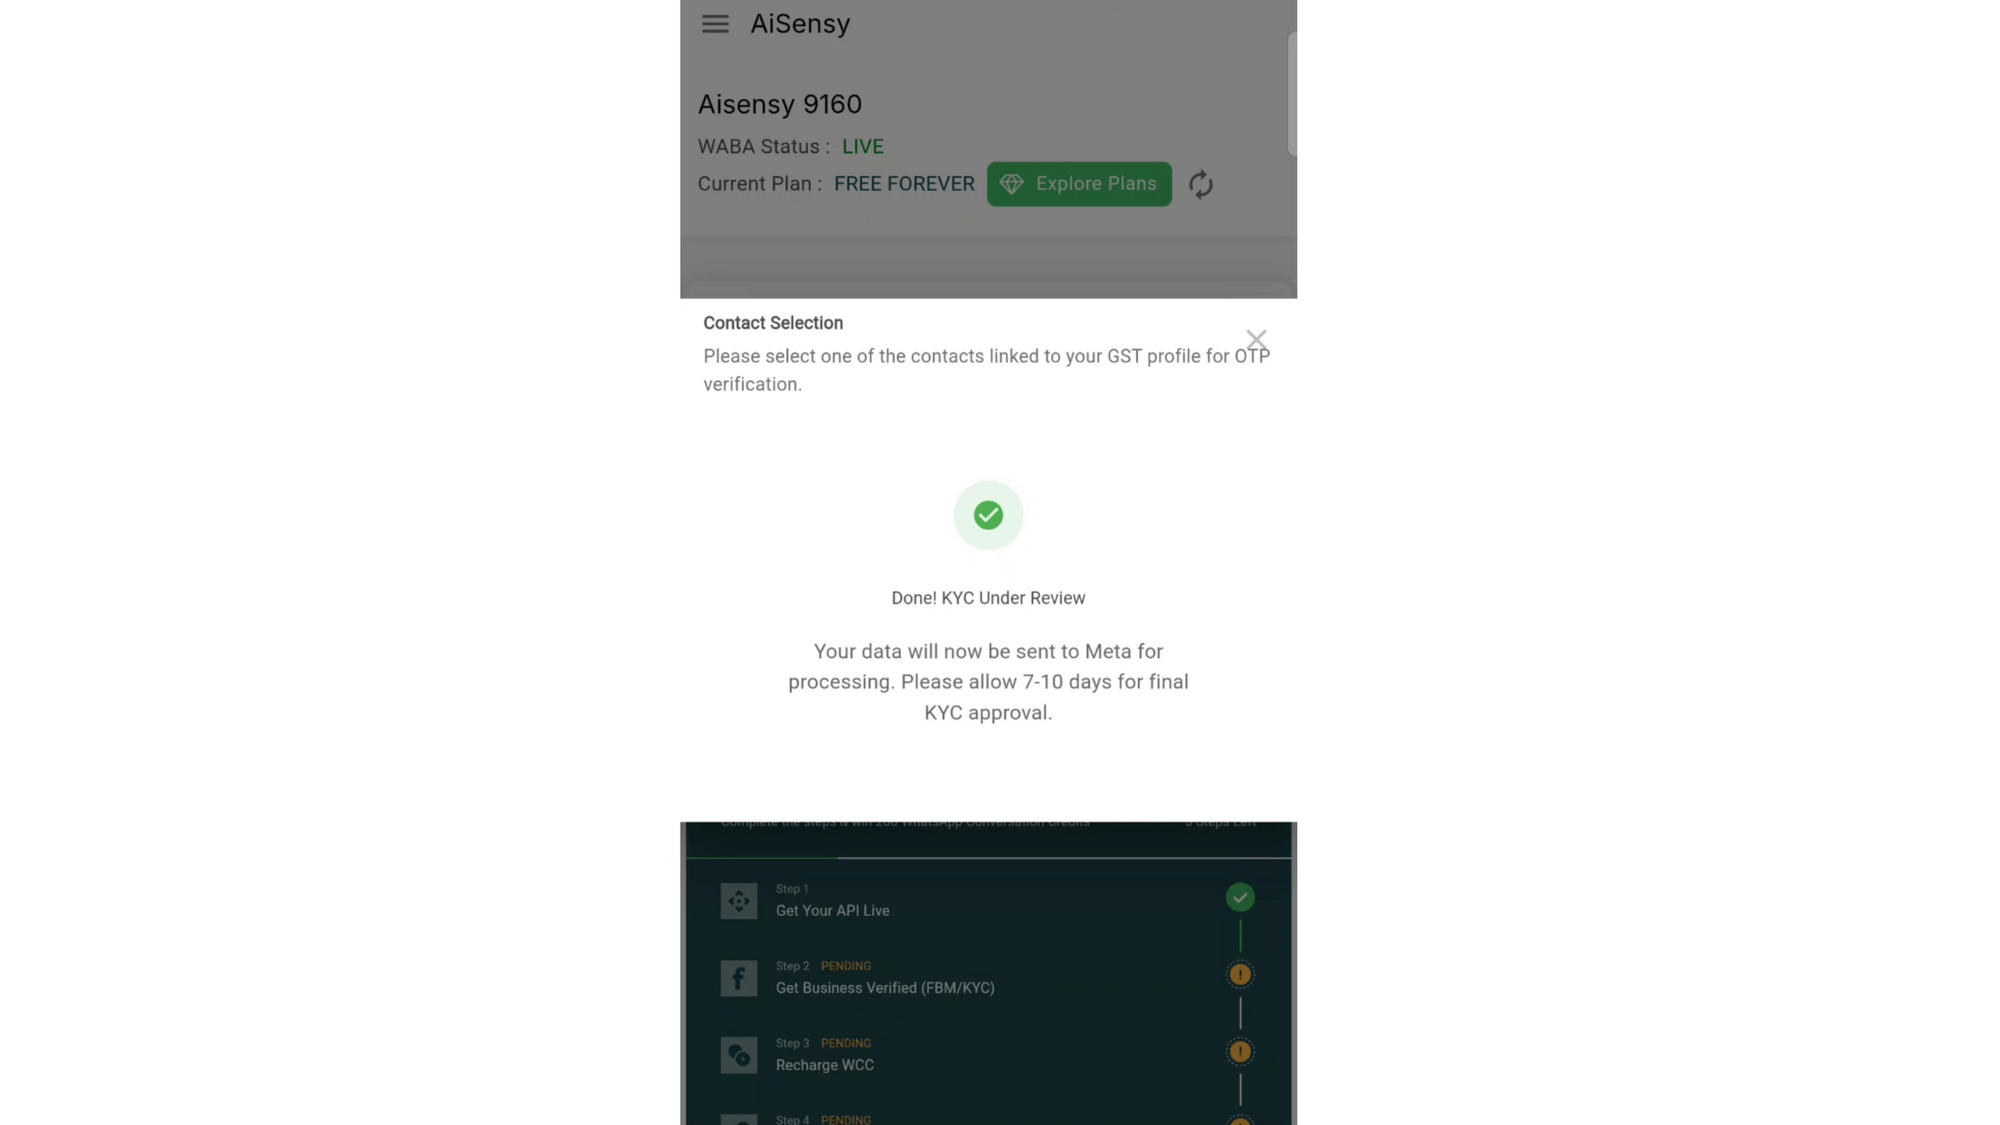
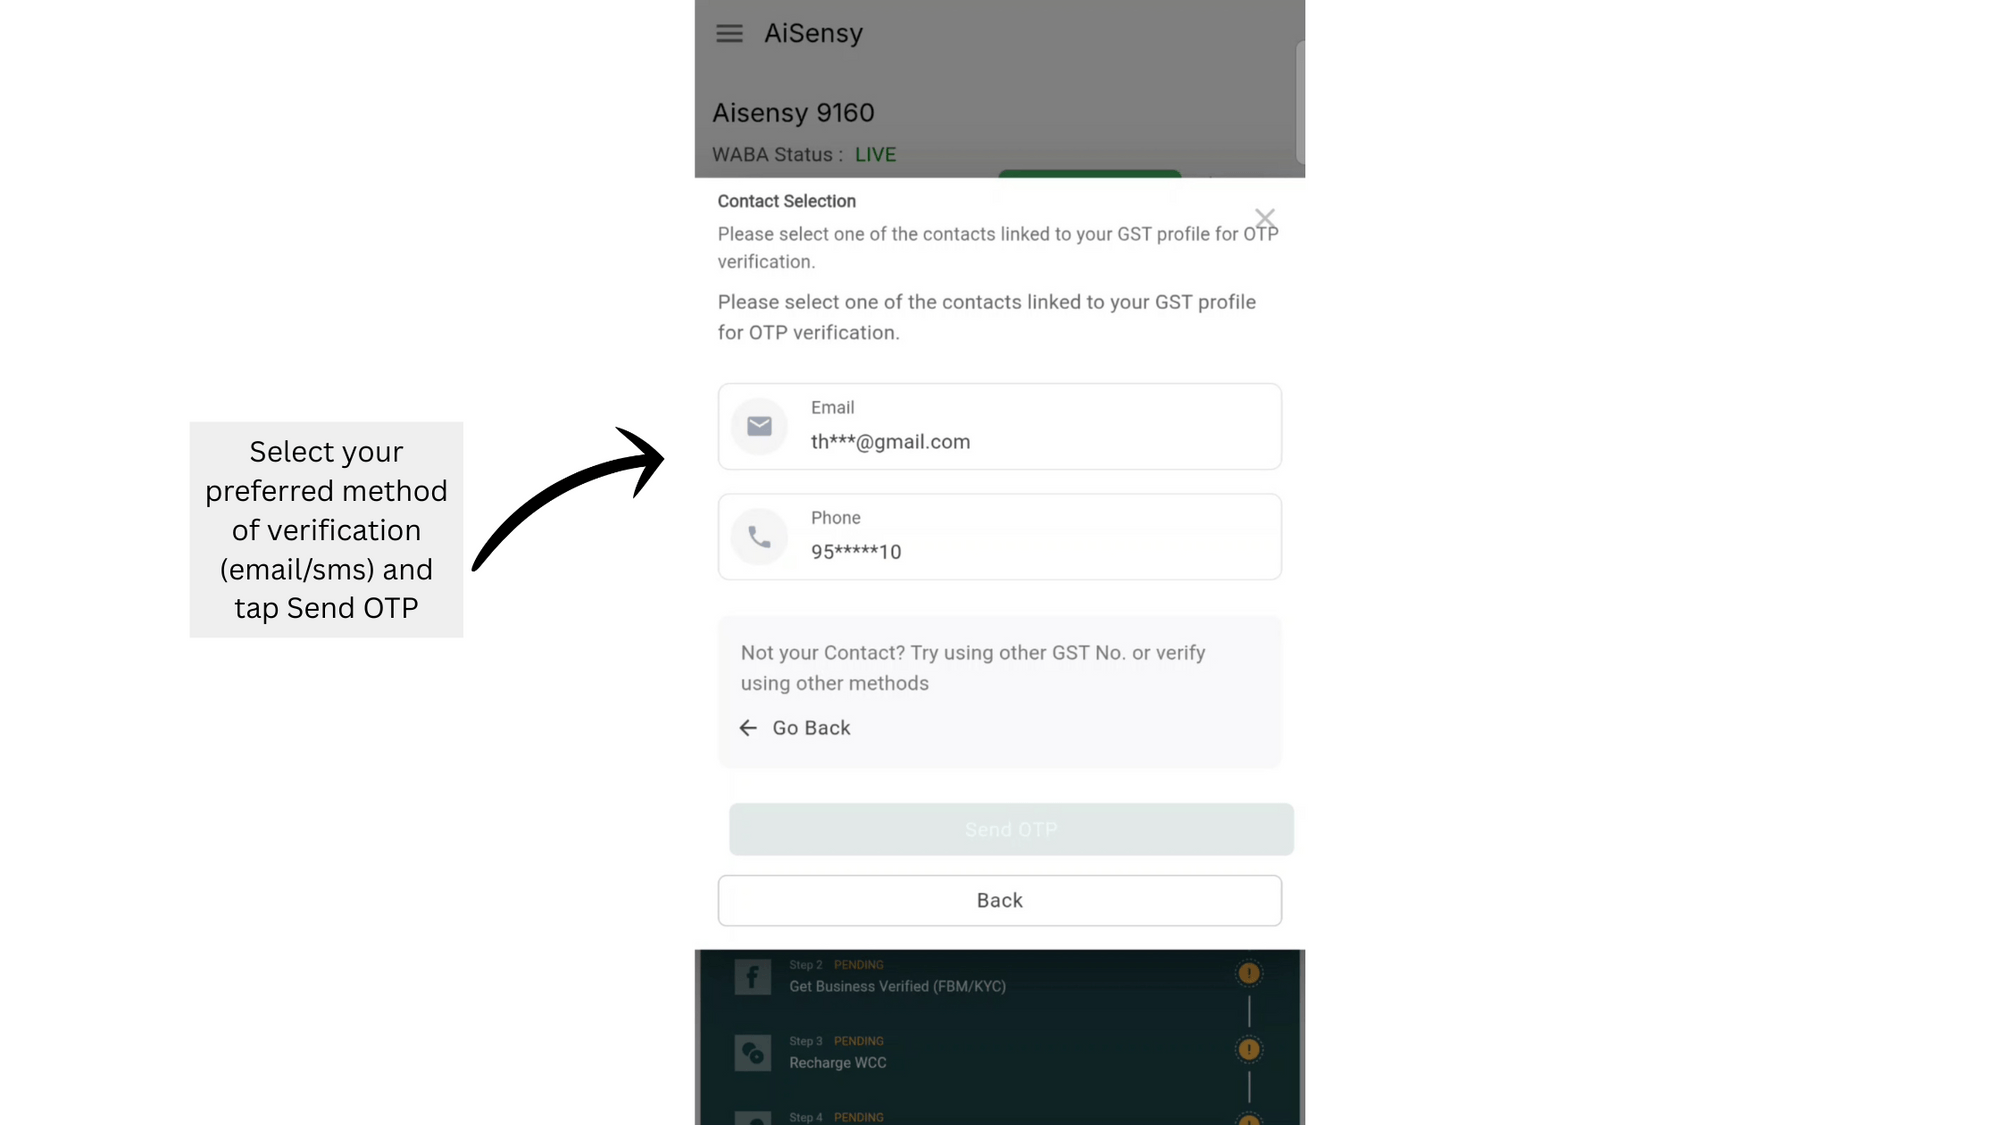
Registered Email ya Mobile Number se Details Verify Karo
Is step mein woh email ya number choose karo jo aapne AiSensy pe register karte waqt use kiya tha.
Preferred channel select karne ke baad "Send OTP" press karo.
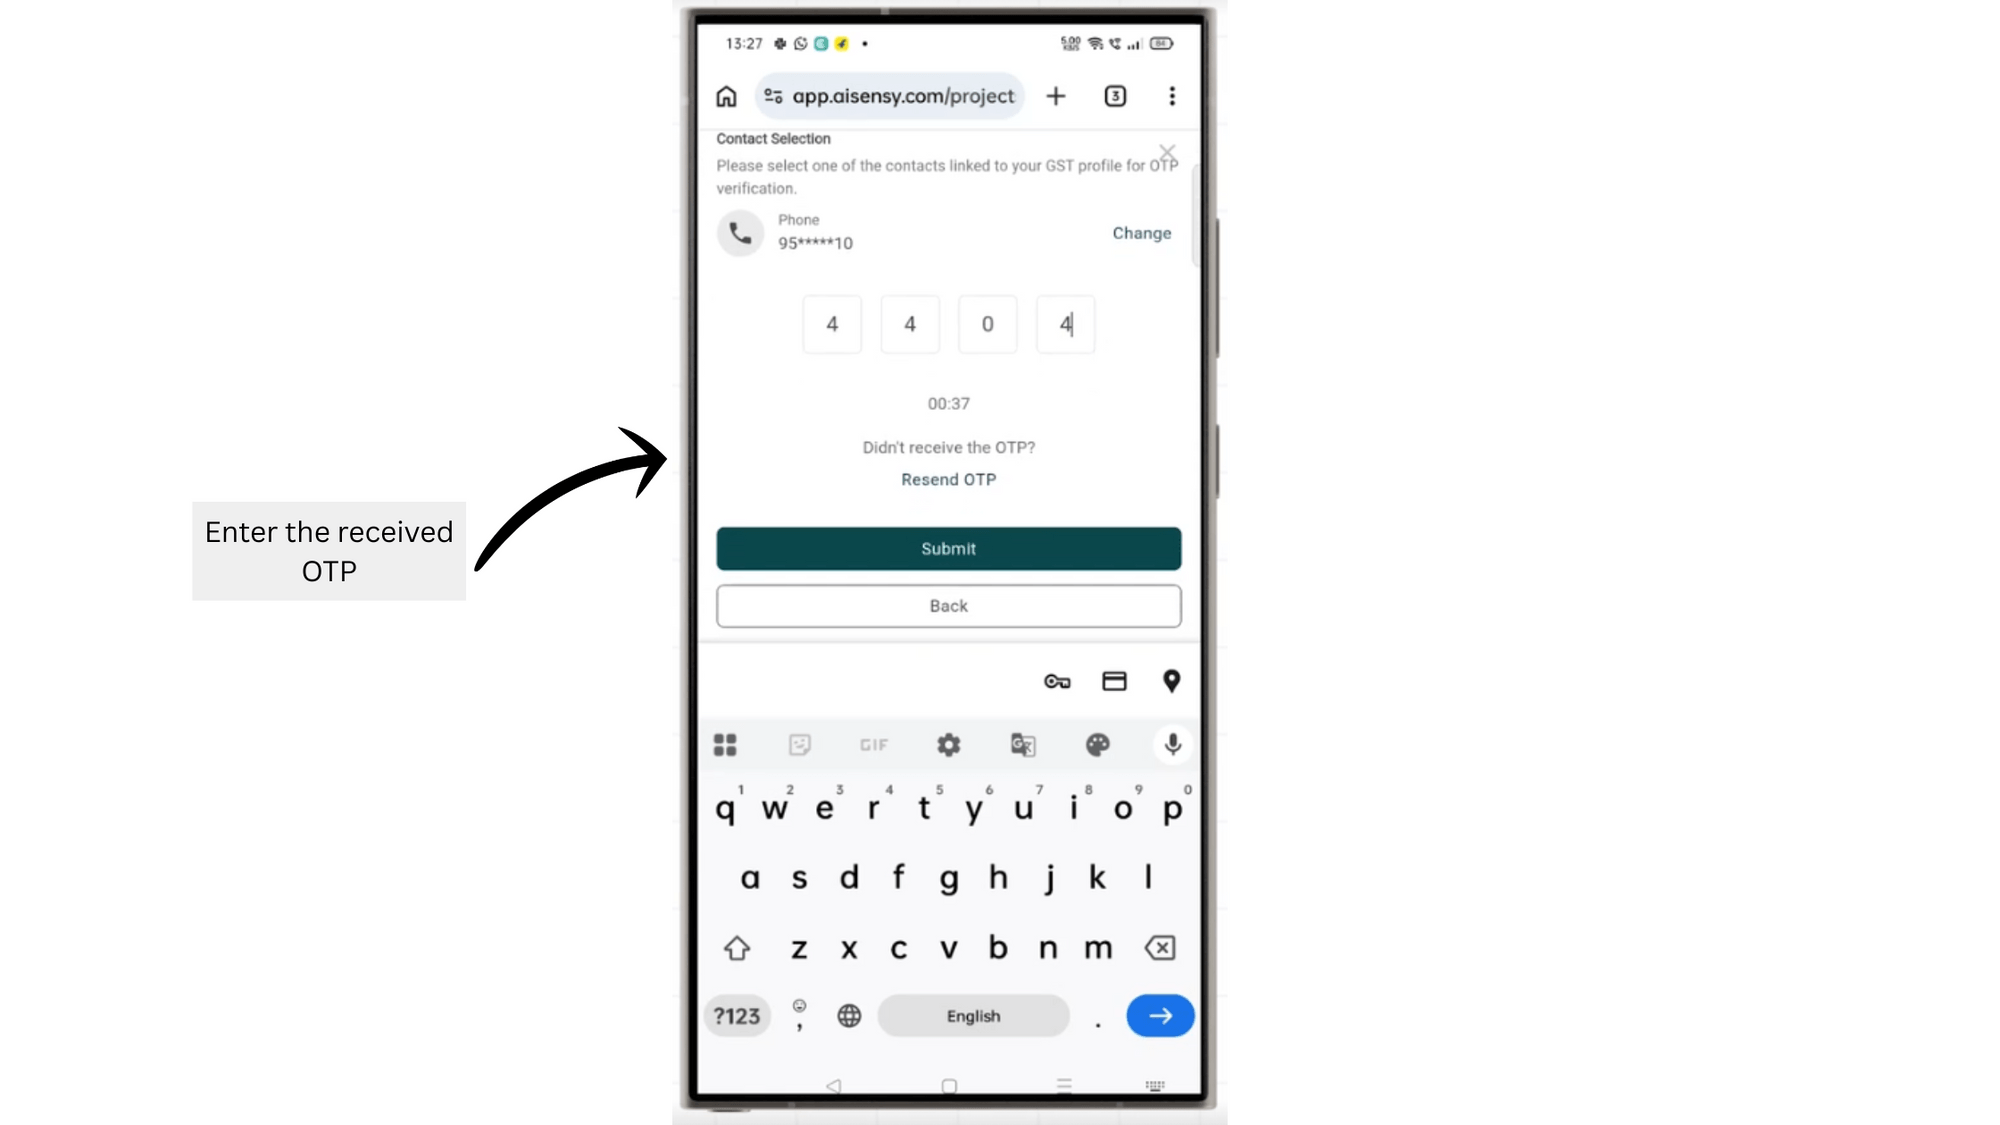
OTP Enter Karo aur Submit Press Karo
Aapki KYC Details Approval ke liye Successfully Submit Ho Gayi
Hamari team aapki submission review karegi aur result 1-2 days mein aapke dashboard pe reflect ho jaayega. Agar 48 hours ke baad bhi KYC status ka update nahi mila, toh shop@aisensy.com pe email karo.