WhatsApp AI Agent by AiSensy
WhatsApp AI Agent for Event Registration
Turn ad clicks into confirmed attendees on auto-pilot with Registration WhatsApp AI agent.
The Event Registration AI Agent answers questions, collects details and takes payments on WhatsApp - 24x7, all on its own.
No coding needed!

What Your AiSensy Event Registration AI Agent Handles
Everything between "sounds interesting" and a confirmed seat, handled inside WhatsApp.
Registers People Start to Finish
No landing page, no form, no drop-off. The whole sign-up happens in the chat the person was already in.
Collects Exactly What You Need
Name, email, company, designation, session choice, meal preference - you decide the list and mark which answers are compulsory before a seat is held.
Answers What Stalls a Sign-Up
Date, venue, agenda, who's speaking, what it costs, who it's for. Answered in seconds from your own event page, at the moment someone is deciding.
Sells Every Ticket Tier
Early bird, standard, VIP, group of five. The agent explains the difference and registers them on the one they pick.
Takes the Ticket Payment in Chat
A secure payment link inside the conversation, and the seat is confirmed the moment it clears.
Registers in Your Attendee's Language
English, Hindi, Hinglish or anything in between - the agent matches how your attendee writes.
How an Event Registration Happens
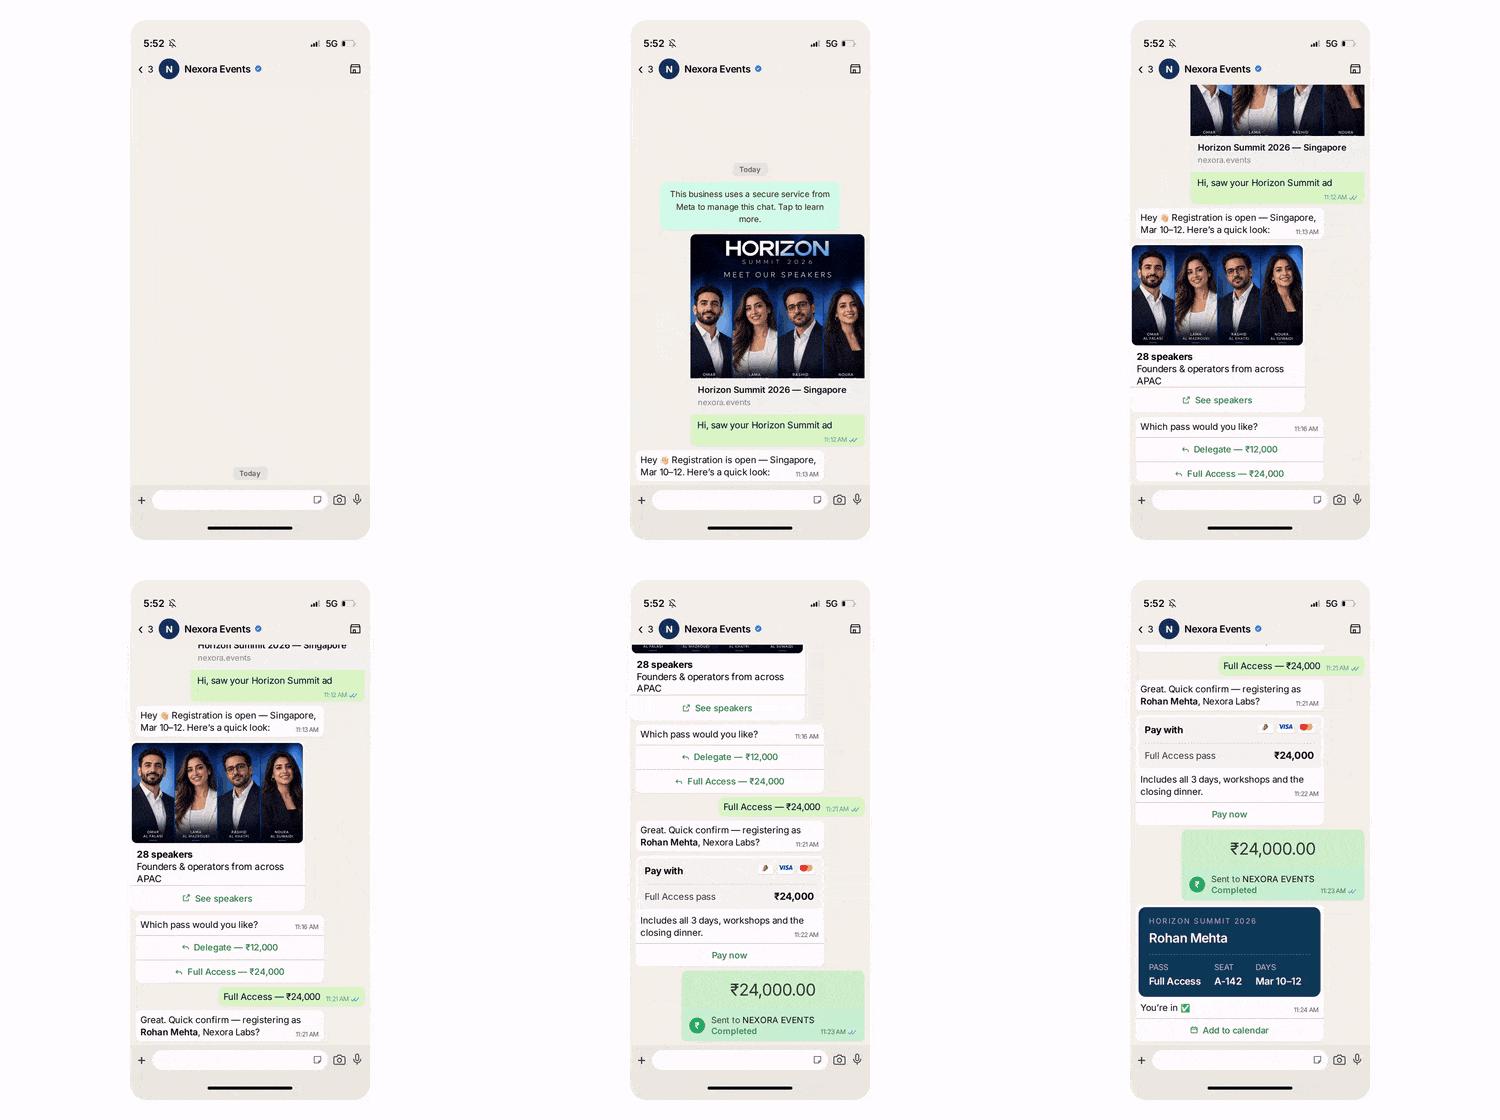
A real conversation, step by step - from ad click to confirmed seat, with nobody from your team involved.
The Click
When someone taps your Click-to-WhatsApp ad for the expo. The agent opens on that event by name. It won't go like "which event did you mean?"
The Questions
It answers the two things holding them up: which day, and is the session worth it for a procurement head? It will then start collecting what you need - name, work email, company, designation.
The Ticket
Selling off the tickets is the next step it jumps to. Early bird closes Friday, so the agent says so and shares the price difference against standard. They take early bird.
The Confirmation
It sends payment link in chat, your seat gets confirmed, the ticket and venue map sent to you on the chat itself.

Key Terms: How AiSensy AI Agent Works
A brief description on each section you'll see inside AiSensy AI Agent Studio and what each one actually does.

Business Profile
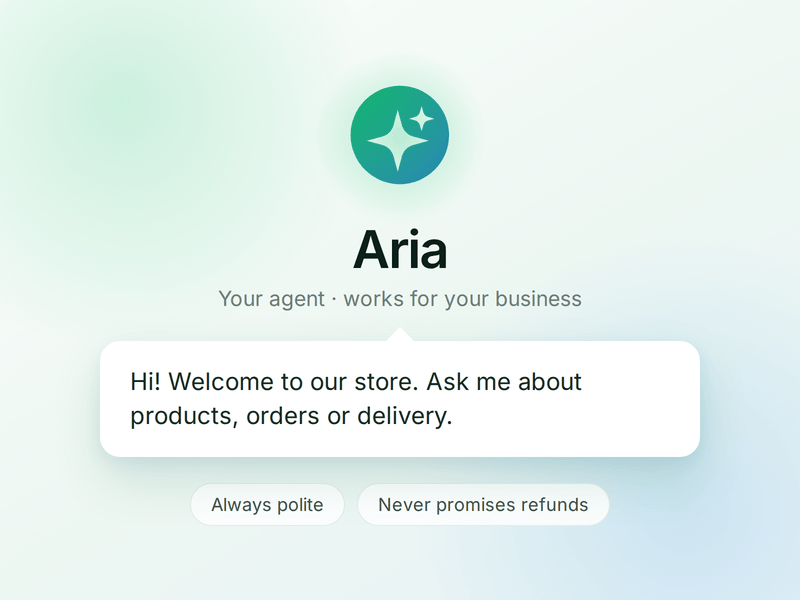
Who your agent is and who it works for. Your business details, the agent's name and greeting, and the ground rules it must always follow.

Knowledge
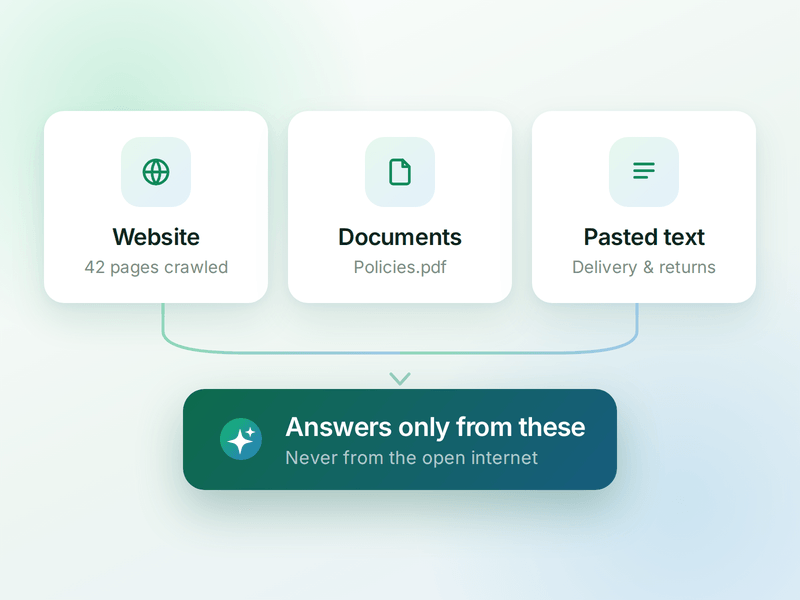
Everything your agent is allowed to know. Crawl your website, upload documents or paste text - the agent answers from these, not from the internet.

Skills
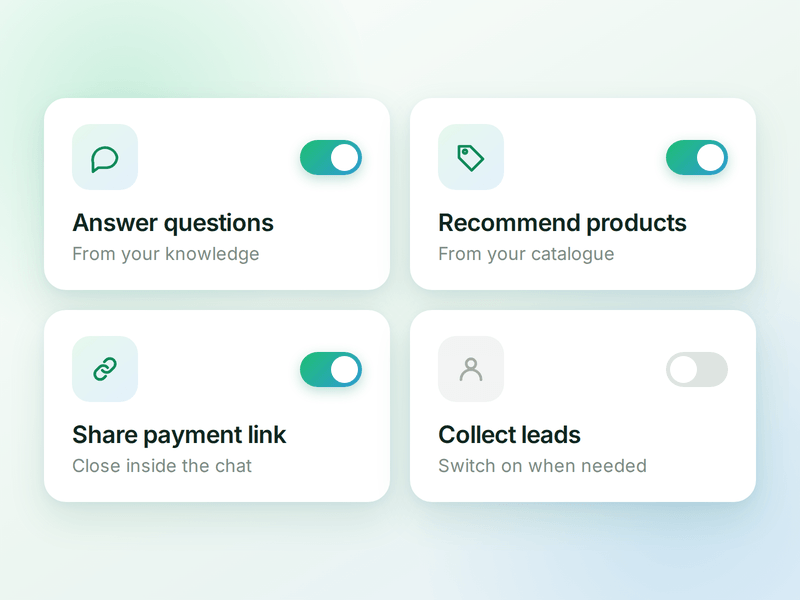
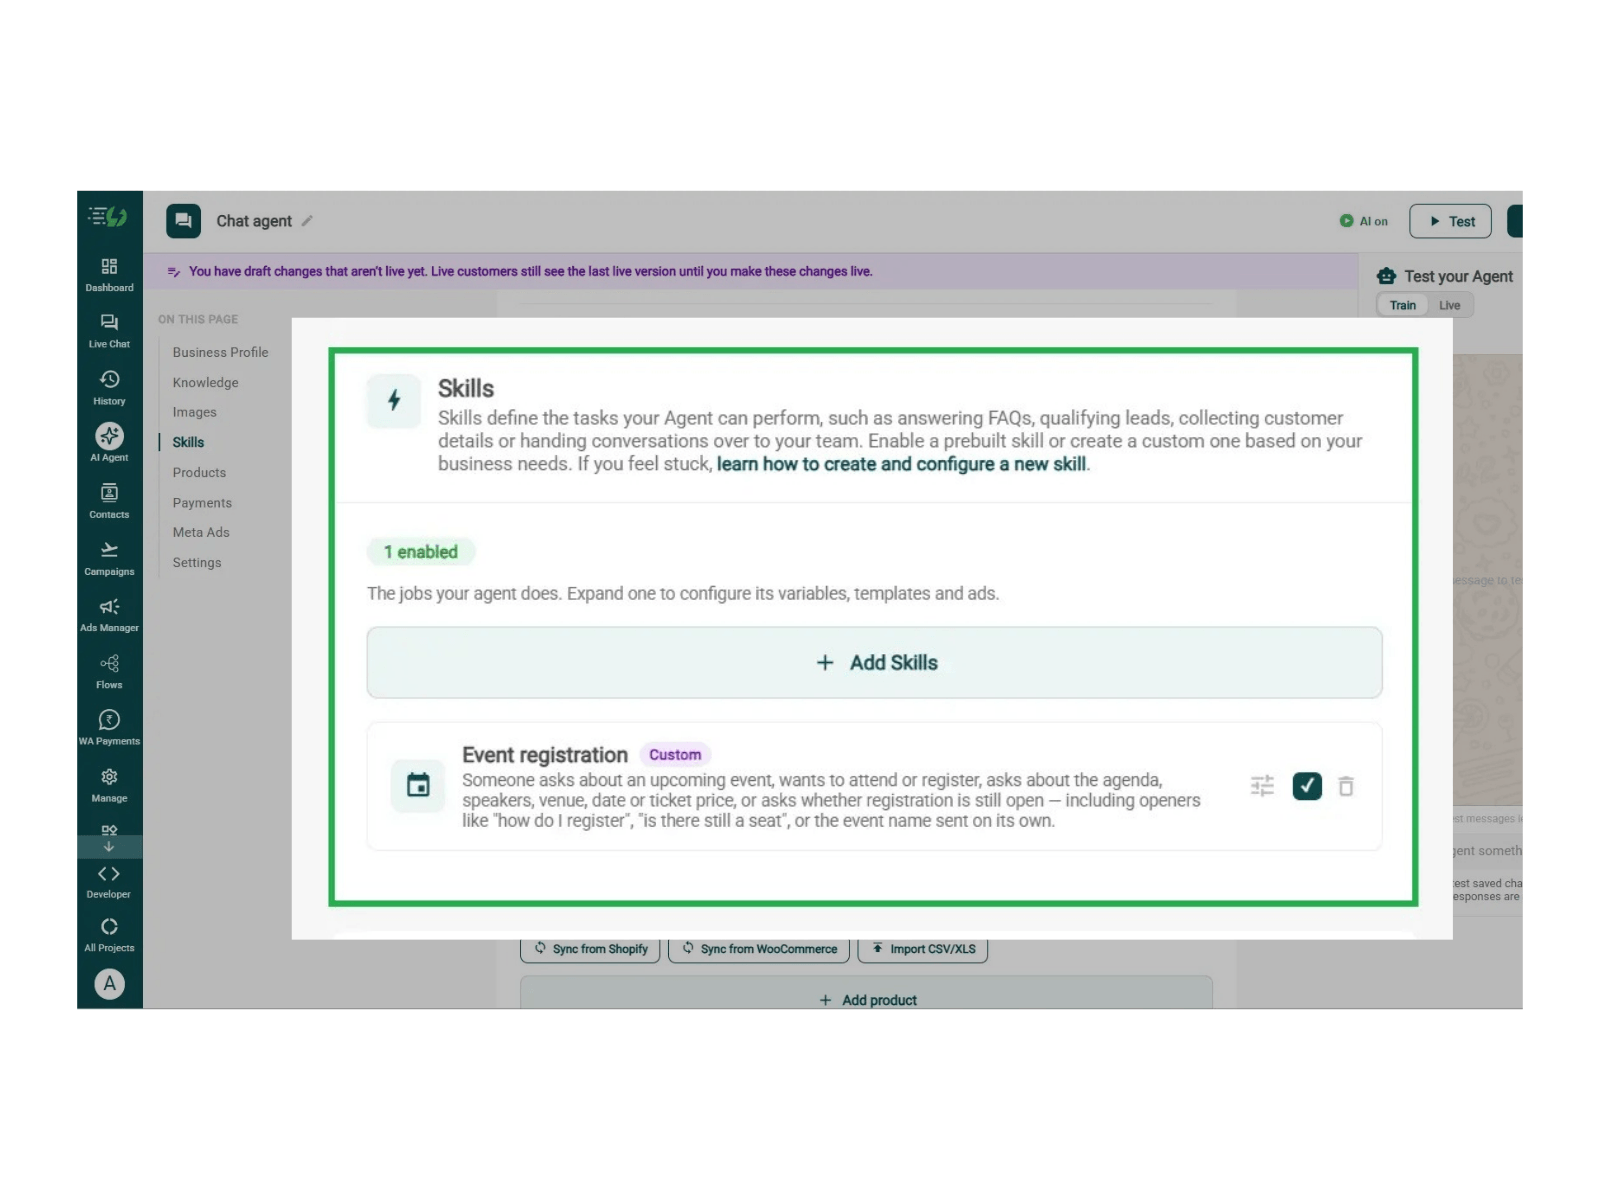
The jobs your agent can do. Switch on a ready-made skill or create your own, and the agent works out which one a conversation needs.

Products
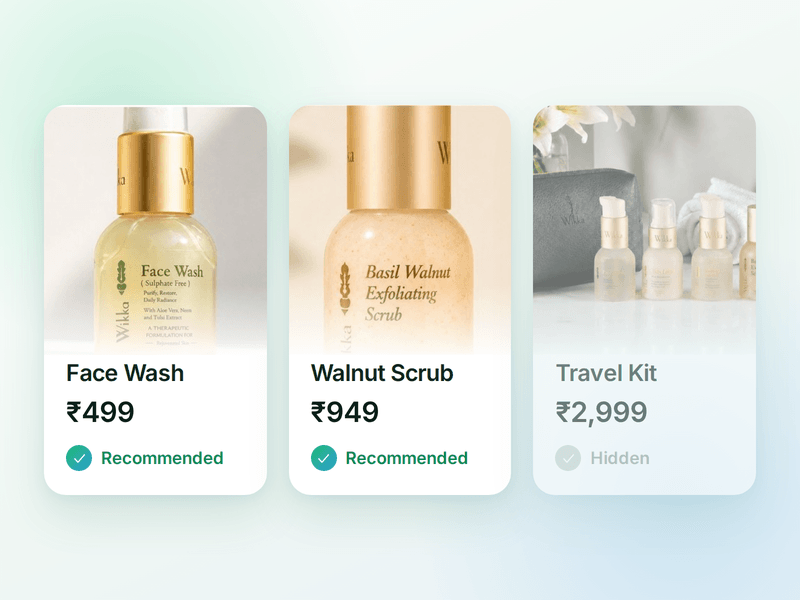
The catalogue your agent sells from. Sync your store or add items by hand, then pick which ones the agent is allowed to recommend.

Payments
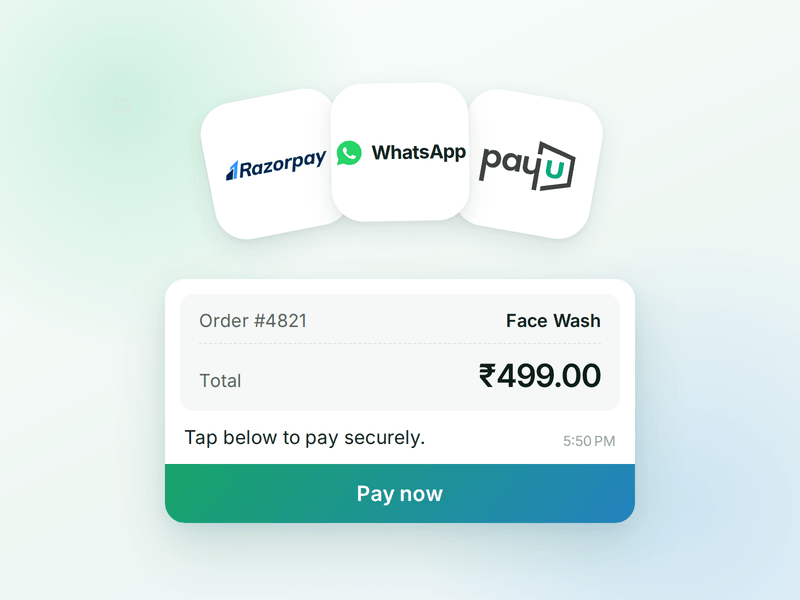
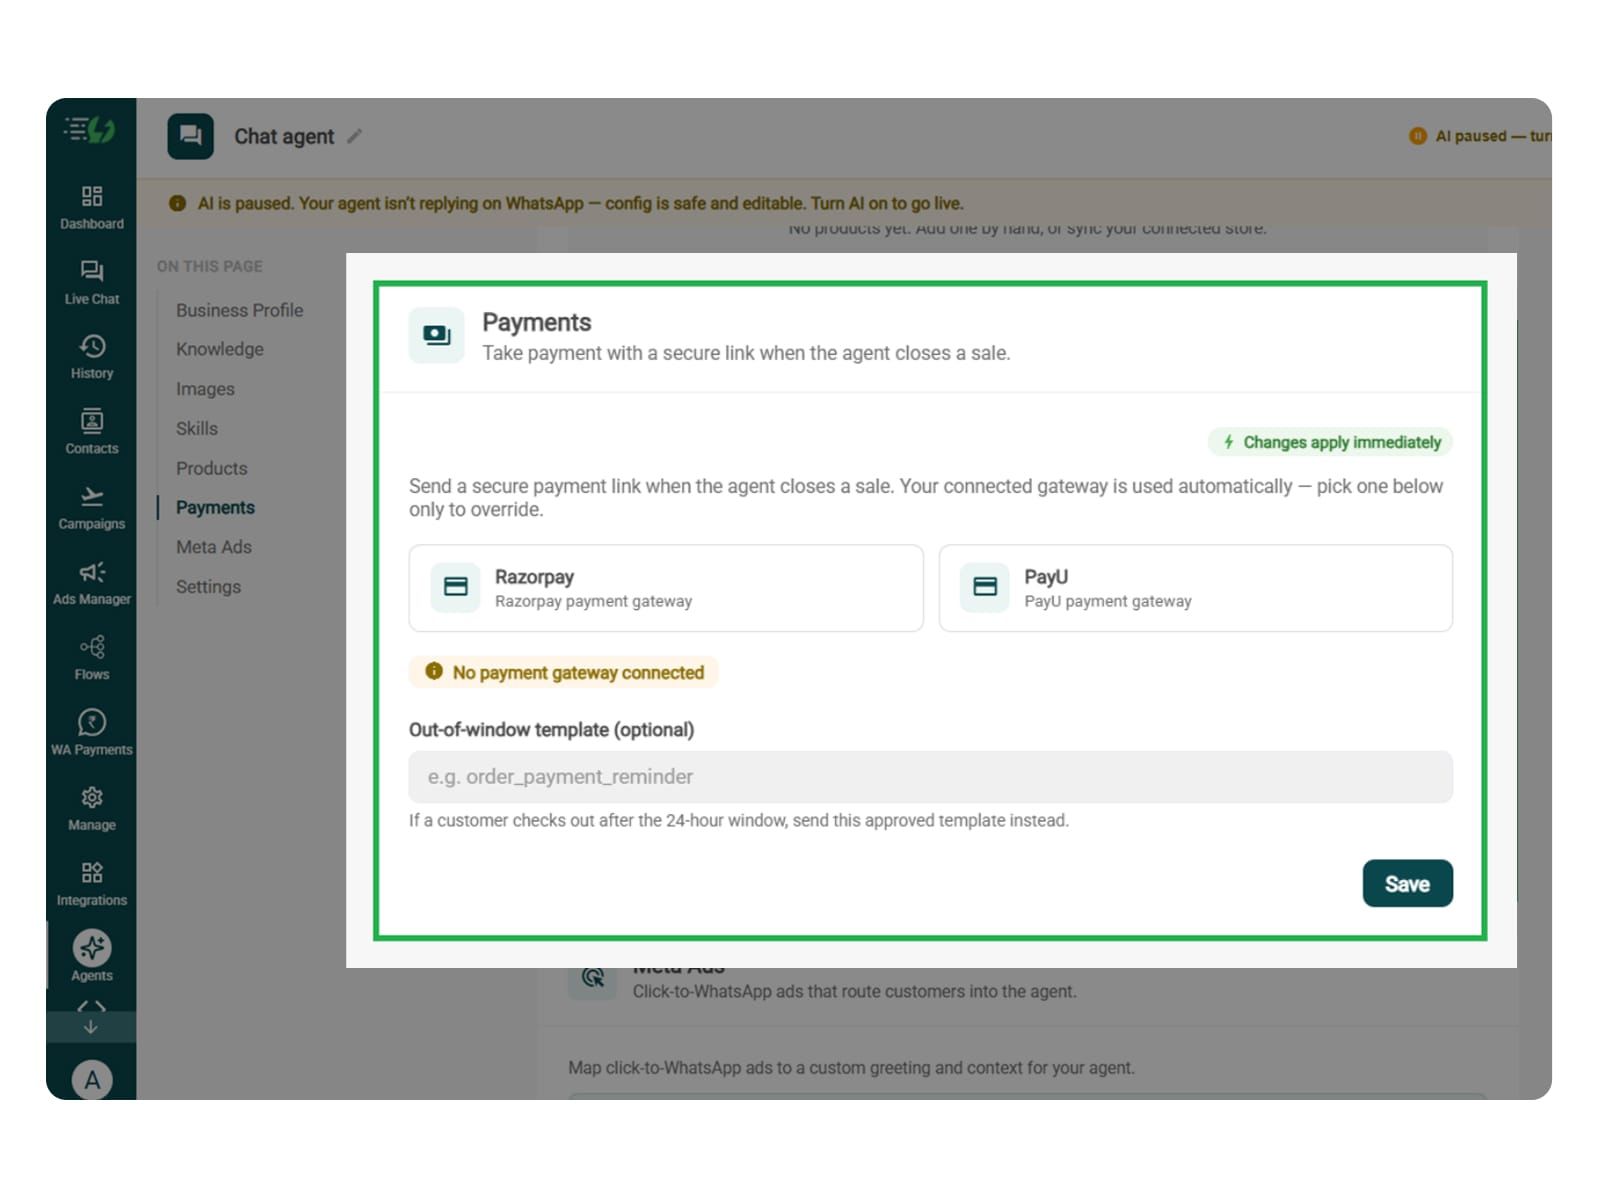
Your checkout, inside the chat. Connect Razorpay or PayU & the agent can send a secure payment link the moment a customer decides.

AI Messages
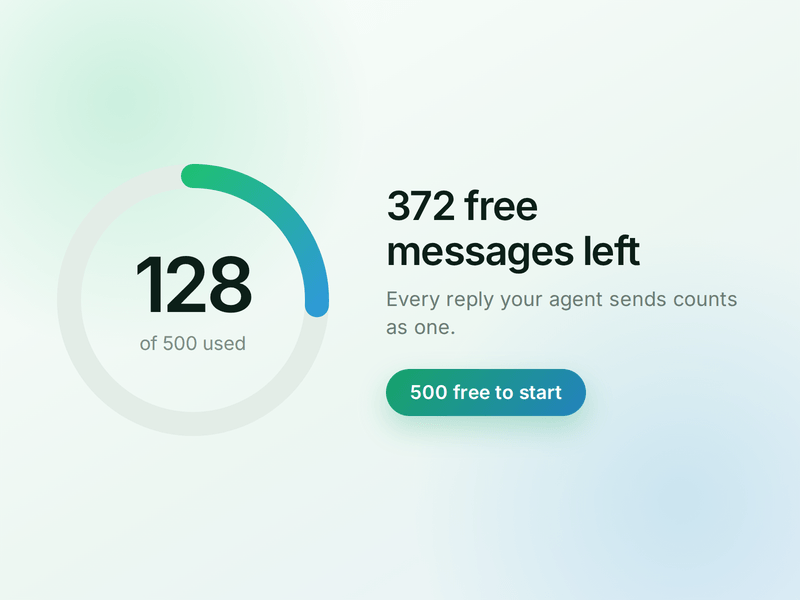
Each reply sent by your AI Agent counts as one AI Message and is deducted from your active plan. You get 500 free AI Messages to test your agent before going live.
How to Build Your Event Registration AI Agent in AiSensy
Here's how a real brand goes from zero to a live Event Registration AI Agent on WhatsApp.
Signup on AiSensy
Go to the AiSensy Signup Page. Create your account using either:
Your Google account, or
Your business email address by filling out the sign-up form.
Once signed up, Log in to AiSensy using the same Google account or email credentials.

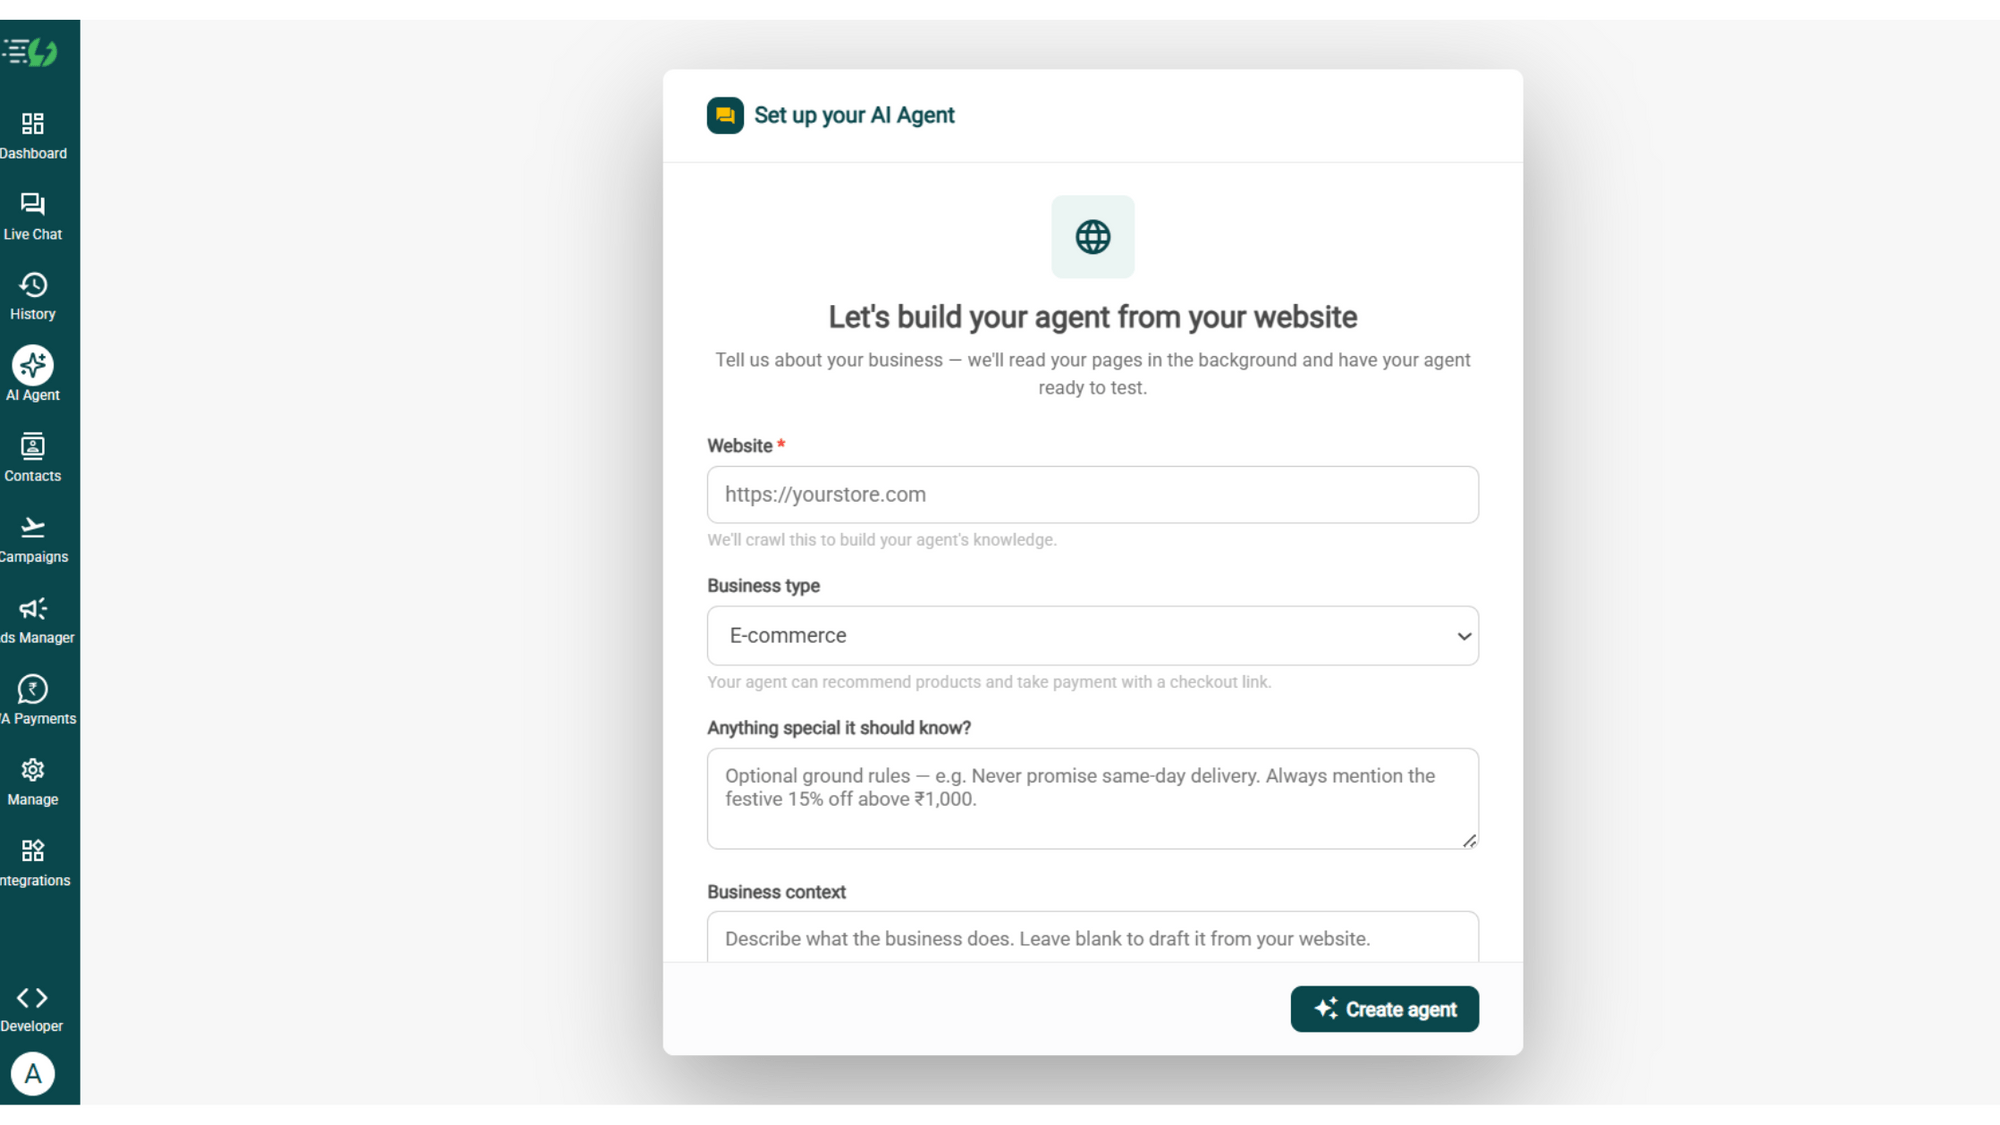
Build Your Agent from Your Website
Once you are logged in, navigate to and click on AI Agent available on the navbar on the left.
Fill in the details given below:
Website (mandatory)
Business type
Anything special it should know? (optional)
Business context (optional)
Once you fill these details correctly, proceed to hit '✨ Create agent' button. AiSensy automatically builds an agent trained on your business.

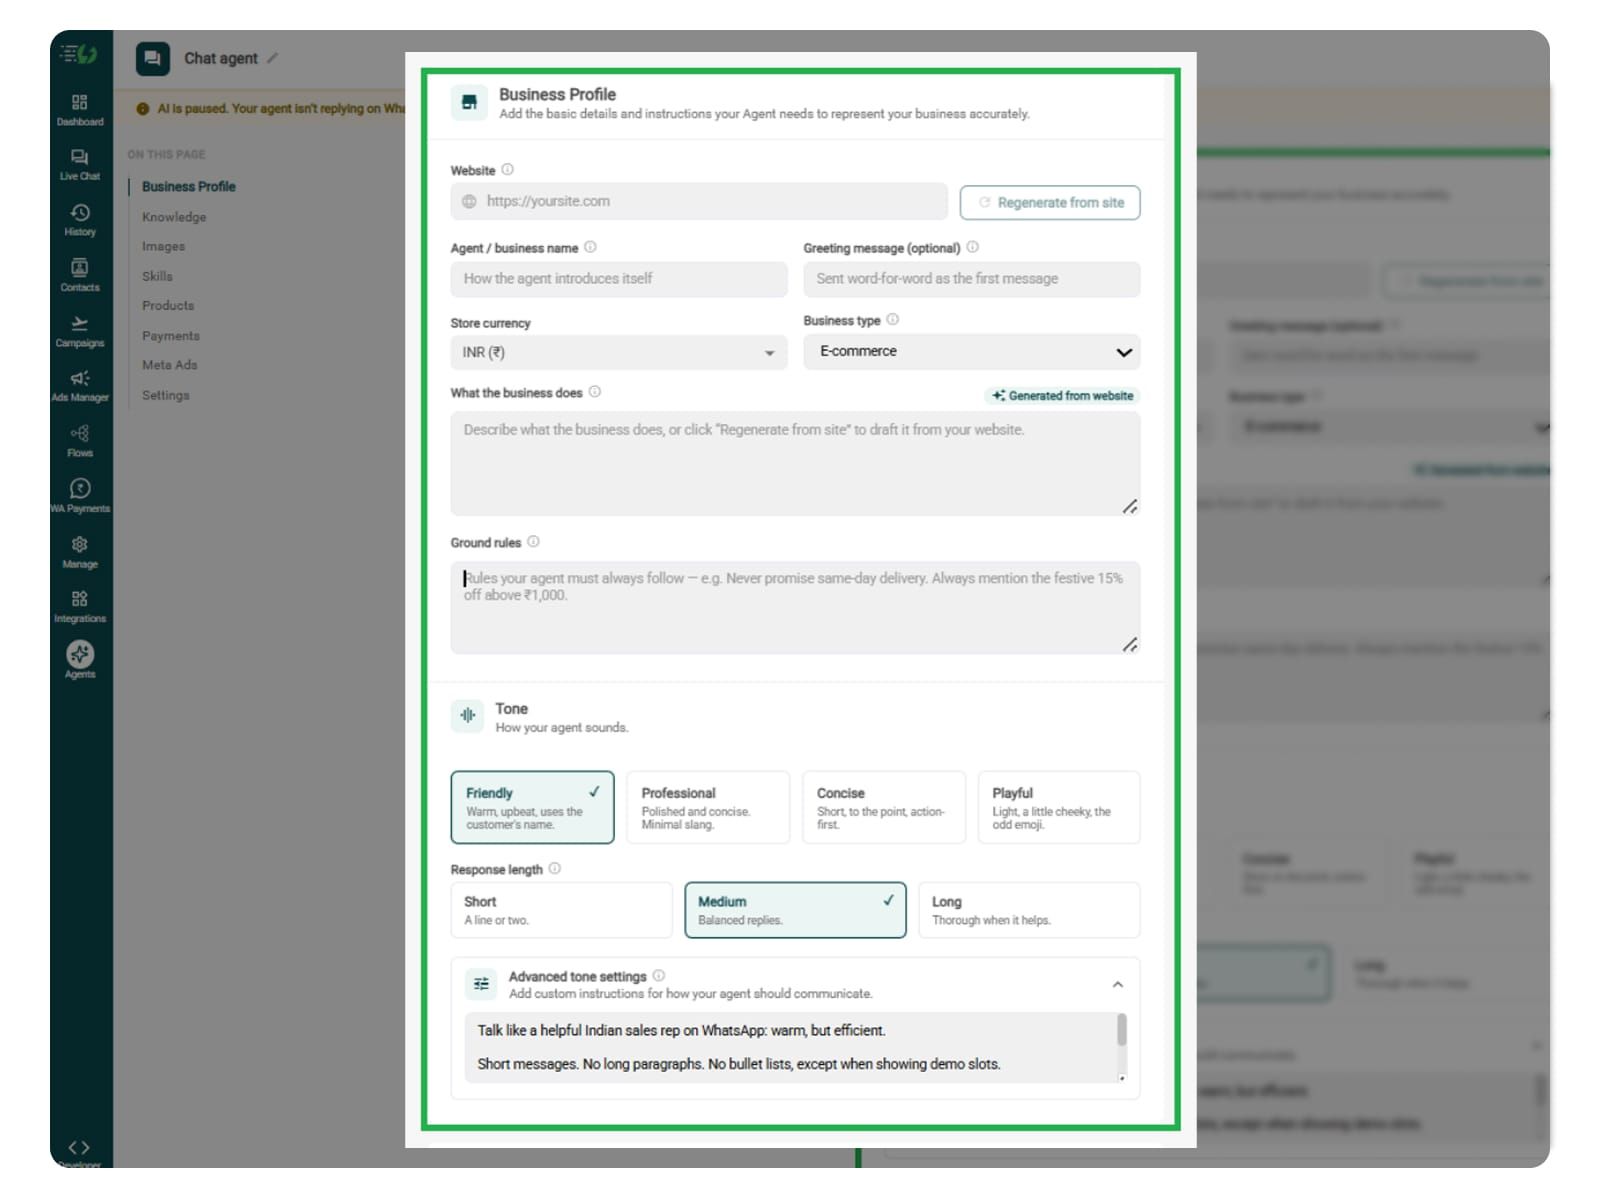
Add Your Business Profile
When you add your website, AiSensy auto-generates your business description. Set your agent's name, greeting, and a few ground rules it must always follow.
Fill the details given below:
Website
Agent/business name
Greeting message (optional)
Store currency
Business type
What the business does
Ground rules

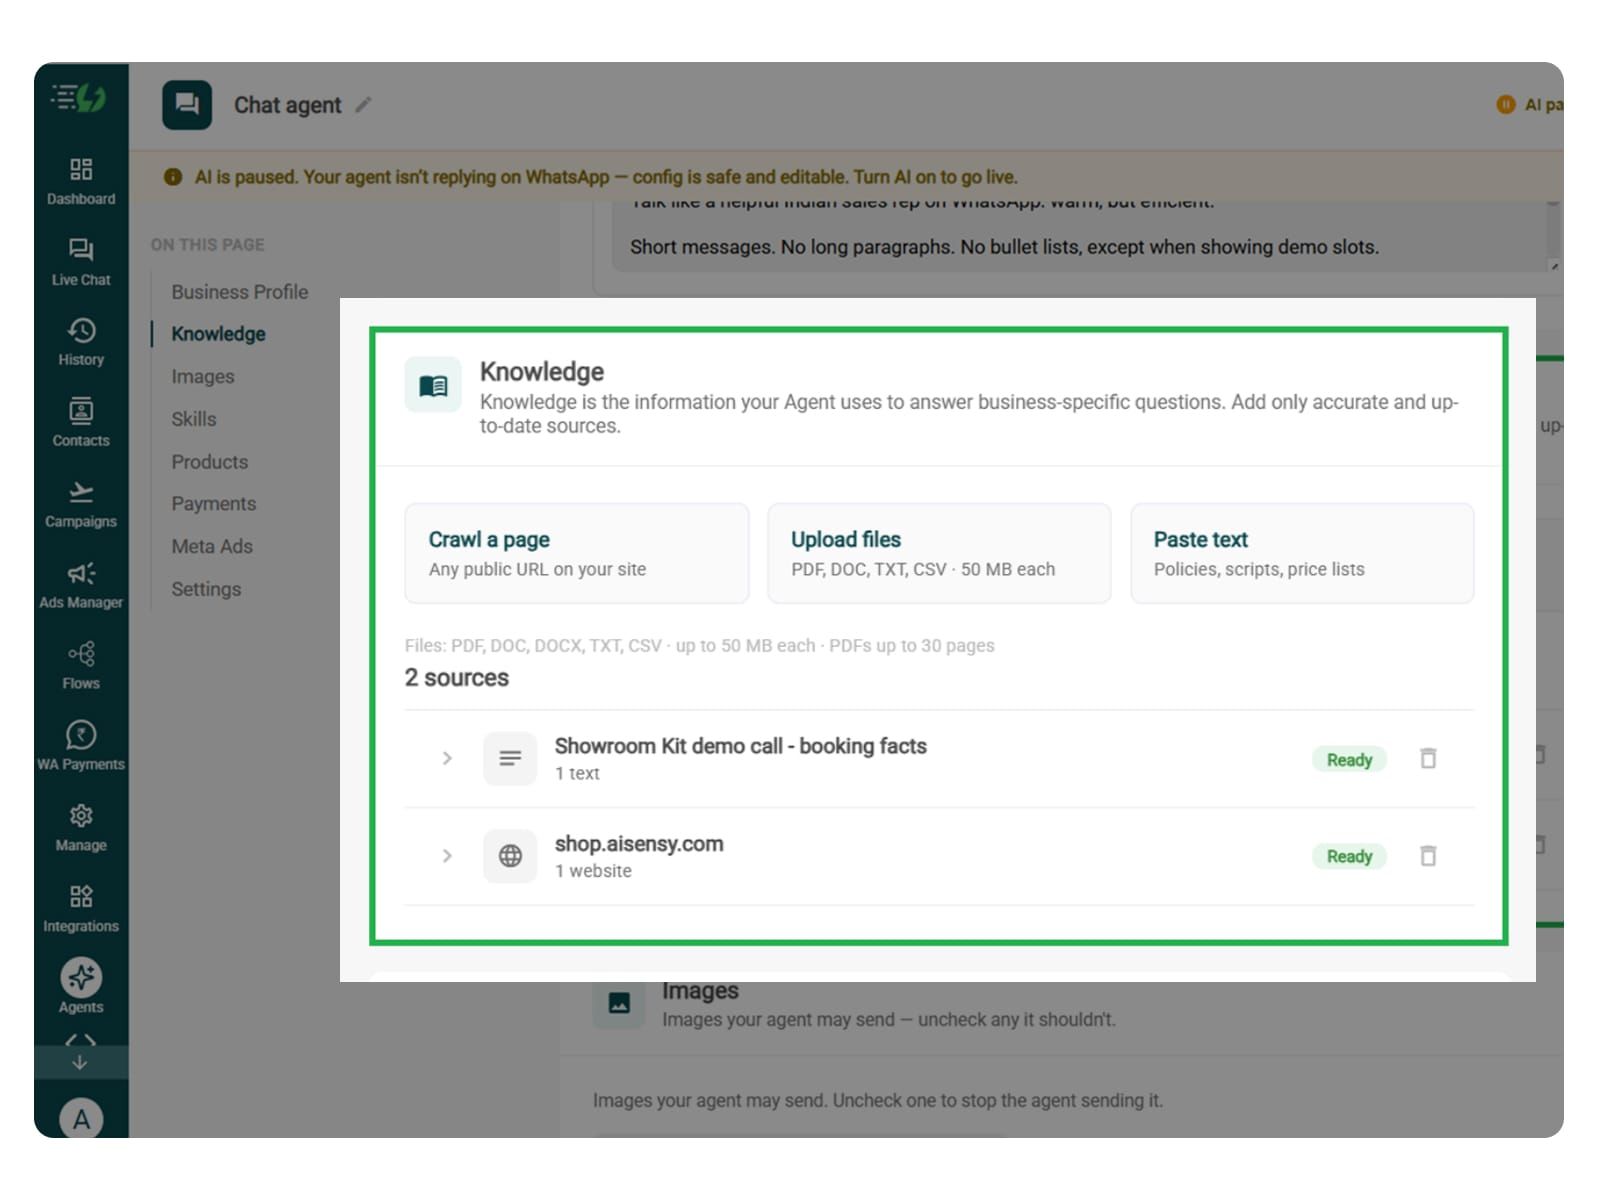
Train the Agent with Your Knowledge
Train the agent on your business website. You can add information that includes event dates, timings, venue details, agendas, speaker profiles, ticket prices, and registration FAQs.
The agent answers from the information you feed to it. This information can be submitted in the form of PDF, DOC, TXT, or CSV files. It never gives generic replies.
Every source shows "Ready" once learned.
Perform the below mentioned steps:
Crawl a page (website URL)
Upload files (PDF, DOC, TXT, CSV - up to 50MB each)
Paste text (policies, scripts, price lists)
Note* For event registration, also add ticket types, eligibility requirements, and what attendees need to bring. These details help people understand the event before registering.

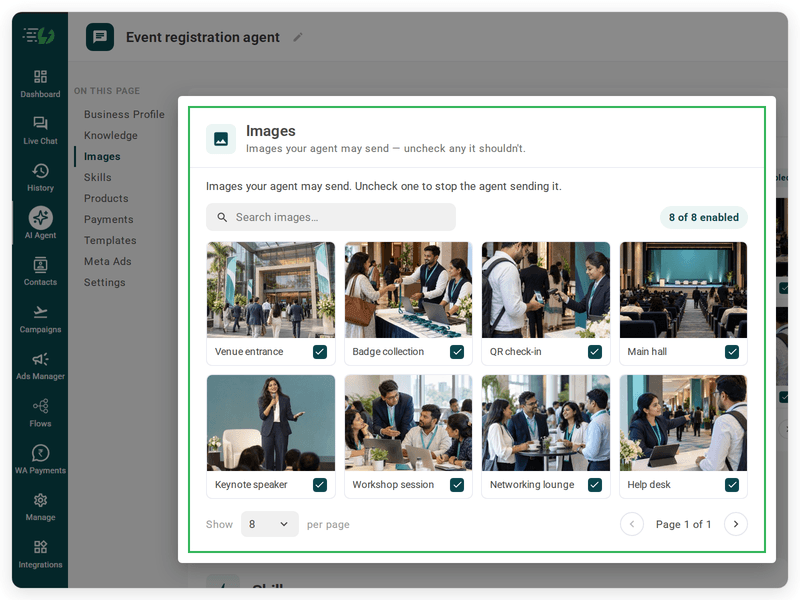
Choose the Images It Can Share (Optional)
When you add your website, the AI Agent automatically fetches the image from it. You can control the visuals the agent can share in chat - product shots, catalogs, offers.
Untick any image it shouldn't send.
You can:
Create Image library (enable/disable per image)
Search images
It is an optional step. You can add vent posters, agendas, speaker images, and venue maps that help users, but event registration doesn’t depend on them.

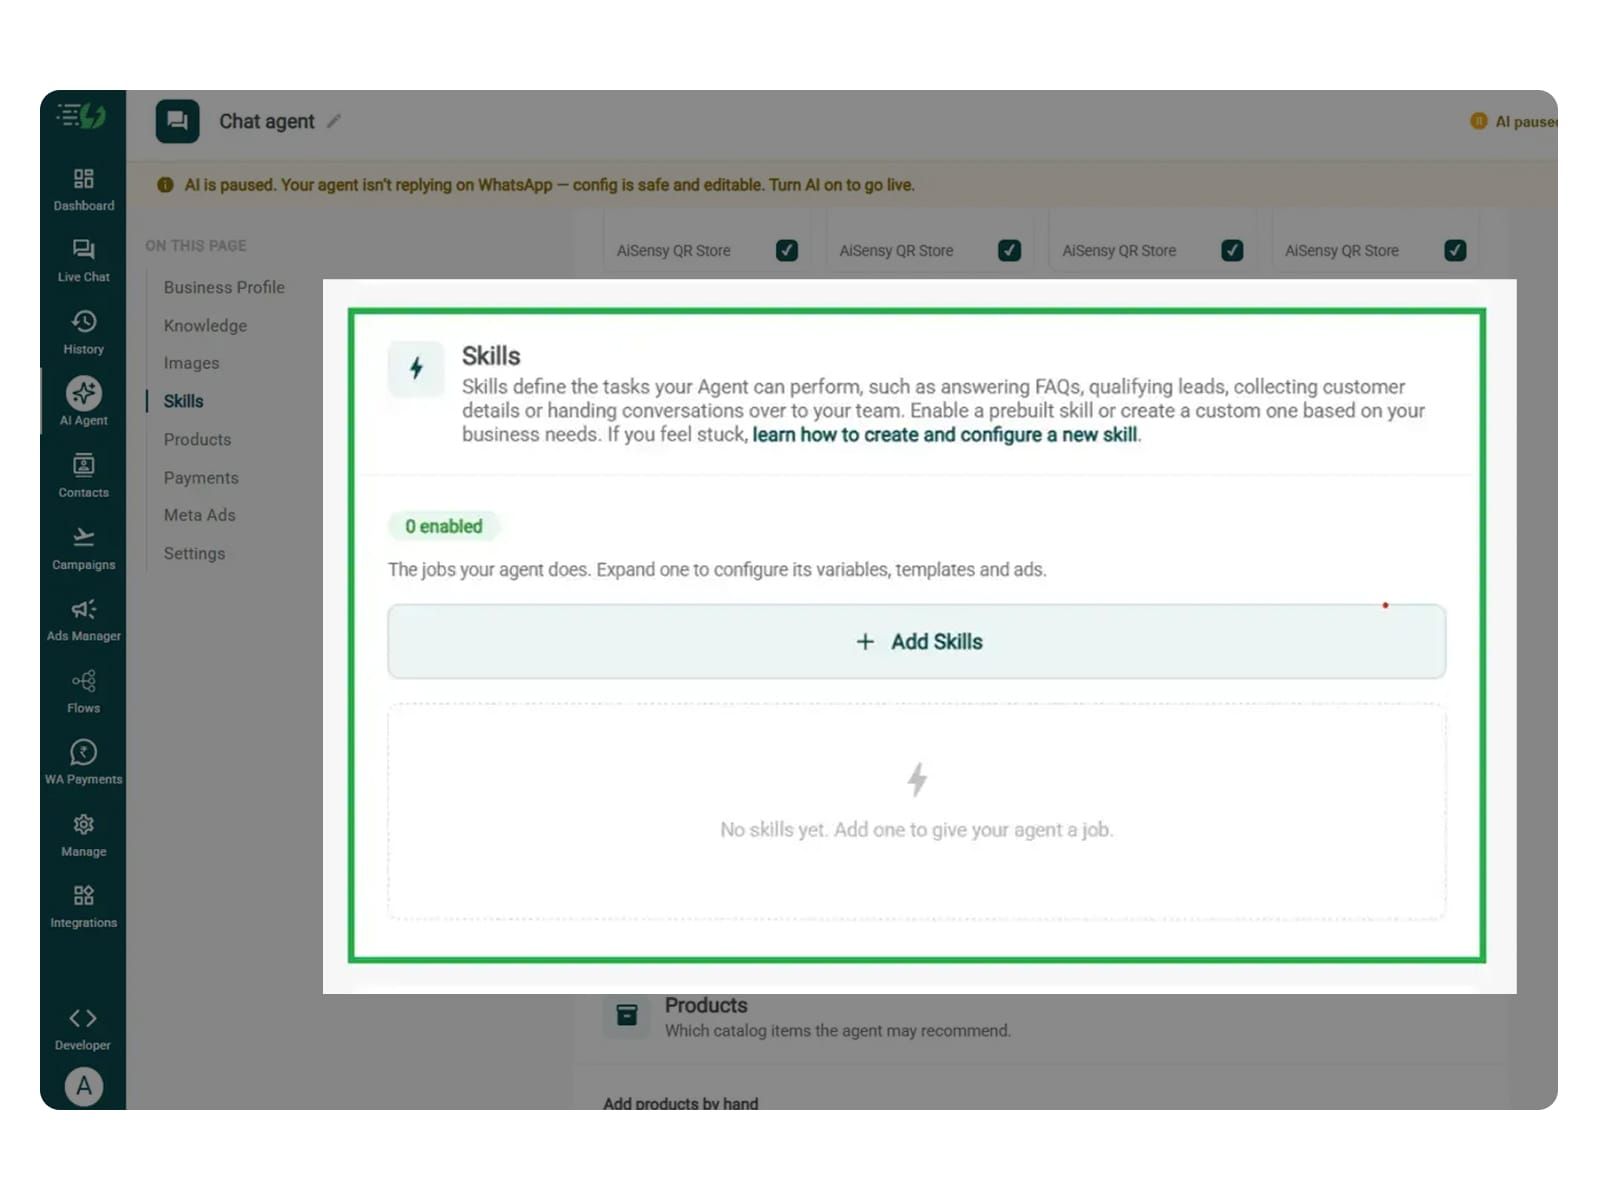
Create the Event Registration Skill
Open Add Skills and check the prebuilt list first - if the skill you need isn't there, hit Create custom, name it Event Registration, and pick Task skill as the type.
What kind of skill is this? (Task skill)
Icon & name: Event Registration
When should the agent use it?
Instructions
Add skills
Now, you must make sure that the instructions fed to the agent are clear and easy to understand. The agent behaves according to the instructions given to it.
One such template is:
"When someone asks “How do I register for the event?”, share the event date, time, venue, and ticket details using the information provided. Collect their name and email, then guide them through registration. Confirm their spot only after registration is successful."
Once you enter these instructions, the agent fetches the information around the instructions and replies accordingly.
For more info, tap here to learn how to create a custom skill

Enable It on Your Agent
The skill you just created lands in the Skills list. You can now switch it on, expand it to set your cut-off and where a qualified applicant should go, then hit Done.
All you have to go through is:
Skills list
Enable the event registration skill
Expand to configure its variables, templates & ads
Skills enabled counter
Now you agent is well taught and it knows how it should respond.

Connect Your Payment Gateway (Optional)
Connect your payment gateway so the agent closes sales with a secure payment link, right inside the chat.
Payment gateway (Razorpay or PayU)
Out-of-window template (optional)
Note* This step is only needed if the agent collects payment for paid registrations. Skip it for free events or if payment happens on an external ticketing page.

Link Your Meta Ads (Optional)
The step is useful if you are running Click-to-WhatsApp ads to promote the event.
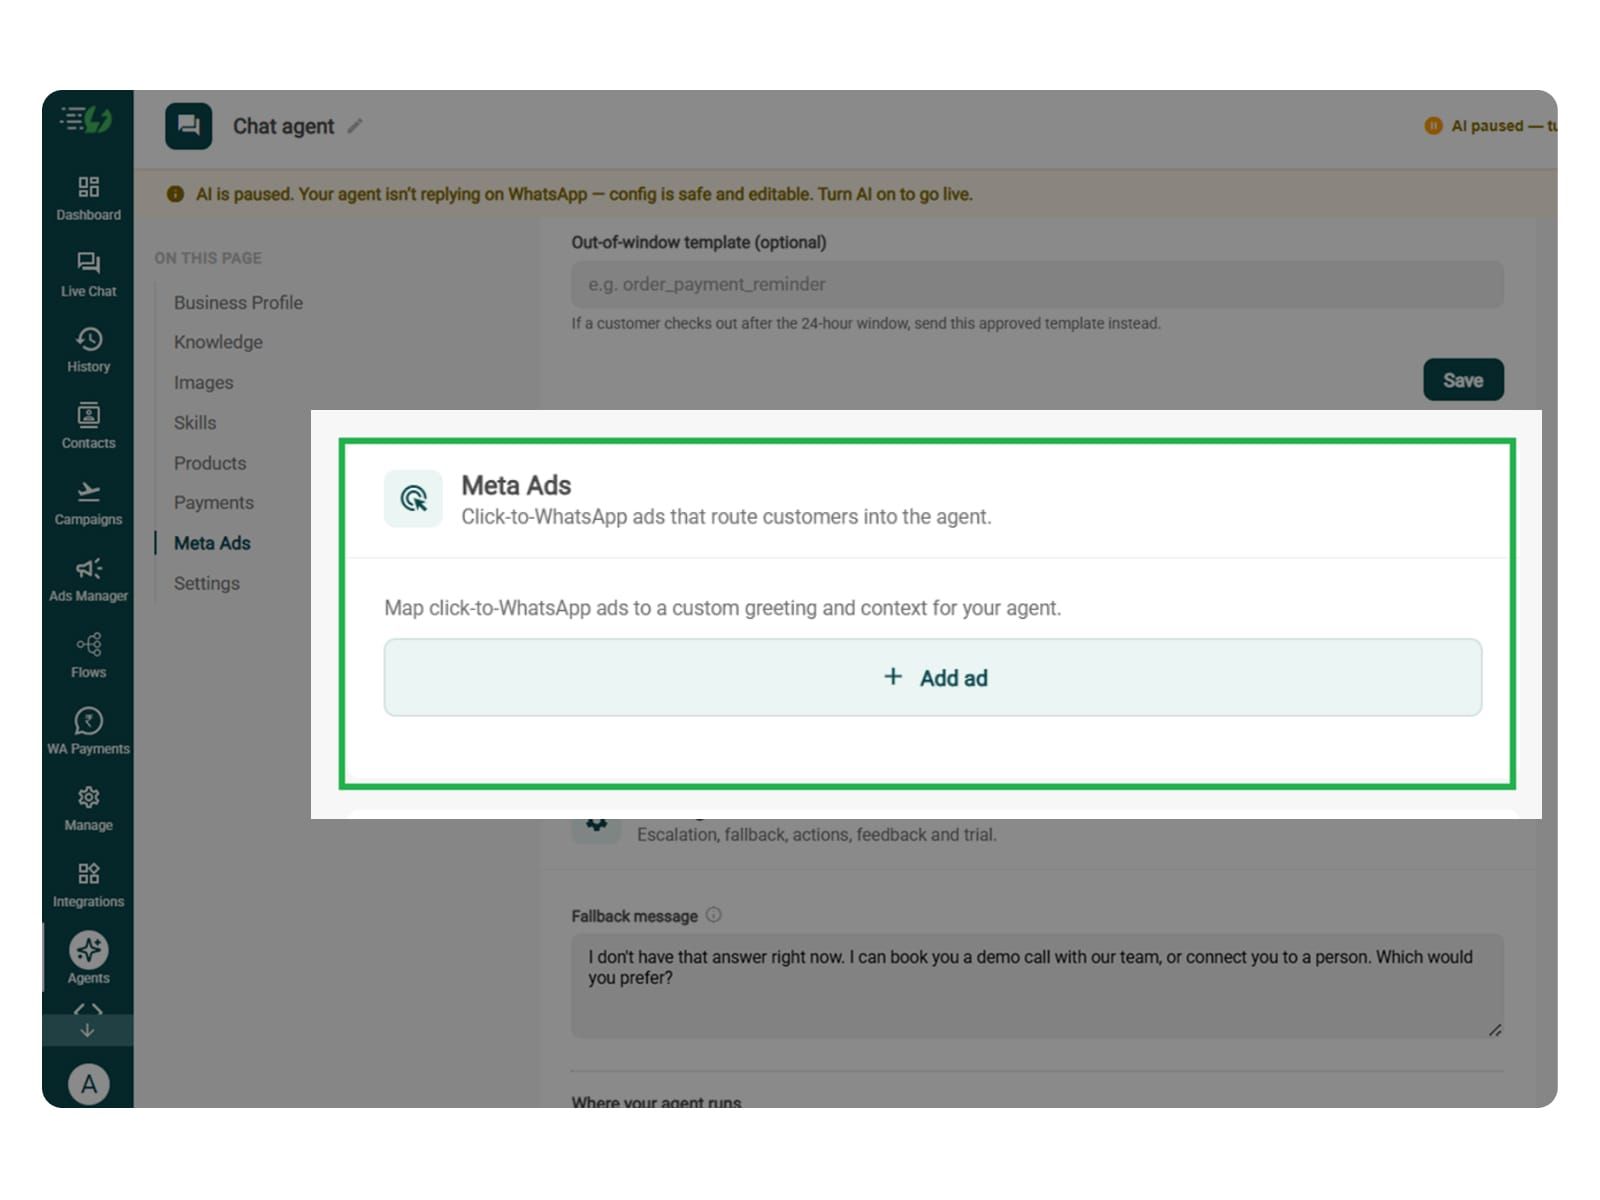
Map each ad to a custom greeting & context, so the agent knows exactly which ad brought the customer in.
Add ad (map ad → custom greeting & context)
Ad ID
Label
Greeting (first message to user)
Context (extra context for the agent)
Discount honoured at checkout (optional)
Products featured in this ad

Set Your Fallback & Handoff Rules
This step comes in handy if the agent can't resolve the requests made by attendees. The issues such as payment issues, missing tickets, or special registration requests may need your event team’s help.
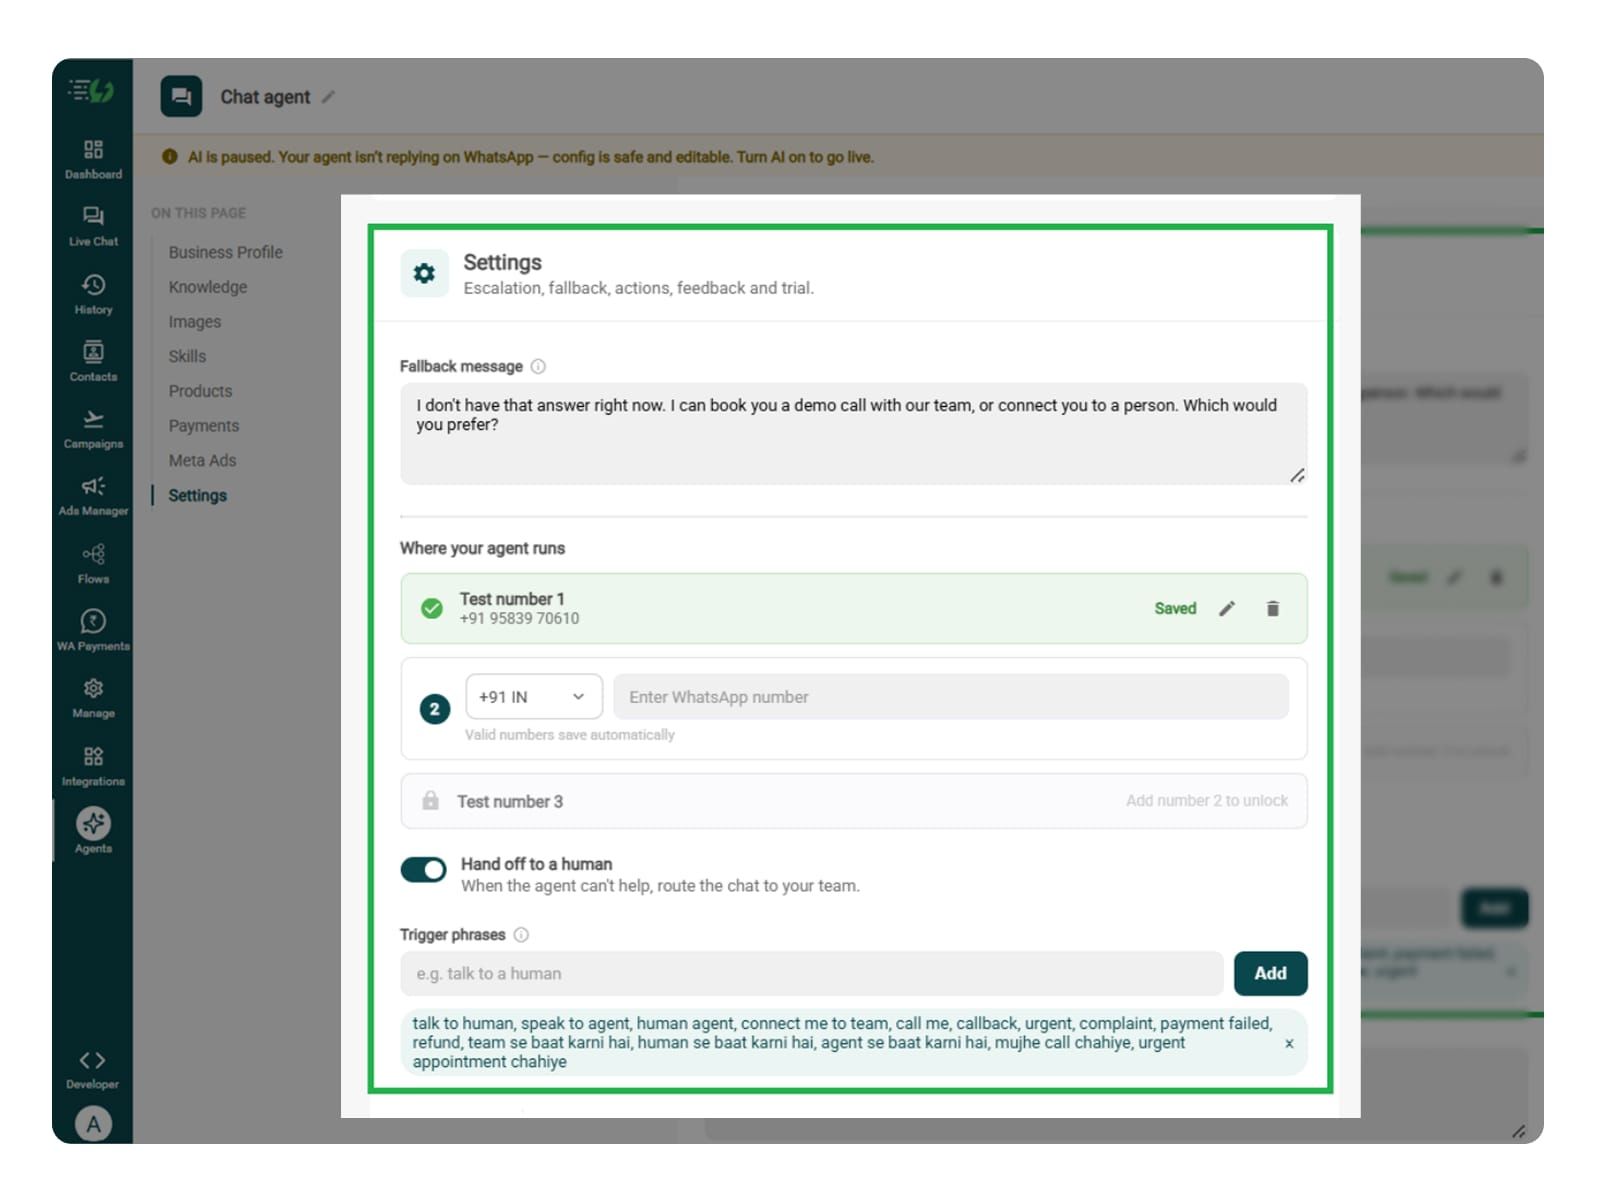
In this step, you get to decide what happens when the agent can't help. Write the fallback message, switch on Hand off to a human, and add the phrases that should pull a person into the WhatsApp chat.
What you must fill:
Fallback message
Where your agent runs: up to 3 test numbers
Hand off to a human: toggle
Trigger phrases
Handoff message

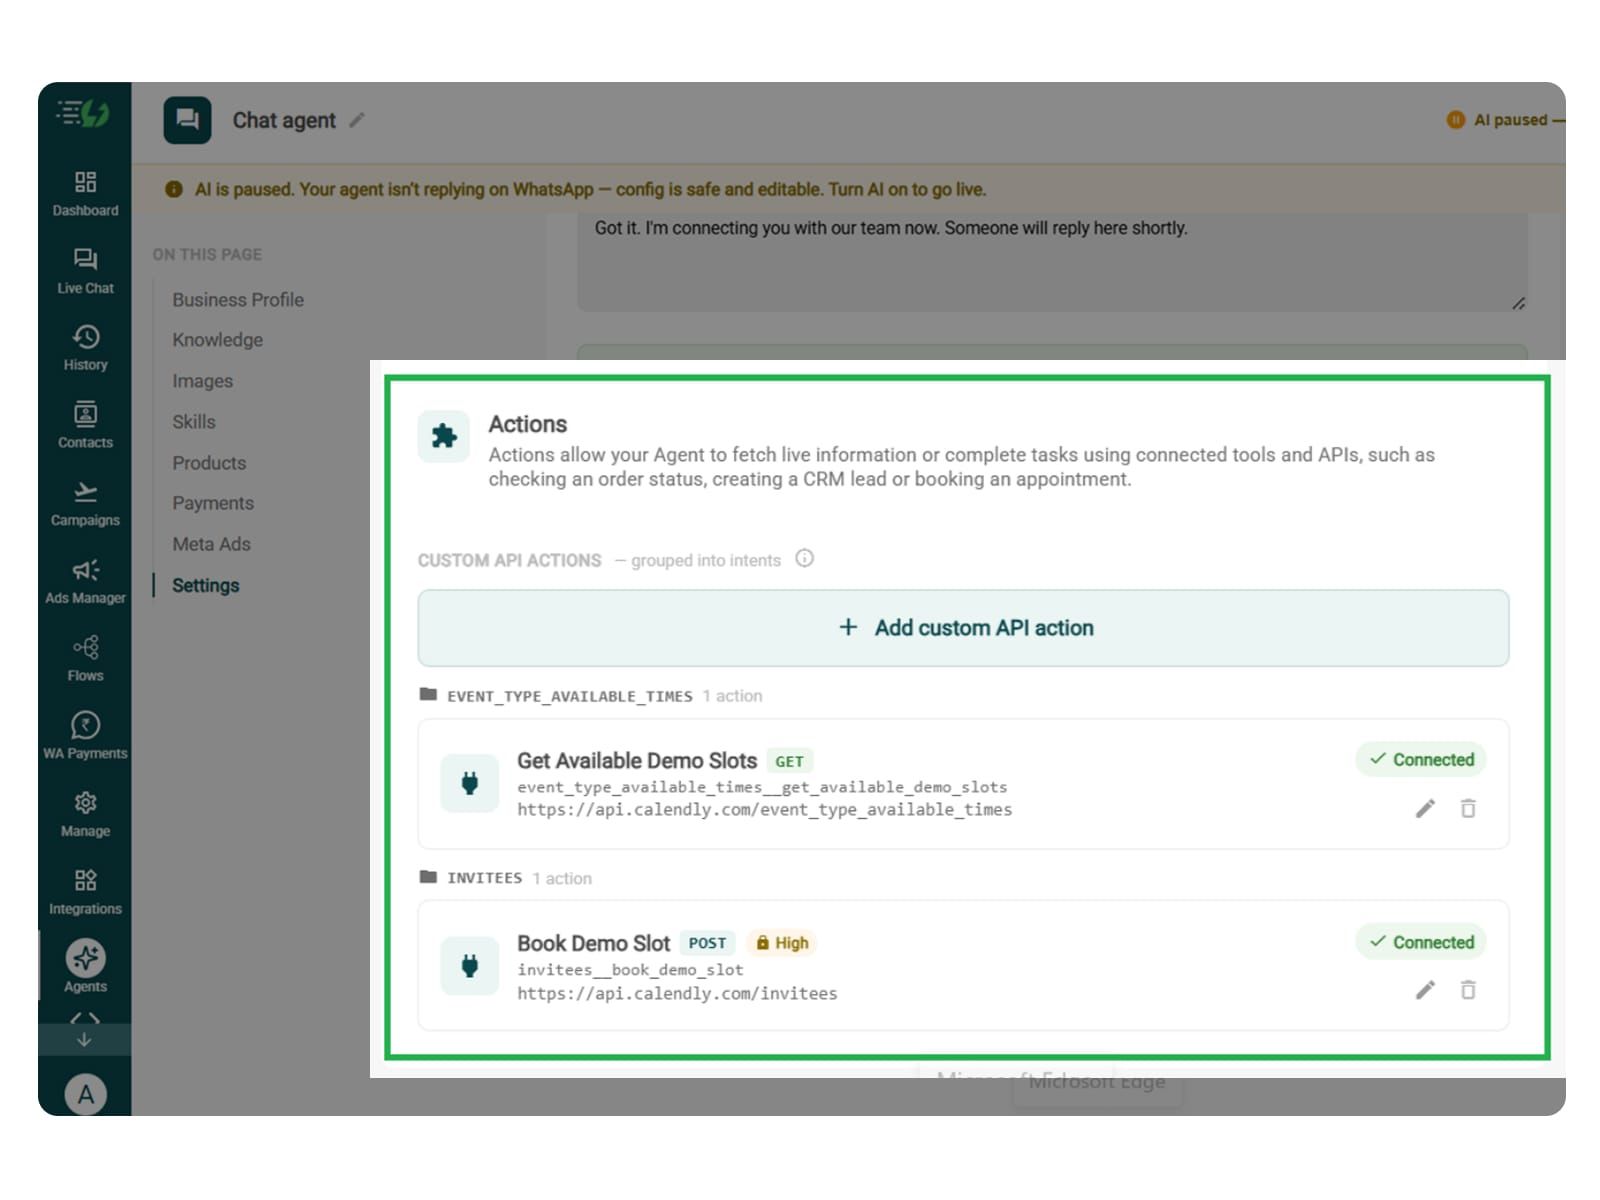
Connect Tools & APIs (Optional)
It is needed only if you want your agent to share registration link with attendees. It directly registers attendees, checks live seat availability, or retrieves booking confirmations from your event system.
Actions let your agent fetch live information or complete tasks using connected tools and APIs - checking an order status, creating a CRM lead or booking an appointment.
Hit Add custom API action, tell it when to call it, then paste your cURL - the request fills itself in.
Action name
When should the agent call it?
Paste cURL
Request: method + endpoint URL
Headers
Params
Body
Auth
Test call
Click on - Next: variables

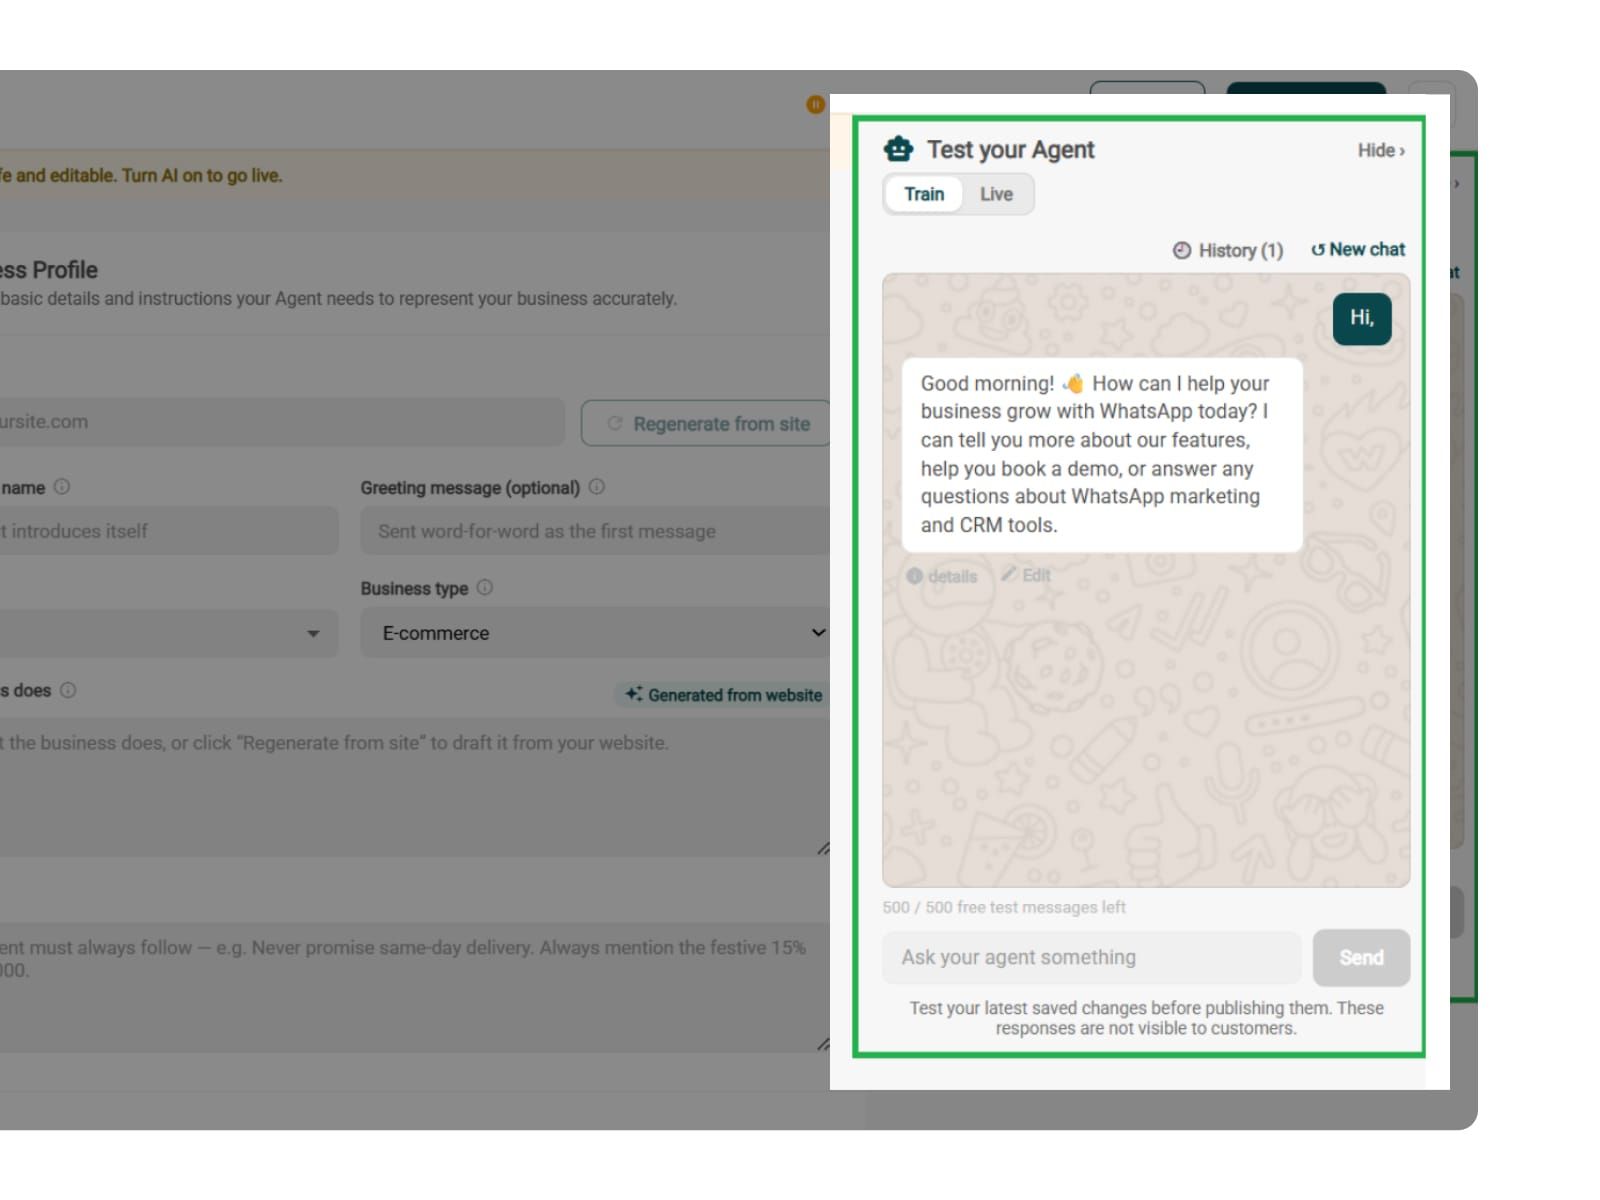
Test, Publish & Go Live
Chat with your agent before your customers do - 500 free AI messages to trial it. Happy?
Publish, switch the AI on & you're live.
Test your Agent panel (Train/Live modes)
Publish
AI on/off toggle

Simple Pricing. Every Agent Included.
One plan unlocks the entire library - deploy any AI Agent, or build your own.
₹1,350
Per Month (includes 1000 AI messages)
$50
Per Month, Billed Annually (includes 1000 AI messages)
WhatsApp AI Agent Features
Access every pre-built AI Agent in this library, plus the no-code builder to create your own - trained on your business and live on WhatsApp in minutes.
1000 AI messages every month
500 FREE AI messages for testing
Knowledge Base Q&A - train it on your website & documents
Long-term customer memory
No-code builder to customize any agent
Tool calling, skills & API integrations
What kind of events can it register people for?
Anything with a date and a guest list - conferences, expos, webinars, workshops, product launches, open days, health camps or community meets. Paid or free, one event or several running at once.
What details can it collect from an attendee?
Whatever you decide. Set the questions on the skill - name, work email, company, designation, session choice, meal preference - and mark which ones are compulsory before a seat is confirmed. Each answer is stored against its own variable, so you get a clean record rather than a chat transcript.
Can it take the ticket payment?
Yes. Connect Razorpay or PayU and the agent shares a secure payment link inside the chat. The attendee pays without leaving WhatsApp, and the seat is confirmed once it clears.
Can it handle different ticket tiers?
Yes. Add each tier as a product - early bird, standard, VIP, group of five - and the agent explains the difference, then registers the person on the one they choose.
Can it send reminders before the event?
Not on its own. The agent replies to people; it doesn't message first. Reminders go out as approved WhatsApp templates through a campaign, which is a separate part of AiSensy - so the agent handles the registration and your template handles the nudge.
Does it know when the event is full?
Only if you tell it. Put your capacity limit and cut-off date in Ground Rules and the agent works to them, or connect your event platform under Tools & APIs so it checks the real number. Without one of those, it has no seat counter.
Will it work with my event platform?
If that platform has an API, yes. Connect it under Tools & APIs and registrations land in your system as they happen instead of being exported later. It's optional though - the agent registers people perfectly well on its own.
Can it run two events at the same time?
Yes. Map each event's Click-to-WhatsApp ad to its own greeting and context, and the agent opens on the right event from the first message rather than asking which one they mean.
Is the Event Registration AI Agent charged separately?
No. One AI Agent plan at ₹1350 a month with 1000 AI messages/month, covers every agent in the library plus the no-code builder, so running this alongside Lead Qualification and Feedback costs the same as running one.