WhatsApp AI Agent by AiSensy
WhatsApp AI Agent for KYC Assistance
Don’t let KYC delays cost you customers.
This WhatsApp AI agent instantly tells them what’s missing, what needs fixing & where to submit it, right on WhatsApp.
No coding needed!

WhatsApp AI Agent by AiSensy
WhatsApp AI Agent for KYC Assistance
Don’t let KYC delays cost you customers.
This WhatsApp AI agent instantly tells them what’s missing, what needs fixing & where to submit it, right on WhatsApp.
No coding needed!
How a Stalled KYC Gets Finished on WhatsApp
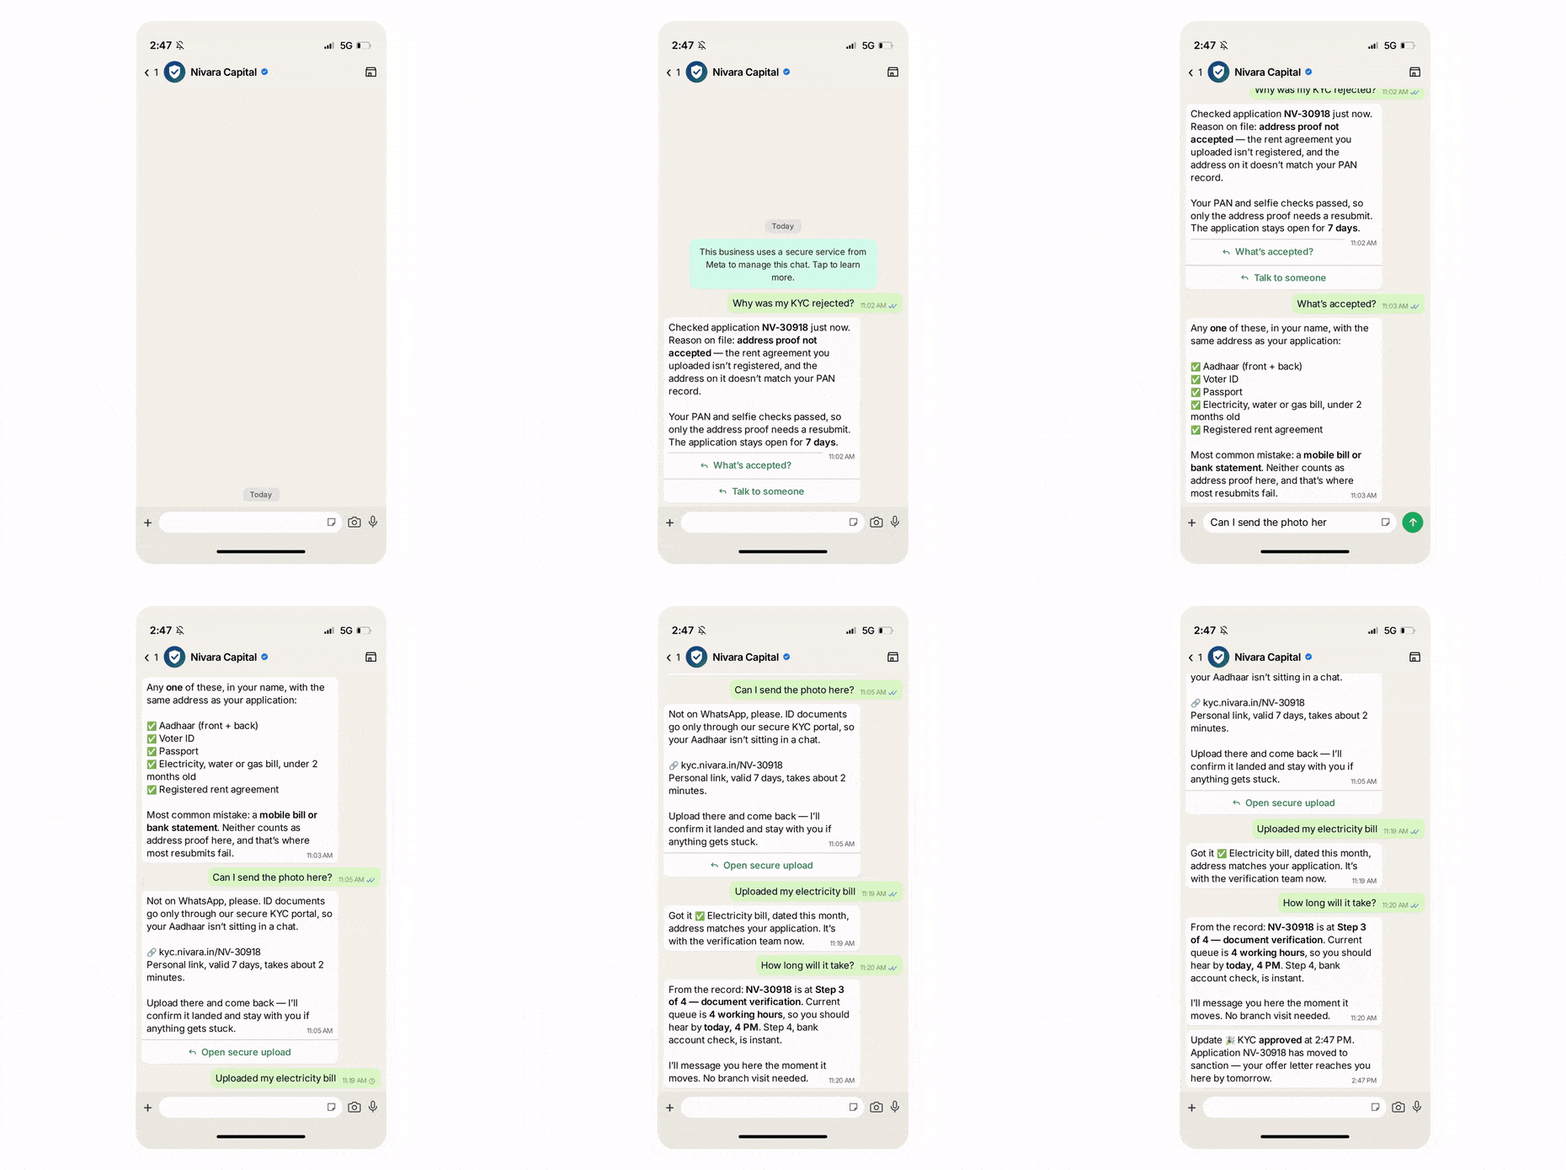
A real conversation, start to finish - and not one document changes hands inside the WhatsApp chat.
Turns a Rejection Into a Next Step
A customer asks, “Why was my KYC rejected?”
The AI agent pulls the reason from your system, explains it clearly, and tells them exactly what to submit next, giving the application another chance.
Names the Document, Not the Category
“Address proof” often sends people to the branch with the wrong document. The WhatsApp AI agent lists what’s actually accepted and flags the most common mistakes customers make.
Sends the Link Instead of Asking for the File
The customer asks: “Can I send the photo here?”
No. The WhatsApp AI agent explains that documents must go through a secure channel, shares your portal link, and stays available to help.
Answers the Waiting Question From the Actual Record
Question: “How long will it take?”
The AI agent pulls the real status from your system, so customers know exactly where they stand instead of calling the branch. All of this gets done inside a WhatsApp chat.
Key Terms: How AiSensy AI Agent Works
A brief description on each section you'll see inside AiSensy WhatsApp AI Agent Dashboard and what each one actually does.
Business Profile
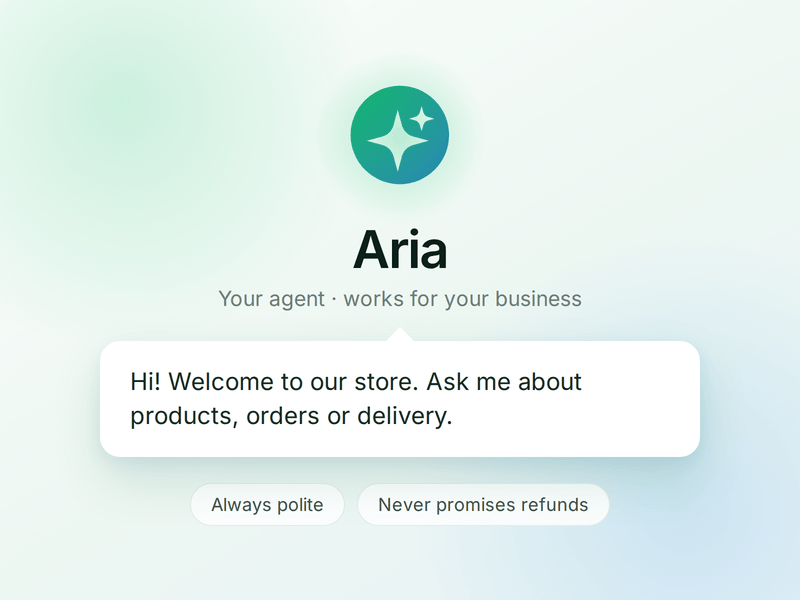
Who your agent is and who it works for. Your business details, the agent's name and greeting, and the ground rules it must always follow.
Knowledge
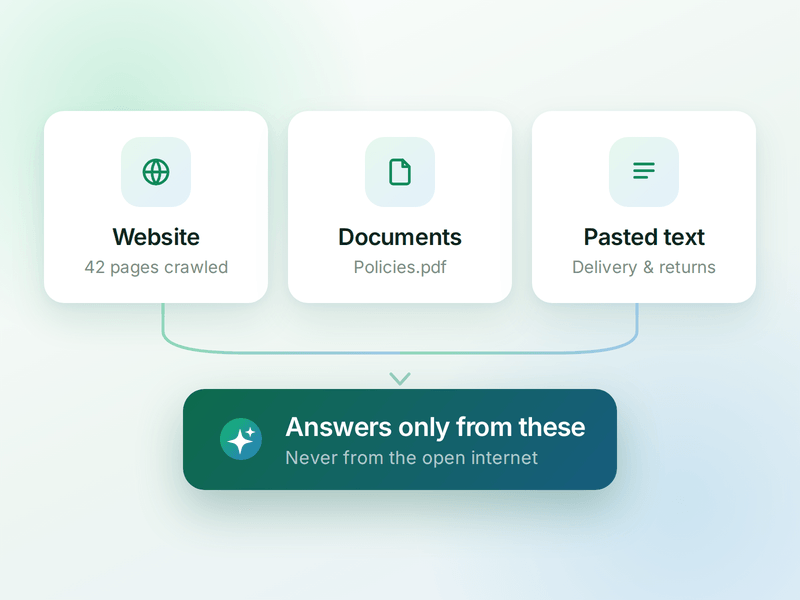
Everything your agent is allowed to know. Crawl your website, upload documents or paste text - the WhatsApp AI agent answers from these, not from the internet.
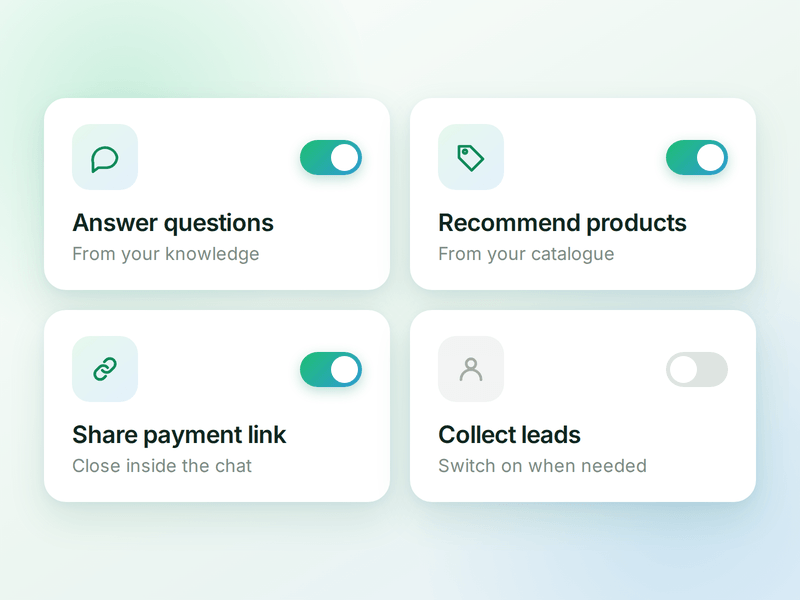
Skills
The jobs your agent can do. Switch on a ready-made skill or create your own, and the agent works out which one a conversation needs.
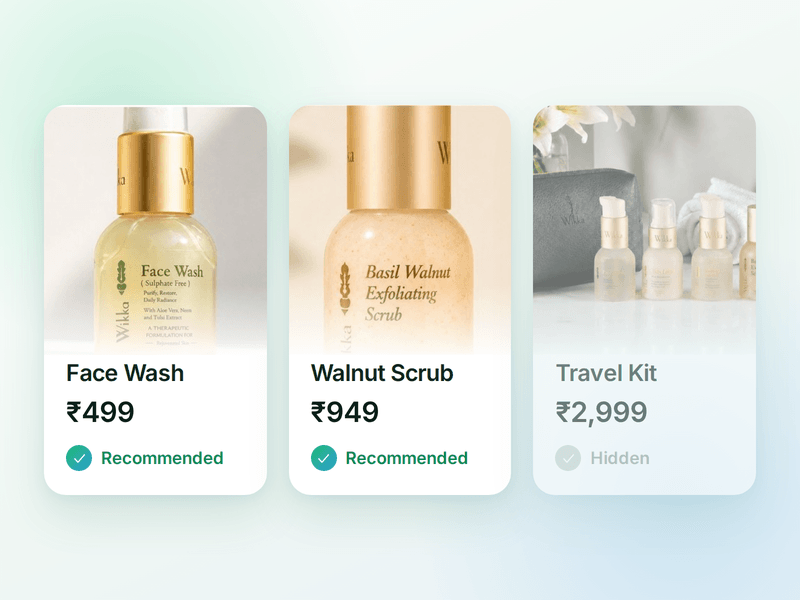
Products
The catalogue your agent sells from. Sync your store or add items by hand, then pick which ones the agent is allowed to recommend.
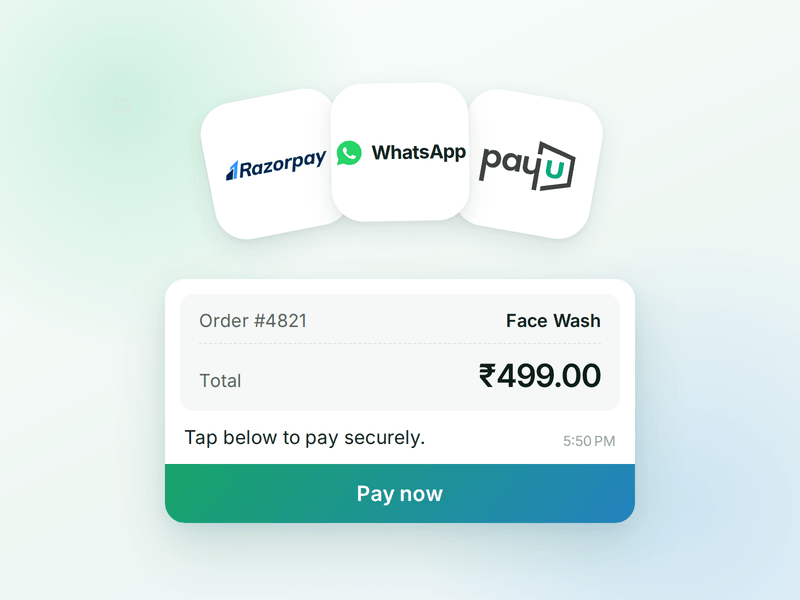
Payments
Your checkout, inside the WhatsApp chat. Connect Razorpay or PayU & the agent can send a secure payment link the moment a customer decides.
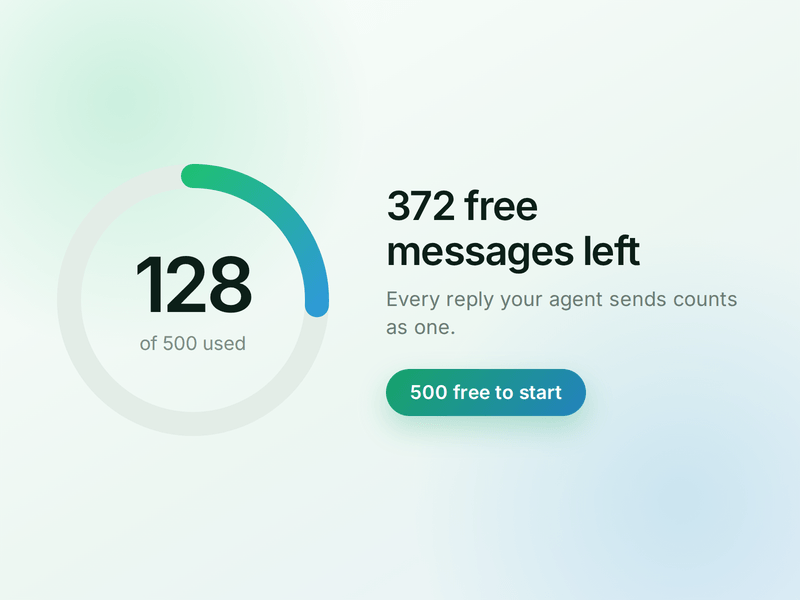
AI Messages
Each reply sent by your AI Agent counts as one AI Message and is deducted from your active plan. You get 500 free AI Messages to test your agent before going live.
How to Build Your KYC Assistance AI Agent in AiSensy
Here's how a real brand goes from zero to a live KYC Assistance AI Agent on WhatsApp.
Signup on AiSensy
Go to the AiSensy Signup Page. Create your account using either:
Your Google account, or
Your business email address by filling out the sign-up form.
Once signed up, Log in to AiSensy using the same Google account or email credentials.
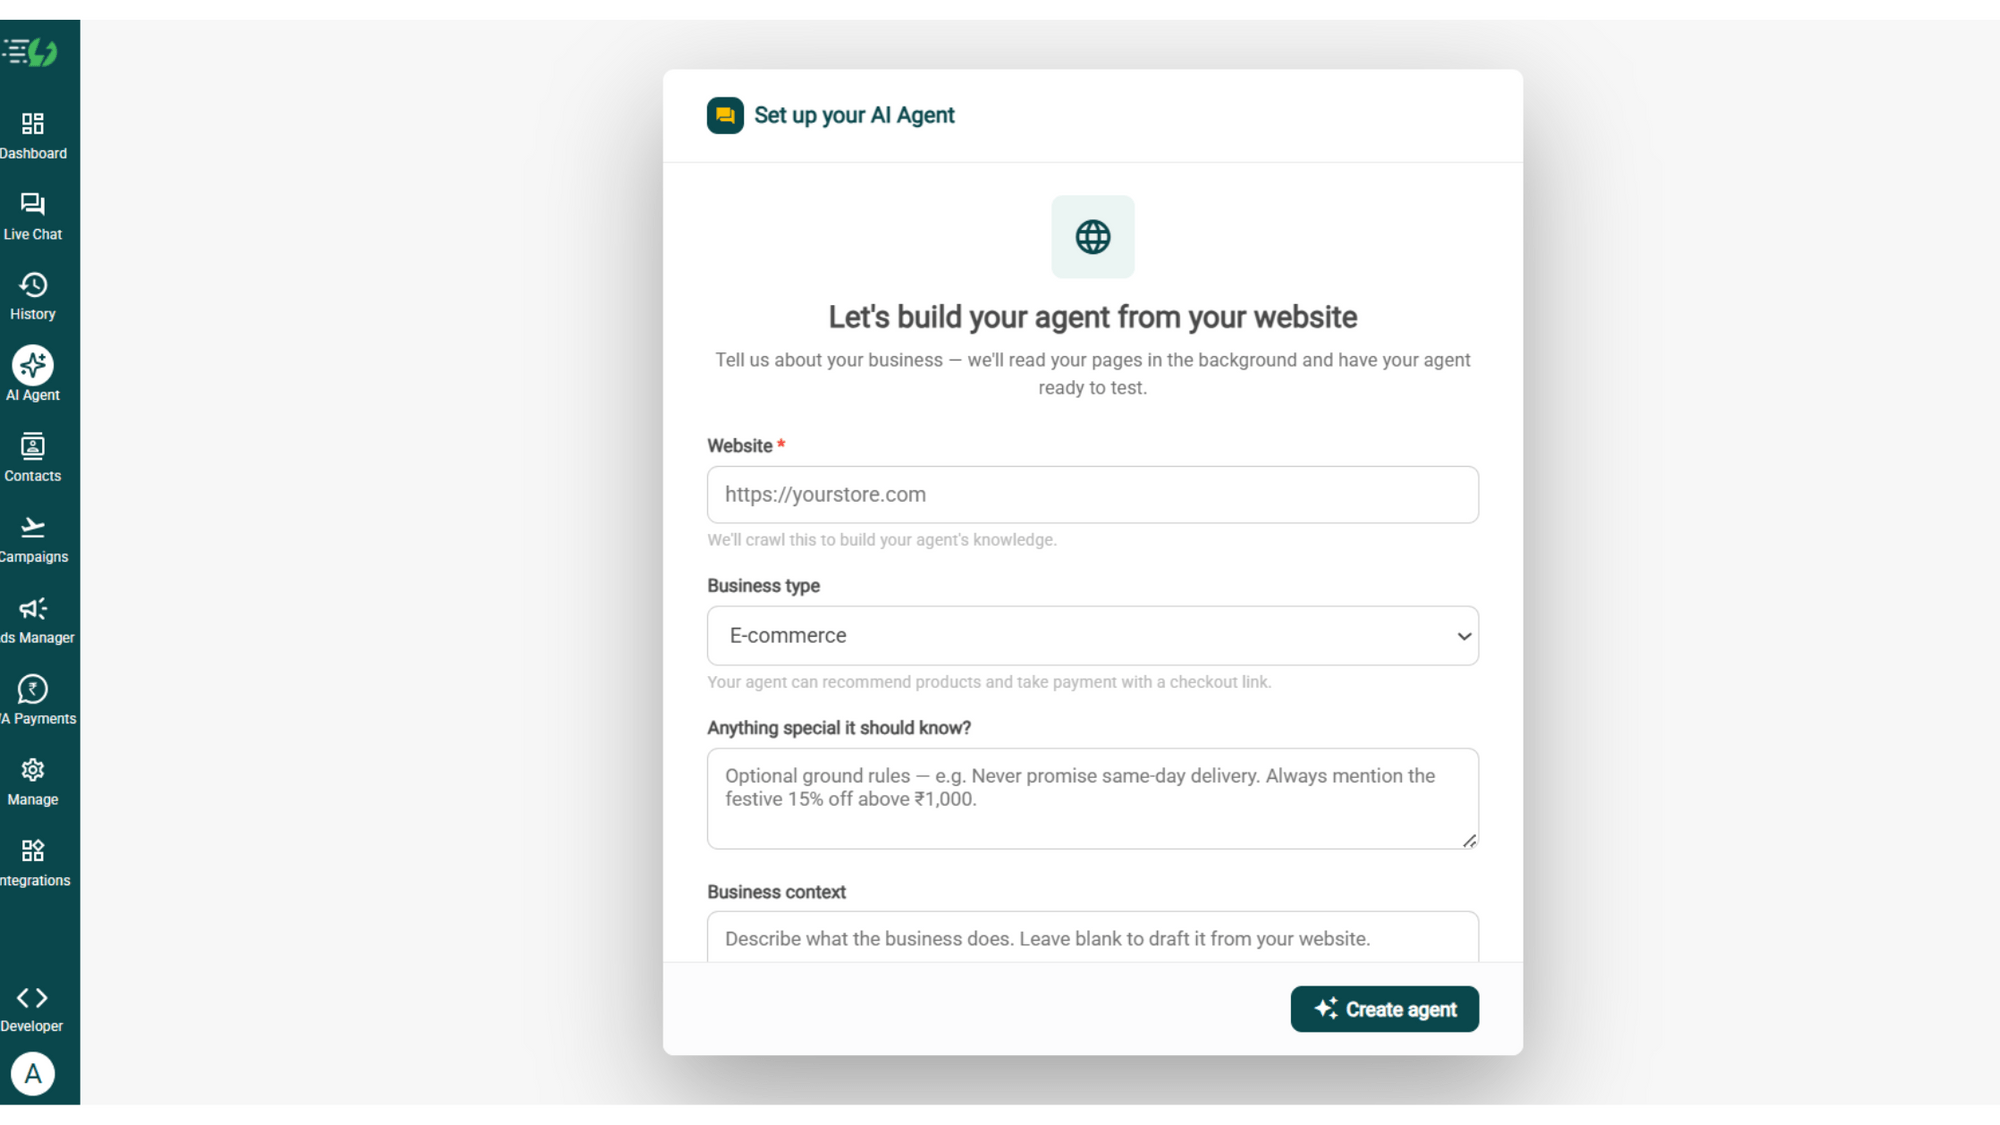
Build Your Agent from Your Website
Once you are logged in, navigate to and click on AI Agent available on the navbar on the left.
Fill in the details given below:
Website (mandatory)
Business type
Anything special it should know? (optional)
Business context (optional)
Once you fill these details correctly, proceed to hit '✨ Create agent' button. AiSensy automatically builds an agent trained on your business.
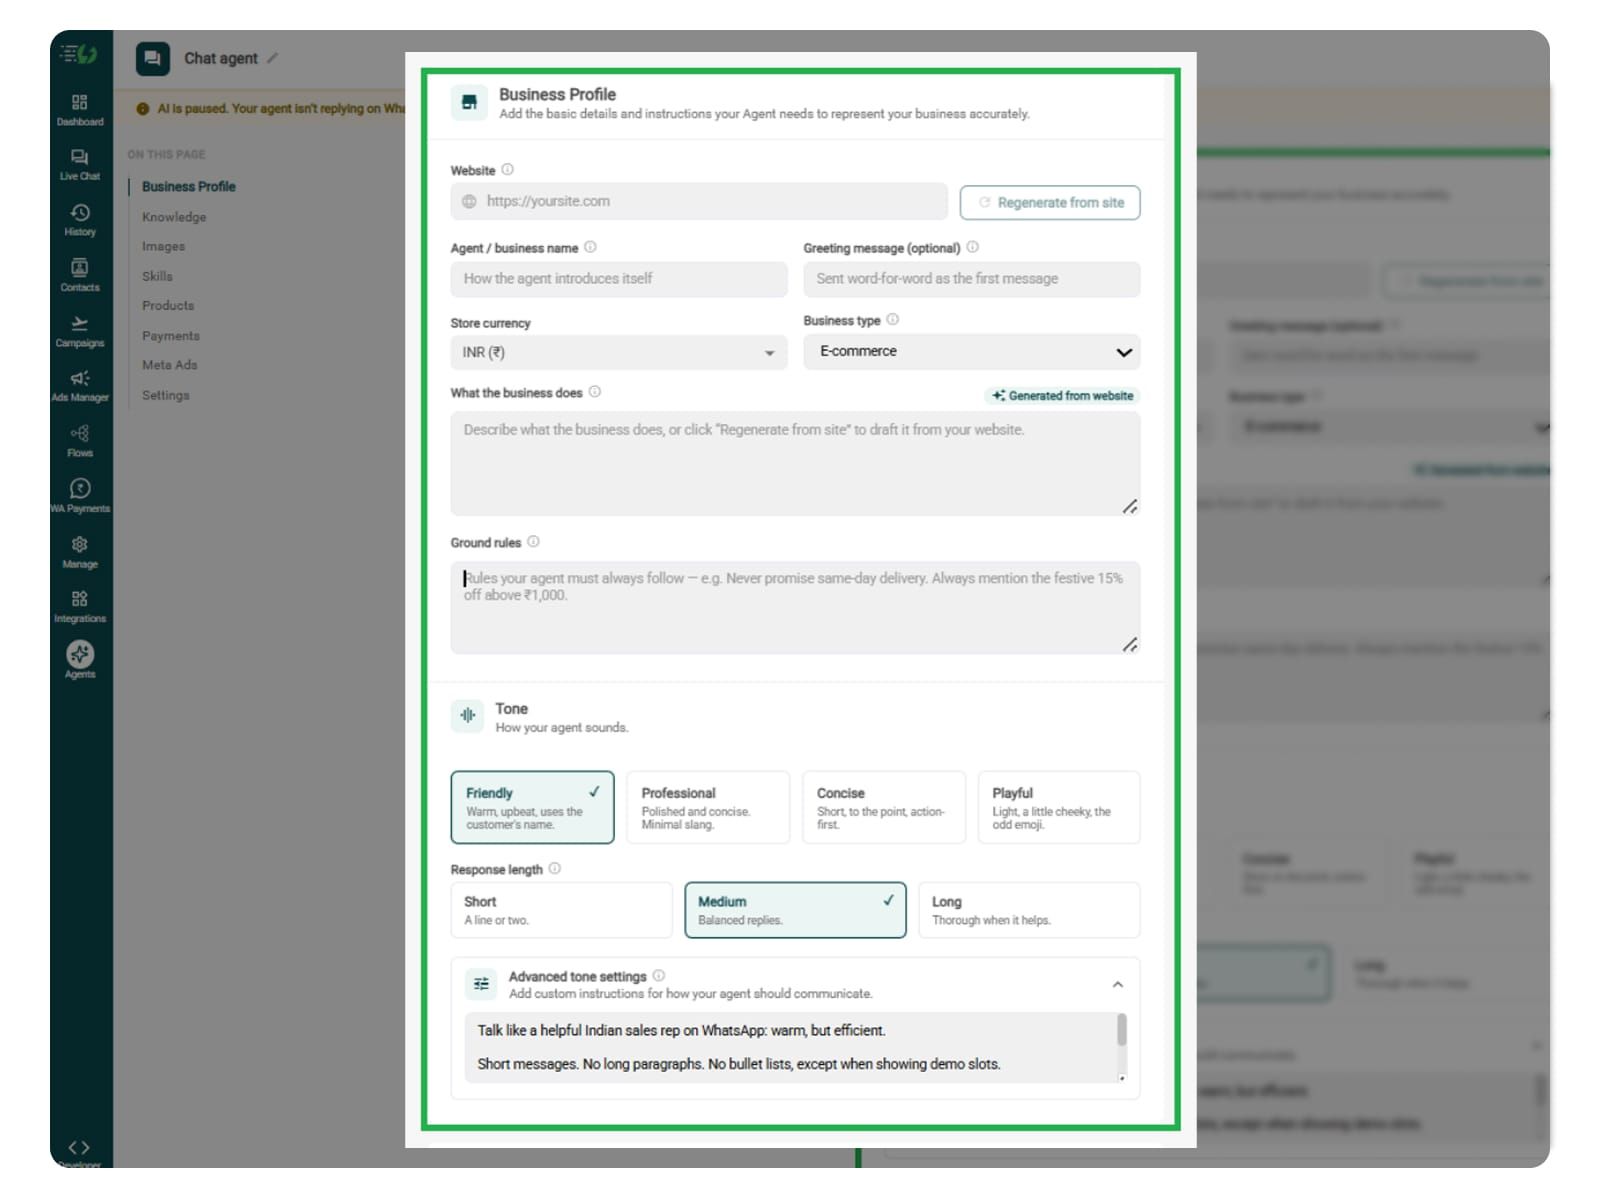
Add Your Business Profile
When you add your website, AiSensy auto-generates your business description. Set your agent's name, greeting, and a few ground rules it must always follow.
Fill the details given below:
Website (fetched automatically)
Agent/business name
Greeting message (optional)
Store currency
Business type
What the business does
Ground rules
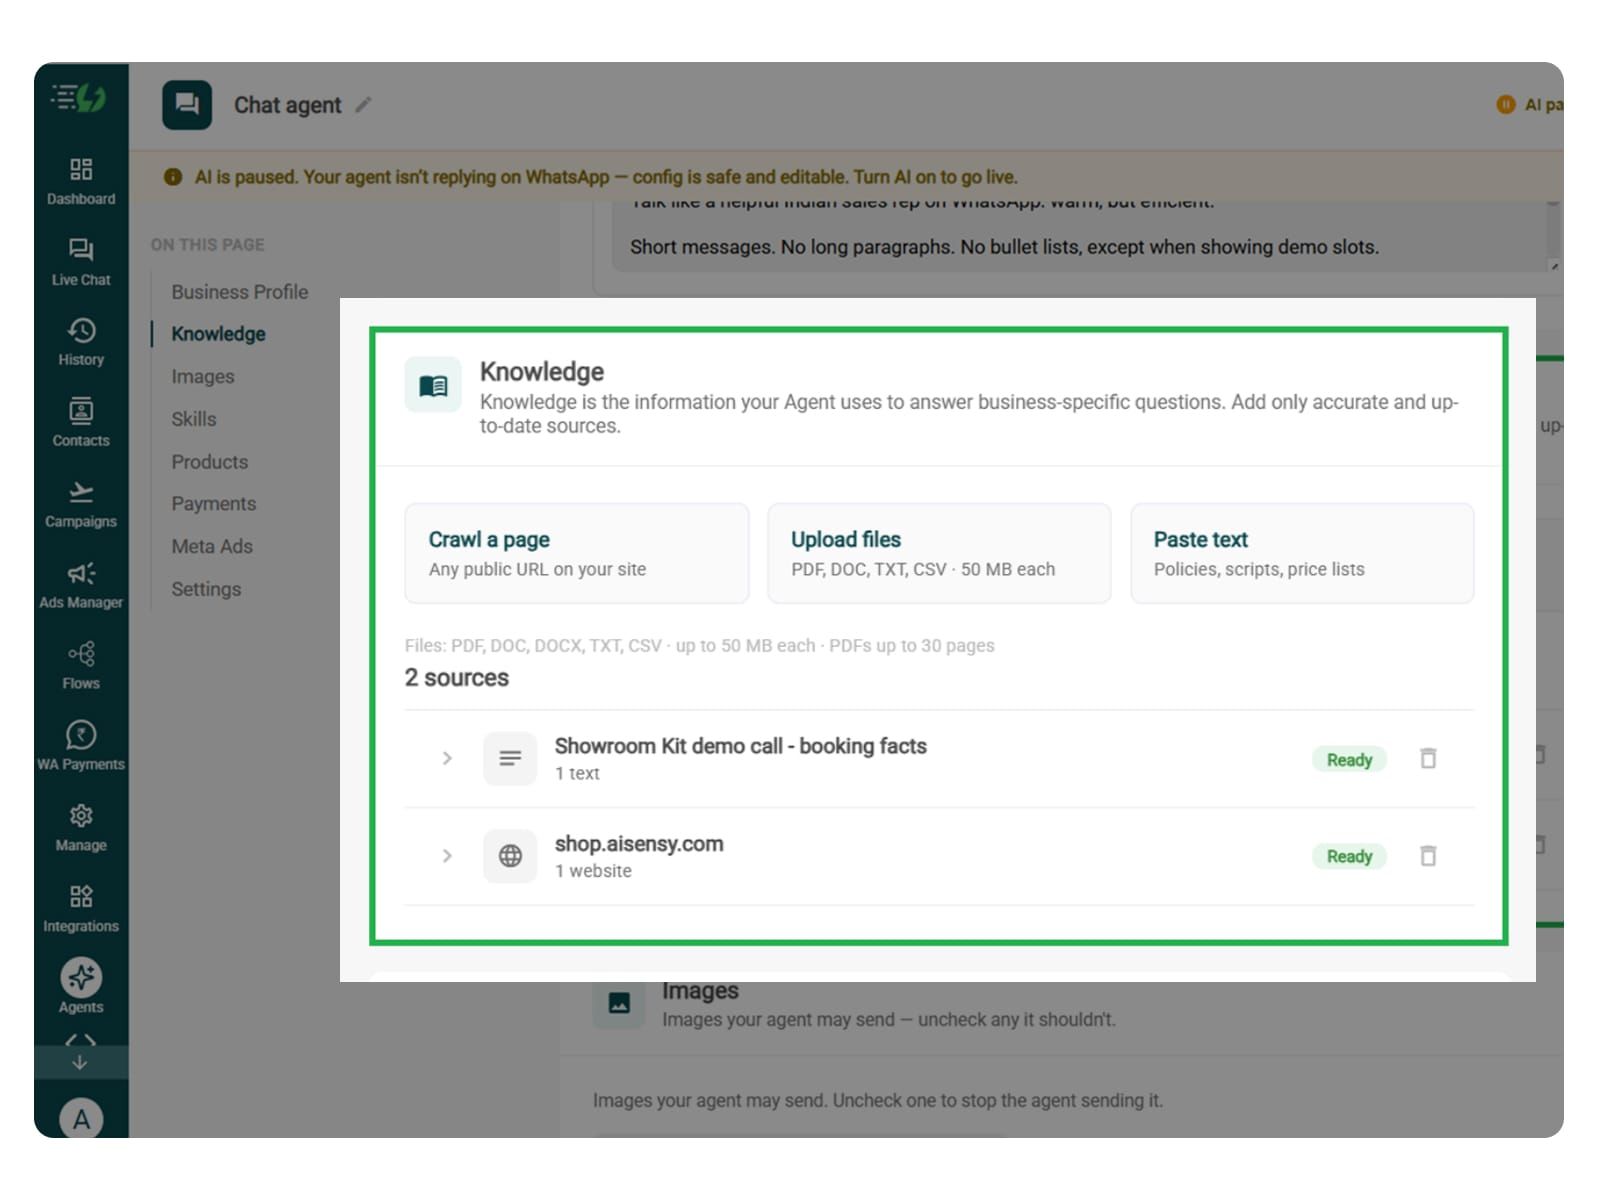
Train the Agent with Your Knowledge
In this step, add your business website and the information your agent needs to assist customers with KYC. Include accepted documents, submission steps, document image requirements, expected verification timelines, common rejection reasons, and FAQs.
The agent uses this information to answer questions and guide customers through your KYC process. You can provide it in PDF, DOC, TXT, or CSV files. Add approved guidance, keeping customer identity documents and personal records out of the knowledge base. Use a connected KYC system for individual application updates.
Every source shows “Ready” once learned.
Add your information using these options:
Crawl a page: Add the URL of your KYC information or help page.
Upload files: PDF, DOC, TXT, or CSV, up to 50MB each.
Paste text: Document requirements, submission instructions, FAQs, and escalation guidelines.
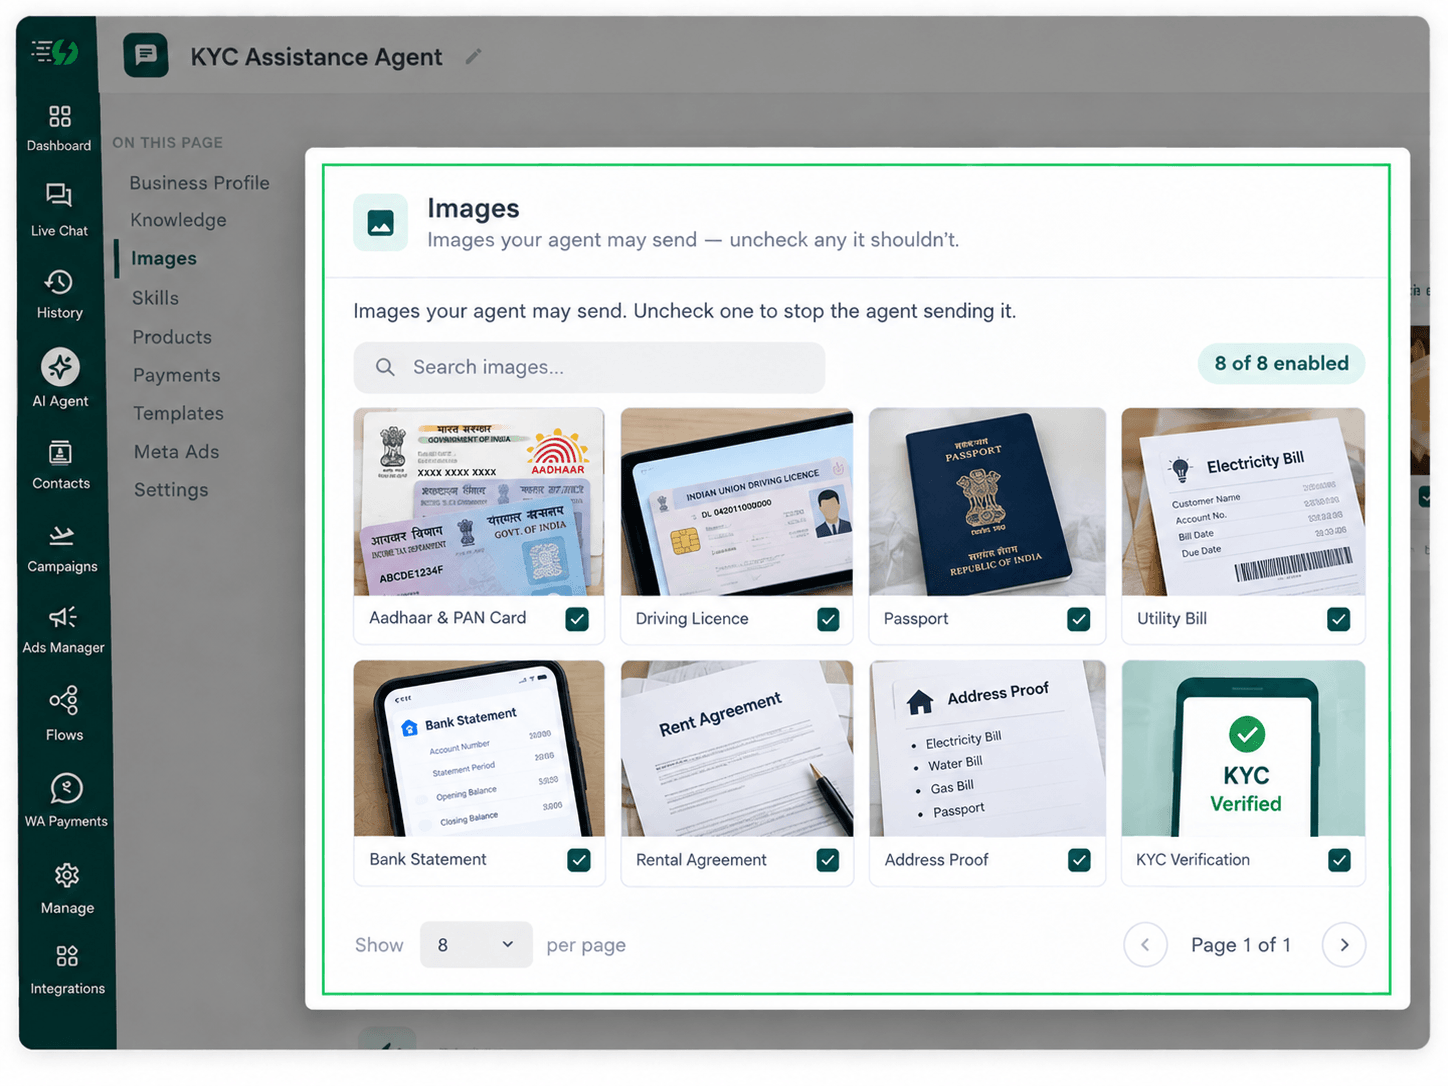
Choose the Images It Can Share (Optional)
When you add your website, the AI Agent automatically fetches images from it. For KYC assistance, select document photography guides and submission screenshots that help customers understand what to upload and how.
You can control the visuals the agent shares in chat. Untick any image it shouldn’t send. Use examples with fictional details instead of real customer documents.
You can:
Create an image library: Enable or disable individual images.
Search images: Find relevant visuals in your library.
Upload a Guidelines PDF that can help users understand the KYC verification process better.
This step is optional. Visual guides can help customers submit clear, complete documents, but KYC assistance doesn’t depend on them.
Create the KYC Assistance Skill
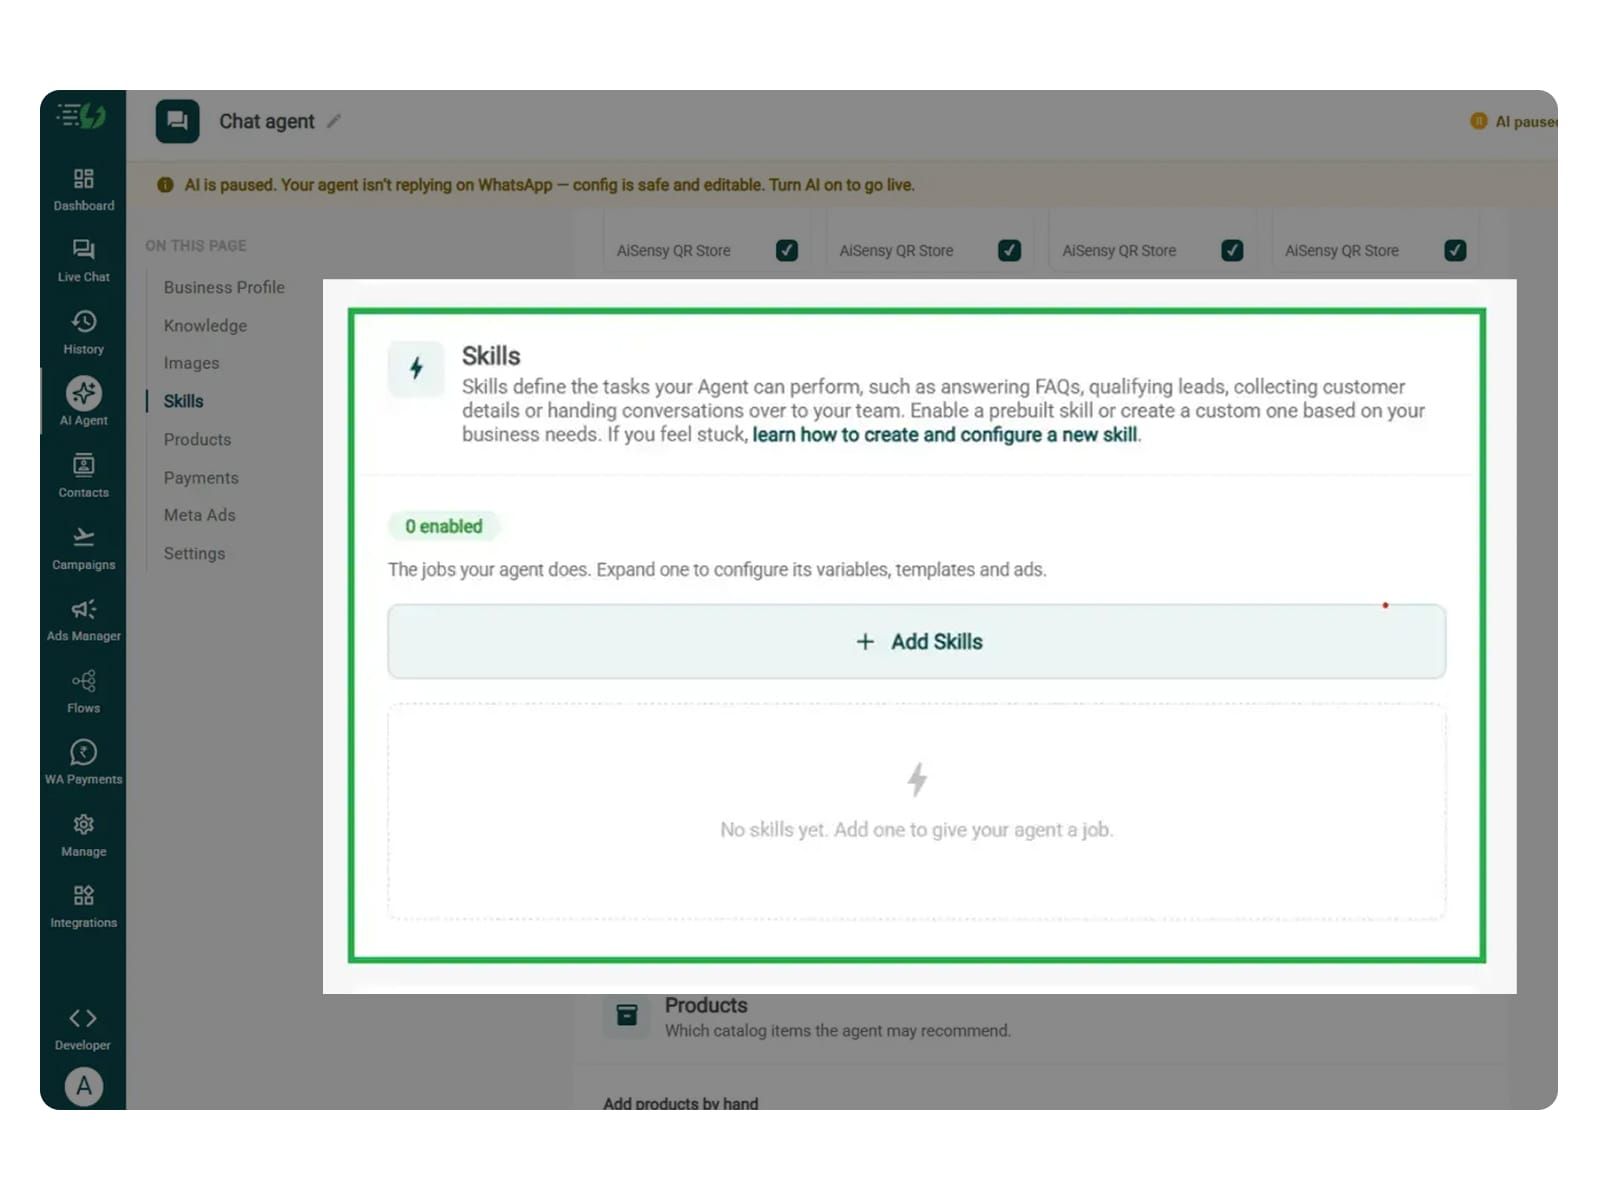
In this step, open Add Skills and check the prebuilt skills list. If the skill you need isn’t available, click Create custom, name it KYC Assistance, and choose Task skill as the type.
What kind of skill is this? (Task skill)
Icon & name: KYC Assistance
When should the agent use it? When customers ask about KYC requirements, document submission, or application status.
Instructions: Define how the agent should assist customers.
Add skills: Save the skill.
Make sure your instructions are clear and easy to understand. The agent follows these instructions when responding to customers.
One such template is:
“When someone asks ‘Can you help me complete my KYC?’, ask whether they are starting a new application or need help with an existing one. Ask one question at a time. Explain the required documents using the approved information provided and guide them to the secure submission process. Before sharing application details, follow the required identity checks and retrieve the latest status from the connected KYC system. Confirm KYC completion only when that system reports approval. Pass unresolved issues to the support team.”
The agent uses these instructions and your knowledge sources to answer questions. Checking individual application status requires a connected KYC system.
For more information, learn how to create a custom skill.
Enable It on Your Agent
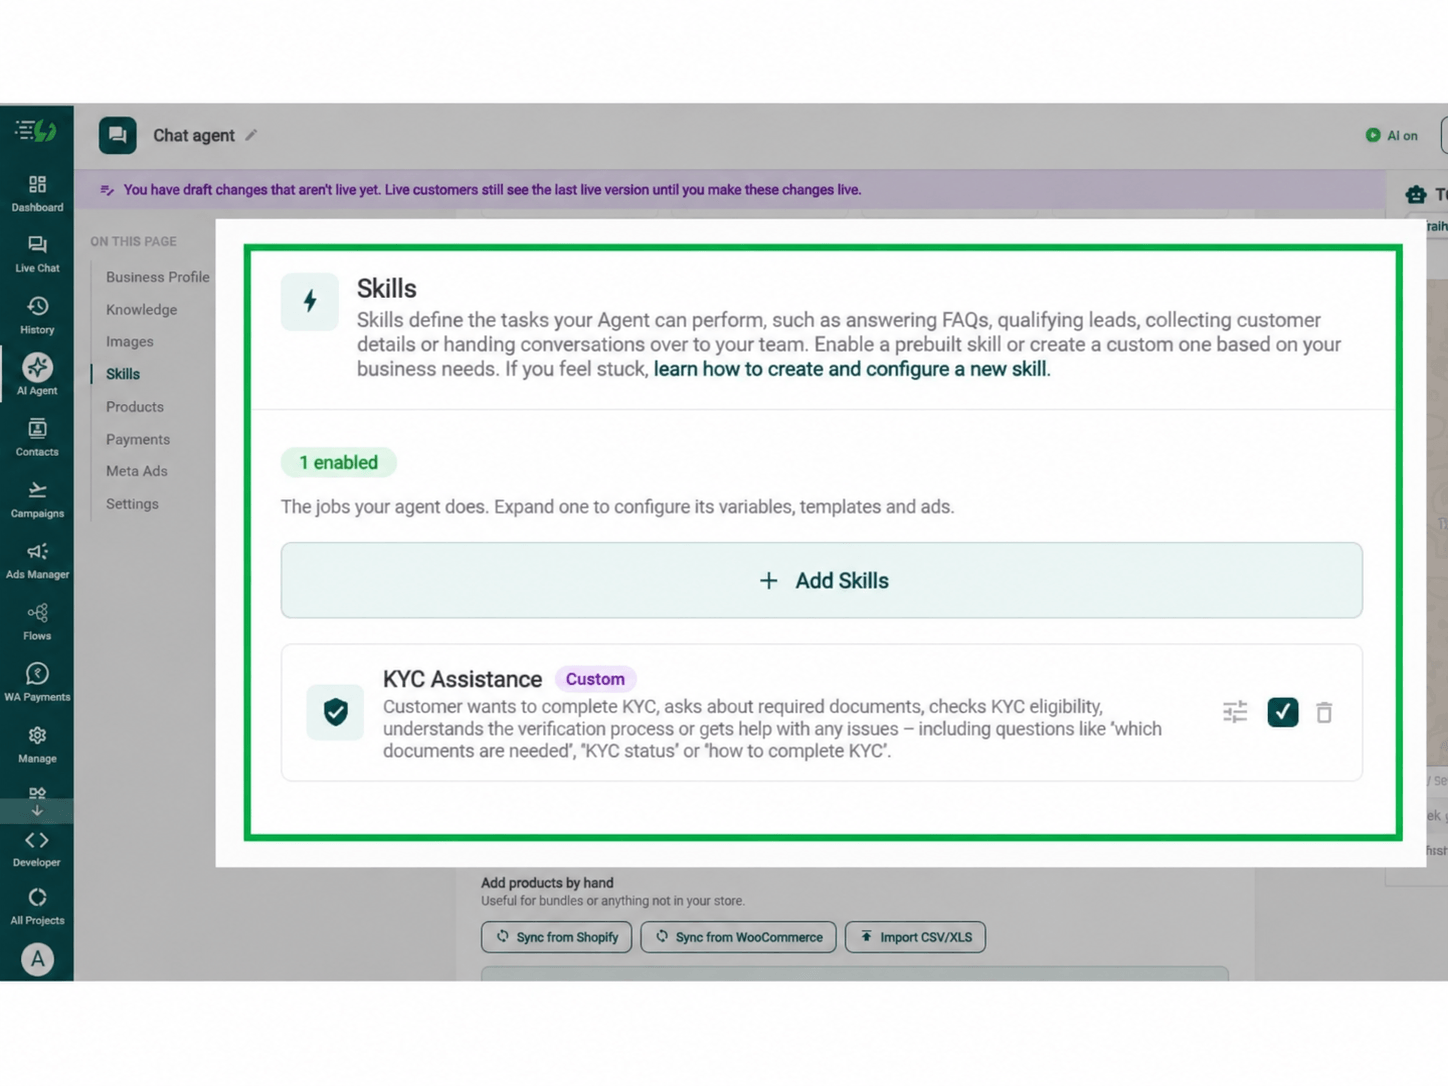
Once you create the KYC Assistance skill, it appears in the Skills list. Switch it on, expand it to configure the required settings, then click Done.
Go through these steps:
Open the Skills list.
Enable the KYC Assistance skill.
Expand it to configure any required variables and templates.
Check the Skills enabled counter.
Your agent can now use the skill to explain KYC requirements and guide customers through document submission.
Note: Connect your KYC system if you want the agent to check application status. It should confirm completion only when the system reports approval.
Define a New API
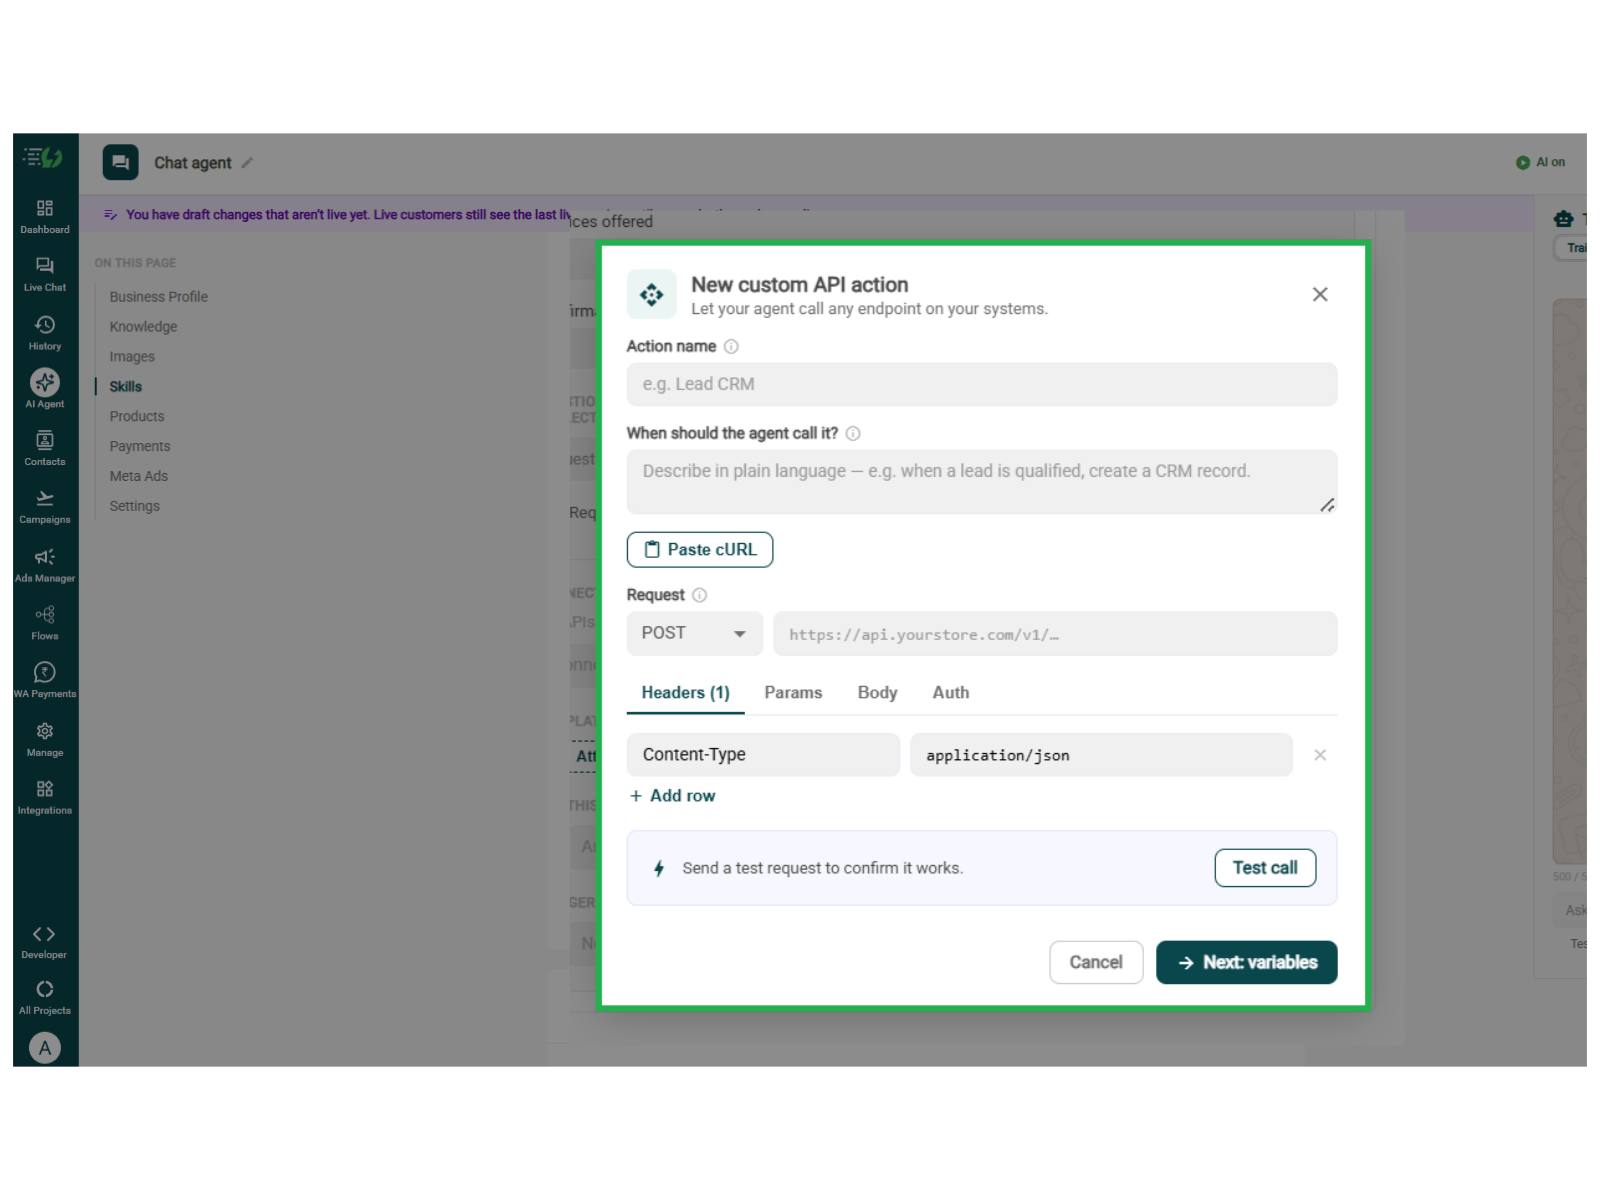
To let your KYC Assistance agent check application status, identify missing documents, or generate secure submission links, connect it to your KYC system. Click + Define a new API under Connected tools / APIs.
Action name: Give the action a clear name.
When should the agent call it? Describe when it should run.
Request: Select the method and enter the API URL.
Headers, Params, Body & Auth: Add the details required by your API.
You can also use Paste cURL to import the request.
Make sure customer-specific information is retrieved only after the required authentication checks. The agent should report the status returned by your KYC system without making its own approval decisions.
Click Test call to check it, then Next: variables to continue.
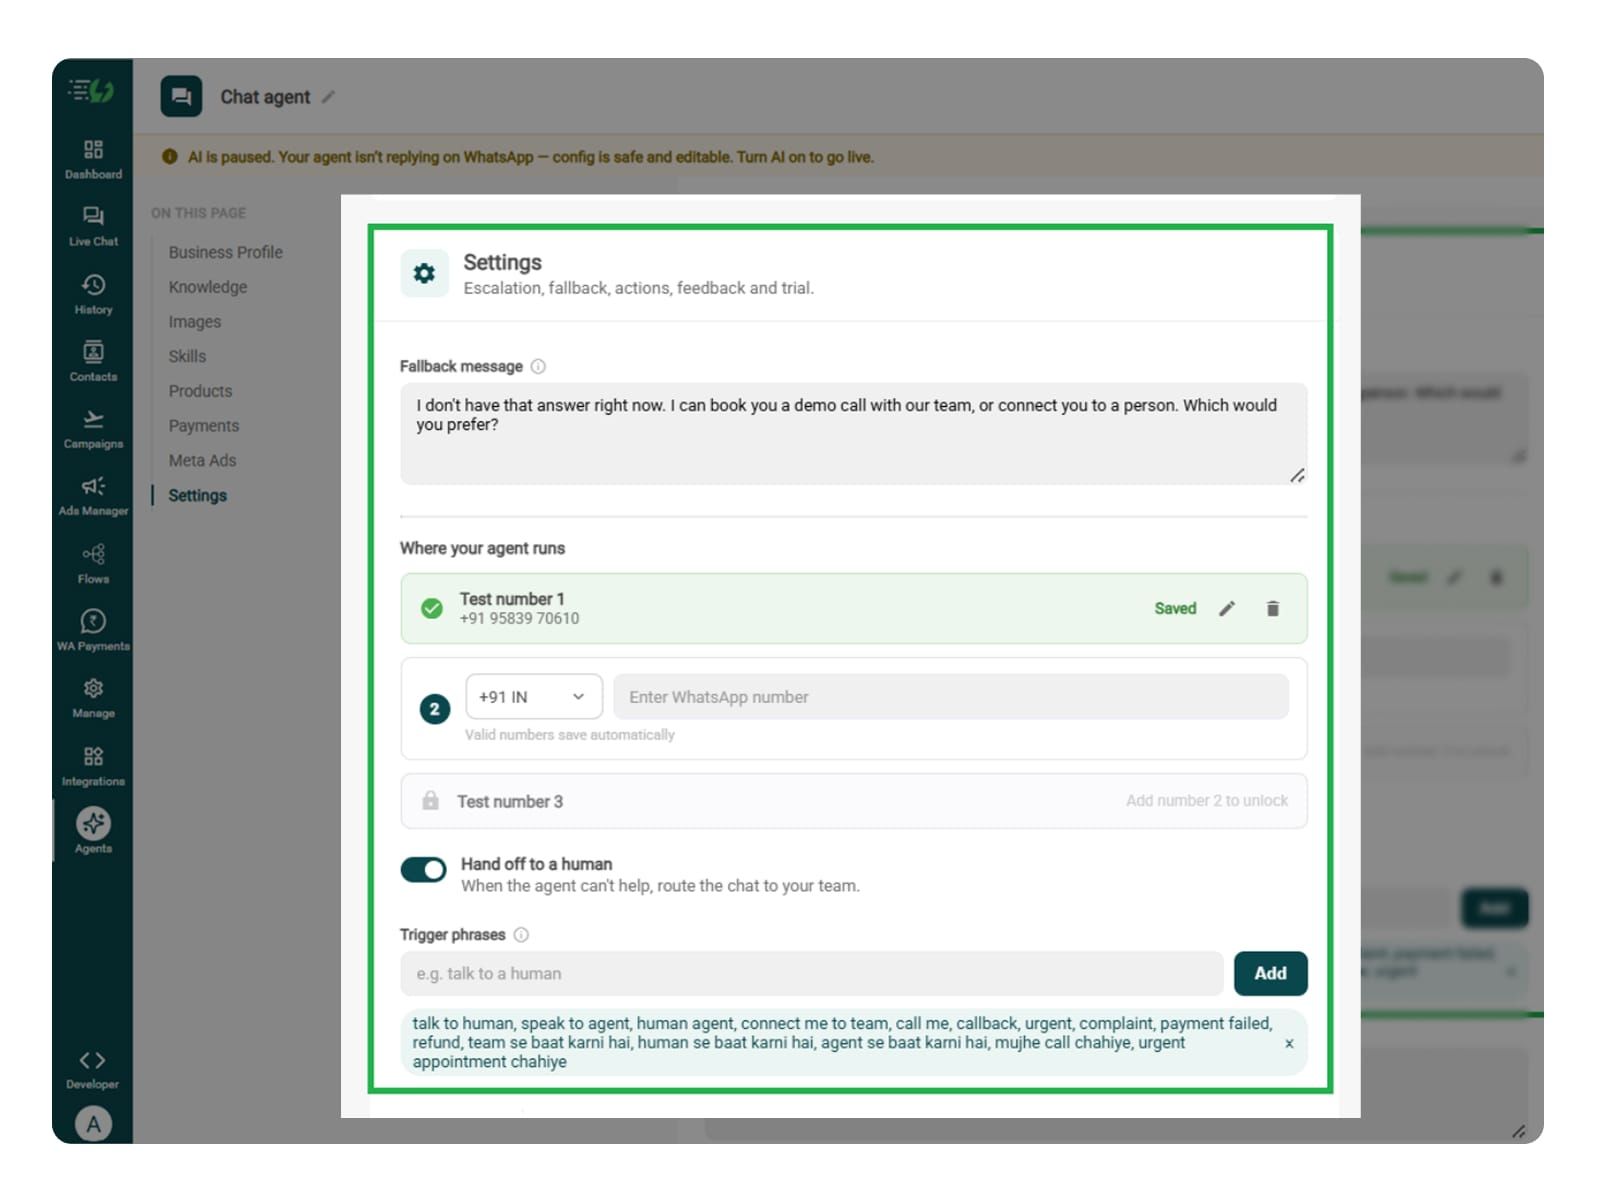
Set Your Fallback & Handoff Rules
This step decides what happens when the agent cannot resolve a customer’s KYC query or needs your support team’s help.
Fallback message: Write a reply for when the agent cannot find the required KYC information or retrieve application details.
Human handoff: Switch on Hand off to a human for repeated submission failures, document mismatches, disputed rejections, suspected fraud, or requests to speak with your team. Add trigger phrases and a message letting customers know your team will take over.
What you must fill:
Fallback message
Where your agent runs: Up to 3 test numbers
Hand off to a human: Toggle
Trigger phrases
Handoff message
Connect Tools & APIs (Optional)
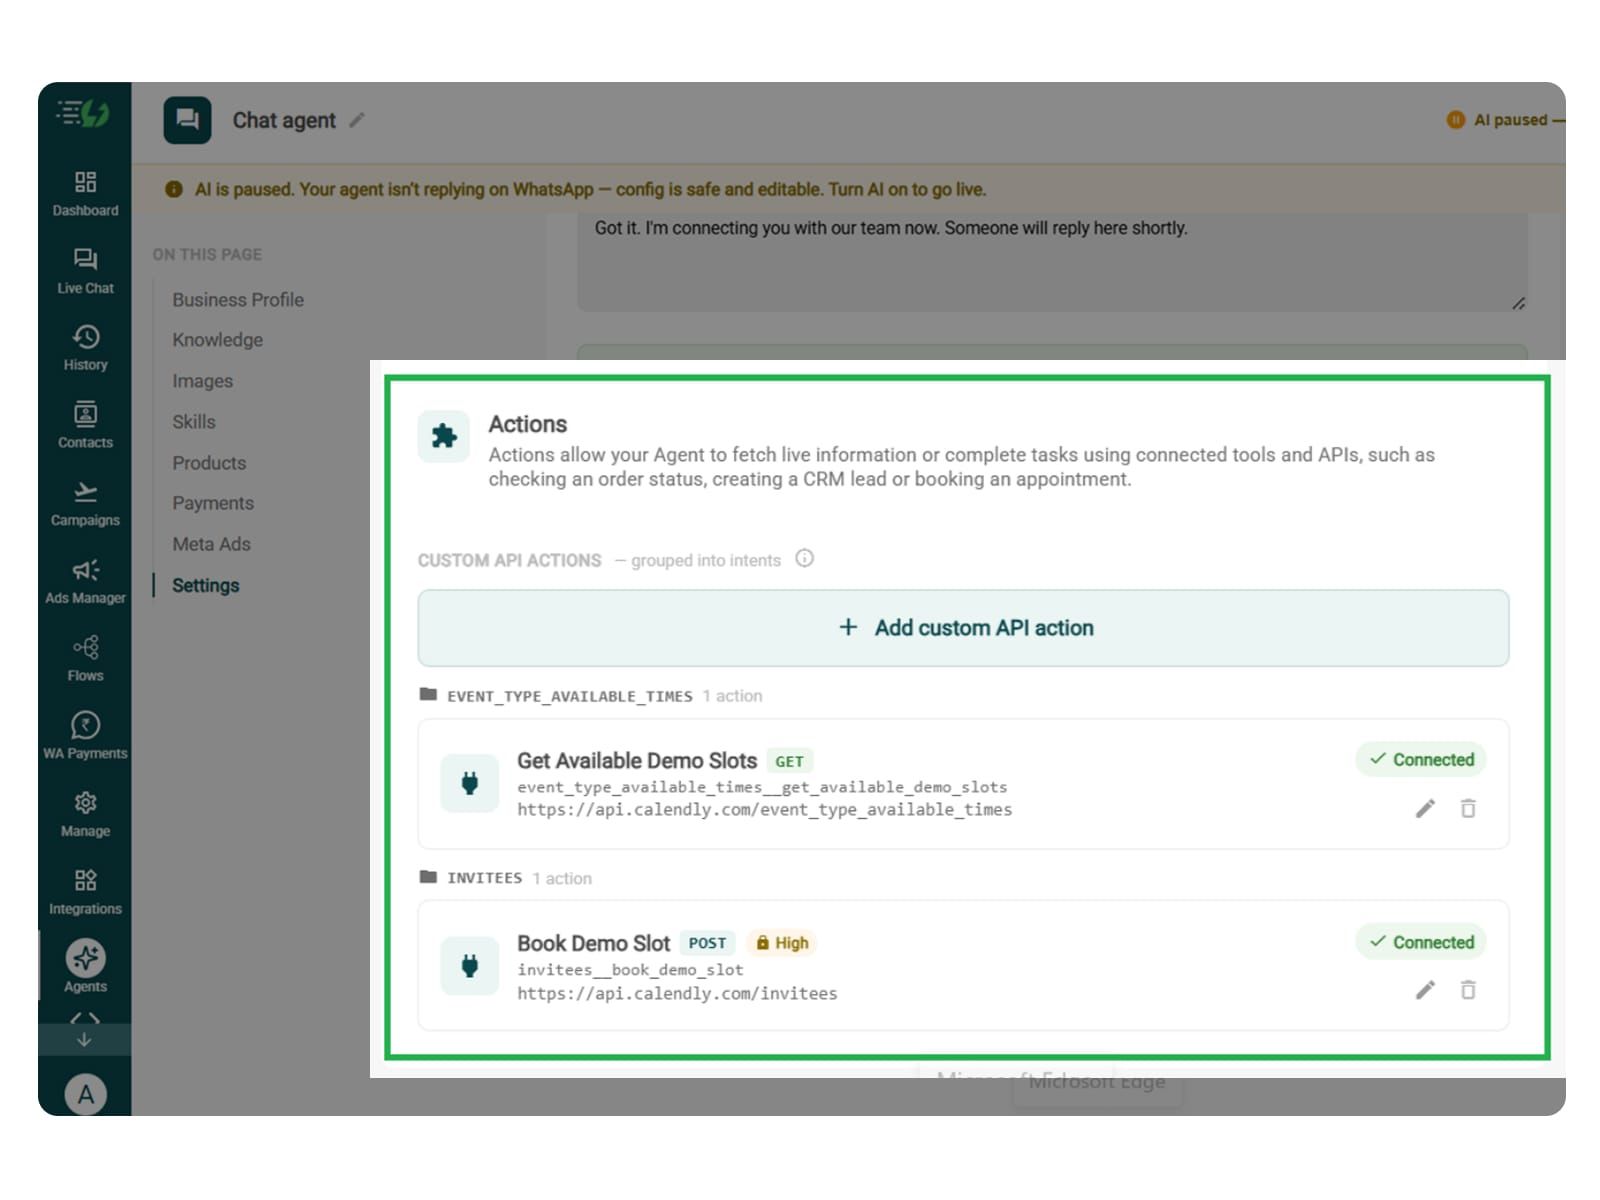
You’ve already connected your KYC system in the earlier step. Skip this step if those actions cover your requirements, or use it to add more actions, such as generating secure submission links or retrieving missing document details.
Configure the required identity checks before sharing customer-specific information.
Click Add custom API action, explain when the agent should call it, and paste your cURL to populate the request.
Action name
When should the agent call it?
Paste cURL
Request: Method + endpoint URL
Headers
Params
Body
Auth
Test call
Test that the action returns the correct information, then click Next: variables.
Test, Publish & Go Live
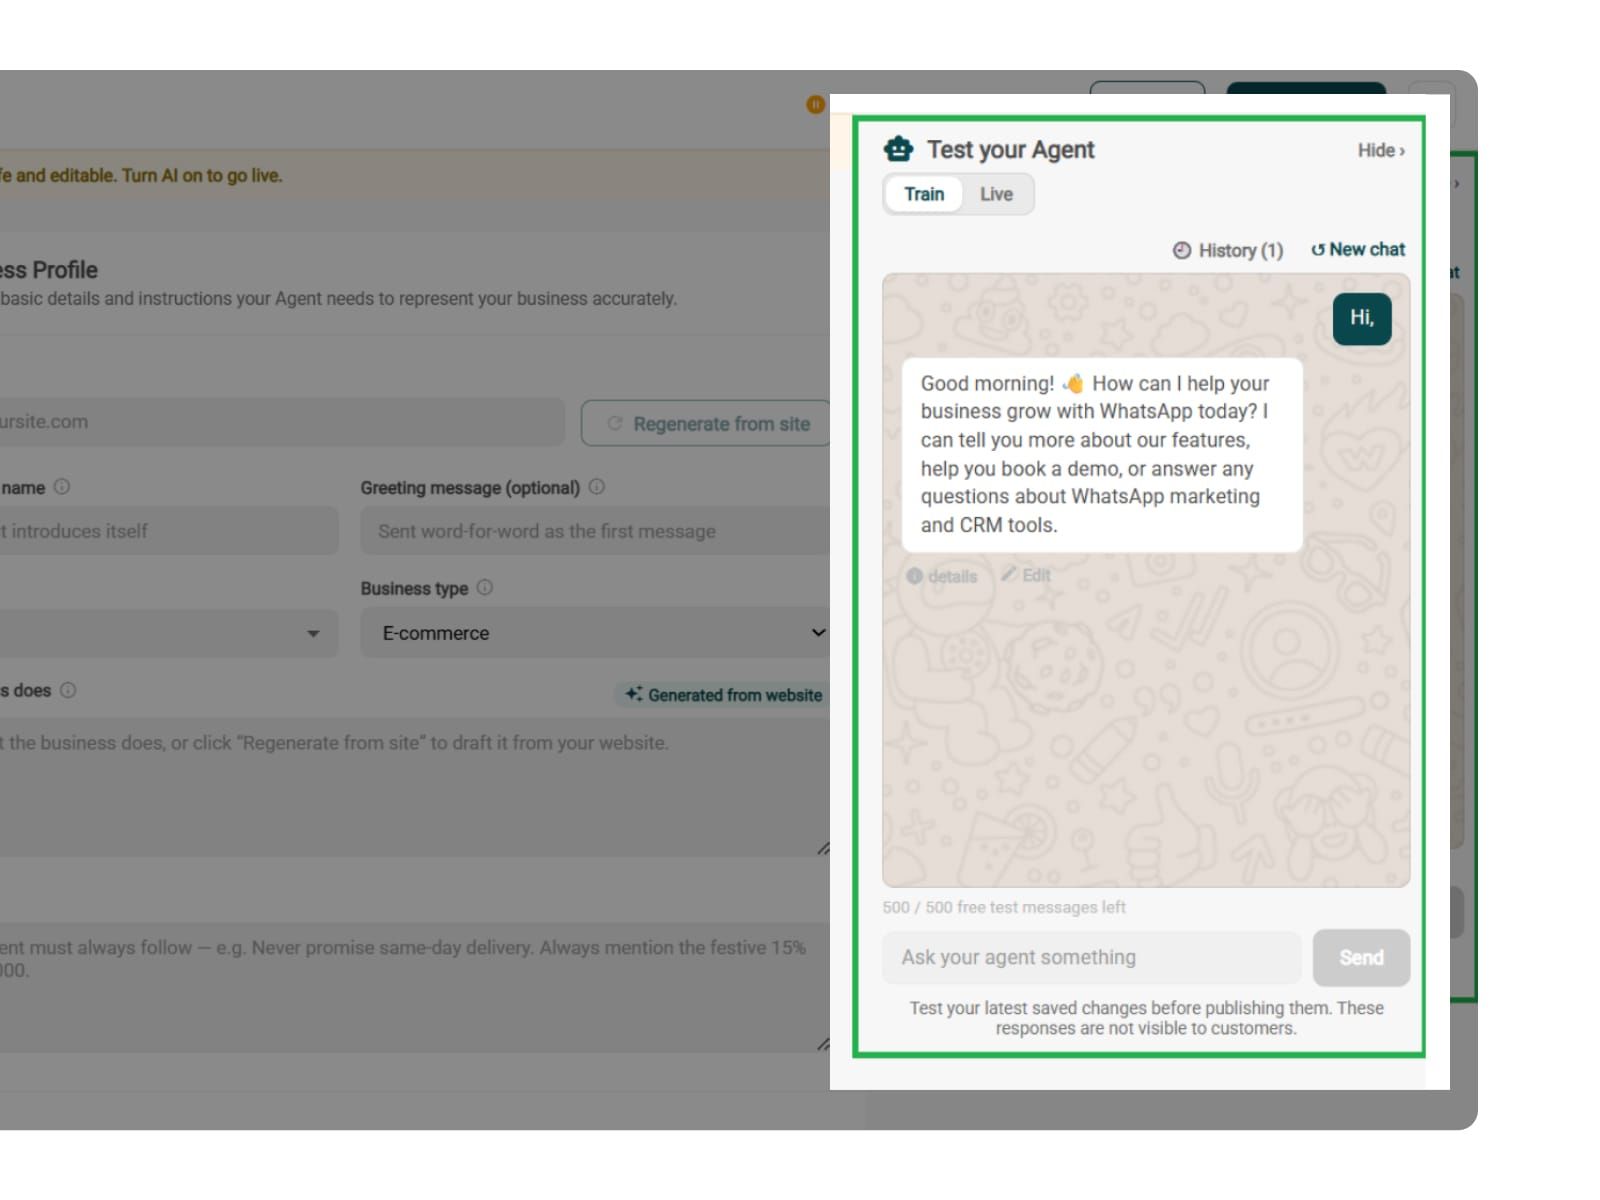
You can test your agent before it goes live. Check how it responds to questions about required documents, failed submissions, pending or rejected applications, and requests for human assistance.
Make sure the agent verifies identity before sharing private application details and confirms KYC completion only when the connected system reports approval.
You can chat with your agent before your customers do with AiSensy’s 500 free AI messages for a trial.
Publish, switch the AI on, and you’re live.
Test your Agent panel: Train/Live modes
Publish
AI on/off toggle